Nvlddmkm.sys also known as blue screen error or video tdr failure error is one of the many common errors that most of the windows users experience. This error is usually encountered by the users using Nvidia GPU. Depending on the causes, there are several fixes to resolve the issue. Before we head to the workarounds, let us tell you what exactly nvlddmkm.sys i.e. video tdr error stands for. TDR here means: Timeout, Detection, and Recovery. Video TDR function is designed to prevent blue screen of death error.
Nvlddmkm.sys is the problem related to the display driver of an Nvidia graphics card. Lets now head towards the workarounds to help you fix the error. Check the solutions in the article below and try another if you aren’t able to fix through one,try another.
How To Fix nvlddmkm.sys Error on Windows 10
List of Contents
1. Check For New Windows Update
The first and the foremost way is to check for the latest Windows update. More often the outdated GPU causes a lot of errors in Windows and therefore, installing latest updates can help you resolve the error. To check for latest updates, follow these steps:
- Press Windows+I to open Settings on Windows.
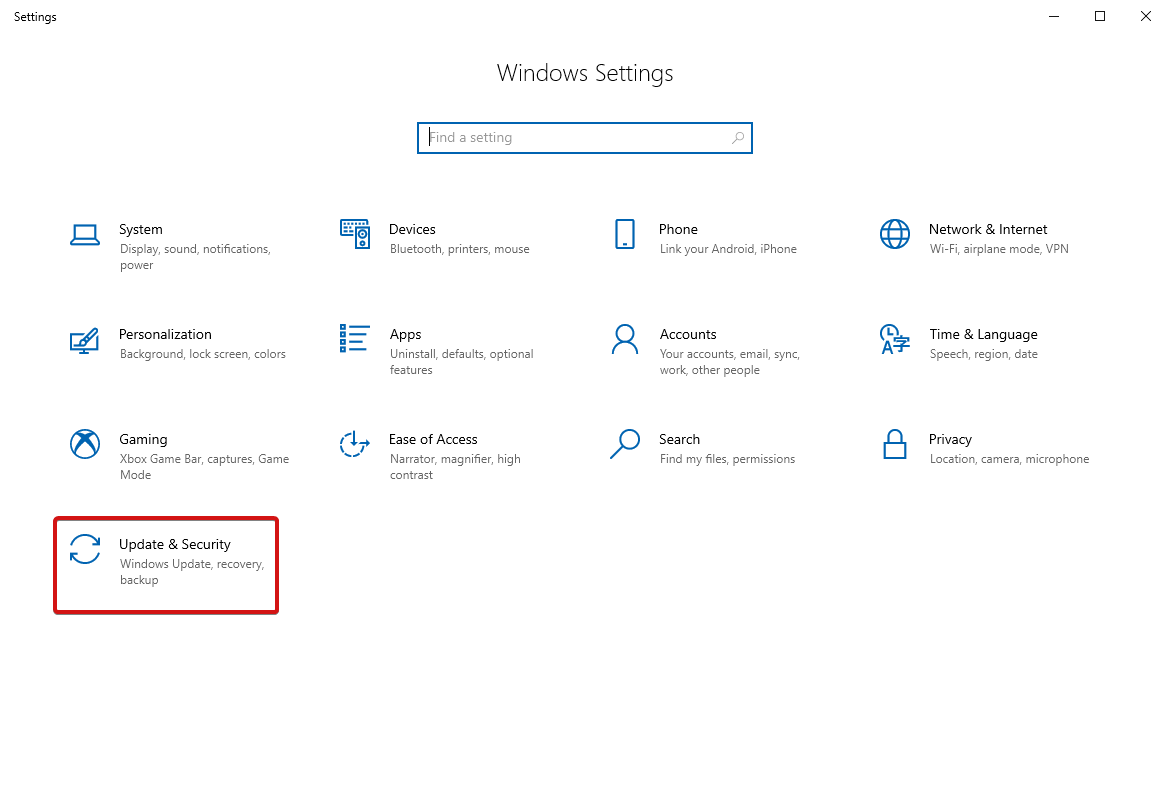
- Head to Update & Security.
- Now click on Check For Updates to see if there are any available updates.
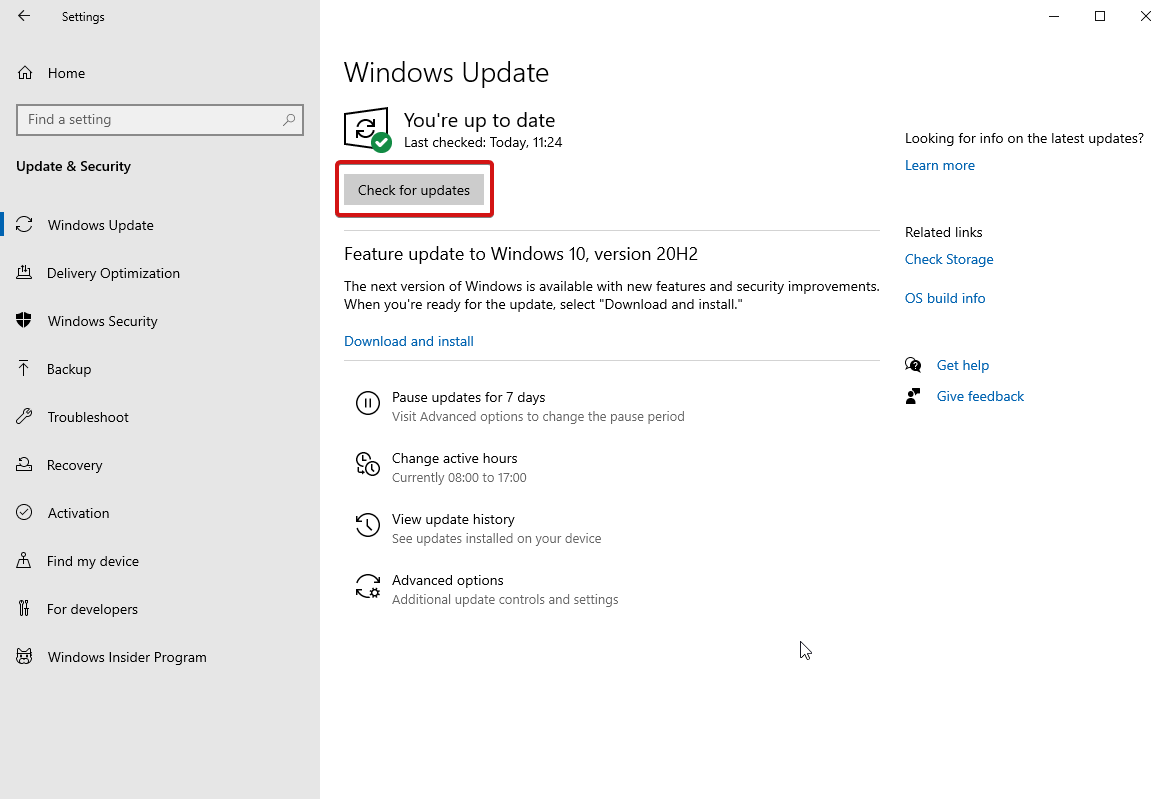
- If you found any, download and install them. See if the error is resolved.
If you are facing problems or stuck at a forced Windows update, click here to solve it immediately.
2. Update Graphic Card Drivers
Head to Device Manager on your computer and follow the steps further:
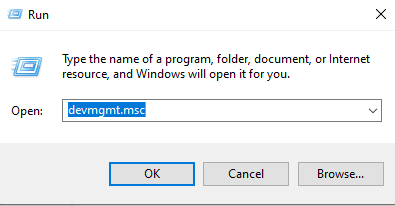
- To head to the Device Manager either open the Run window (i.e. press Win + R key) and enter devmgmt.msc.
- On the next window, navigate to Display Adapters and click on the arrow beside it for an expanded menu.
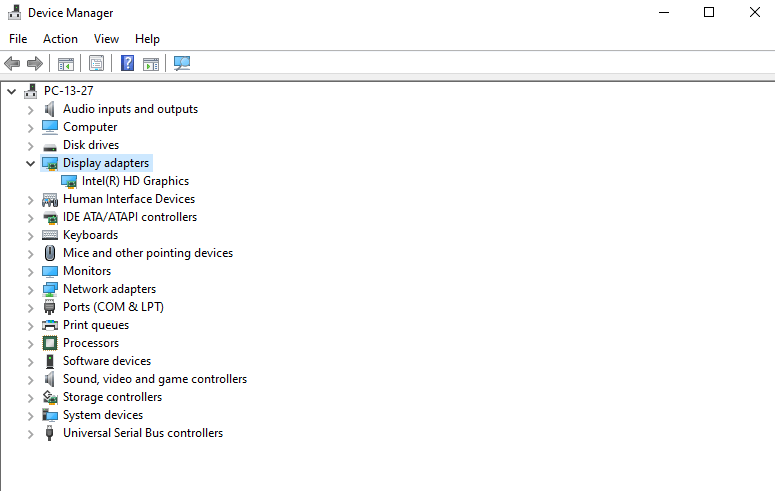
- If you see NVIDIA GPU, right click on it and choose to Update Driver.
- In the next window, from the available options, choose Search automatically for updated driver software.
- Doing this, Windows will auto-search for the best suitable drivers on the internet and install them.
- Now, restart your PC to apply changes.
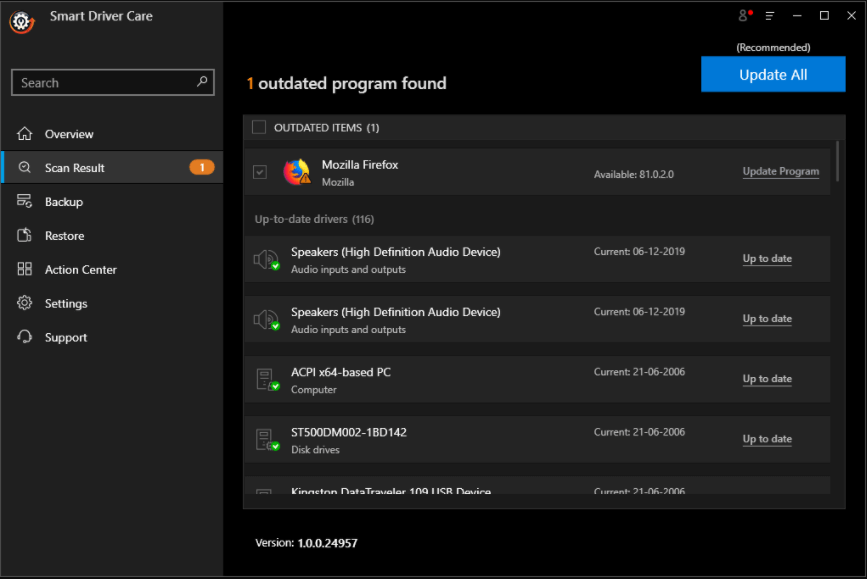
If you do not wish to process driver updates manually, you can seek help from an automated utility like Smart Driver Care- a robust driver updater for Windows 10.
|
Smart Driver Care- Highlights:
Step-wise process to use Smart Driver Care 1. Download and install Smart Driver Care from the link below. 2. Open the app and head to the Backup option to create a backup on a safer side. 3. Select all drivers and choose Start Backup. 4. Now, head to the Scan tab and start scanning for the outdated drivers. 5. Once the process completes, click on Update All to update all the drivers at once. Click Here to Download Smart Driver Care |
If the error persists, try another workaround.
3. Run a Disk and Memory Check
To resolve the nvlddmkm.sys error on Windows 10, another hack is to check for faulty memory or problems within your disk. Here’s how to do this:
Use Chkdsk to run a Disk Check
This is a built-in Windows utility that helps users by automatically checking and repairing issues within your hard drive. Follow the steps below to proceed:
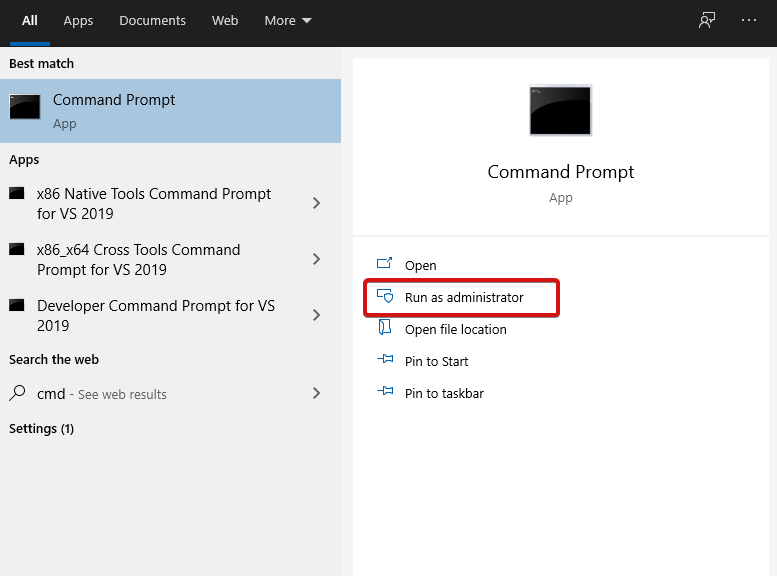
- Open Command Prompt using Start Menu and select Run as administrator.
- Type in chkdsk /f c:. Press Enter to continue.
- You’ll be asked if you want to run CHKDSK at the next boot. Tap Y and then Enter to continue.

- Close cmd window and restart your PC.
Hopefully, the error is now resolved.
Run Memory Check
To initiate memory check in order to resolve nvlddmkm.sys error on Windows 10, Windows Memory Diagnostic Tool is a great help! Using this tool is quite easy and helps you resolve most of the memory problems on your Windows computer. To process, follow the steps below:
- Press Windows+R key to open the Run window.
- Type in exe and press Enter.
- On the next window, choose if you wish to restart your computer or wait if you do it manually. To fix sys error, we recommend you to reboot instantly.
- Wait a while until the process completed.
4. Reinstall Graphic Card Drivers
If nothing has helped, try reinstalling Graphic Card drivers. Ensure that you generate a system restore point as a precautionary measure. Here’s how to process this workaround.
- Open Device Manager using either the search box or using the Run window by typing msc.
- Locate Display adapters. Use the arrow beside to open the expanded menu.
- You’ll see Nvidia GPU in the menu that opens and click on
- When asked, checkmark ‘Delete the driver software for this device’, and click OK to continue.
- Wait until the uninstallation is finished.
- Now, download the latest Nvidia drivers from Nvidia’s official website.
- Install required drivers and restart your computer to apply changes.
- After your computer reboots, head to C:\Windows\System32\Drivers. You’ll find a file named ‘sys’. Rename this to nvlddmkm.sys.old
- Then, open the Nvidia directory, and locatesys_ file. Copy this file to System32 folder.
- Next, open Command Prompt from Start Menu and select Run as administrator. Type inexe nvlddmkm.sy_ nvlddmkm.sys.

- Wait for the process to complete. Further, copy the nvlddmkm.sys file and paste it to the C:\Windows\System32\Drivers folder.
That’s all! You need to have a bit of advanced technical knowledge to process this step to resolve nvlddmkm.sys error on Windows 10.
Wrapping Up
So, these were some of the best and tested workarounds to fix nvlddmkm.sys error on Windows 10. This is one of many common Windows errors, check the list here now. Try these steps and let us know if you have any queries or suggestions to make. We’d be happy to help!
For more troubleshooting articles, keep reading Tweak Library.
Recommended Readings:
Perplexed With “Error Accessing The Windows 10 Registry?” Let’s Get It Fixed
Quickly Fix VPN Error 691 on Windows 10 With These Methods
Fix For Error “Can’t Extend Volume” On Windows 10


Leave a Reply