
If you are a gamer and love to play games on your PC, then you must be well aware of the graphic card. For a gamer, a graphics card holds the same importance as CPU and RAM. The importance of a powerful GPU can be understood by the fact that if you don’t have a powerful GPU then either you can’t play the latest trending games, or you have to reduce graphical settings (which again is not a great option for a gamer). Now besides the fact that how important a graphic card is a few of us know how to check graphics card in windows 10.
So, if you too do not know which graphics card your computer has then you have landed at the right place. In this article, we will discuss various ways to check the graphics card on Windows 10.
Checking Graphic Card in Windows 10 Using Device Manager
Device Manager in Windows 10 is a place that holds the information for all the drivers installed on your PC. Moreover, if you want to get any information about the hardware devices, attached to your system like a sound card, network card, graphics card, etc. then you can navigate to Device Manager.
To check Graphic card information via Device Manager, follow the steps below:
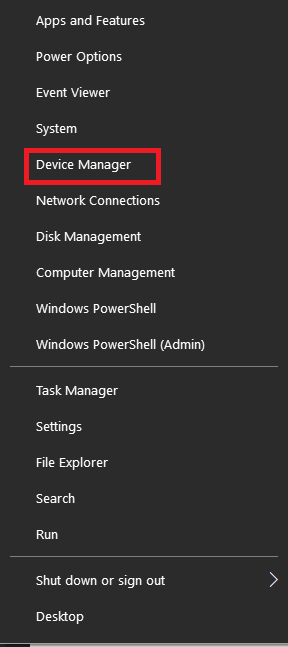
1. Right-click on the Windows Start button and from the list that populates select Device Manager. Alternatively, on the keyboard, press the Windows key and X at the same time, and from the list click on Device Manager.
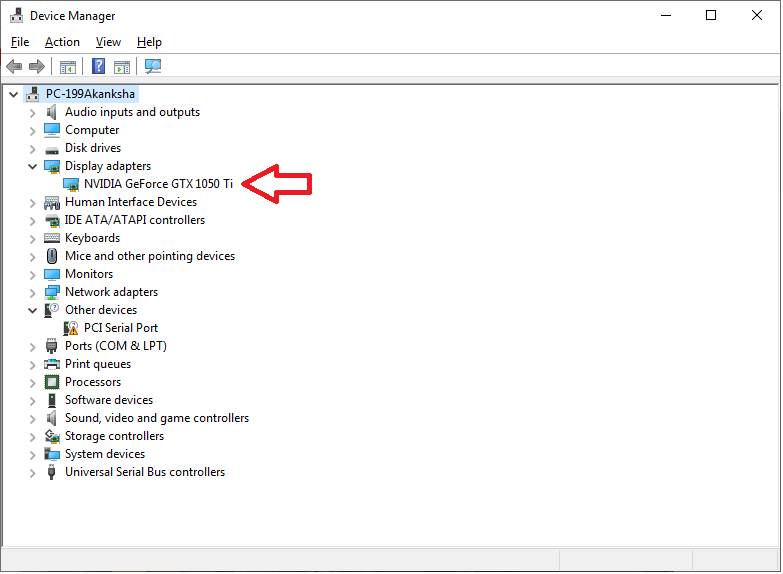
2. On Device Manager Window, click on Display adapters. This will show you the graphics card installed on your system. In our case, we have NVIDIA GeForce GTX1050 Ti Graphic Card attached to our PC.
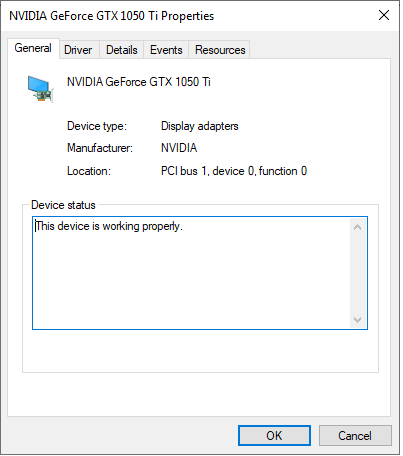
3. You can also check whether the graphics card is working correctly or not by double-clicking on it. This will open a new window, with the name of the graphics card and the Device status, whether it is working properly or not.
Check Graphics Card on Windows 10 from Display Settings:
Another method to check the graphics card on your machine is through Display Settings of your computer. To do so, follow the steps below:
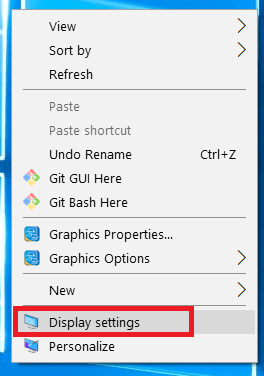
1. On your desktop right-click on an empty area and from the drop-down menu select Display settings. Alternatively, click on the Windows start button and from the menu select gear icon to open Settings. Now, click on System to open System Settings.
2. On the left pane select Display and the right pane click on Advanced display settings.

3. On Advanced display, settings window click on Display adapter properties for Display 1.
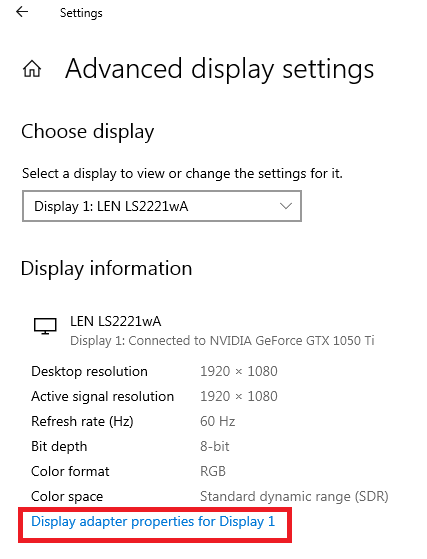
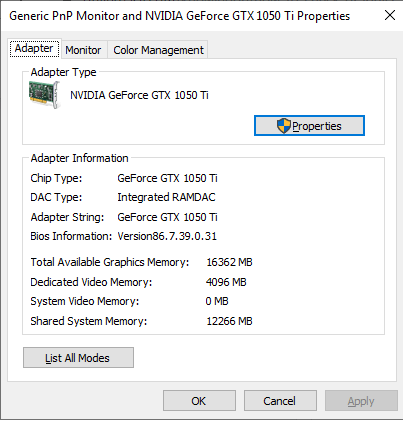
4. On the new window in the Adapter tab, you can find the name and type of graphics card installed on your system along with its memory details.
Check Graphics Card from DirectX Diagnostic Tool:
Although DirectX Diagnostic Tool is used for troubleshooting various DirectX issues that may exist on your PC. But this tool can also be used to get various system information like a graphic card installed on your system. To check the graphics card from DirectX Diagnostic Tool, follow the steps below:
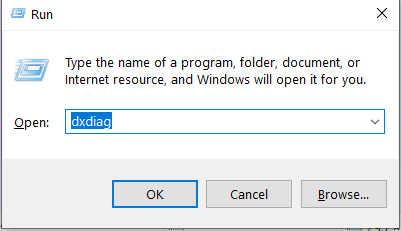
1. Using the keyboard press Windows + R to open the Run Command box. Alternatively, right-click on the Windows Start button and select Run.
On the Run Command window, type dxdiag and press Enter.
2. Now just wait for a couple of seconds for the DirectX Diagnostic Tool to load and display the information.
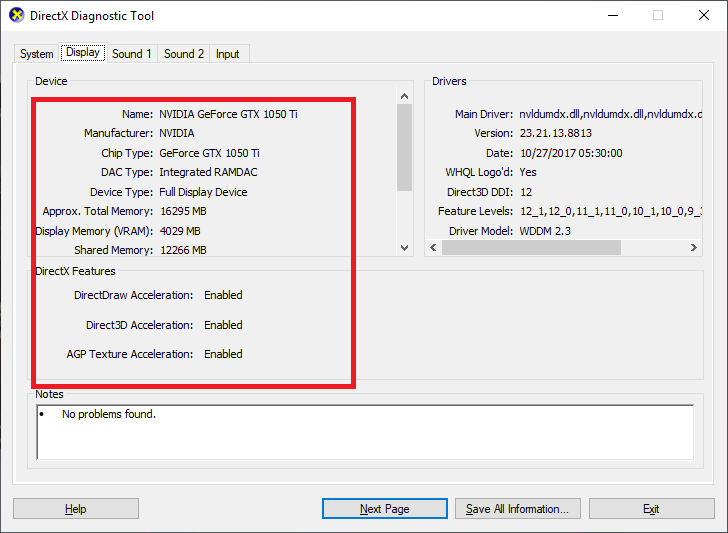
3. Click on the Display tab. This will show you the complete information regarding the name and type of graphics card installed on your system along with its memory details.
Check Graphics Card from Windows Task Manager:
As well all know that Windows Task Manager shows us the information regarding all the processes running on our computer along with the CPU and RAM consumed by these processes. But Windows Task Manager can also be used to find graphics card details by following the steps listed below:
1. Right-click on the Windows start button and from the menu select Task Manager. Alternatively, press Ctrl + Shift + Esc to open Task Manager.
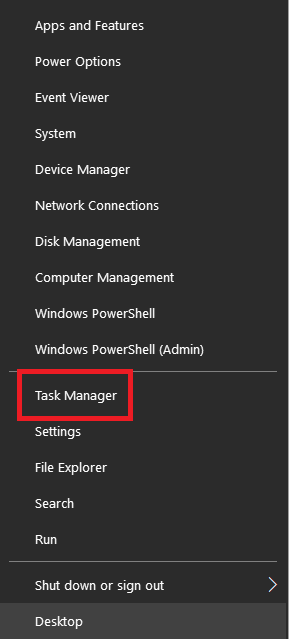
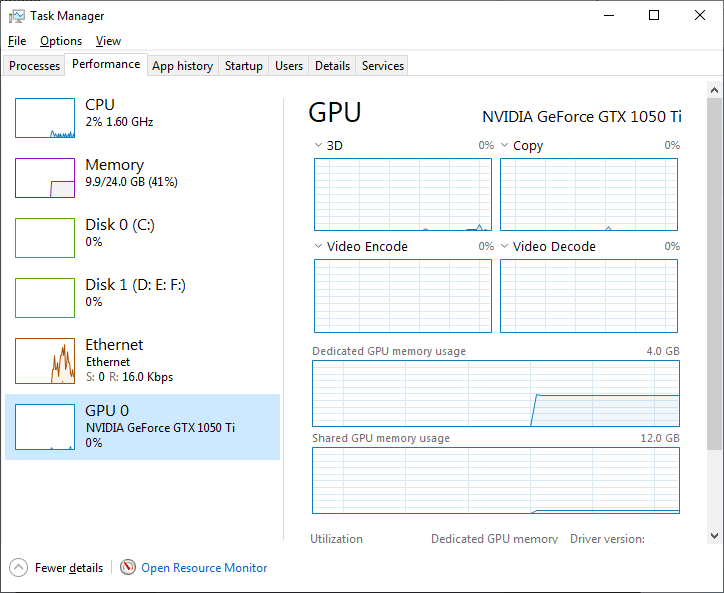
2. Now click on the performance tab. The manufacture of the GPU and its model name will be displayed on the right pane.
So, folks, these were some of the easiest ways to check the graphics card on Windows 10. We hope that you find the article helpful. If you wish to share your opinions or comments that please write them in the comment box below.
Follow Us:


Leave a Reply