Frequent driver updates on your Windows PC are rolled out to fix all kinds of bugs, introduce new features and improve overall performance and stability. But there could be instances when a driver update might not be compatible with your newly installed driver and you might have to restore your driver to the previous version. One way to do that is the Roll Back Driver Option.
If you are facing issues while updating drivers here’s what you can do.
Let’s say you have recently updated your graphics driver or your sound adapter and are facing driver issues. Before heading on to the Roll Back Driver option make sure you have a backup of drivers ready.
You can backup Drivers in Windows 10 using one of the methods mentioned below.
1. You can backup drivers in Windows 10 using software
2. You can manually backup drivers in Windows 10 by using the elevated command prompt
1. Backup Drivers in Windows 10 Using Driver Update Software
Before you use the “Roll Back Driver” option, make sure that you take a backup of drivers already present on your system. This will ensure that you at least have your old drivers safe in case you don’t have any other ways of recovering your old drivers.
There are several backup and driver update software available in the market that don’t just let you take a backup of your existing drivers but even let you update all drivers in windows 10 as well. Not just that, these even let you restore drivers should an emergency arise.
Advanced Driver Updater is one such fantastic driver update software that apart from scanning your Windows PC for outdated drivers and updating them, also gives you the facility of creating a backup of your drivers as well.
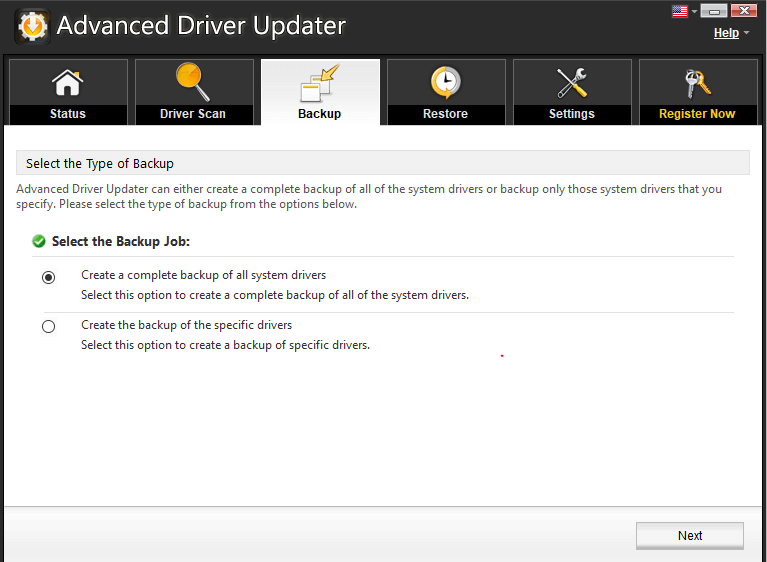
It exhibits the following features like –
- You can choose to backup all the drivers or backup selective drivers on your Windows PC and then you can restore driver as and when required.
- You can exclude those drivers from the scan list that cause frequent compatibility issues or cause system instability
- Schedule the scan of drivers as per your wish. This will ensure that as soon as new hardware is released, you have a driver ready for that device.
This is How Advanced Driver Updater Works to backup drivers windows 10 –
1. Launch Advanced Driver Updater
2. Once you have launched Advanced Driver Updater, click on Restore option. Here you can choose the desired driver from the list that you wish to restore.
3. When you are sure of the driver, click on ‘Load backup’ to restore the desired driver backup and a previous version of a driver.
2. Using Elevated Command Prompt to Backup Drivers in Windows 10
Also known as an ‘Elevated Command-line’ or ‘Elevated Mode’, this mode allows the user to execute system commands using administrative privileges. These are the privileges that a normal user does not get.
To open the Elevated Command Prompt –
1. Search for Command Prompt and choose Run as administrator
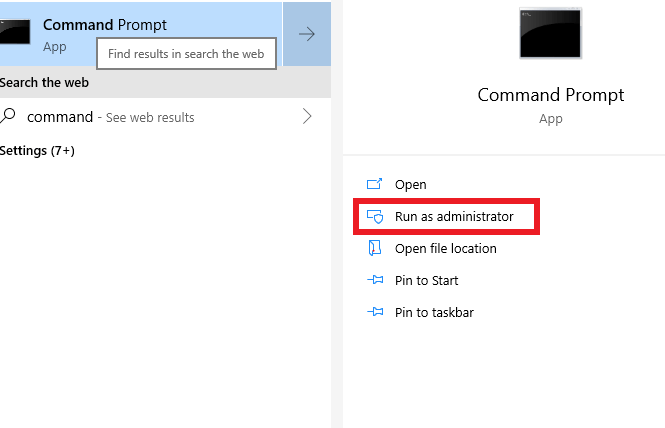
2. Enter the following command in the prompt that opens
dism /online /export-driver /destination:”the folder path” .
Replace ‘the folder path’ with the path where you wish to export the driver backup. Eg: dism /online /export-driver /destination: “D:\Drivers Backup”
3. You can now close the command prompt and head towards the specified folder (D:\Drivers Backup) where you will find the driver backup is created.
Restore drivers in Windows 10 Using the Roll Back Driver Option
Now to restore Backup Drivers in Windows 10 using the Roll Back Driver option you must meet two basic requirements which are mentioned below –
- To restore driver of hardware, you must make sure that the device whose driver you wish to restore has a previous version of the driver installed, something where driver backup can come in handy.
- You must be logged in as an Administrator
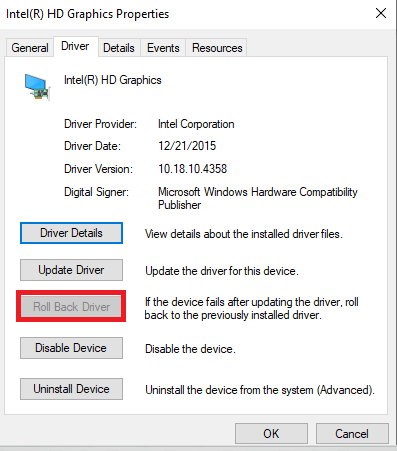
Note: If either of the two points is not met when using Roll Back Driver, you will find that the Roll Back Driver is disabled or is dimmed.
Ways you can reach the Roll Back Driver option to restore drivers –
1. Reaching Roll Back Driver Option Using the Start Menu
2. Reaching Roll Back Driver Option Using Run Command
1. Reaching Roll Back Driver Option Using the Start Menu
- Type Device Manager in the search bar appears next to the Window Button.
- When the Device Manager window opens, click on any Device’s tree view (> Device)
- Right-click on the Device and click on Properties
- In the Device Manager window that opens click on the Driver tab
- Click on the Roll Back Driver option
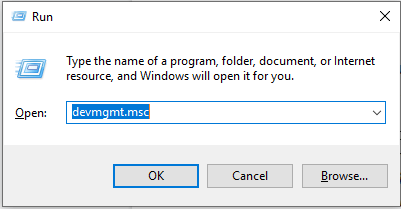
2. Reaching Roll Back Driver Option Using Run Command
- Press Win+R button
- Type devmgmt.msc in the search bar
- Press OK
- When the Device Manager window opens, click on any Device’s tree view (> Device)
- Right-click on the Device and click on Properties
- In the Device Manager window that opens click on the Driver tab
- Click on the Roll Back Driver option
Restore Drivers Using Backup That You Have Stored At A Specified Location
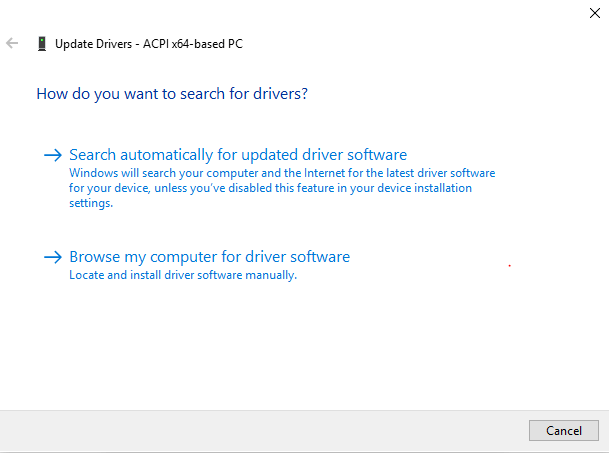
We have already mentioned how you can backup drivers in a specified folder. Once you have the backup ready in the specified folder (D:\ in our case), follow the steps mentioned below to restore drivers
- Search for device manager in the search bar next to the window button
- Select the device whose driver you wish to update and go to Properties
- Head to the drivers tab and click on the Update Driver
- Now click on Browse my computer for driver software
More commonly known as a driver, a device driver or hardware driver is a group of files that enable one or more hardware devices to communicate with the computer’s operating system. Without drivers, the computer would not be able to send and receive data correctly to hardware devices, such as a printer.
To Wrap Up
Drivers or device drivers as they are more commonly referred to, are very important as they enable hardware devices to communicate with your PC’s operating system. If you are facing issues in creating a backup of drivers, these are some of the ways using which you can backup and restore drivers.
Follow us:




duffelbagb
Help pls. keyboard no worky. type with on screen keyboard. sad. mad. bad.