Windows 11 is said to be quicker and more efficient than its predecessor due to better memory and hardware resource management. Like with all versions of the dominant operating systems, slow startup troubles aren’t quite a thing of the past.
It’s aggravating to have to wait for a slow-starting, but there are a few things you can do to speed things up. We’ve compiled a list of troubleshooting techniques to assist you in fixing a delayed startup with Windows 11.
What Is The Cause Of Windows 11’s Slow Startup?
The following are some of the most common causes of a sluggish startup:
- Configuration of built-in and third-party starting applications.
- Problems with your Windows installation and system files.
- Windows updates that aren’t working.
- A traditional hard disk is preferred over an SSD as a Windows boot drive.
Fortunately, you can optimize startup speed by changing a few settings on your computer. This is how you do it.
1. Perform a Clean Boot
When you execute a clean boot, Windows begins with the bare minimum of drivers and starting applications, and all third-party services are disabled. This is useful for determining whether third-party background software is interfering with the functionality of your machine.
In Windows 11, a clean boot might also help you figure out whether background programs are creating delayed starting problems.
To do a clean boot, follow these steps:
- To launch the Run dialogue, press Win + R. type msconfig, and click OK.
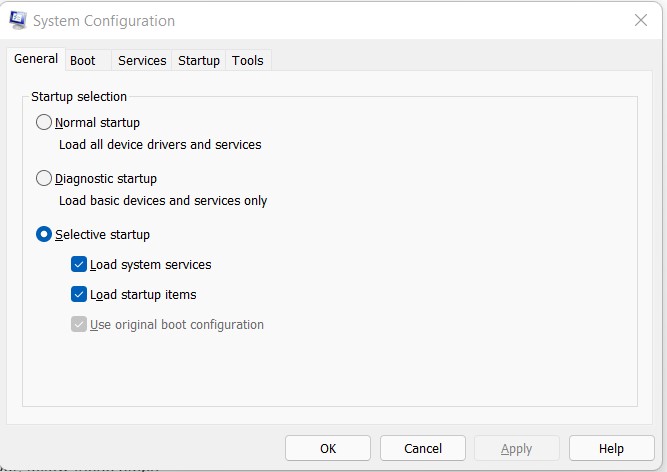
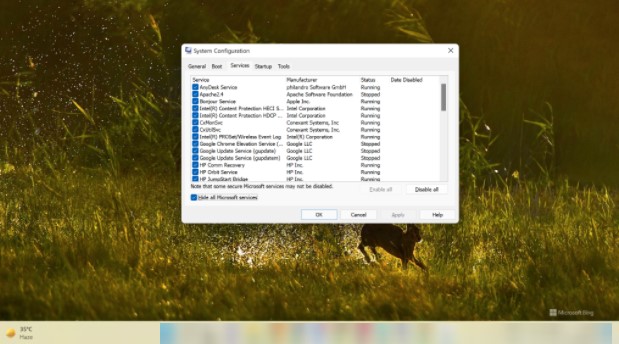
- Select the Services tab when the System Configuration tool appears.
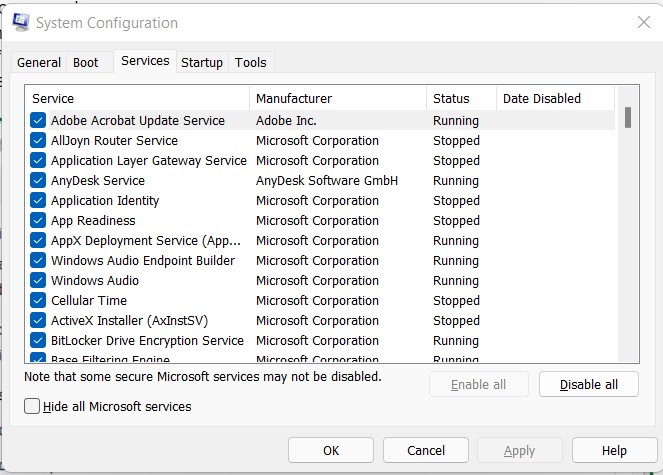
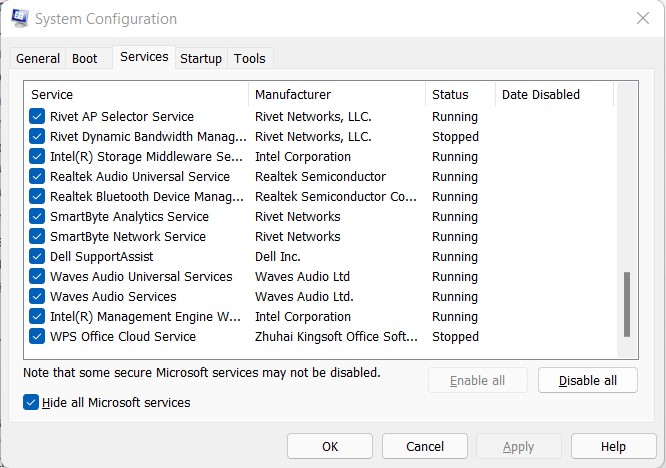
- Then, check the option labeled Hide all Microsoft services.
- Then, on the Disable all option, click.
- After that, go to the Startup tab and select Open Task Manager.
- Select each item in the Startup tab and click Disable.
- Click OK in the System Configuration window, then restart your computer.
Look for starting programs that are slowing down your computer if the boot time improves in the clean boot environment. Enable all services and disable the clean boot in System Configuration to find the issue software. Restart your computer and compile a list of all the programs that start up automatically. Disable each application one by one to find and remove the software that isn’t working.
2. Update Windows
A defect or obsolete device drivers can sometimes cause the delayed starting issue. You can try upgrading your computer to the current release to obtain better performance with Windows 11.
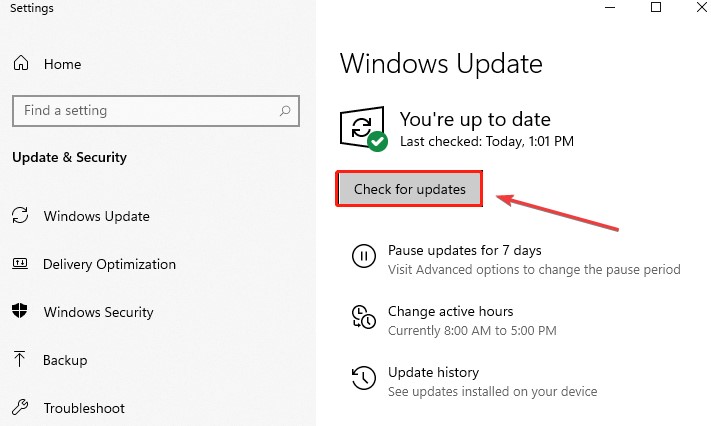
In the Search box, type update and then choose to Check for updates from the best match.
Select the icon for Check for Updates. If updates are available, Windows 11 will begin downloading and installing them for you automatically. Please be patient as this procedure takes a long time to finish.
Note:- Try Advanced Driver Updater to automatically update all outdated drivers.
3. Disable Unwanted Startup Apps Slowing Down Your PC
When you install a new program, it may be configured to start automatically when the computer boots up. Due to the excessive load, your computer may struggle to start fast when numerous programs try to start at the same time.
Fortunately, the new Settings panel in Windows 11 allows you to swiftly deactivate starting programs.
You may also deactivate starting programs with the use of the good old Task Manager.
Using Task Manager, deactivate starting programs in Windows 11:
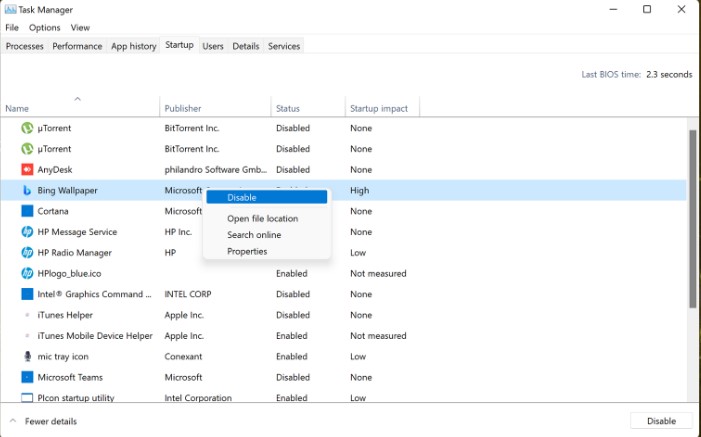
- To launch the WinX menu, right-click on the Start button and select Task Manager. You may also reach the menu by pressing Win + X.
- Open the Startup tab in the Task Manager window.
- After selecting each item, click the Disable button.
- Close the Task Manager application. Restart the computer and see if anything has changed.
It’s worth noting that certain programs conceal and don’t display in the starting tab. To stop such programs from starting up, go into the app’s settings and deactivate the startup launch.
4. Run a Virus Scan
You may have downloaded a virus with the delayed startup issue if you recently installed an app from an untrustworthy source. As a result, we strongly advise you to conduct a virus check on Windows 11. Here’s how to do it:
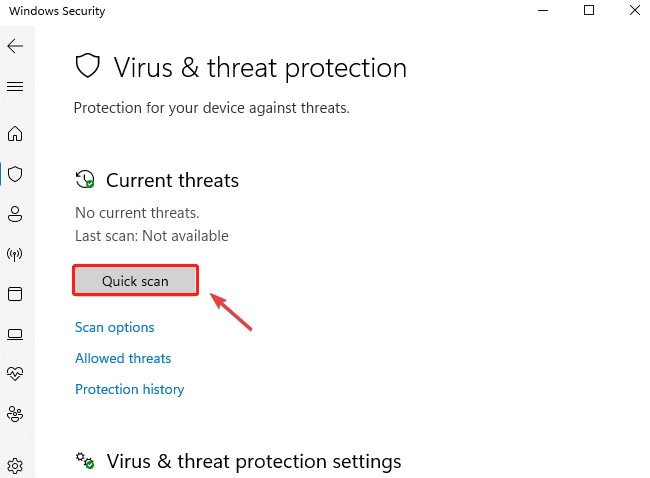
- Go to Privacy & security > Virus & threat protection under Settings.
- Wait for the scan to finish after clicking on Quick Scan. You may also set a Full scan and a Custom scan by clicking on Scan settings.
5. Enable Windows Fast Startup Mode
After a shutdown, Windows’ Fast Startup feature helps your computer boot up faster. It’s a cross between hibernation and complete shutdown.
When activated, the OS will go into hibernation mode, which will help you start up faster by not saving active sessions and closing running programs.
Fast Startup is set to on by default on computers that support hibernation. Here’s how to switch it back on if you accidentally disabled it.
To make Fast Startup mode available, follow these steps.
- To open Run, press Windows + R.
- To open the Control Panel, type control and then press OK.
- Then select System and Security > Power Options from the drop-down menu.
- Choose what the power buttons should perform in the left pane.
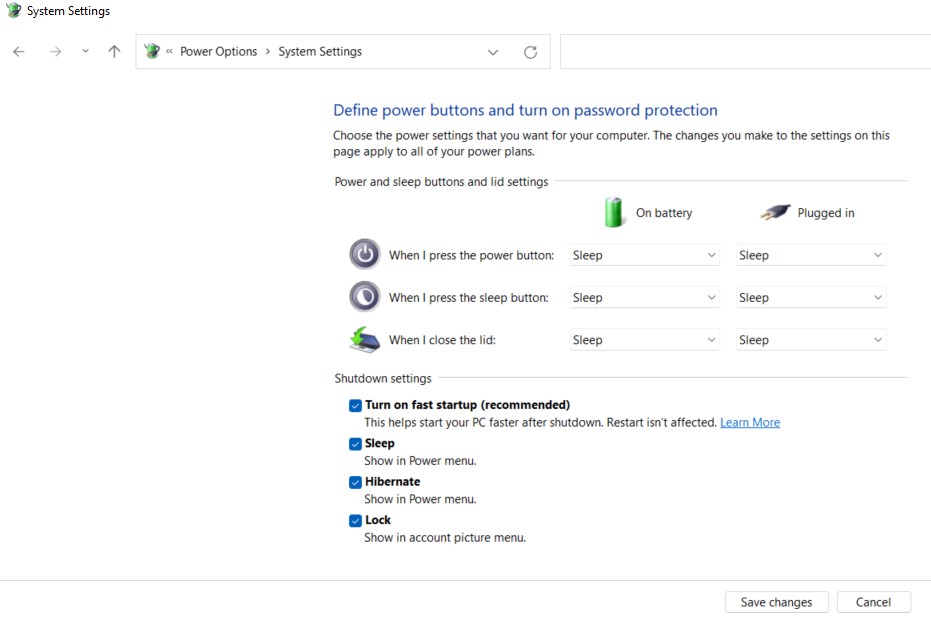
It’s worth noting that a Fast Startup isn’t without flaws. It may tamper with encrypted disc images, bypass scheduled shutdowns, and lock the boot drive, rendering it unavailable in the event of dual booting. If you can’t live with these drawbacks, you should disable Fast Startup.
6. Change Performance Power Plan
The system’s performance and speed are affected by the performance power plan. Improper power plan settings might be causing your Windows 11 to function slowly. To modify that, follow the instructions below.
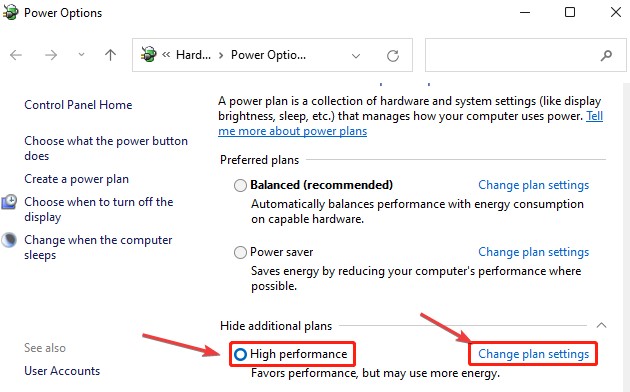
- Choose a power plan after typing power plan in the Search box.
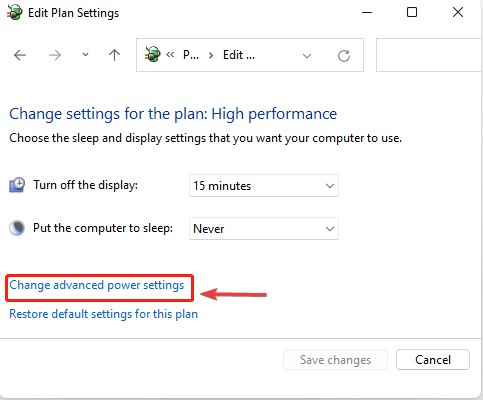
- Change plan parameters after selecting the High-performance option.
- Change advanced power settings, navigate the Processor power management tab, and set the processor state minimum and maximum to 100 percent. To save your changes, click OK and then Apply.
- Once you’ve finished, restart your computer to see whether the problem has been resolved.
7. Turn Off Virtual Effects
The visual effects, according to a report, need many system resources. Turning off the options can minimize system resource utilization and, as a result, solve Windows’ delayed boot time. Here’s how to go about it.
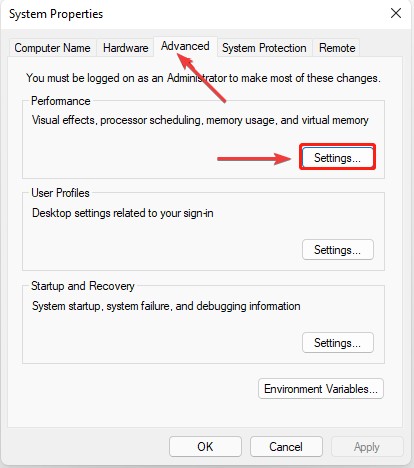
- At the bottom of the screen, enter view advanced, and select View advanced system settings.
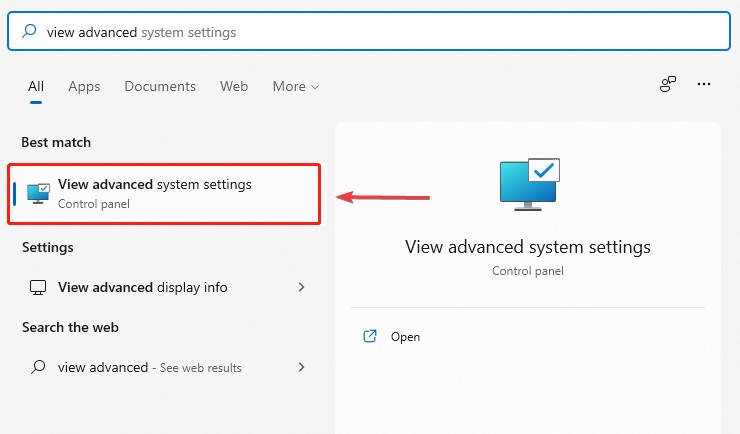
- In the Performance box, go to the Advanced tab and select Settings.
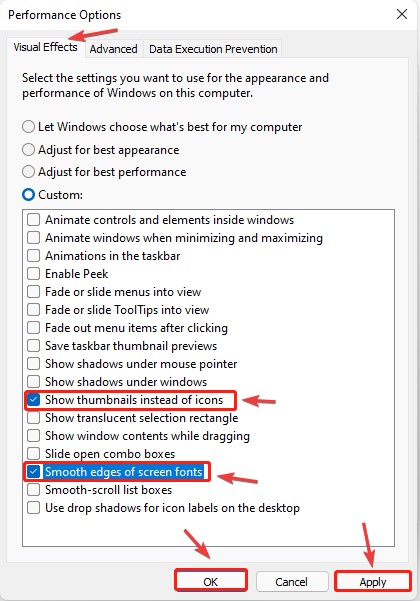
- Select Adjust for optimal performance from the drop-down menu.
- Select Show thumbnails instead of icons and Smooth edges of screen fonts from the Custom drop-down menu.
- To save your changes, click Apply and OK.
- Restart your computer now to test whether Windows 11 is still sluggish.
8. Upgrade Your Boot Drive to an SSD
Occasionally, hardware bottlenecks cause the delayed starting issue. Most current laptops have an NVMe SSD boot disc to aid increase system performance. It’s an essential consideration in every computer purchase. If you bought a low-cost system with an HDD as the boot disc, it’s time to update.
While SSDs may appear to be a pricey improvement, they may reduce your boot time to a few seconds while also improving the speed with which programs load. If you’re still undecided, check out our comprehensive guide on the differences between SSDs and HDDs.
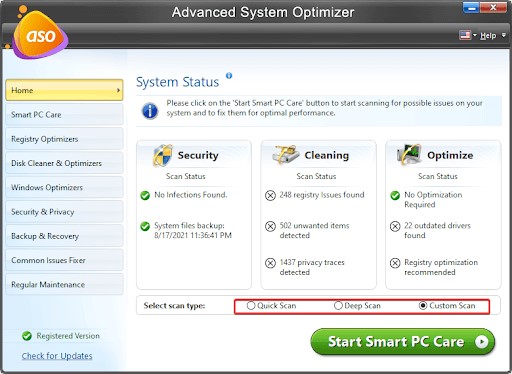
| Writer’s Tip: Advanced System Optimizer is one of the greatest PC optimization applications for cleaning garbage files, decluttering the system, removing duplicates, and keeping your computer free of viruses. Registry Optimizers, Disk Cleaning & Optimizers, Security & Privacy, Backup, and Recovery, are just a few of the modules included in this PC optimizer, covering everything a decent cleaner program should.
Click here to learn more about the tool.
If you like the tool, you can download and try it by clicking the button below: |

Conclusion:-
On SSD-equipped PCs, slow starting issues are relatively uncommon. However, faulty Windows updates, file corruption, and a large amount of startup junk can drain your system’s resources, resulting in a long boot time.
To repair sluggish starting difficulties with your computer, use the basic and advanced troubleshooting procedures outlined in this article. Examine your system’s setup to see whether hardware changes help slow startup and performance concerns.


Leave a Reply