Automatic device switching is a great feature that helps you in making calls, watching videos, playing songs on iPhone, iPad, Mac via your AirPods. However, sometimes this function does not work. You face trouble connecting AirPods to iPhone, iPad, and Mac; in this blog, we will give you 6 possible fixes to help you resolve Automatic device switching not working on AirPods
Fixes For AirPods Not Switching Automatically
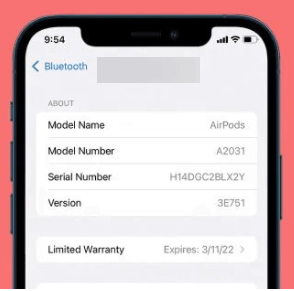
1. Check AirPods Compatibility
All the AirPods support automatic device switching except the first-generation AirPods. If you cannot switch between devices, check the model number and determine which generation AirPods you are using.
To check the model number, follow the procedure:-
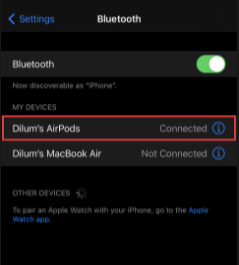
- Connect AirPods to the device (iPhone or iPad)
- Open Settings and select Bluetooth
- Tap on the info icon next to the AirPods connected
- Check Model Number under About tab
- If you see A1722 or A1523 in Model Number, that means your AirPods are the first generation that does not support automatic device switching.
A2031 and later models are compatible with automatic device switching.
If you have the first generation AirPods, you need to switch between the devices manually. However, follow the following steps if you have a later generation AirPods that are not switching automatically, follow the next steps.
2. Update Software
Check your device to confirm if you are running the latest iOS, iPad, or Mac Operating System. iPhone users must be running iOS 14 and above, iPad users iPADOS 14, and Mac users macOS Big Sur and above.
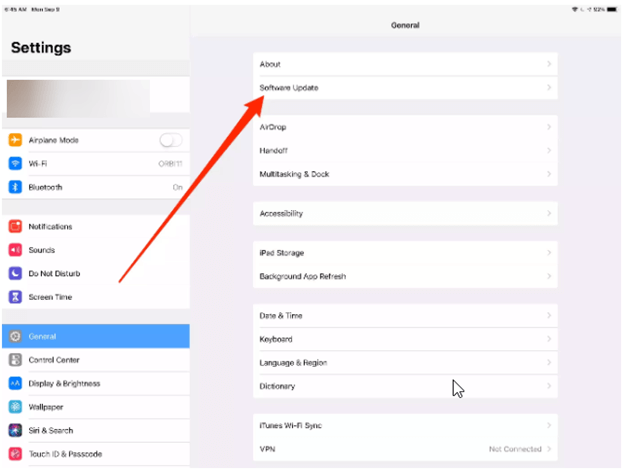
To update the iOS 14, follow these steps:
1. Go to iPhone Settings > General > tap Software Update.
2. Choose the update you want to install.
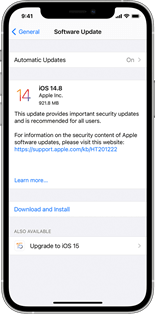
3. Tap Install Now. However, if you see Download and Install, tap it to download the update, enter your passcode > tap Install Now.
Steps to Update iPadOS
Before updating the iPad, ensure the device is plugged in and connected to the Wi-Fi. Then follow these steps:
1. Go to Settings > General > Software Update.
2. Install the update you wish to run on iPad.
3. Tap Install Now.
Update macOS
1. Click the Apple menu > System Preferences > Software Update & check for updates.

2. If an update is available, click the Update Now button to install it. Alternatively, you can click More info to see details about each update and select specific updates to install.
3. Ensure that the Apple ID is the same in all devices
If you have multiple Apple devices but not all the devices are connected to a single Apple ID, it could cause the issue. So, to resolve the issue, make sure that all the Apple devices have the same Apple ID for automatic AirPods switching to work.
Follow the steps to check Apple ID on iPhone and iPad:-
- Open Settings
- On the top, tap on profile portrait
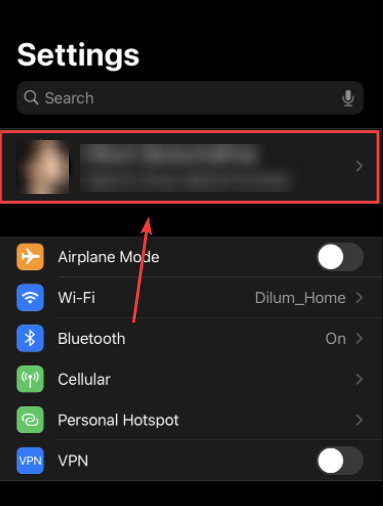
- You will see your registered Apple ID on the top.
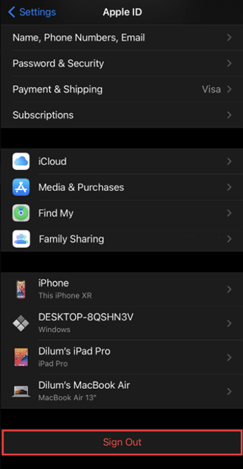
- If the Apple ID is not the same, then click on Sign Out and Sign In from the registered Apple ID as the rest of your devices.
Follow the steps to check Apple ID on Mac:-
- Open System Preferences
- Select Apple ID
- If you see a different ID from the rest of the devices, navigate to the Overview tab and then Sign Out.
- Sign In from the registered Apple ID that is the same as the rest of your devices.
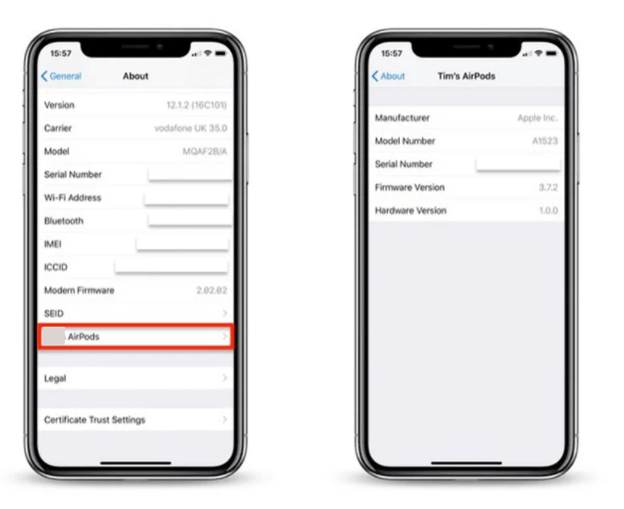
4. Upgrade AirPods firmware
If your AirPods have a firmware version earlier than 3A283, AirPods will not switch between Apple devices. Although the firmware version gets upgraded on its own, you can follow the below steps to cross-check the latest version.
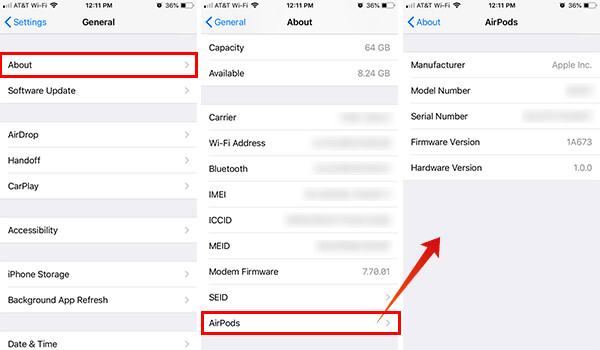
- Connect AirPods to the device (iPhone or iPad)
- Open Setting
- Select General
- About tab and select your AirPods
- Check Firmware version
If the firmware is earlier than 3A283, you will need to update the AirPods firmware. To upgrade the firmware, put the AirPods in the charging case & connect it to power. Leave your iPhone near to AirPods so that the firmware gets updated automatically. Check after 30 mins, and it will be updated.
5. Enable automatic audio switching
After following the above steps, if the problem persists, check whether automatic audio switching is disabled. If yes, to enable it, follow these steps.
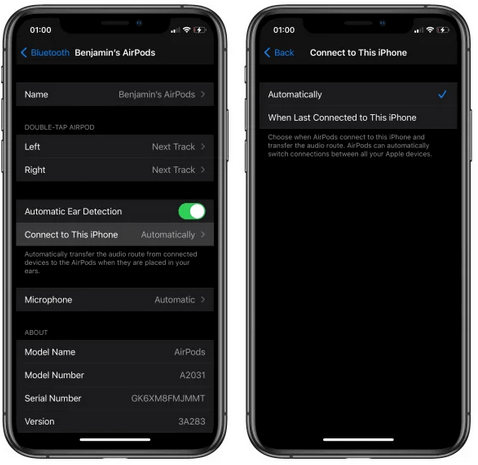
- Connect AirPods to the device (iPhone or iPad)
- Open Settings
- Open Bluetooth
- Tab on info icon next to the AirPods
- Select connect to this phone
- Select Automatically
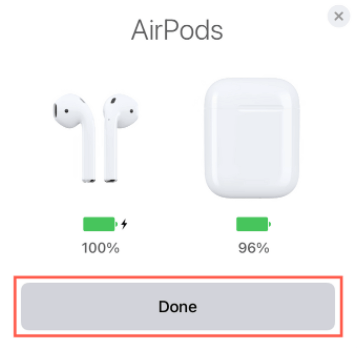
Follow the process to enable automatic audio switching on Mac:-
- Connect AirPods to Mac
- Open System Preferences
- Select Bluetooth
- Click on the Options button next to AirPods connected
- Navigate to menu Connect to This Mac, and select Automatically
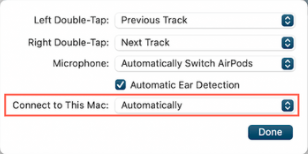
- Click on Done to save the preferences.
6. Reset AirPods
If, after trying all the fixes, you cannot get automatic device switching to work, then it is time to reset AirPods.
Follow the steps to reset AirPods:-
- Put AirPods in a smart case or charging case.
- Open the lid and press and hold the button on the back of the charging case for 15 seconds.
- Press and hold till the status indicator changes from a flashing white light to Amber.
Note:- If you are using AirPods Max, press and hold both the Digital Crown and Noise Control buttons.
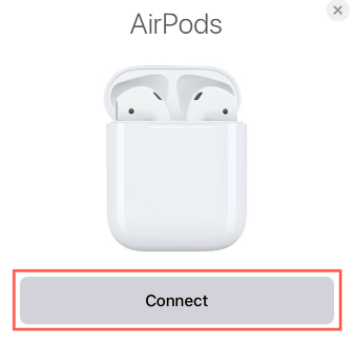
- Now the AirPods will reset. Start the pairing process again.

Conclusion:-
Automatic device switching is a great feature that allows the AirPods to seamlessly switch between iPhone, iPad, and Mac. However, sometimes due to some glitches, the function doesn’t work correctly. This blog has discussed how you can activate the automatic device switching function and enjoy the hassle-free pairing.
If you face such an issue with your AirPods, then try the above-mentioned troubleshooting steps and let us know your experience in the comment section below.

Leave a Reply