Photos are one of the most important parts of our lives & the way we try to click the best ones, the efforts are top notch. Since going through photos feels like a beautiful & exciting journey, it demands to be perfect, no interruptions. However, there are some internal elements that can ruin your whole experience of taking perfect photos, for example Digital Noise.
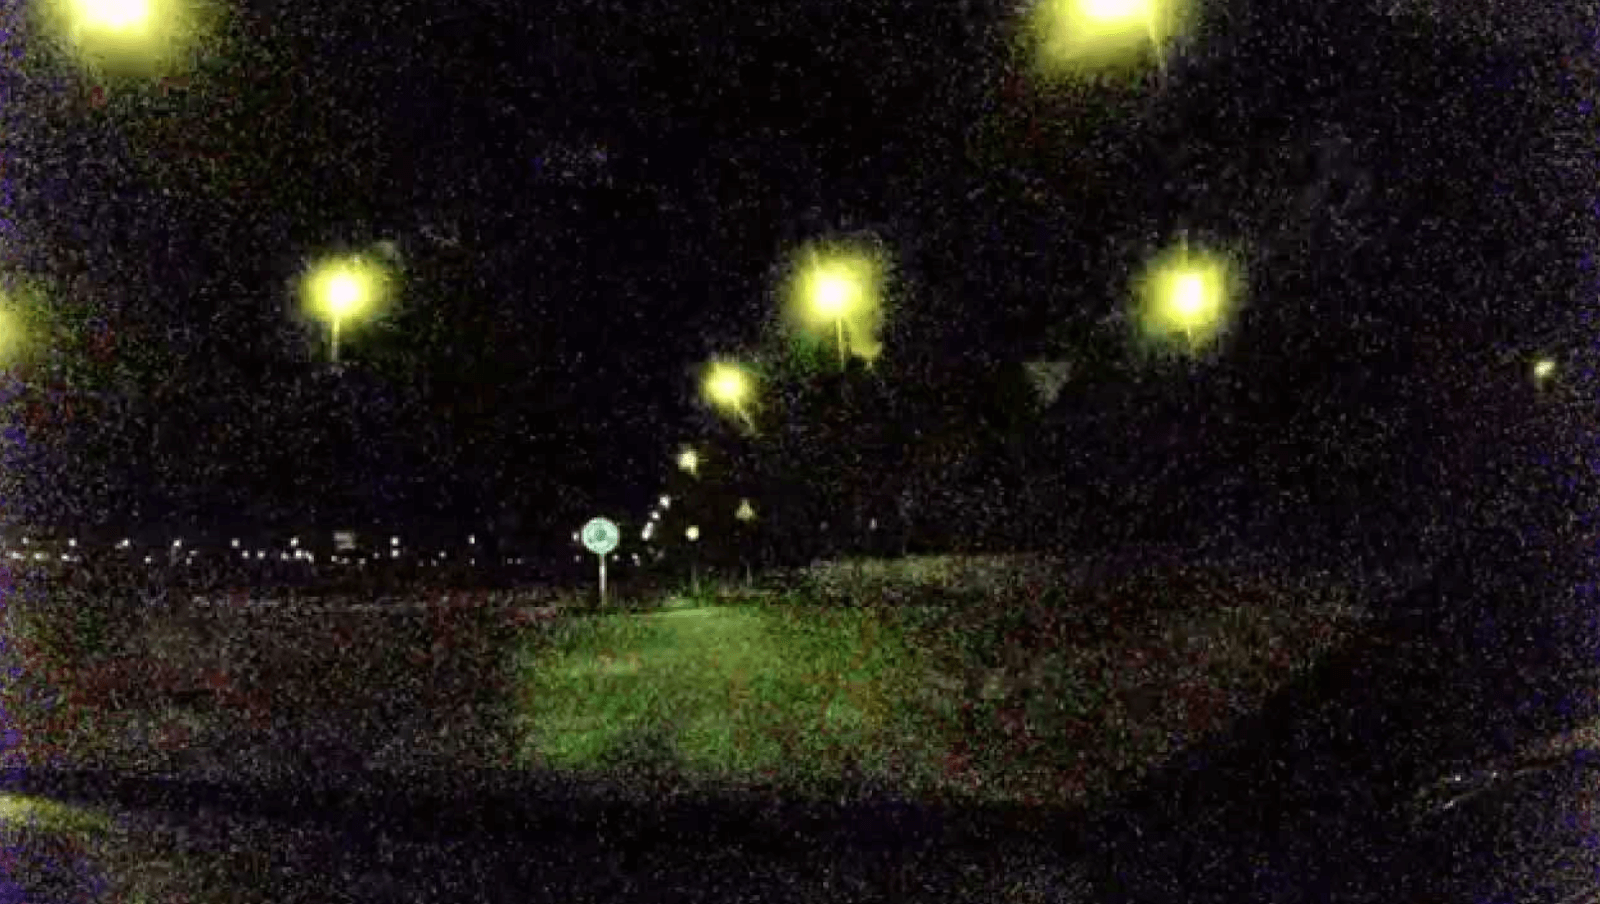
I myself got to know about this concept a while ago when I tried to take some pictures while hanging out with my friends. Since it was late evening, we were trying to get pictures in low light & no matter how much I tried, photos weren’t as good as I expected. Maybe my cell phone’s camera wasn’t as sharp as I thought it would be & it made all the pictures look grainy.
Also Read: How To Find And Delete Duplicate Photos
What is Digital Noise? Can You Reduce it From Photos?
As I was looking for the answers to this issue with my photos, I found out there are many incidents with other people as well. The digital noise has affected many images & users are trying to find the right tool to denoise those images.
Yeah, that’s possible!! If you have got the right tools, anything is possible in the tech world including taking perfect pictures in low light situations. Many times, the reason behind not getting good pictures can be the camera quality, however, a few times, it can be because of Digital Noise.

It’s not a rocket science or complicated concept to go through because digital noise is all about the fluctuation of color info & brightness in pictures. It’s not something a user triggers because an image sensor can produce the digital noise in images that can make the picture unusable. Though digital noise is clearly visible while taking photographs from Digital Camera, these unwanted electric fluctuations can be experienced on cell phones as well.

That’s why tech experts try to use tools that can reduce the noise from the photos so they can be as memorable as you wanted them. So yeah!! You can easily reduce noise from photos, thanks to Noise Reducer tools available in the market. Since it’s a cut-throat-competitive market, you may find hundreds of noise reducer tools that claim to be the perfect ones. However, you need to narrow down & choose the one that offers you the best results along with working as an excellent digital noise reducer.
Also Read: Use Photos Recovery Tool & Never Lose Your Precious Photos
Start Reducing Noise in Pictures with Photo Noise Reducer
While trying to narrow down the best digital noise reducers, I went through many photo denoisers that claim to be the best in the business. However, I was looking for something that can be the perfect example of one-stop-solution. That’s when I found out about the Noise Reducer Pro from Systweak that’s been designed with the concept of “get spot-free, flawless images instantly”. The perfect tool that not only starts denoising pictures but also removes the tinted pixels. Photo Noise Reducer is a self explanatory term that doesn’t require any further explanation. However, it’s an app that’s going to denoise all your photos with ease and will make them look spectacular.

Compatible from iOS (7.0 & later) to Android (3.0 & up) & Windows to macOS, Photo Noise Reducer is an excellent & powerful product that offers you spotless images in no time. Let’s start with exploring this simple yet effective Photo Noise Reducer & start denoising our pictures:
Note: Noise Reducer Pro has been discontinued from all platforms (Windows, Mac, Android, iOS).
- First of all, you need to download the Windows version of Photo Noise Reducer on your system.
- Post downloading & successful installation, the tool will automatically launch on your PC.
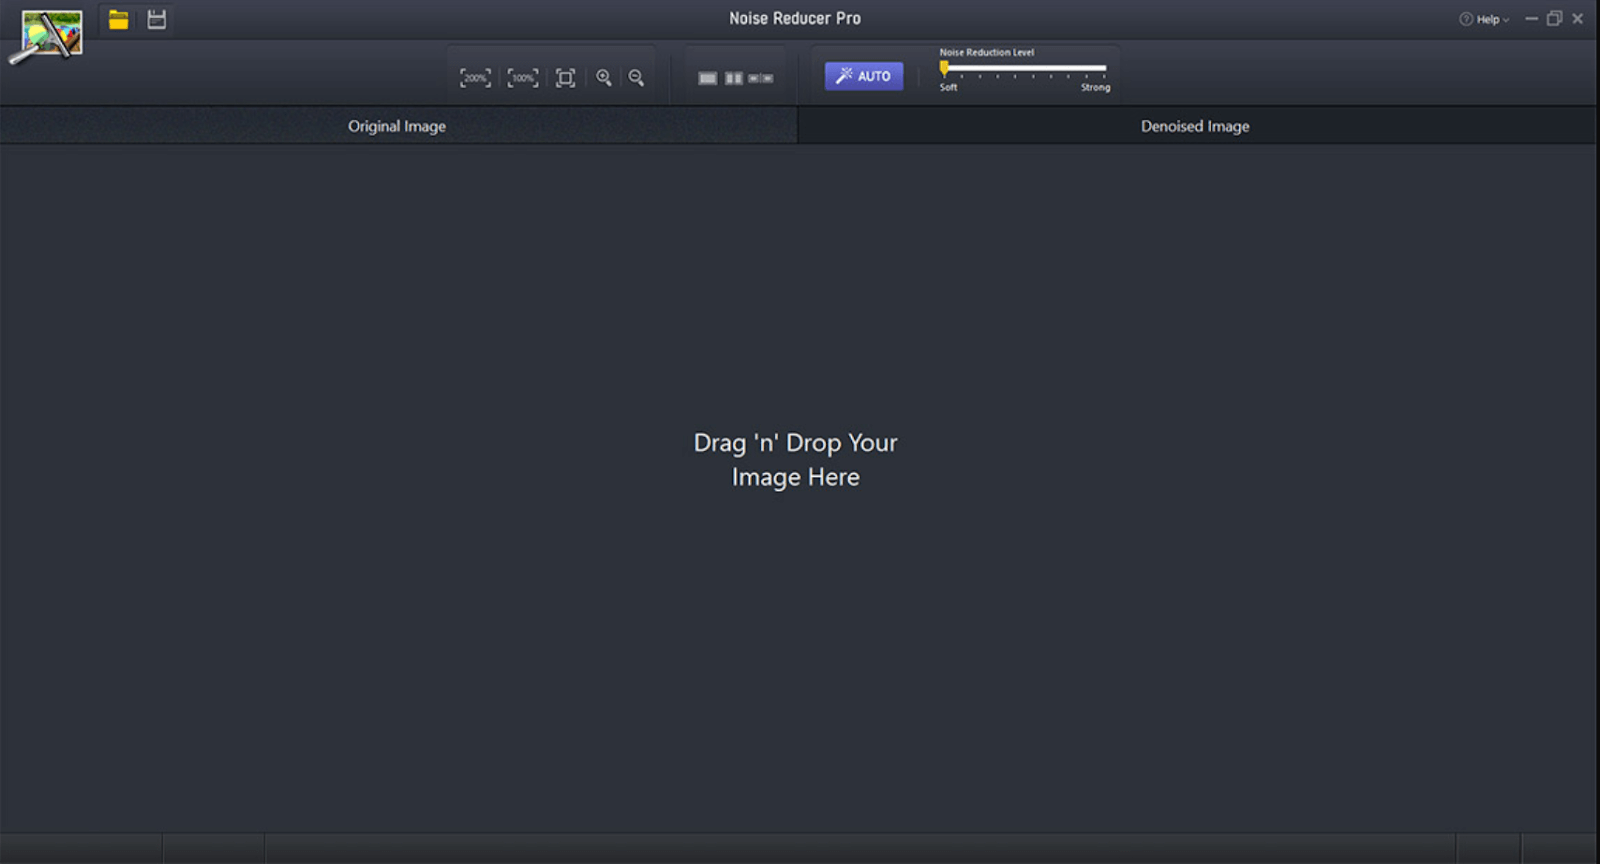
- You can see the “Drag ‘n’ Drop Your Image Here” function in the middle of the Photo Noise Reducer app so either directly drop the image here (from the system drive). Or you can simply tap on the Yellow folder icon (top left side of the screen) to add the image you wish to denoise.
- After selecting the picture or directly dropping it onto the tool’s homepage, this powerful digital noise reducer starts the denoising process. & within a couple of seconds, you have got yourself the denoised image in front of you.
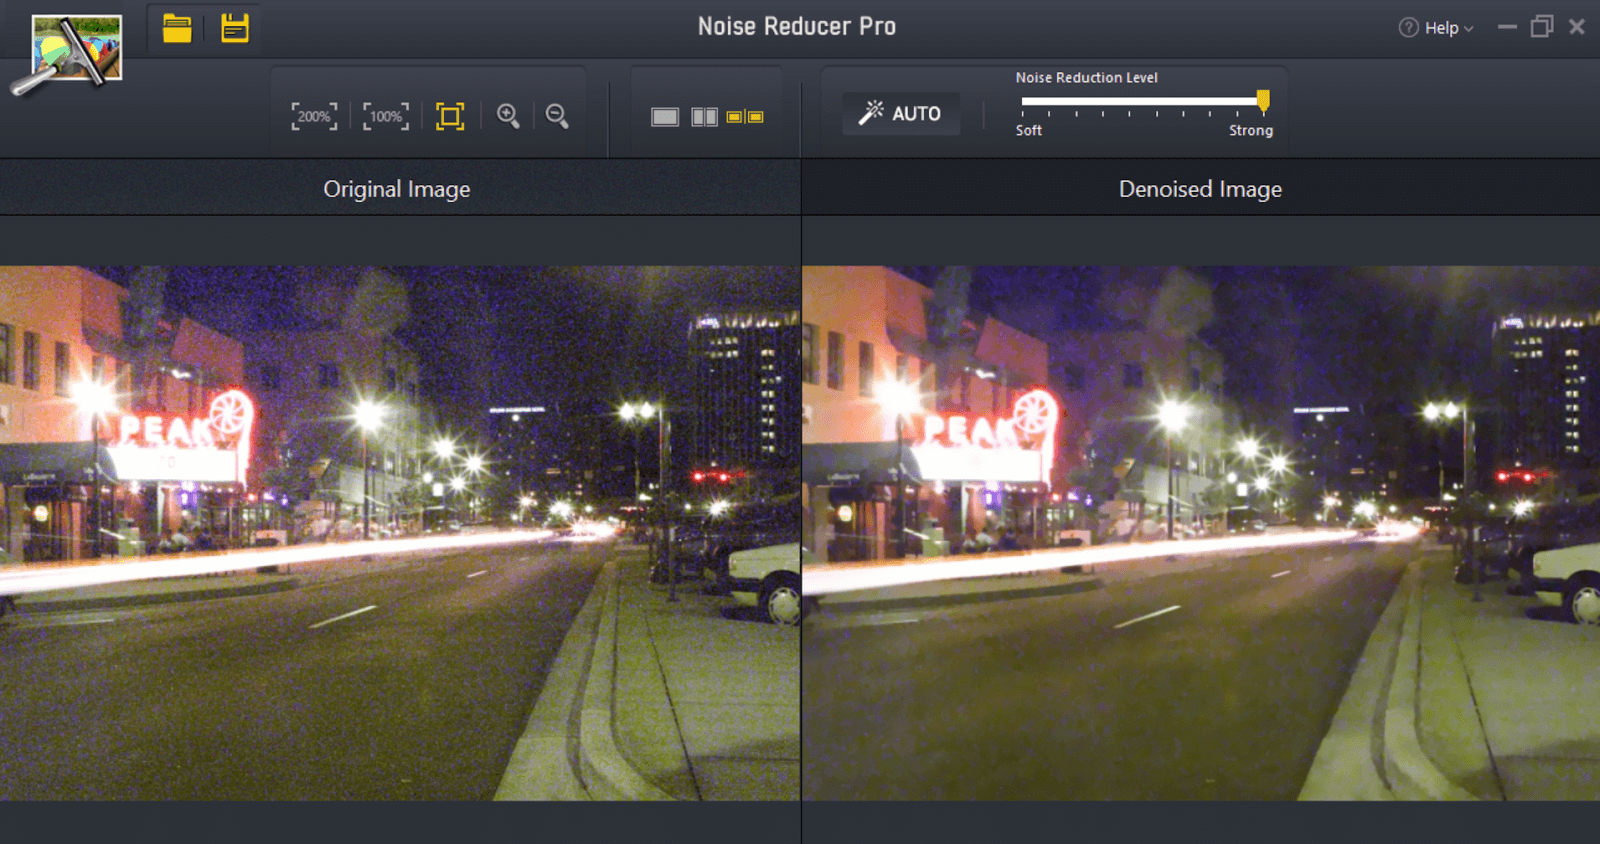
- Start looking at both the pictures thoroughly & then only you will know the digital noise reduction we are talking about here.
- Zoom in or Zoom out the pictures (original & denoised) to identify if Photo Noise Reducer has made an impact on the image or not.
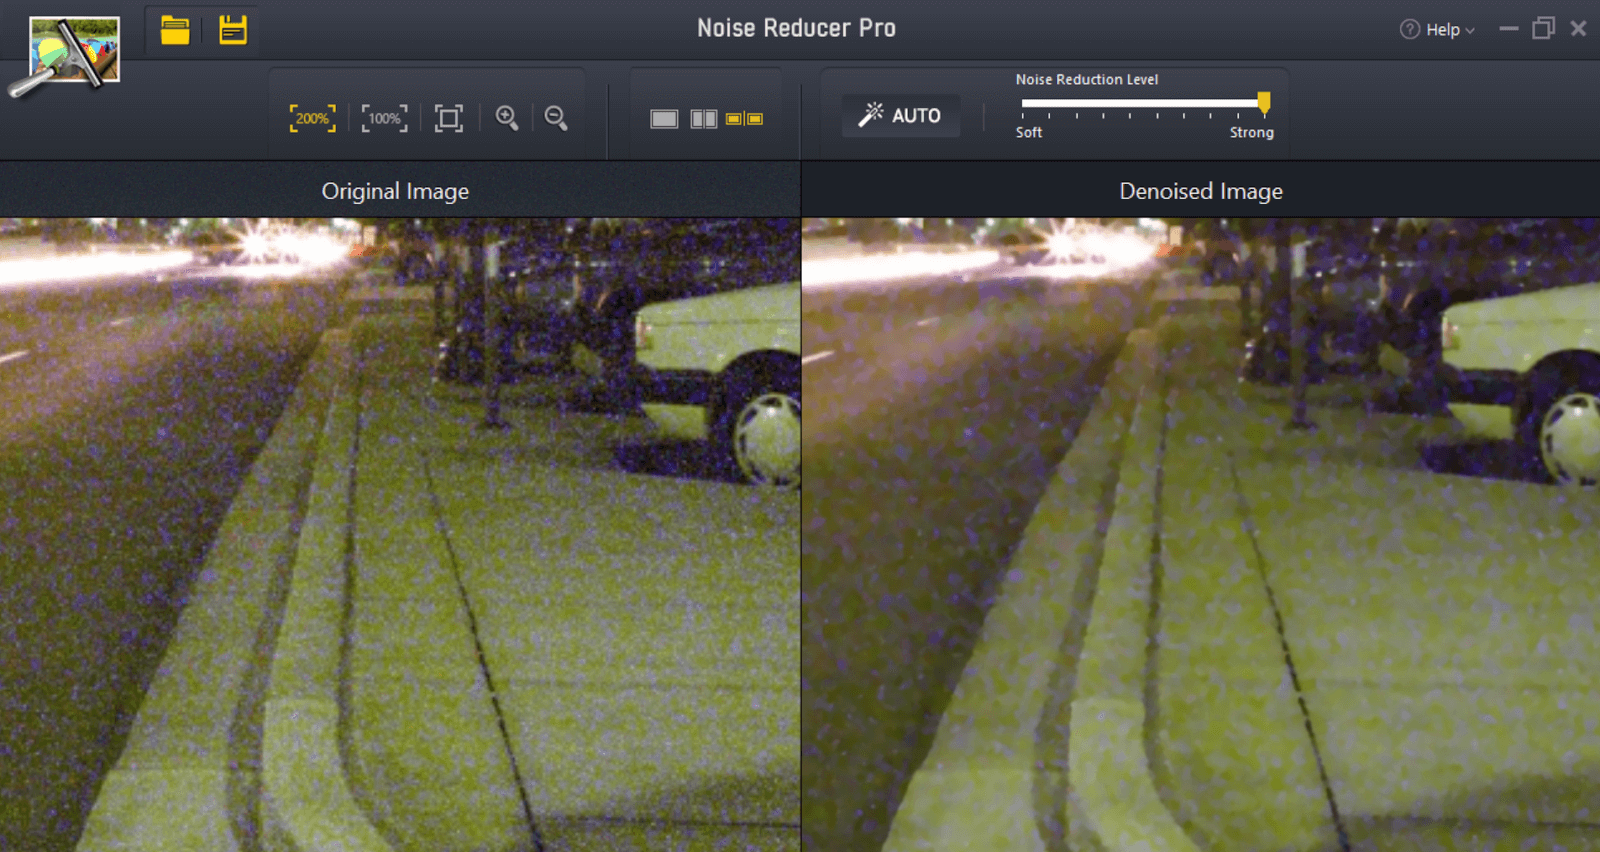
- All you need to do is, tap on the options (exactly above the original image) to zoom in 100 to 200% & check every corner of the photo. You just need to move your cursor around the original image & the denoised image will simultaneously show the exact part of the photo in the other image. Simple as that!!
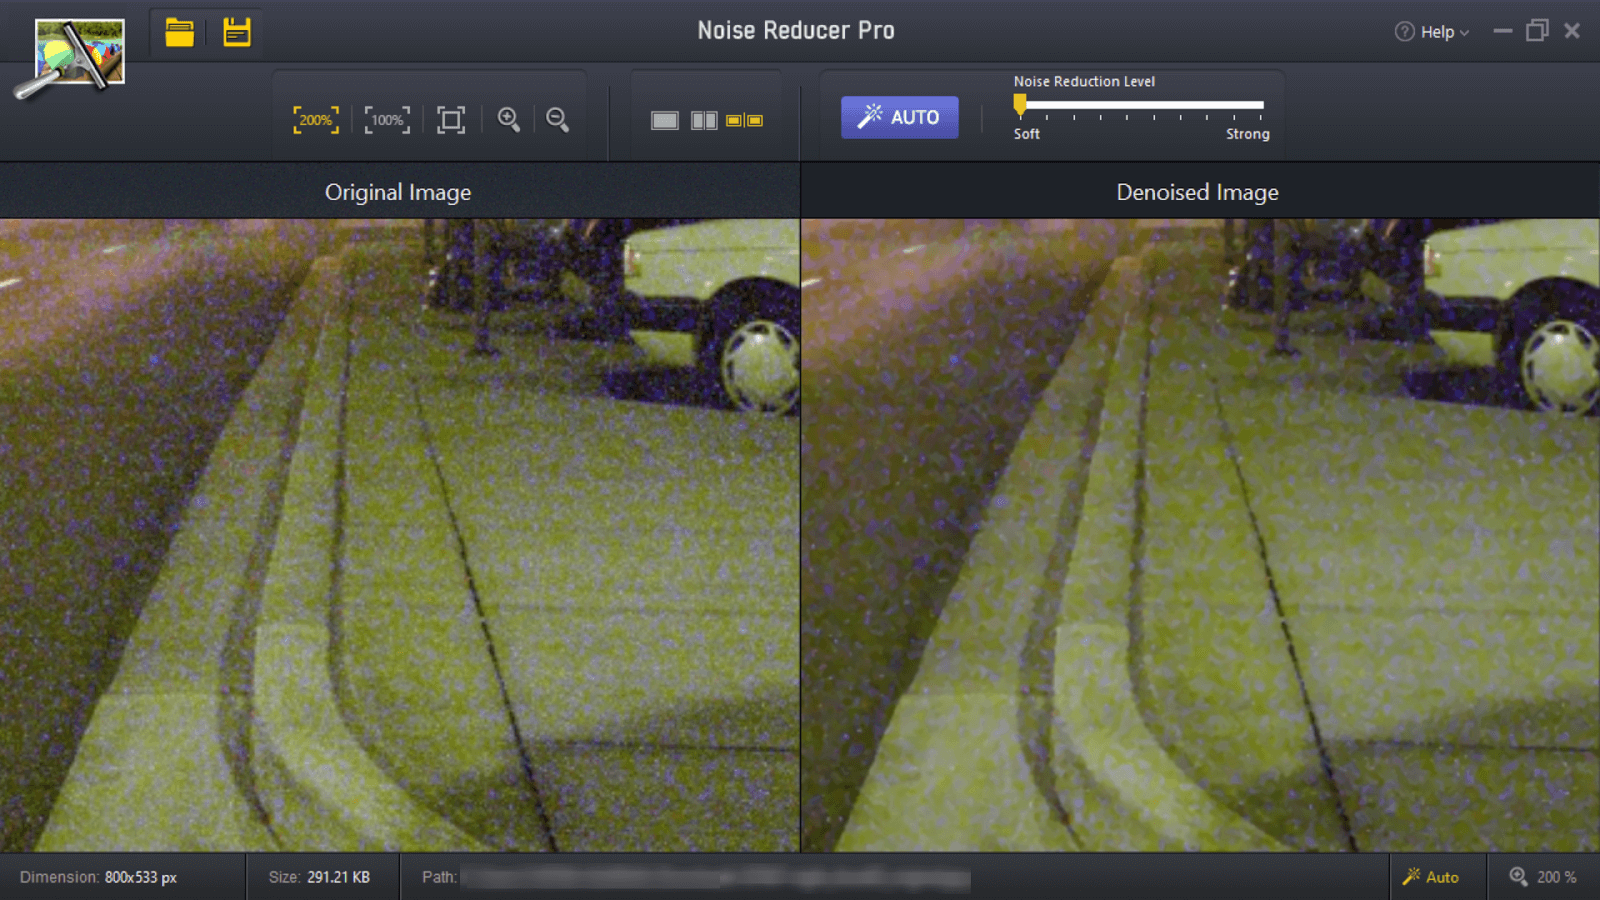
- Additionally, in case you aren’t satisfied with the sharpness of denoising level, you can tweak it according to your needs (options above the denoised image). Just start increasing the noise reduction level from Soft to Strong & you will see the difference. & if you feel like nothing is working out for you, tap on Auto & it will denoise the image keeping every aspect into consideration.
- Since you have put in so much effort, you want the file to get saved so click on the Floppy or Save icon (top left side of the screen) & the file will be saved. Also you can see the output file path along with file size & dimensions onto the bottom of the Photo Noise Reducer page.
See, how simple it was to reduce the noise from images that were queso to unusable before, thanks to Photo Noise Reducer. Since you can find the noisy images in any of the devices, start exploring this magnificent tool in every device you own so that all the features can be visible to you.
Additional Note: If you would be using Photo Noise Reducer on any of your cellphones (iOS device or Android smartphone), you’d really like the additional features. For example, clicking the denoised pictures directly from the Photo Noise Reducer tool & not think about denoising them again. This is something you may miss while using the desktop version of the digital noise reducer tool.
Plus, the Auto button functionality, tap on it & the tool will start denoising your photos smoothly without any interruptions. There are additional features that can be extremely important for your pictures & Photo Noise Reducer takes all of them into consideration as below:
- Enhanced exposure
- Intuitive interface
- Auto mode
- Single & Dual Window To View Images
- No compromising in image quality
- User-friendly
- Fixing denoised images in one tap only
- Directly click denoised images from the Photo Noise Reducer app
- Smooth slider feature to adjust the matching levels
Electric fluctuations like distortions, grains, and specks while taking photographs can be annoying & ruin the whole experience. & that’s where you start using the Photo Noise Reducer to clear out all digital noise from your images to make them spotless. Apart from providing the easiest way to reduce noise in pictures, Photo Noise Reducer gives the above listed benefits to the users & that’s what makes it one of the best digital noise reducer tools. So start denoising your photos efficiently by getting rid of the visual distortions & speckles along the way.
What Does User Think About Photo Noise Reducer?
Irrespective of the field or the industry, if the ultimate consumer has denied the product, there is nothing you can do apart from improving the product as a whole. Similarly, in the tech industry, the consumer is the user who has used the app, product, or software & is ready to give feedback for the same. A positive feedback goes a long way but a negative way travels longer & the authenticity of any app can be verified by what the user thinks about the app. So here are a few comments that have been posted by users,
Image noise reduction on the iOS platform lags behind the Mac, perhaps understandably because it’s as much art as science. Nevertheless, this little app performs better than most, managing to smooth artifacts while maintaining edges and the illusion of sharpness. – Stevearcher (*****)
If you want the ultimate result it’s not going to be from a tablet edit, but this app can be very useful in improving some of your images that have larger scale (sky,Mountain), but you will probably want to take them to a app that can add structure and sharpness for your finished tablet edit. – Qborg (****)
Wrapping Up
Digital noise in a picture isn’t something to be scared of. It’s just that maybe we weren’t familiar with the concept & called it a camera quality issue; a blurry photo; or a grainy one. Now we know that these electric fluctuations or distortions are called digital noise that can ruin the whole trying-to-get-a-perfect-picture experience, let’s do something about it. Start by looking for tools that can reduce the digital noise from the images & make them flawless, Photo Noise Reducer from Systweak.
Explore this powerful digital noise reducer tool’s rich features & you won’t have to think about denoising the images again.
Next Read
Organize and Edit Photos In Windows Photo Gallery Like A Pro
Which is The Best Photo Editor App for Windows & Mac?


Lucy
Is this tool working on android device ?