Apple’s AirPods are a series of truly wireless earbuds designed by Apple. You have to take them out of the charging case and start using them with your iPhone, Apple Watch, iPad, and Mac.
Apple AirPods is designed by Apple and works perfectly with Apple products, but it doesn’t mean that it won’t work with non-Appledevices. Apple AirPods can be connected with Android phones, and even with Windows 10 PC. Well, yes you heard it right! Let’s know how to easily connect AirPods with Windows 10
Before we go to the steps of using AirPods with Windows PC let’s take a look at the features of Apple AirPods below.
Features:
1. Truly Wireless
2. Fit comfortably
3. 5-hour battery life while listening and 3 hours of talk time.
4. Charging Case holds multiple charges which give 24 hours of total battery life.
5. Quick 15 min charge which gives 3 hours of listening time and 2 hours of talk time.
6. Easy One-tap setup (Apple devices)
7. Switch easily between iOS and Mac.
8. Music plays instantly as soon as you put it on your ear and stops when you remove it.
9. No need of using both AirPods, you can use just one to call and listen music
10. Are Siri enabled
11. Easy music playback
Also Read: How to Access AirPods Pro Hidden Settings on iPhone
Steps to Connect Apple AirPods with Windows:
Connecting Apple AirPods with Windows PC is an easy task. You just need to follow these simple steps for connectingAirPods with Windows PC.
Note: Make sure that Bluetooth is turned on your Windows system.
1. Keep your AirPods in the charging case and make sure they’re a little bit charged.
2. Open the lid of your AirPods charging case and tap and hold the circular buttonon the backside of the charging case for a couple of seconds until the light inside the case blinks white.
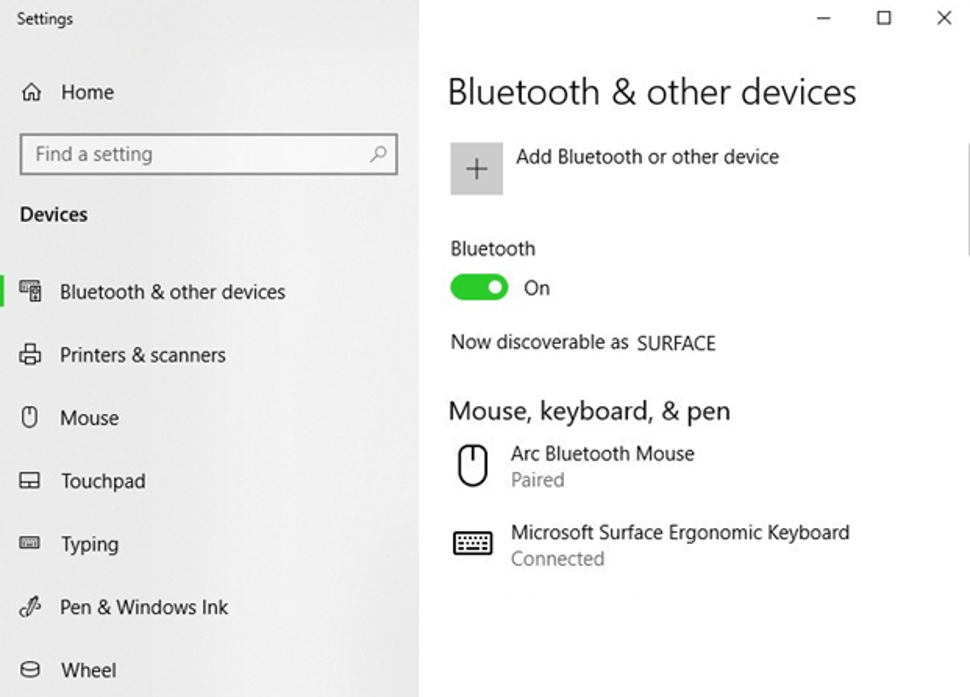
3. Now open Bluetooth settings on your PC by searching for Bluetooth in the taskbar search field and clicking on the Bluetooth and other devices settings.

4. Now, click on the Add Bluetooth or other devices.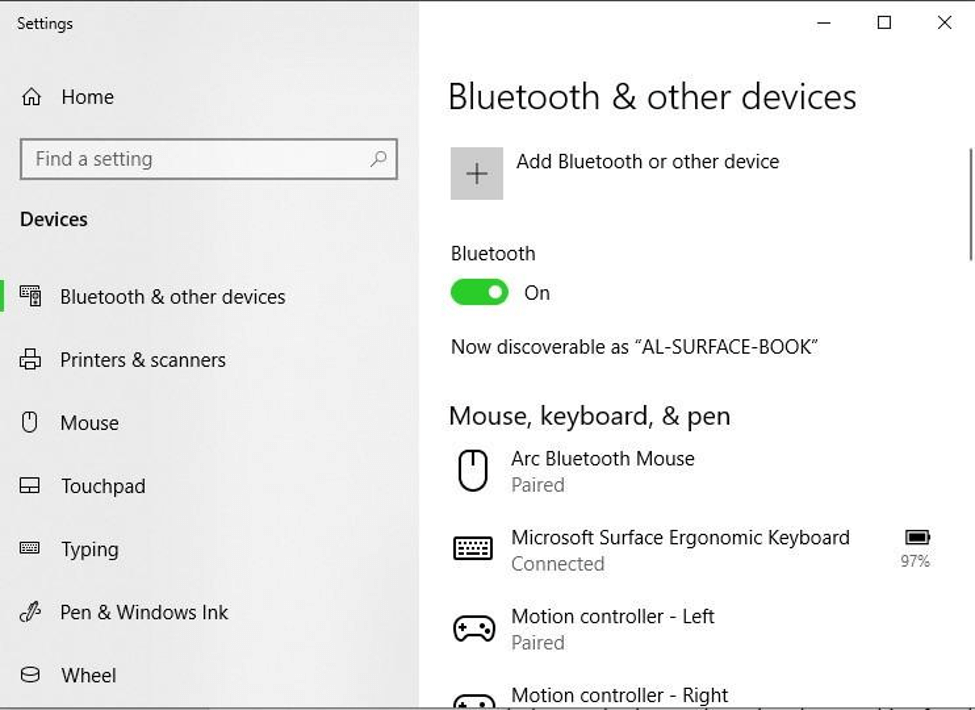
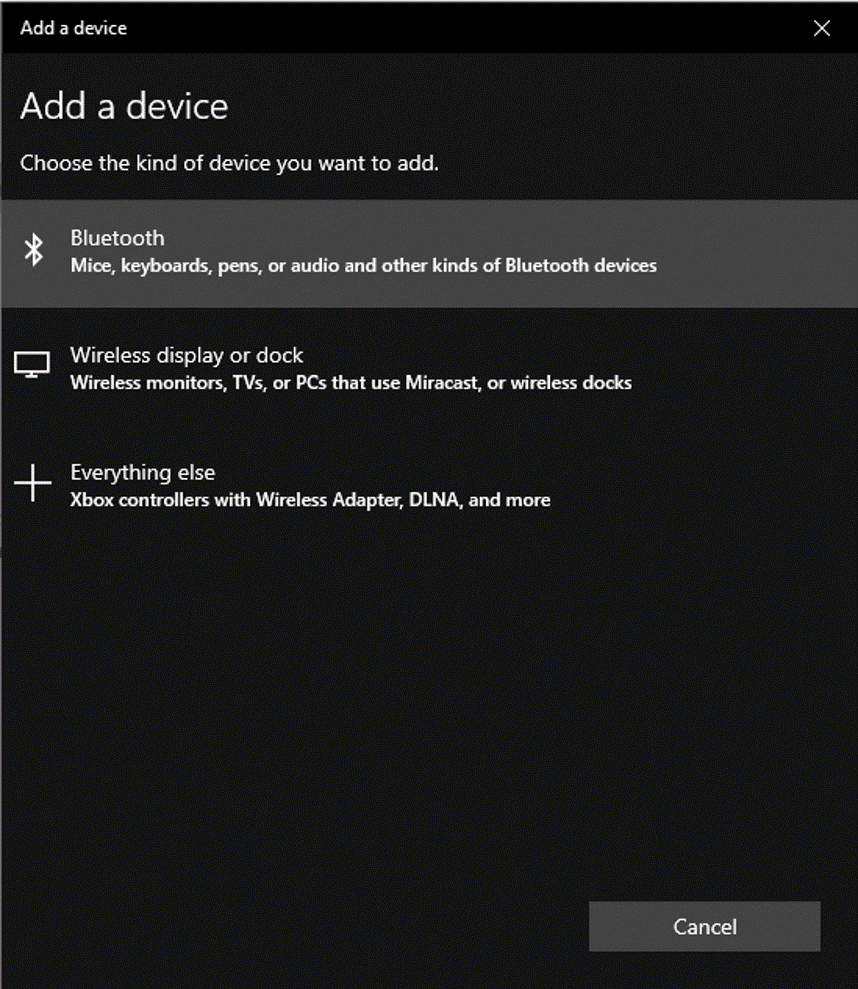
5. On the next Add a device page, click on Bluetooth.
6. Now, you will see your AirPods in the list of discoverable devices.
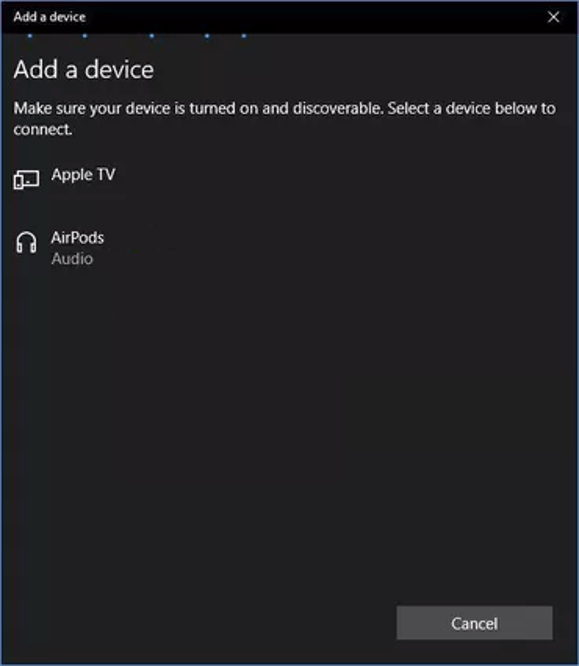
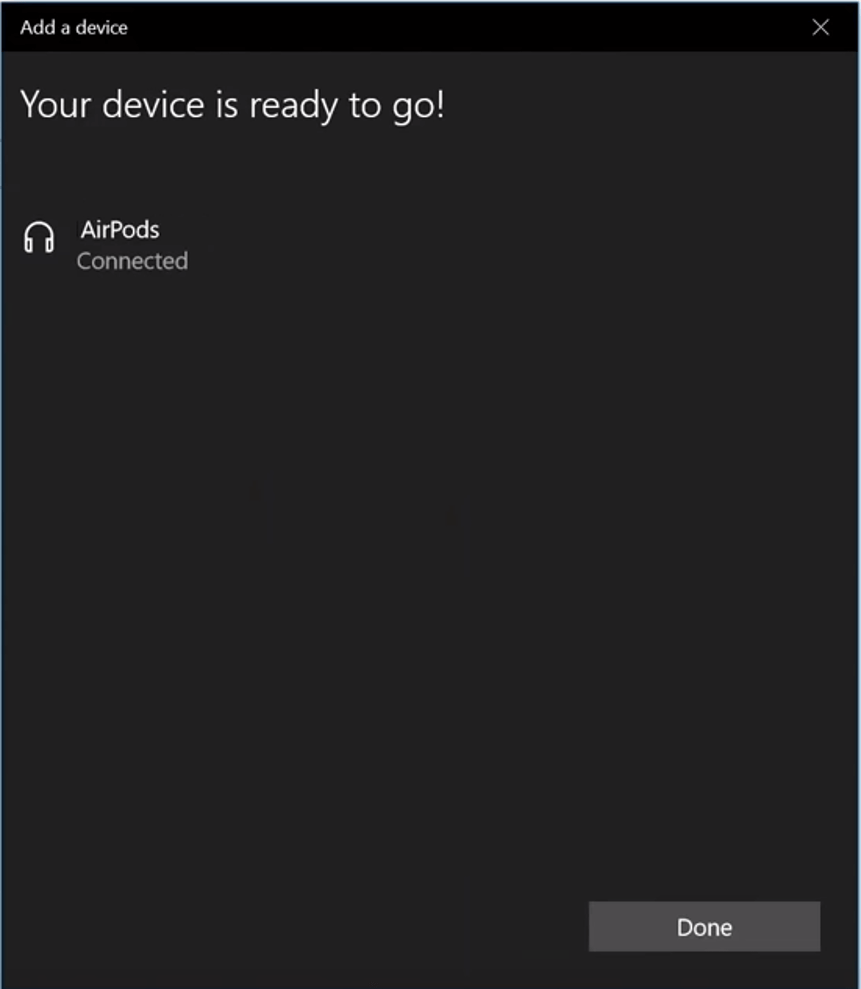
7. Now click on Your AirPods from the list to connect your AirPods. Once you click on it, you will see a confirmation dialogue box saying, the AirPods and PC are connected.
Note: If you are unable to connect your AirPods, we suggest you repeat the process above.
8. Now you can remove AirPods from the case and start using them.
Connecting AirPods to your Windows PC is as easy as connecting them to other devices. When you want to stop using them, you can just put them back in their charging case and close the lid.
How to reconnect AirPods with Windows PC
To use previously connected AirPods to your Windows System, you just have to take them out from the case, and it will automatically connect to Windows PC. However, if the AirPods are not connected automatically, then we suggest you follow the steps below:
1. Open Windows Bluetooth settings like you have opened before when connecting AirPods first time to your Windows PC.
2. Now Scroll down to the Audio section below Bluetooth and other devices list, and click on the AirPods.
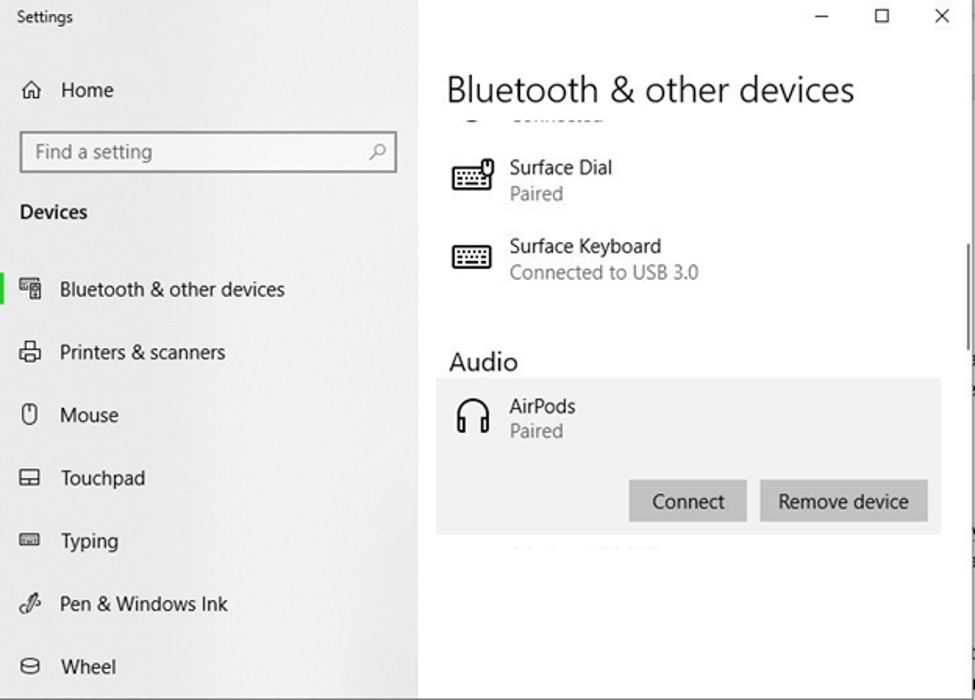
3. Now, click on the Connect button to reconnect your AirPods to your PC.
4. Your AirPods will be again connected to your Windows PC.
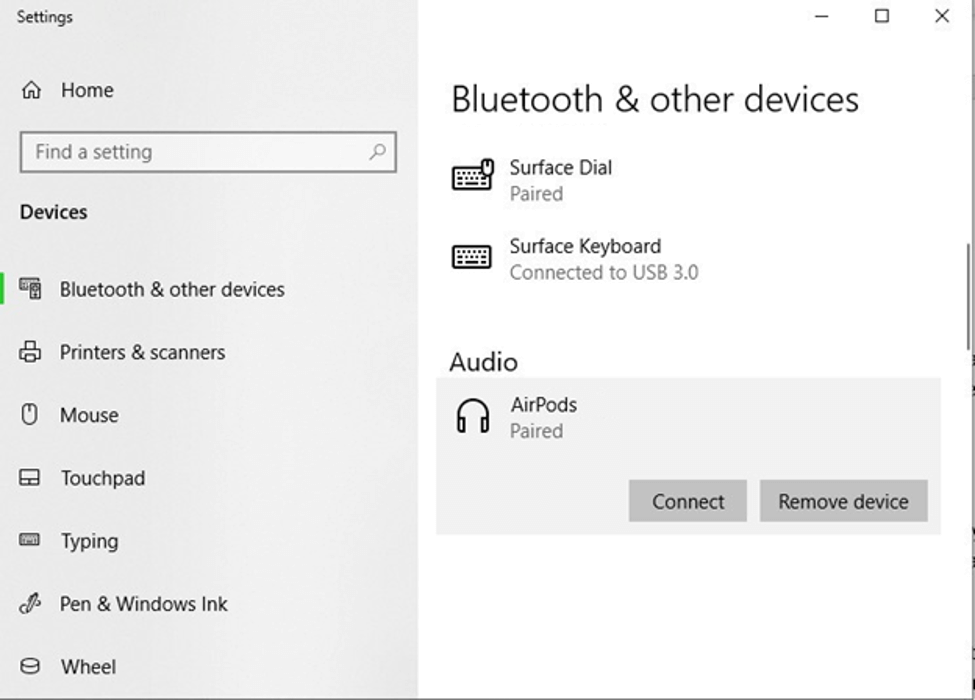
If you still face the problem while connecting the AirPods then we suggest you remove the device by clicking on the Remove device button and repeat the steps you have used to connect the AirPods for the first time with your Windows PC.
Verdict:
If you have recently purchased AirPods and want to use them on Windows PC instead of Apple Machine. Then these steps will help you to connect them to your Windows 10 PC easily.


Leave a Reply