Android Emulators are a great tool to run Android Apps on PC. There are a great many Android Emulators available in the market. However, slow performance of Android Emulator can ruin that experience.
Slow performance of Android Emulators is a recurrent issue, especially BlueStacks. BlueStacks is one of the most popular Android Emulators there is. But it isn’t the most convenient piece of software to use. BlueStacks is highly demanding and heavy on PC.
Then, how are we supposed to fix it? How to Speed Up BlueStacks or any Android Emulator for that matter? Continue Reading to know how to speed up BlueStacks.
How to Speed Up BlueStacks or Any other Android Emulator?
1. Make Sure you are Using the Best Available to Speed up the Android Emulator
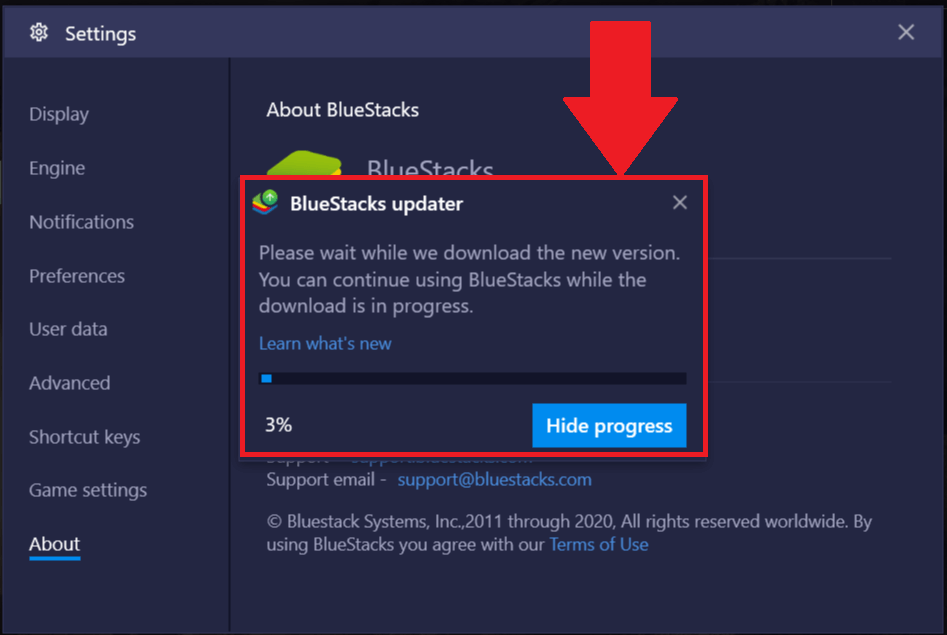
No, we aren’t talking about the best piece of Hardware or CPU. Making Sure that your BlueStacks is updated to its latest version can help improve the performance of the software noticeably.
The latest version of BlueStacks is BlueStacks 4 i.e. on the date of writing it. You can check for the latest update from the app itself or you can simply visit BlueStacks.
2. Update Drivers to Speed up BlueStacks
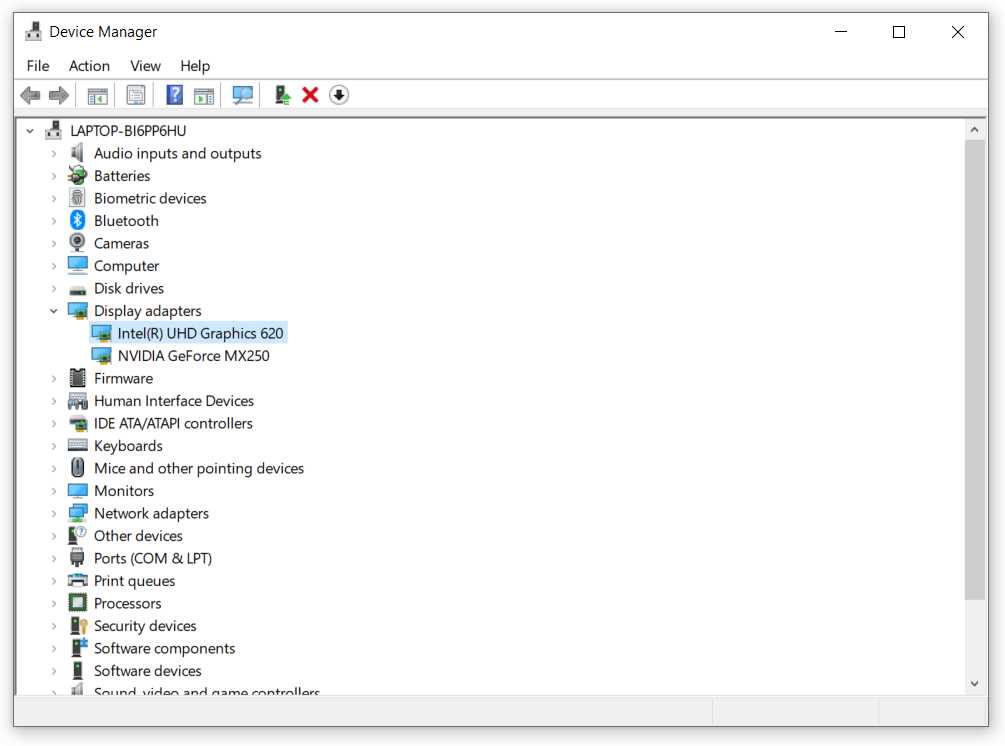
Graphics Drivers have the most evident impact on the gaming experience. If your BlueStacks software is running fine but the gaming doesn’t seem as impressive as it should, an outdated Graphics Driver can be the issue. In order to update graphics drivers:
- Search and Open Device Manager from the Start Menu.
- Search for the Display Adapters from the list.
- Click on it and expand
- Right Click on Graphics tab and click Update to update the drivers.
3. Allocate More System Resources to Speed up the Android Emulator
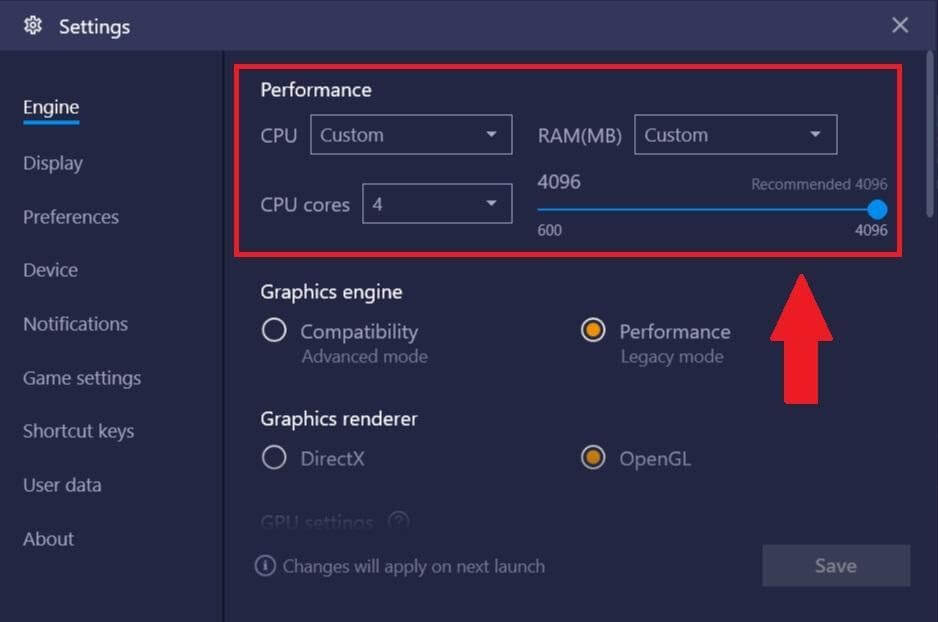
If BlueStacks is running slow on your PC, it may be because of the insufficient allocation of RAM and CPU Capacity allotted for BlueStacks to function.
In the recent updates, BlueStacks has started to include the option to manage the system resources allocated to BlueStacks Android Emulator. In order to Speed up BlueStacks, you can increase the amount of resources assigned to BlueStacks. To do so:
- Open the emulator.
- Then click on Settings on the top right-hand corner of the screen.
- Again click on Settings to open a new window with all the different settings.
- Click on the Engine Tab
- Manage RAM and CPU Cores allotted to BlueStacks to Function Properly.
4. Turn Off the Antivirus for the moment to Speed up the Android Emulator
Not all us have PCs that are equipped with the best-in-industry specs. We use average PCs with average performance and some Antivirus Software can be heavy on the system. Even if you are using a lightweight Antivirus Software, it won’t be a bad idea to close/pause the Antivirus tool for the moment while you are using BlueStacks to haul down the workload a bit. This can instantly boost the system performance and help speed up BlueStacks.
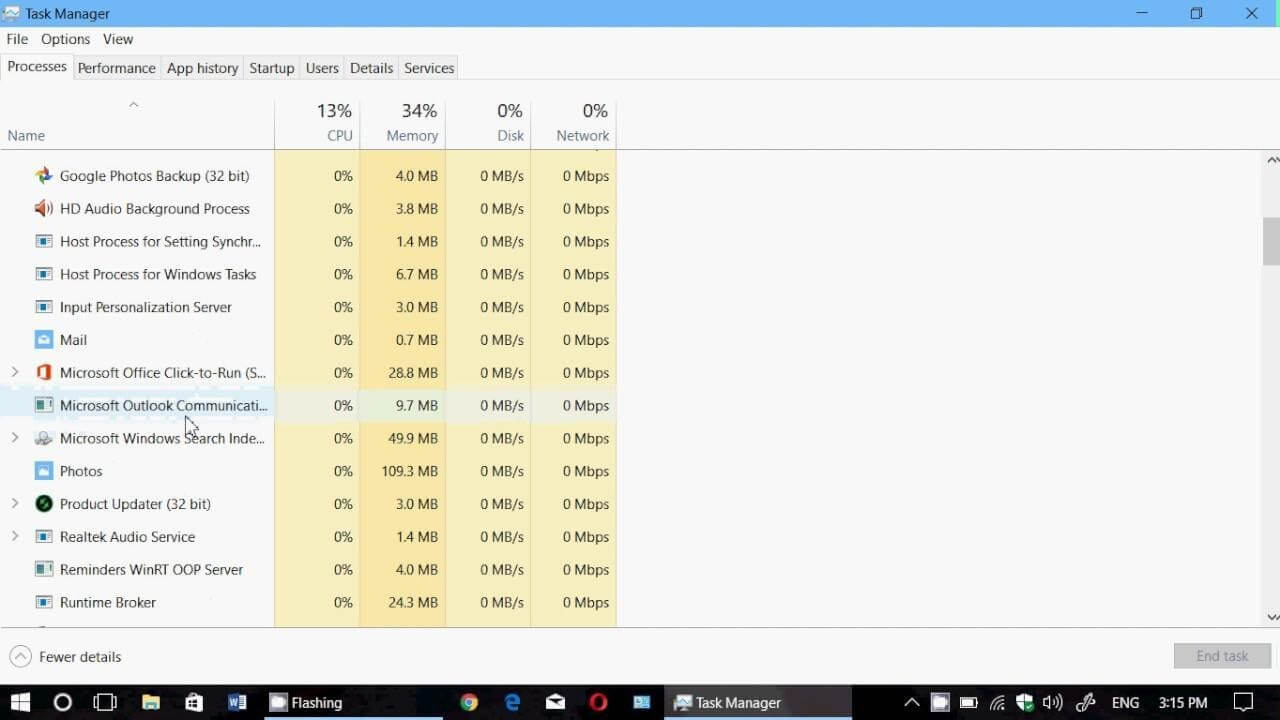
5. Turn Off Background Processes
Similar to Antiviruses, there are a lot of background processes that can hamper the performance of your PC in general and can be the reason behind BlueStacks running slow. In order to speed up BlueStacks Android Emulator, you can stop these background processes in order to give your system a quick boost.
Turning off the Background Processes can have an instant impact on the performance of BlueStacks on your PC.
6. Use PC Optimizer Software to Speed up the Android Emulator
PC Optimizing Software are created to help increase the performance of your PC in general and free up memory and CPU being used from the unwanted processes. This, in turn, has a direct impact on any software running on your PC and hence, can help speed up BlueStacks.
There is a plethora of PC Optimization Software available in the market. However, we suggest using Advanced System Optimizer to get the best out of your Windows PC. Let’s talk about Advanced System Optimizer in a bit more detail.
Advanced System Optimizer:
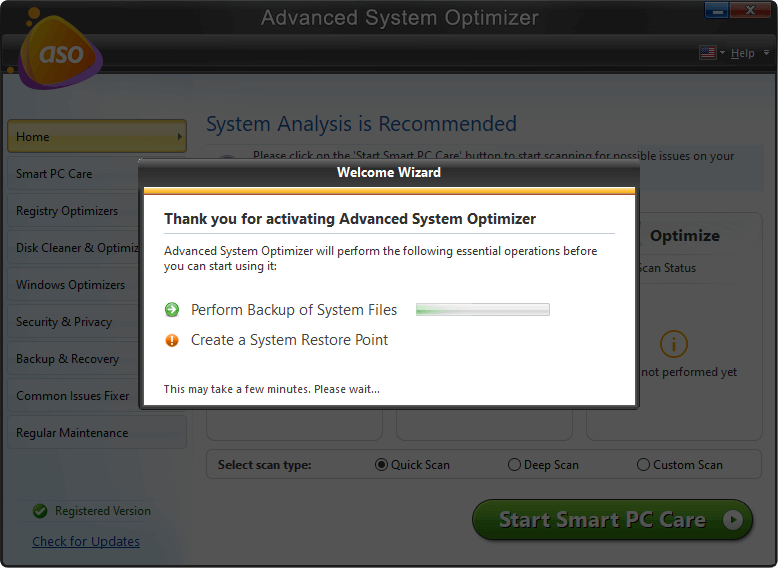
This Advanced System Optimizer is one of the most feature packed PC Optimization Software available in the market. Advanced System Optimizer can provide an instant boost to your PC Performance with the help of its extensive list of tools and perks.
Click Here to Download Advanced System Optimizer ($49.95)

Read Full Review of Advanced System Optimizer
- Memory Optimizer: Advanced System Optimizer comes equipped with a Memory Optimizer tool that can help free-up System RAM by clearing unwanted background processes and cleaning junk.
- Game Optimizer: It also features a separate Game Optimizer which is intended to provide an instant boost to system performance before playing games or running software that are heavy on the system.
- Driver Updater: The Driver Updater helps keep all the system drivers updated automatically. Keeping the System Drivers up-to-date helps maintain optimal PC Performance.
- System Cleaner: Sometimes it isn’t the background processes that cause the system to slow down but the accumulated clutter and junk files. Advanced System Optimizer features a System Cleaner that automatically gets rid of all the junk and clutter on your system to speed up PC Performance.
With all these amazing features and much more, Advanced System Optimizer is truly the real deal and can surely help speed up BlueStacks performance. To know more about or download Advanced System Optimizer, visit Advanced System Optimizer.
So, this was all from our end on how to speed up BlueStacks. Do let us know if you tried these hacks and solutions and if they helped speed up BlueStacks, We love hearing from you.
Recommended Readings:
What Happens When You Disable All Startup Programs
How to Fix CPU Fans Not Spinning in Windows 10?


Leave a Reply