At some or the other point in time, you might have accidentally deleted photos, only to regret your decision later. But, with advancements in technology, you needn’t lose hope. Some effective photo recovery tools can help you recover lost images in no time at all.
However, when thinking of recovering lost photos, things go beyond just recovering them. Let’s suppose, you had spent hours sorting clicked images into folders, just so that you could edit them easily later. But fate had something else stored in it for you, you accidentally deleted the complete folders and subfolders (instead of maybe deleting a few photos).
As we can infer from the above scenario – two main challenges surface. One is of course looking for an apt tool that can help you recover lost photos and the second, is to restore the order of the lost photos.
If that is you, you have come to just the right place. Here, we will not only talk about how you can recover lost photos but also how you can restore the order of lost photos.
(i) How to Recover Lost Photos?
You can recover lost photos using image recovery software. Here are some great image recovery tools. For instance, Photos Recovery from Systweak is one of the best ways to recover deleted or lost photos from Windows 10. It helps recover photos that are lost, deleted, or formatted from your hard drives, memory cards, USB flash drives, etc.
Photos Recovery – Features at a Glance
- Easy to use, simplistic interface
- Multiple scanning modes – Quick and Deep scan modes can recover photos that are permanently deleted either using the shift + delete keys or when you formatted your drive
- Facility to preview files before recovering them
- Dedicated search bar where you can look for exact photos
- Various types of storage mediums are supported such as hard drives, flash drives, external hard disks, etc
- Highly customizable
- Restore deleted or lost photos from various kinds of file systems such as FAT. FAT 32, NTFS, etc
How Does Photos Recovery Work?
1. Download, install and run Photos Recovery


2. Select the drive you want to scan. You can either select one of the drives located on your computer or you can select a removable drive (E.g. a flash drive)
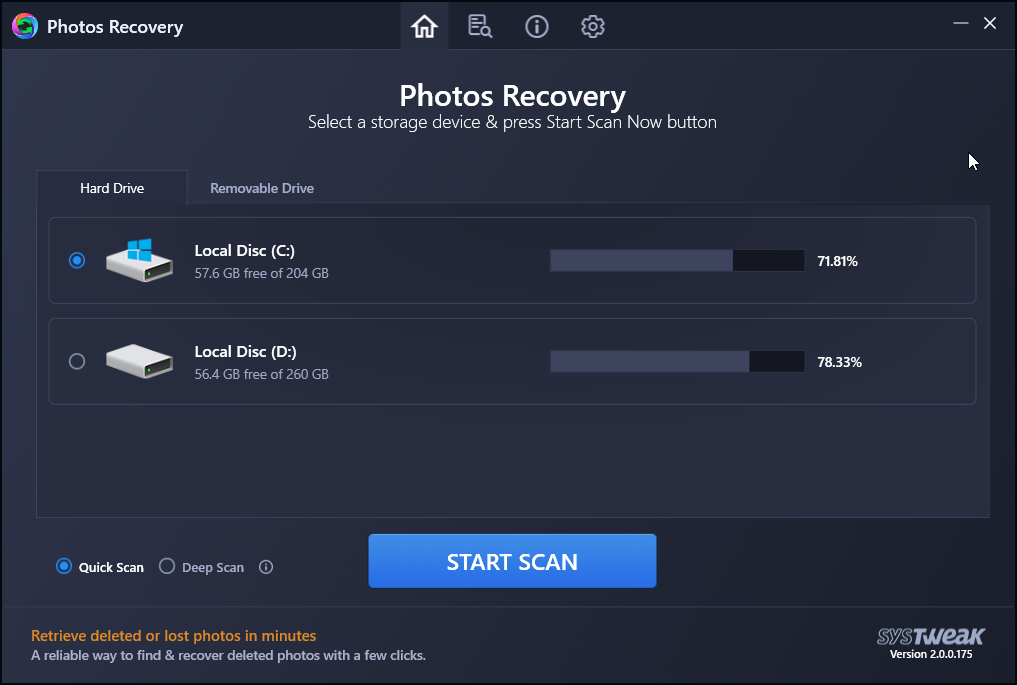
3. Select the mode of scan – Quick Scan or Deep Scan
4. Click on the Start Scan button
5. You will now be presented with deleted files
6. Choose a file that you want to recover and then click on the Recover button located at the bottom right corner of the screen.

(ii) Restoring Photos Using EXIF Metadata
First thing’s first, what is photo EXIF metadata? When organizing photos, EXIF data comes in really handy. It gives you information about settings such as shutter speed, camera model and make, ISO, max aperture, focal length, etc. Now, let’s say you have also recovered certain blurry images and you want to get rid of them. You can take the help of this EXIF data shutter speed and boil it down to the right images.
That you have a fair idea of what EXIF data is, here is how you can sort images based on the EXIF Metadata.
1. Using The File Explorer
Now that you have all your memories back. Great! But, now you have another task carved out for you. You now have to sort those images and here we will talk about few such ways –
1. Go to the recovered folder using File Explorer
2. Click on the View tab
3. Click on Details
4. Now, just under the address bar locate the Type column, left-click on it and select more. You can click on any column and repeat the same
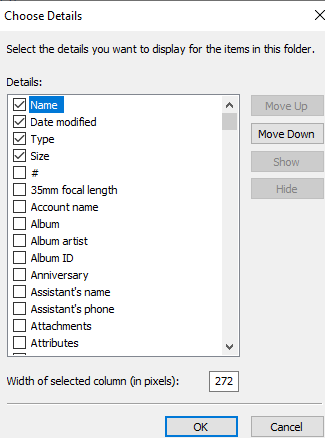
5. You can select various other details that you want to appear with your file name
6. You can also select the file type, date modified, camera model and make, file size, date of creation so on and so forth
7. Click OK.
If there have been photos of multiple formats such as JPEG, PNG, BMP, GIF, etc we recommend that you create folders of each format. You can then put photos accordingly after they have been recovered.
2. Get Rid of Temporary Files
With the help of image recovery software, you might not have just recovered actual images but also temporary internet files or images from various other applications. So now the question is – how do you sift through this mess? Look at the size of images (you can again use the size filter). Your main digital photos will typically be more than 250 KBs. That means quite a majority of the files that are smaller than 250 KBs could be images from web applications or other applications. You can simply bulk select these and then hit the shift + delete button.
3. Use A Third-Party Software To Organize Recovered Photos Based On Exif Data
There are some great tools out there that can help you sort your restored images based on their EXIF metadata. Some popular third-party tools include PhotoMove, DigiKam, Photo Organizer, Movavi Photo Manager, and Elodie. Let’s see how these tools can help you sort images based on meta data by seeing one of these into action. Here we will take an example of Photo Organizer –
What is a Photo Organizer?
This photo management tool scans your entire computer for scattered digital photos and then intelligently organizes them in a folder or a single location based on metadata.
How Photo Organizer Helps Organize Images Based on EXIF Info?
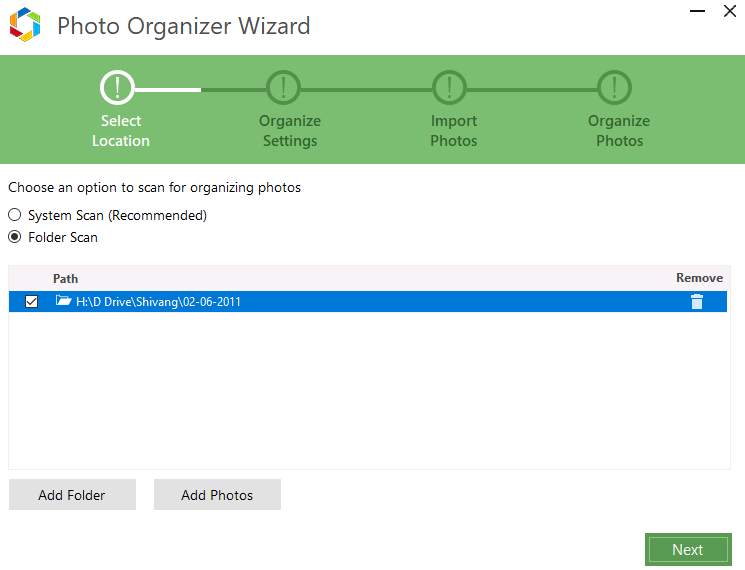
1. Download, install and launch Photo Organizer
2. Click on Folder Scan radio button and then click on Add Folder
3. Click on the Next button at the bottom right corner of the screen
4. You can click on the Customize button and then click and add Meta
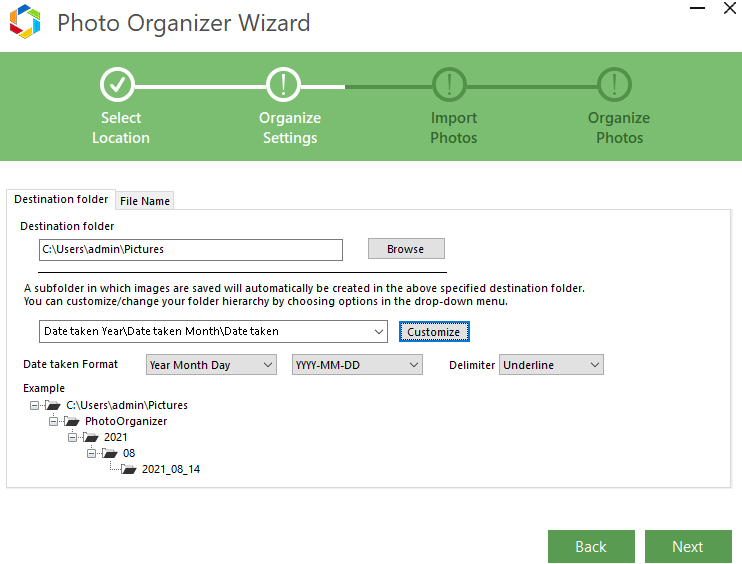
5. The data in the fields such as Date Taken, Camera Maker, ISO, Camera Model, etc.
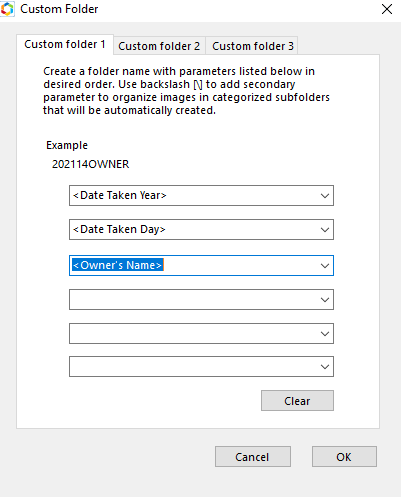
6. Click OK
Wrapping Up
We hope that now you will be able to organize recovered deleted images based on EXIF data with utmost ease. And, do give us a shoutout in the comments section if you were able to do that. For more such content, keep reading Tweak Library.
Related Topics
- Tips To Find The Best Photos Recovery Tool For Windows >
- How To Recover Deleted Photos From Windows Using Photos Recovery >
- Is It Safe to Use Photo Recovery Software? If Yes, Then How? >
- Organize and Edit Photos In Windows Photo Gallery Like A Pro >
- Best Deleted Photo Recovery Apps to Recover Deleted Photos >


Leave a Reply