The Windows operating system has been a constant support in our day to day lives for quite a long time. From creating workflow sheets on MS Excel to working on important presentations on MS Powerpoint, Windows made things easier for us. Another set of examples include Homegroup that Microsoft introduced to us to share files across devices.
Another feature in Windows operating systems is ready to help you share files, docs, & printers in the same network group. A unique concept on your PC, Homegroup is an excellent way to get connected with your people & share different files. Initially introduced on Windows 7 edition, Homegroup has made its way to Windows 10 edition & is still running successfully.
Also Read: Best Browsers With Built In VPN For Windows 10
What is Homegroup & How Do We Create Homegroup?
Microsoft Homegroup is a set of PCs that’s been connected on a home network where you get to share files as well as printers. Obviously, there would be other people in your homegroup with whom you will be sharing media files.

Additionally, you can protect your homegroup with a password as with password as well for security. Having your homegroup password protected gives you an edge where other users can’t change the files you get to share. Unless you are the one who gives permission to those users to make changes.
And please know once you have created the Homegroup, you get to select the media libraries. As well as, you have the power to prevent files & folders (of your choice) that you wouldn’t want to share with other users. So without further ado, let’s start creating Homegroup on your Windows PC:
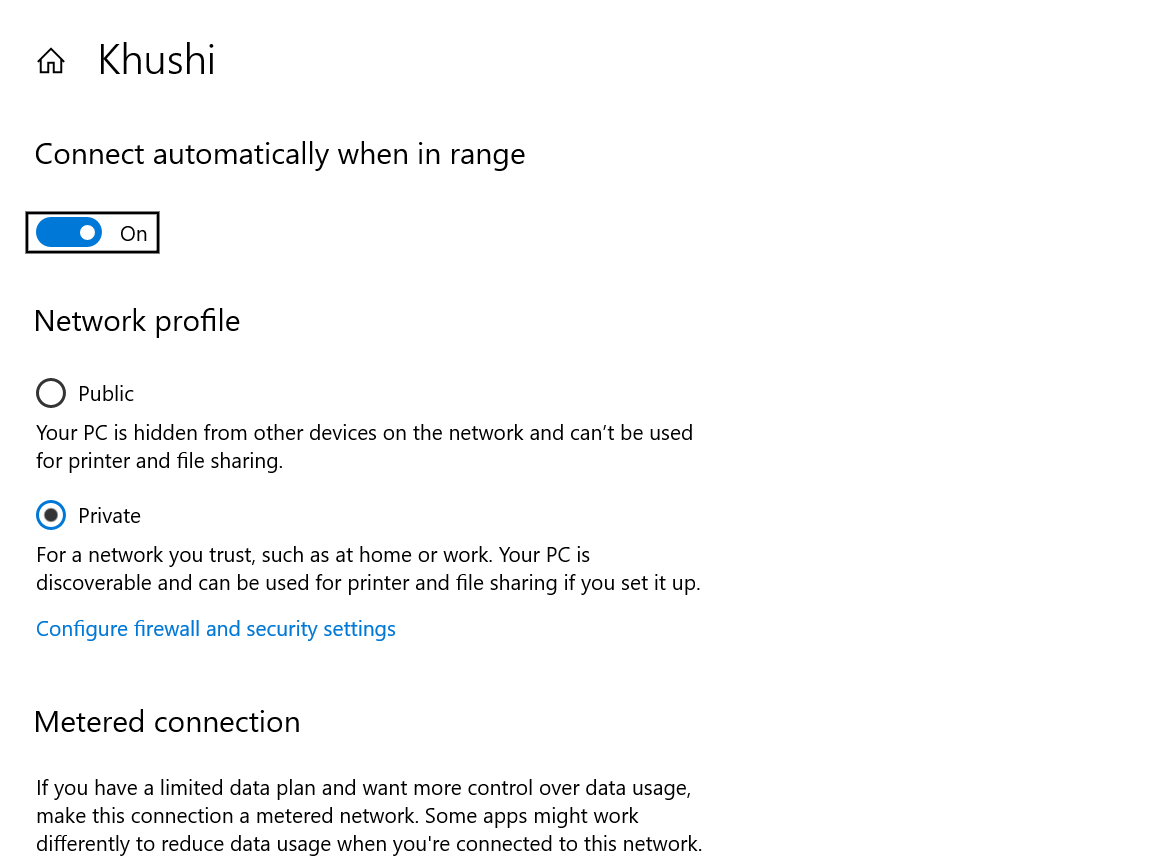
1. In order to create the Homegroup in Windows 10 PC, first of all the connected network must be the Private network (usually it’s done when you connect to the specific network for the first time, however, it can be tweaked afterwards as well).
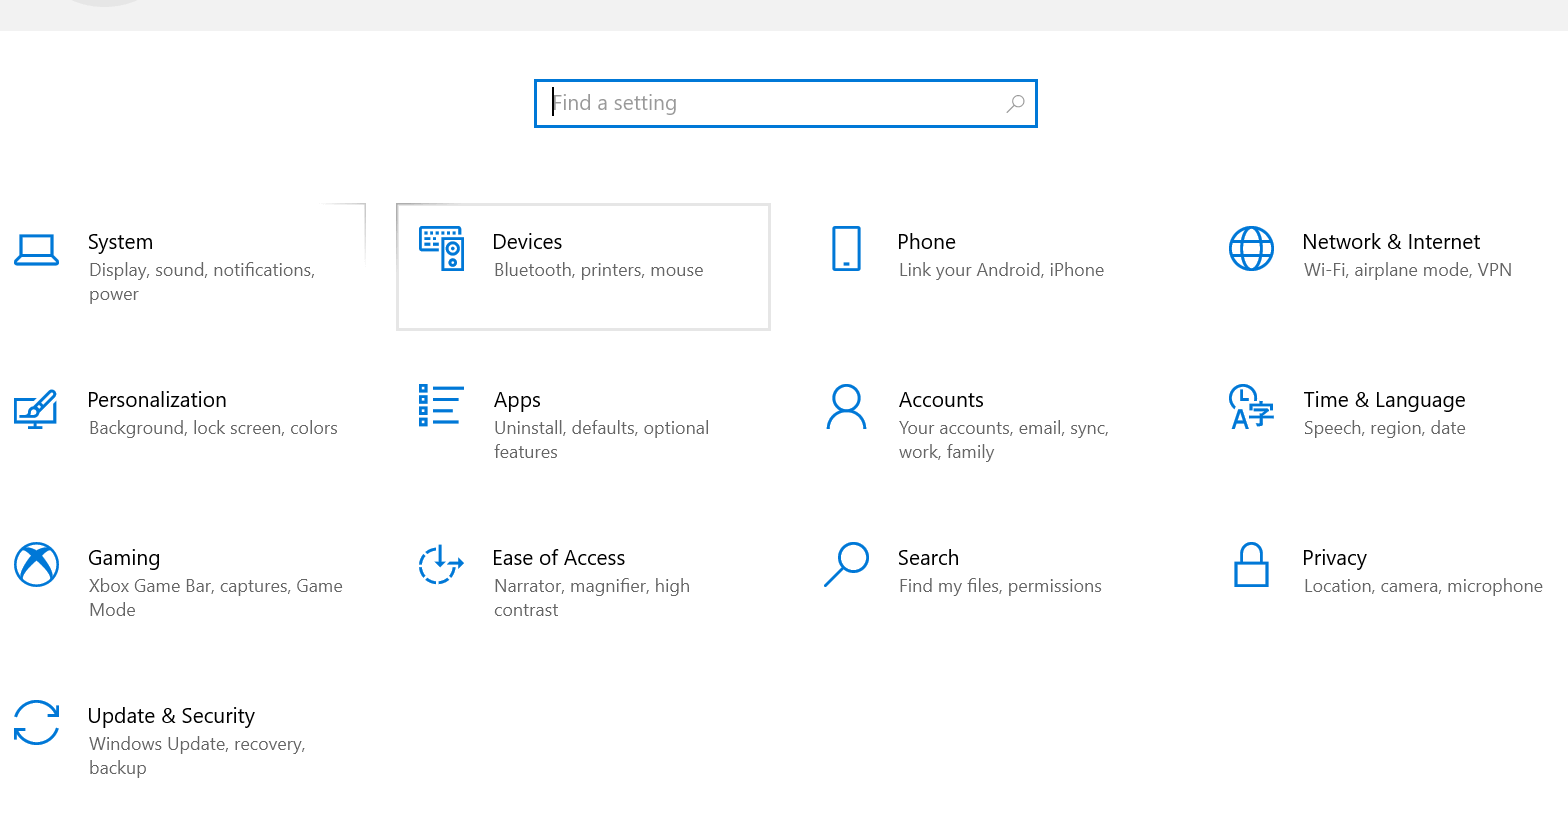
2. Press the Windows key on your PC’s keyboard & type in Settings to open the Settings page.
3. Once opened, here you need to tap on Network & Internet to open up the internet settings on your PC.
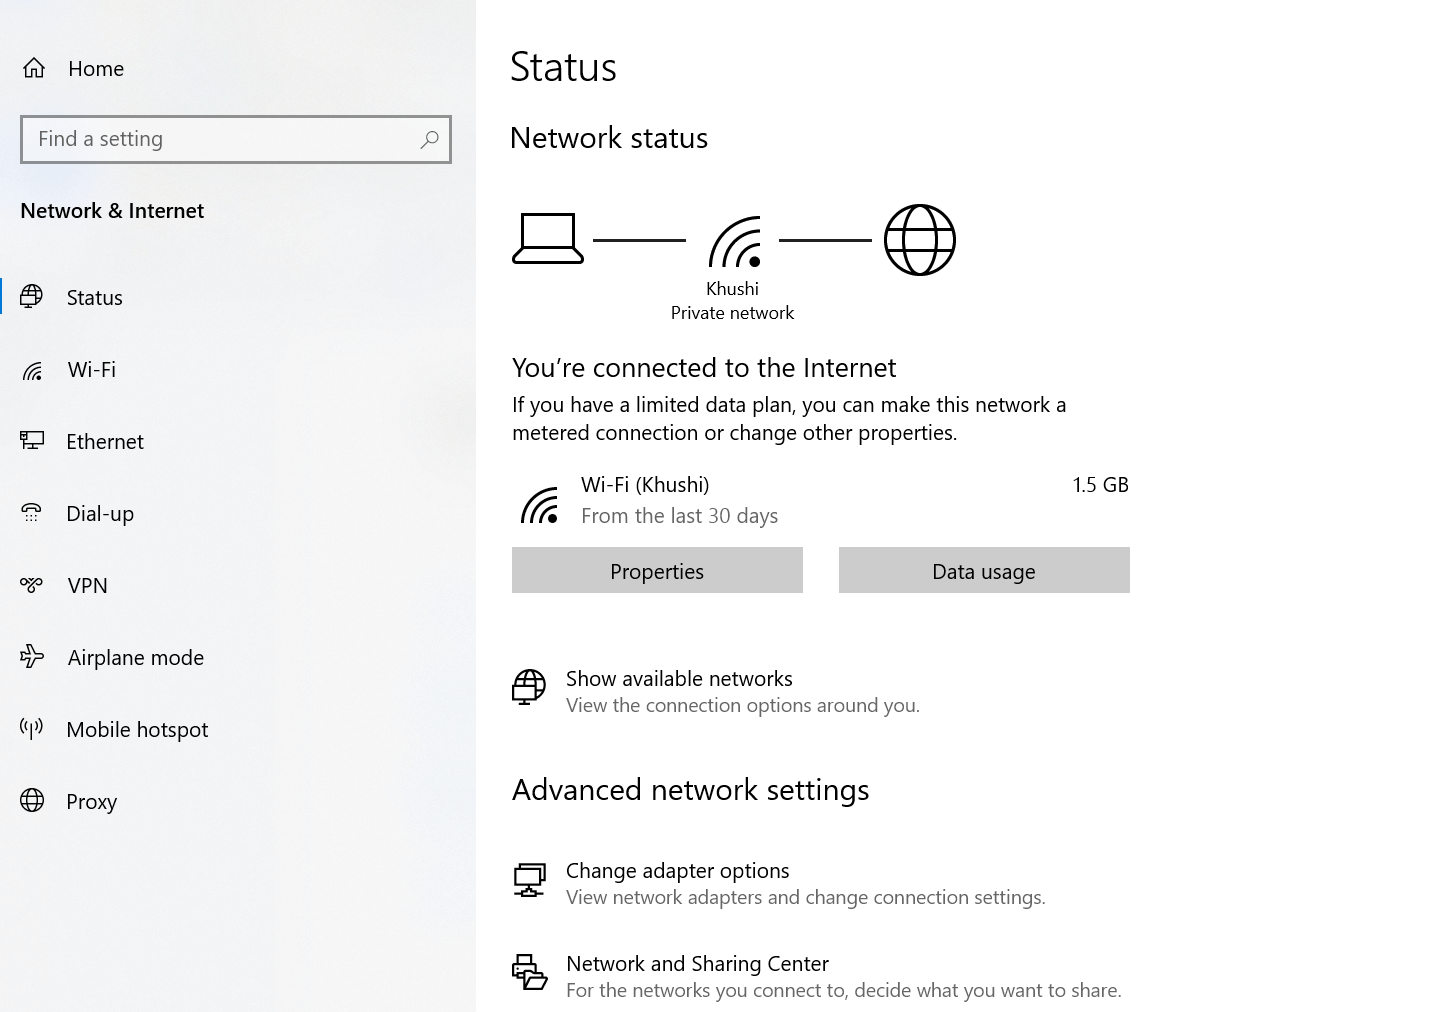
4. Whatever network you are connected to, you need to tap on Properties & change the network type from anything to Private.
5. Once you have made the necessary changes, get back to the Network & Internet settings page.
6. Here, you need to tap on Status (from the left side of the screen) & scroll down on the page to look for the Homegroup option (under Advanced Network Settings).
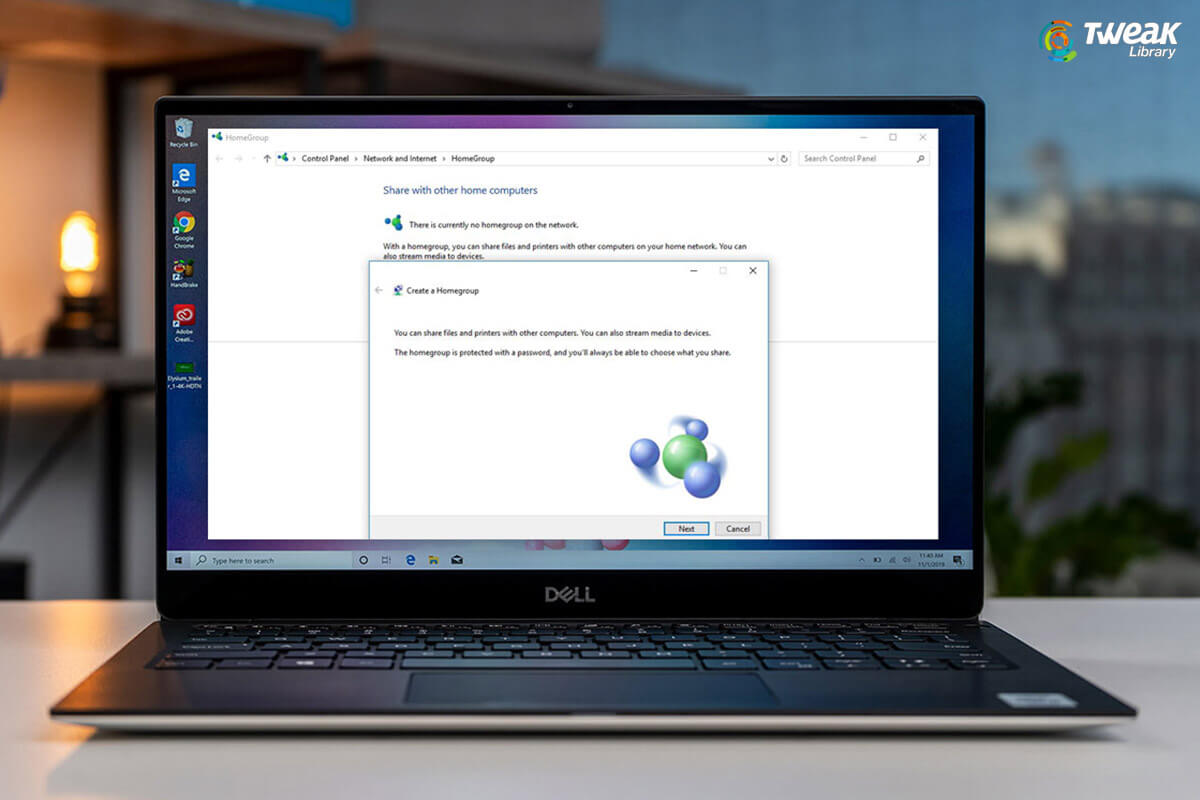
7. Once found, tap on Homegroup that will lead you to the next page where you need to click on Create a homegroup.
8. The following screens will have the general instructions & information regarding Homegroup so keep tapping on Next (until you reach to the Sharing control page).
9. Post reaching the sharing control page, there will be a list of libraries (including photos & videos) that you wish to share with other people in the group. Additionally, there will be Printers & Devices that can also be shared across so give your permission accordingly.
10. Once every permission has been set, tap on Next which will take a few minutes to process.
11. You will be prompted with a password which you must write down somewhere & post that, tap on Finish. Simple as that!!
You have successfully created the Homegroup on your PC which would help you share files across with your group flawlessly.
Here’s How to Join Homegroup in Windows 10 PC
Now that you have created Homegroup in Windows 10 PC, you need to join the network as well; or else what’s the use of creating the homegroup in the first place. Let’s start the process of joining the Homegroup after you have created in on your Windows PC:
- Either tap on the Windows logo on your PC or press Windows key command on the keyboard
- Post that, type in Network & Internet on your PC and once you see it in the list, tap on the same.
- This will lead you to the Network & Internet settings page where you need to tap on Homegroup under Advanced Network Settings.
- Since you have already created Homegroup on your PC, Windows system will ask you to join the network (tap on Join now).
- Go through the next page of general information & then select the library types you want to share with your Homegroup users.
- The next step would be to type in the password you wrote down in the last process.
- After putting in the correct password, you need to click on Next & within a few seconds, Windows will confirm your secure connection to the Homegroup. You will be successfully connected to the Homegroup network without any interruptions.
Wrapping Up
Homegroup on Windows operating systems is one of the best features you can opt for sharing files across devices. All you need to do is create the Homegroup & other users to get connected or join the Homegroup network, which is no rocket science.
Once successfully created & joined, you need to give permission to library files that you wish to share with other users & that’s it.
This is how you will be able to create, join, & start sharing files & folders with your Homegroup network in Windows operating system.
Next Read
Best Fixes to Resolve: Thread Stuck In Device Driver Error On Windows
Best Ways To Speed Up File Transfer On Windows 10


Leave a Reply