
Follow the simple and easy-to-do steps in the article below to set up a Virtual Private Network(VPN) on your Windows 10. This will allow you to enjoy the enhanced features of the modified OS.
Also Read: What is VPN And How A VPN Service Works
Setup a Virtual Private Network(VPN) in Windows 10:
Setting up a VPN on your Windows 10 computer does not require advanced computer skills. Once you sign-up for a good VPN service provider and have the following information ready as mentioned below you can then set up a VPN on Windows 10.
- Web Address or IP address of VPN server.
- Your VPN Username and Password.
- Other Specific requirements (if any).
You will require a web address that displays the name of your VPN (example: www.yourvpn.com) or the IP Address (example: 192.000.1.19) of your VPN server to connect it from your computer.
Next, you will require your VPN User Name and Password that you may have setup as the method of authentication with your VPN service provider.
You can now follow the steps below to setup a VPN on your Windows 10 computer.
- Click on the Windows 10 Start button and then click on the Settings
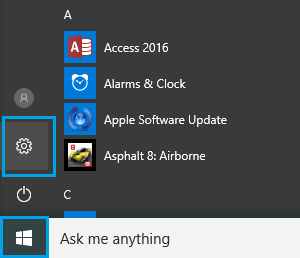
- On the Settings screen, click on Network & Internet.

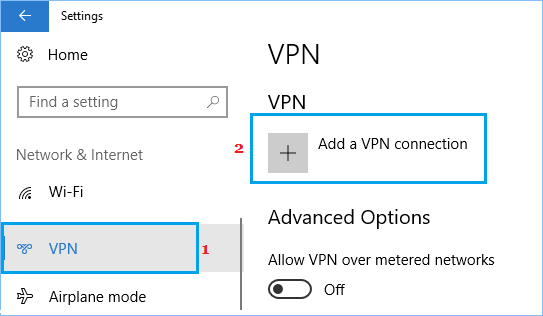
- Now, click on VPN from the left pane and then tap Add a VPN connection.
- In the next window, you will be required to provide the details about your VPN Connection. You will need to provide information about your VPN Provider, Connection name, Server address, and VPN type.
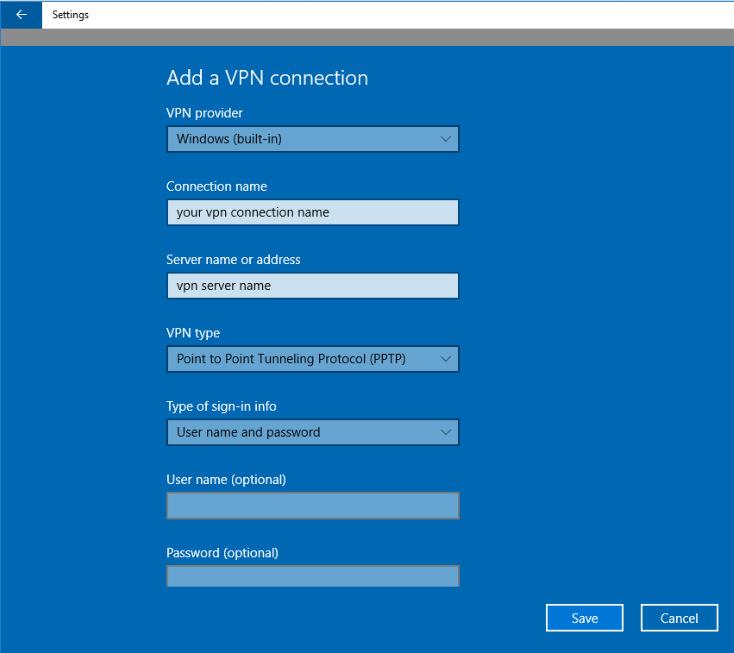
VPN Provider: Choose Windows (built-in)
Connection Name: Type any name you want you VPN to be called as.
Server Address: Here you will need to provide the web address to your VPN Server as provided by the VPN service provider.
VPN Type: Select Point to Point Tunneling Protocol or any other option recommended by your VPN provider.
Type of Sign-in-info: Choose User Name and Password as the method you will be using to sign-in to your VPN. You can also select from other options, in the case recommended by your VPN Service Provider.
User Name: Insert the username.
Password: Insert the password.
- After filling all the details, click on the Save button.
Connect to VPN in Windows 10:
Once Virtual Private Network is setup on your computer, you can connect to it either from the Settings menu or directly from the Taskbar.
- Click on the Network Icon located at the right corner of the Taskbar on your computer and then click on your VPN Name in the menu that appears.
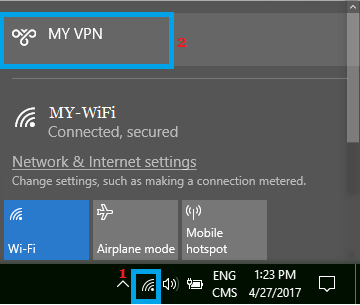
On the next screen, you may be requested to enter your VPN Username and Password to login to your secure Virtual Private Network.
Another way of connecting to VPN is by accessing the Settings menu in Windows 10.
- Click on the Windows 10 Start button and then click on the Settings.
- On the Settings screen, click on Network & Internet.
- On the next window, click on VPN and newly created VPN Name.
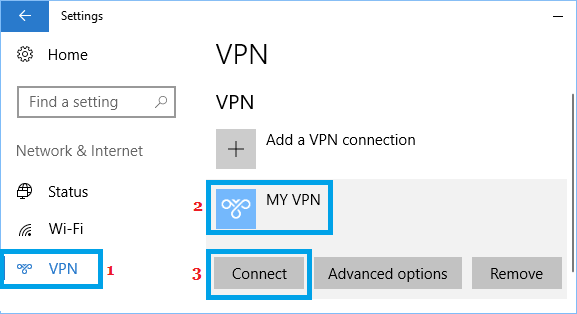
- Click on the Connect option.
Using this tutorial, you can easily set a Virtual Private Network(VPN) to your Windows 10 Computer.


axmed sheekh maxamed
It great opportunity to use vpn