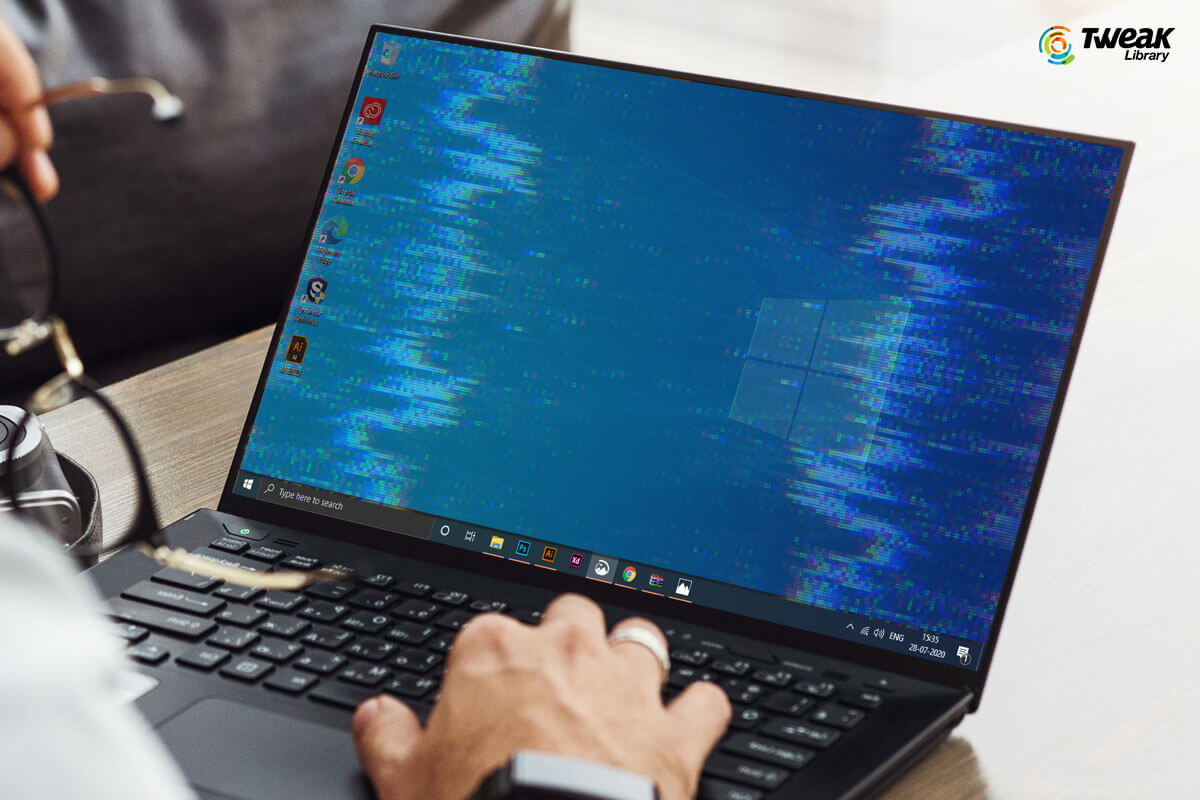
Encountering flashing screen on your Windows 10 after upgrade? This issue might occur after any kind of Windows upgrade you have undergone. You are not the only one who faces issues with your PC display after any of the Creators Update or Fall Creators Update 1709 or so. The usual reason for flashing screen on Windows 10 is due to some issue with your system’s display drivers.
Flashing screen is a distraction that produces fatigue and decreases overall productivity. A flashing screen after Windows 10 upgrade is caused due to some app that causes Explorer to crash, or driver issues. Like all Windows issues, this is also one of many frustrating issues that can be, however, solved easily using a best driver updater tool or so.
What Causes Screen Flashing After Windows 10 Upgrade?
Out of many, the major reasons that could lead to screen flashing issues after Windows 10 upgrade includes incompatible programs and some graphics or display driver problems after Windows 10 upgrade. Proceed forward to learn the best resolutions to fix flashing screen after Windows 10 upgrades.
How To Fix Flashing Screen On Windows 10 After Upgrade?
Firstly, you need to check if the Task Manager is flashing. For this, open Task Manager by pressing Ctrl + Shift + Esc and see if it flashing. If it flashing, you have to update your display drivers and if it doesn’t flashing, you need to check for any incompatible app installed on your PC.
Here’s what you need to do to fix flashing screen on a Windows 10 PC:
Fix 1: Manually Update/ Roll Back/ Uninstall Display Driver
You can update/ roll back or uninstall display drivers depending on the current situation of your PC. If you have recently made a Windows update, roll back your display driver or otherwise, try updating or uninstalling drivers to fix screen flashing issues.
Update Display Drivers
- Open Device Manager by either way from the Run window (type in devmgmt.msc) or search for Device Manager directly from the Start Menu.
- From the screen that opens, expand the list under Display adapters. Right-click on the adapter that opens and select Update driver.
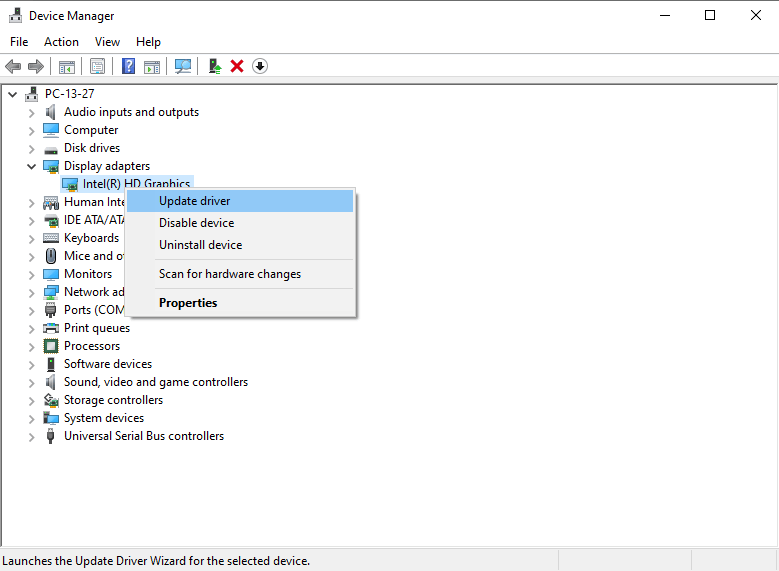
- Next, you have to select Search automatically for the updated driver software, when prompted.
Uninstall Display Driver
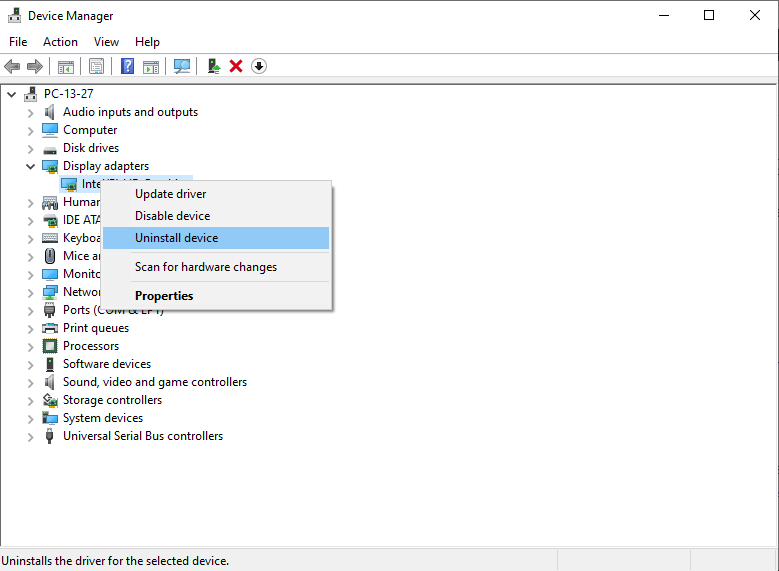
- Start your PC in Safe Mode.
- Then, open Device Manager > Display adapters.
- Instead of choosing Update drivers you need to choose Uninstall drivers.
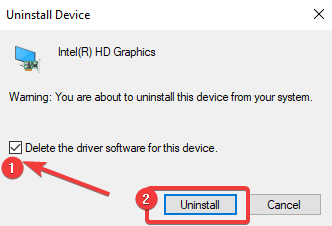
- Next, you need to select Delete the driver software for this device check box, and then select OK.
- Restart your device to reinstall the driver.
Roll Back Display Drivers
- Open Device Manager > Display adapters.
- Right click on the driver to open Properties.
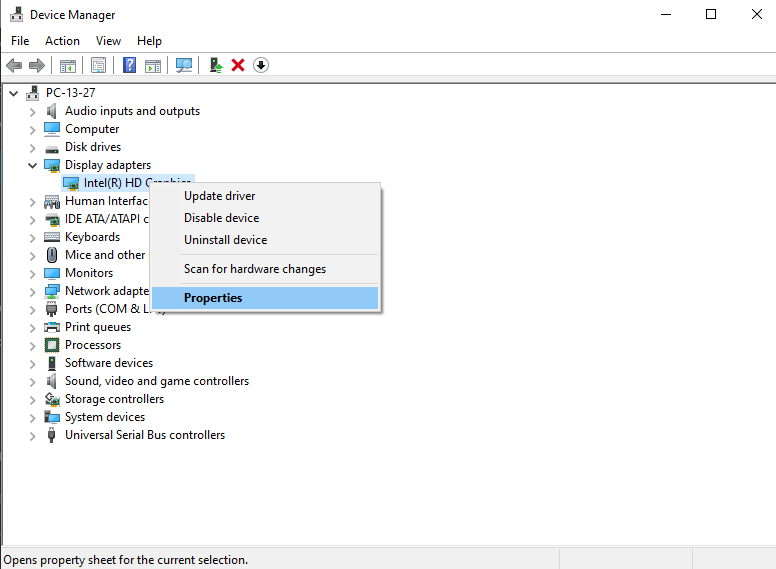
- Go to the Driver tab and choose Roll Back Driver and click
- Restart your PC to apply changes.
Automatically Update Drivers Using Smart Driver Care
As the name says, Smart Driver Care is one of the popular driver updater tools that makes updating all corrupt drivers easy with just a single click. All you have to do is follow a simple pile of steps and you are done:
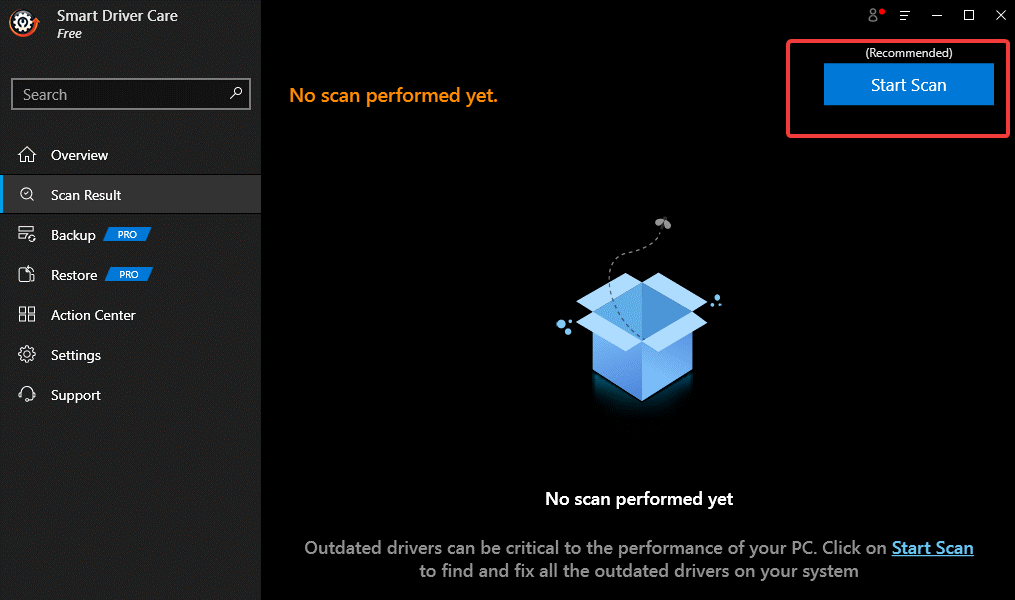
- Download Smart Driver Care from the link below and install it on your computer.

- From the home screen, click on Start Scan and wait for the tool to detect outdated drivers and programs.
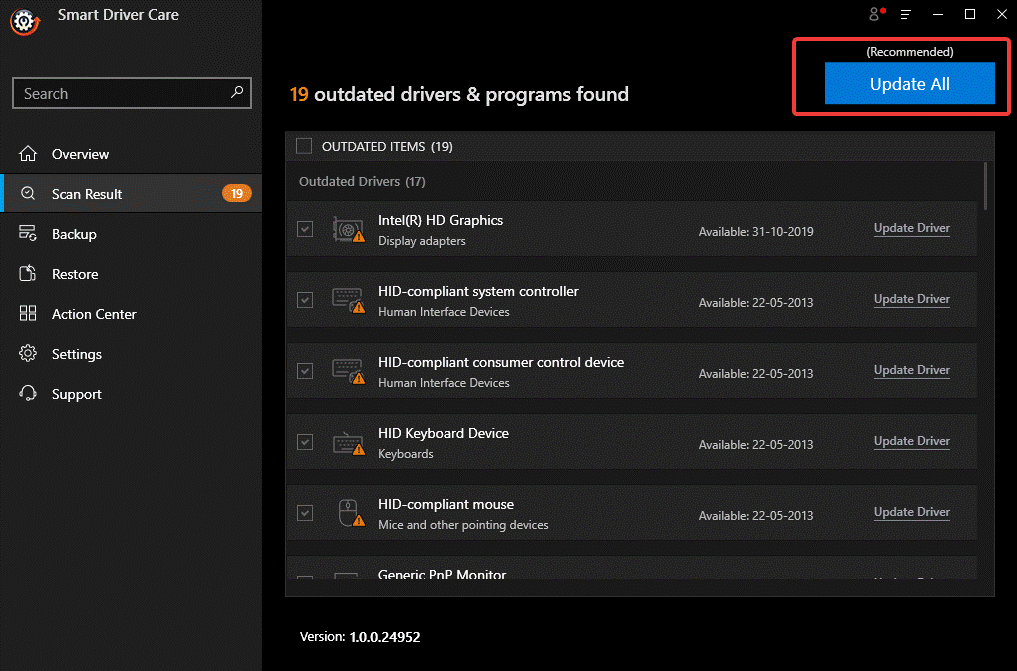
- Once the scan is finished, you’ll see the tool will show you a number of drivers and programs that are outdated. Click on the Update All button and wait for the processing to finish.
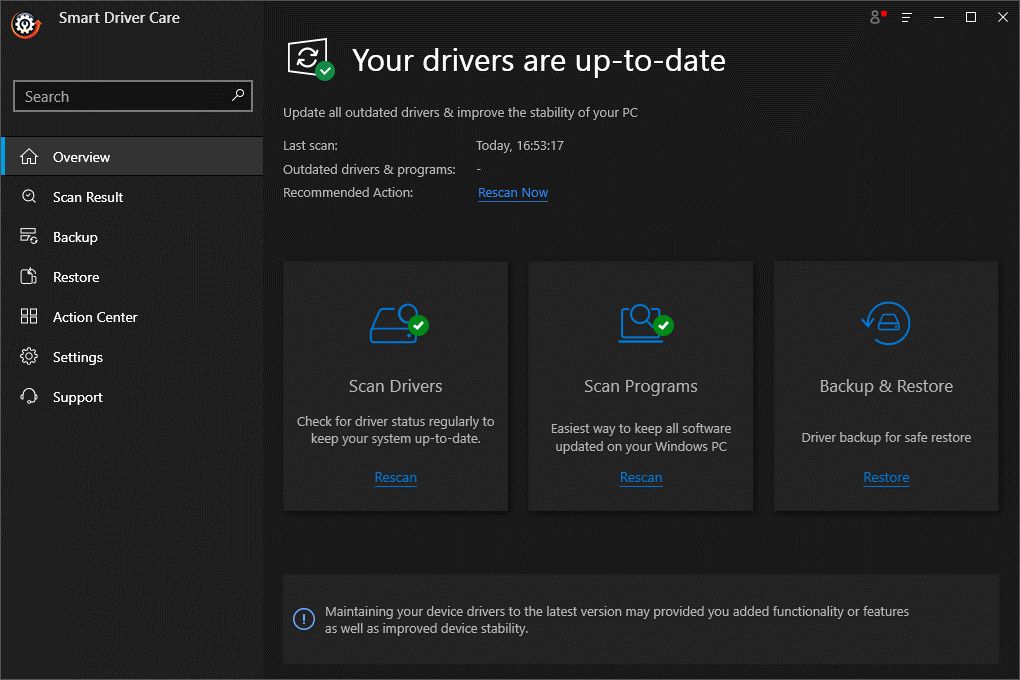
- When finished, you will see your system overview as ‘You are up-to-date’ on Smart Driver Care.
That’s it! This is how you can update all outdated and corrupted drivers and programs on your Windows PC at once. This is an easier way to fix display drivers issues leading to flashing screen on Windows 10 after upgrade.
Fix II: Update Or Uninstall Incompatible Apps
Update Incompatible Apps
To update incompatible apps on your PC, you have to either check Microsoft Store for any updates or check Manufacturer’s site of the app.
Uninstall Incompatible Apps
There might be a few apps installed on your PC that can cause screen flashing issues on a Windows PC. Here’s how to uninstall such apps for your device safety:
- Open device Settings (Win + I)
- Go to Apps and then Apps & Features.
- Scroll down to the list of apps and find the app you wish to uninstall.
- Click on the App and then click Uninstall.
- Again click Uninstall and select Yes to confirm.
That’s it. Once you uninstall apps you think are incompatible, restart your PC to check if the issue is resolved. If you do not know which app is causing the issue, try uninstalling apps one by one and check if the issue is resolved.
Concluding Ways To Fix A Flashing Screen after Windows 10 Upgrade
So, these were some of the best ways to fix flashing screen on a Windows PC. You can try any of these to safely troubleshoot your Windows PC and fix screen flashing issues.
Let us know in the comments below which one of these fixes helped you fix flashing screen after Windows upgrade.
Recommended Readings:
How To Fix Driver Power State Failure In Windows 10 PC
Screen Flickering Windows 10? Here’s the Fixes!


Leave a Reply