Windows Hello is a Microsoft’s biometric security system that allows you to add fingerprint and face recognition to your computer. This personal security system by Microsoft allows you to securely access your Windows PC. Windows Hello uses facial recognition, fingerprint or a PIN number to ease logging in to your PC.
If you are the one who has the least information on Windows Hello, this guide will help you learn what it is, how to set up and how it works as a complete security solution.
Windows Hello: A Quick Guide
What is Windows Hello and How Does It Work?
Windows Hello is a more personal and a secure way to instantly access Windows 10 devices. It uses either of the three formats i.e. Face recognition, Fingerprint authentication or a secure PIN. having Windows Hello set up, you can log into your device ten times faster than using a password. However, when you create a password for your Windows device, you get an option to create a PIN as a backup.
Not to forget, Windows 10 is a powerful operating system that offers multiple ways to do one particular task and similarly, Windows 10 provides you with several ways to access your system quickly and securely.
It is on the discretion of Windows 10 users whether they want to enable Windows 10 biometric authentication or not. If they are interested in it, Windows 10 uses biometrics to authenticate users by analyzing and measuring specific and some unique human characteristics to identify the identity of the user trying to log in.
As we hear, even twin babies have different fingerprints. Similarly, the technology used by Windows Hello utilizes these distinct identifiers as authentication.
Windows 10 Sign-In Options
To look out for Windows 10 sign-in options, go to the Start tab > Settings > Accounts > Sign-in options. Or simply, press Win + I directly to open the Settings tab, and rest follow the same path. You’ll then see a list of options like shown in the image below:
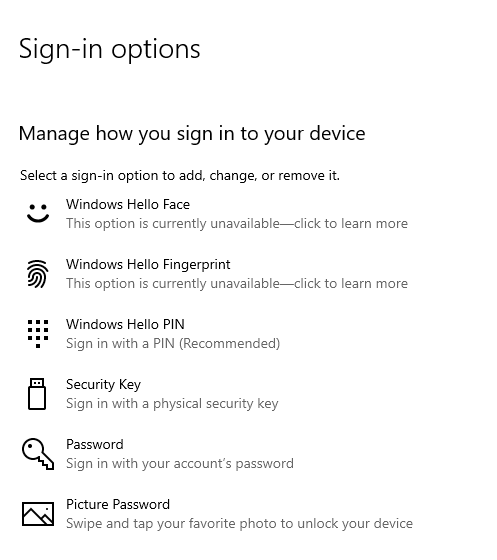
As a whole, Windows 10 offers 6 different ways to login to your device, out of which three are Windows Hello options. It includes:
- Windows Hello Face: Here, the device will use a specially-configured camera to authenticate and unlock Windows devices.
- Fingerprints Windows Hello: Lets you register your fingerprint and later scan it to unlock Windows devices.
- Windows Hello PIN: It is an alternative password that is linked to the device.
Now that you know all the Windows Hello sign-in options, read the article further to know how to set them up. But first ensure that your device is compatible with Windows Hello Face and Windows Hello Fingerprint feature. To check compatible devices, click here.
How To Set Up Windows Hello Face
To set up Windows Hello Face biometric on your Windows PC, get started with the following steps:
- Either type Hello in the Windows search box and click on the first option that appears or go to Settings > Accounts > Sign-in options.
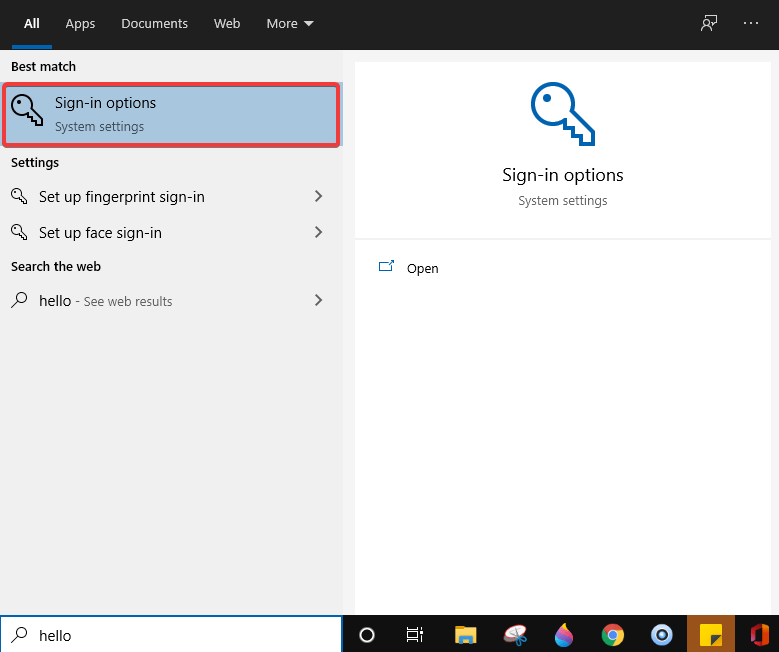
- Select Windows Hello Face > Set Up.
- Now, select Get Started.
- Ensure that your device is compatible with this biometric option and you also ensure that your face is centered in the frame.
- Follow the on-screen instructions and complete the setup.
How to Set up Windows Hello Fingerprint
Similarly, if you have a Windows device that either has a fingerprint reader or is compatible with Fingerprint authentication options, you can follow the steps below to set up Windows Hello Fingerprint. To get started:
- Either type Fingerprint in the Windows search bar and click on the first result that appears or go to Settings > Accounts > Sign-in options.
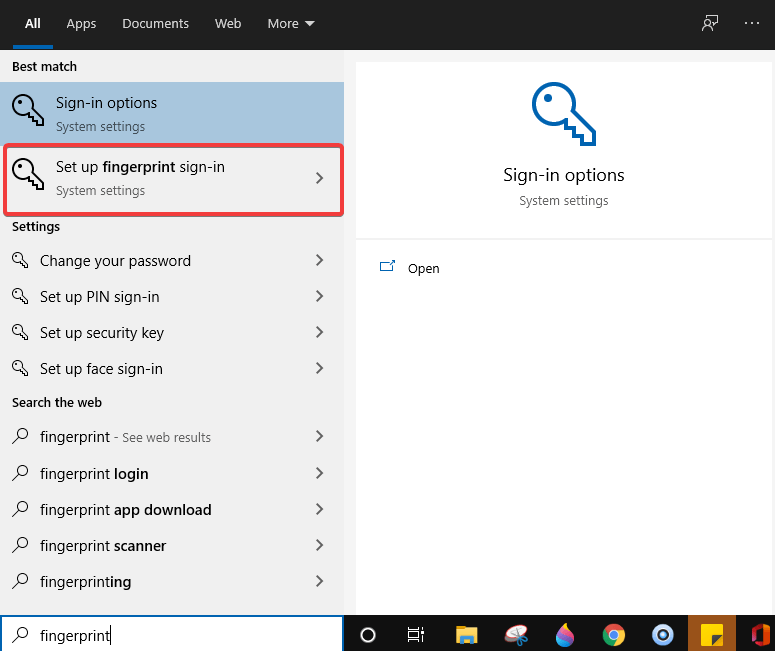
- Choose Windows Fingerprint > Set Up.
- Then, click on Get Started.
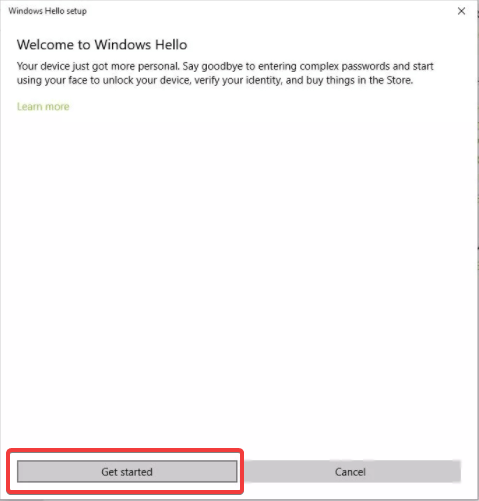
- Enter the PIN, and continue setup.
- Scan your finger on the fingerprint reader and complete the setup.
If you haven’t set any PIN yet, read further to know how to set up PIN authentication on Windows.
How to Set up Windows Hello PIN?
A PIN is one of the most used sign-in options used by Windows users. You can even use a PIN as a backup login option. Setting up a PIN for your PC is helpful many times, especially when you aren’t able to login via Windows Hello Face and Windows Hello Fingerprint on your computer. Here’s how to get started:
- Type sign in into the Windows search bar or navigate through Settings > Accounts > Sign-in options.
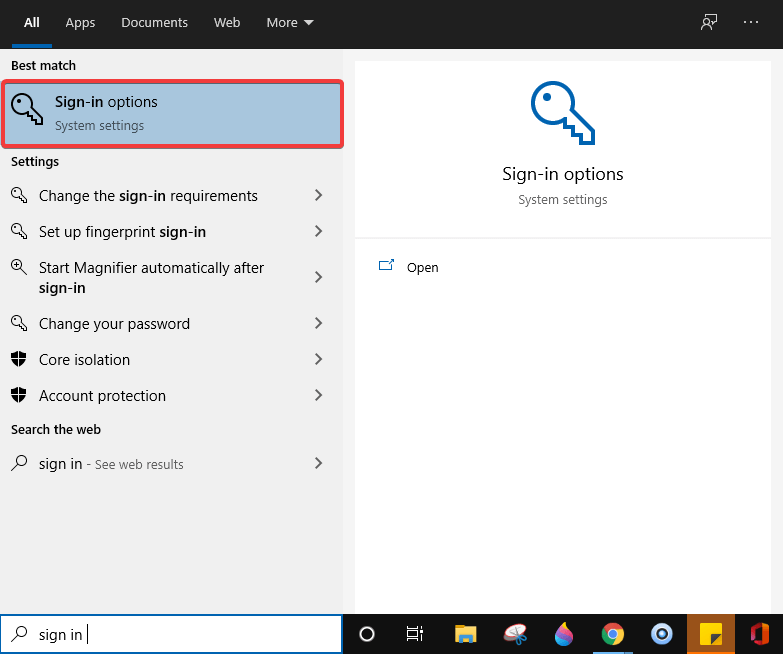
- Select Windows Hello PIN and click on Add.

- You’ll be asked to enter your password to verify your identity.
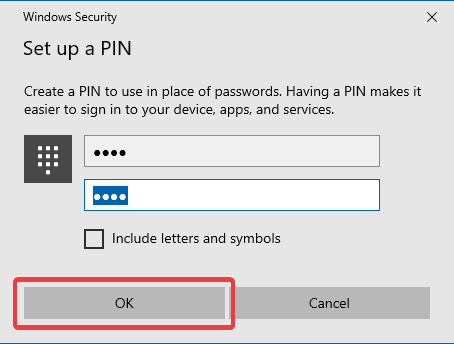
- Once verified, set up a new PIN. Enter the new PIN and re-enter it again to confirm, then select OK.
That’s all!
Windows Hello: An advanced way to sign-in into Windows
Windows Hello can be denoted as an advanced way to sign-in into your Windows devices. However, we prefer using the basic sign-in options like Password or PIN most of the time, these options come handy with a few yet compatible devices. PIN acts as a backup login option that you can use to get started with your PC.
| Recommendation:
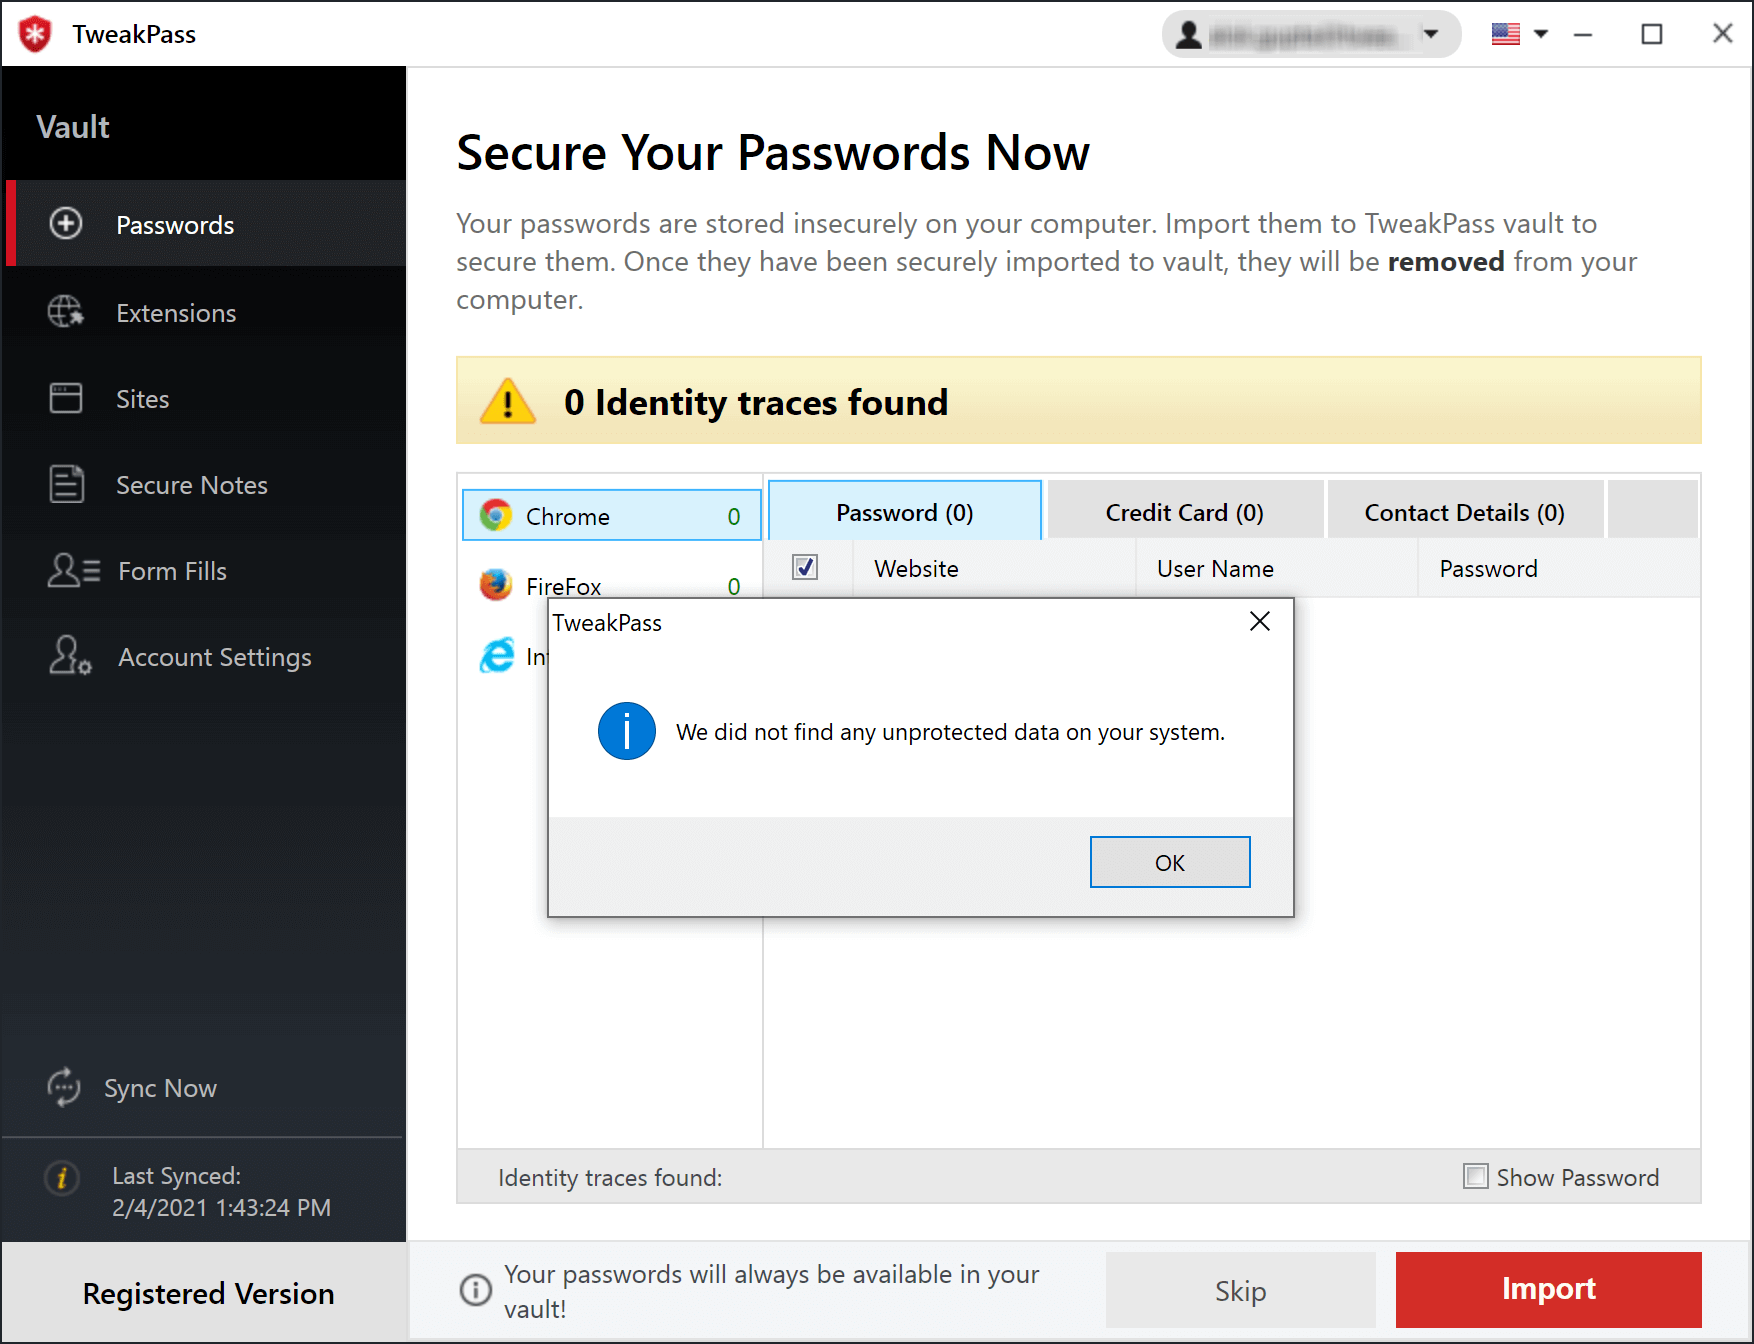
Though you can always keep yourself backed up with a strong Password Manager like TweakPass. It is a cloud based secure vault that keeps all your passwords safe. If you ever forget your password, you can access TweakPass from any of your devices and get back your password for a smooth login. Click Here To Download TweakPass |
Have you ever tried using Windows Hello- Microsoft’s biometric system yet? Do try this out if you have a compatible device and share your feedback in the comments section below.
Were we helpful? We would love to hear from you.
Keep reading Tweak Library for more such interesting content.



Gajendra singh
Thanks for this detailed windows hello intro
Akshita Gupta
Thanks :)