
Photoshop is hands down, one of the best photo editing tools ever produced. But, just like any other tool, it too has its share of issues. One such issue being Scratch disks are full. In this blog, we are going to look at some of the most effective ways to resolve the issue.
What Is A Scratch Disk In Photoshop?
Photoshop uses some temporary storage to store parts of your documents, files, and their history panel that otherwise don’t fit into the RAM. For this scratch, a disk is used which is a disk drive or SSD. By default, Photoshop uses the hard drive on which you have installed your operating system as a scratch disk.
What Is The “Scratch Disks Are Full” Error In Photoshop and Why Does It Occur?
The “Scratch disks are full” error occurs when there is insufficient space on your computer to store temporary files. When this error occurs, you will either find it hard to perform a function in photoshop or the application “Photoshop” will not load at all.
Ways To “Resolve Scratch Disks Are Full” Error In Photoshop
List of Contents
1. Purge Cache
Photoshop periodically washes out the cache, yet, there are times when you might be required to manually clear the cache. So, in case you can still access Photoshop, here is how you can purge cache –
1. Open an image
2. Click on Edit at the top of the screen
3. Click on Purge and then
4. Click on All to remove cache files from the scratch disk
2. Use The Disk Management Tool

Using this method, we will be altering the size of the scratch disk by allocating a partition. To do that, follow the steps mentioned below –
1. Press Windows + R to open the Run dialog box
2. Type diskmgmt.msc and press Enter
3. Select the disk that you were using as Scratch Disk before
4. Right-click on it and select Shrink Volume
5. Select the size you desire your scratch disk to be
6. Once, you have allocated this partition, open Photoshop and then press Ctrl + Alt. You will now be able to select the recently created partition.
3. Adjust Scratch Disk Preferences
You can always tweak the settings pertaining to scratch disks by following the steps as mentioned below –
1. Open Photoshop
2. Select Edit > Preferences > Scratch Disks
3. When the Preferences dialog box opens, select or deselect the active checkbox to enable or disable the scratch disk. If you wish to change the order of the scratch disk, click on the arrow keys
4. Click OK and apply changes
4. Allocate More Memory To Photoshop
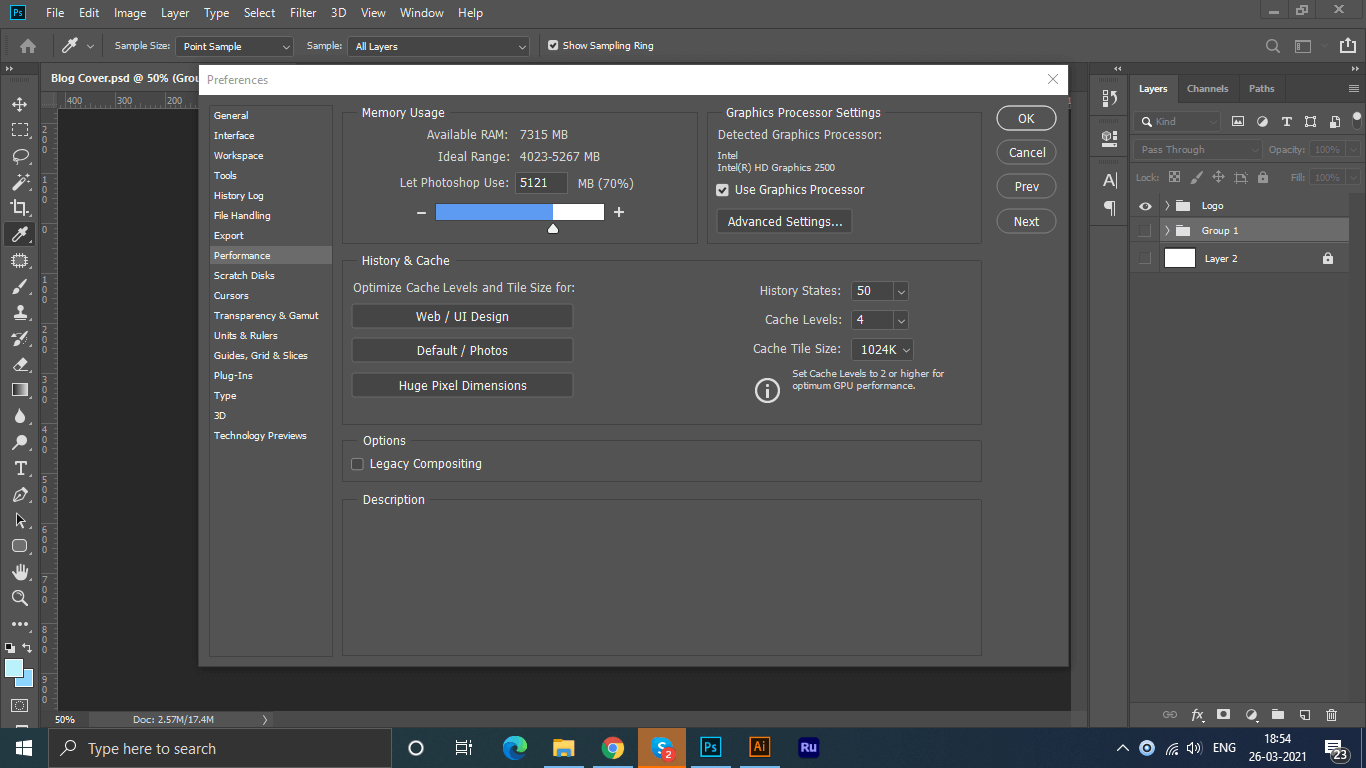
Before we head-on with this step, we’d like to mention that by proceeding with this step, you will most likely be able to resolve the issue and will even see an improvement in performance. But, this step may slow down the other applications on your PC. When you allow Photoshop to consume more memory, it will first consume your PC’s RAM before even touching or allocating any data to the scratch disk. To increase RAM for this purpose, follow these steps –
1. Open Photoshop
2. Head to Edit > Preferences > Performance
3. Move the slider to increase the RAM
5. Defrag Disks
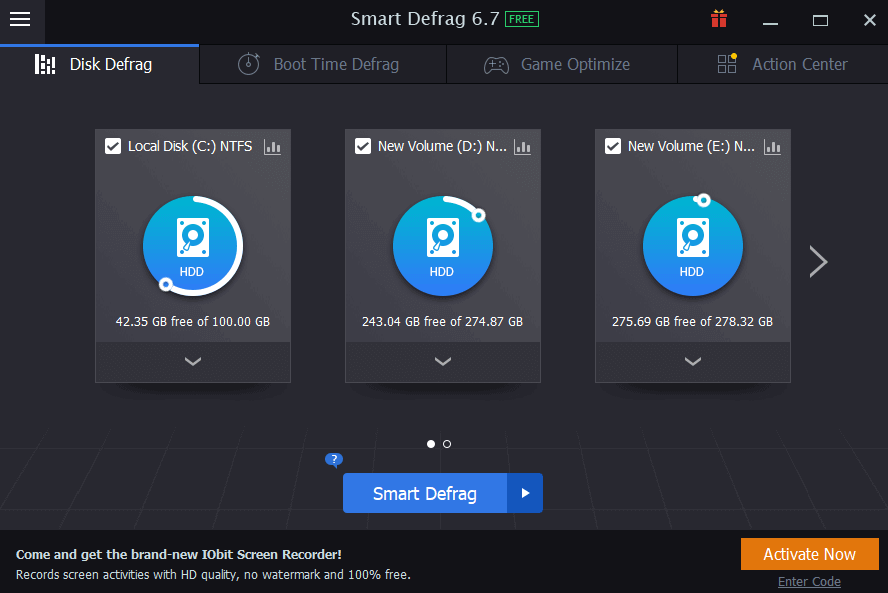
Photoshop scratch disk drive requires unfragmented space, in the absence of which, you might get “scratch disks are full” error. You can either opt for the manual way of defragging disks in Windows or even better, you can take the help of a disk defragmenter utility such IObit Smart Defrag 6 which is one of the best Disk Defragmentation Software.
Here are some of the features of IObit Smart Defrag –
- Customizable defragmentation
- Comprehensively looks at each of the drives on your PC and defrags them
- Also defrags hibernation files, page files, MFT, and many others
- You can even optimize games within the same application
Click here to Download IObit Smart Defrag 6

6. Delete Temporary Files
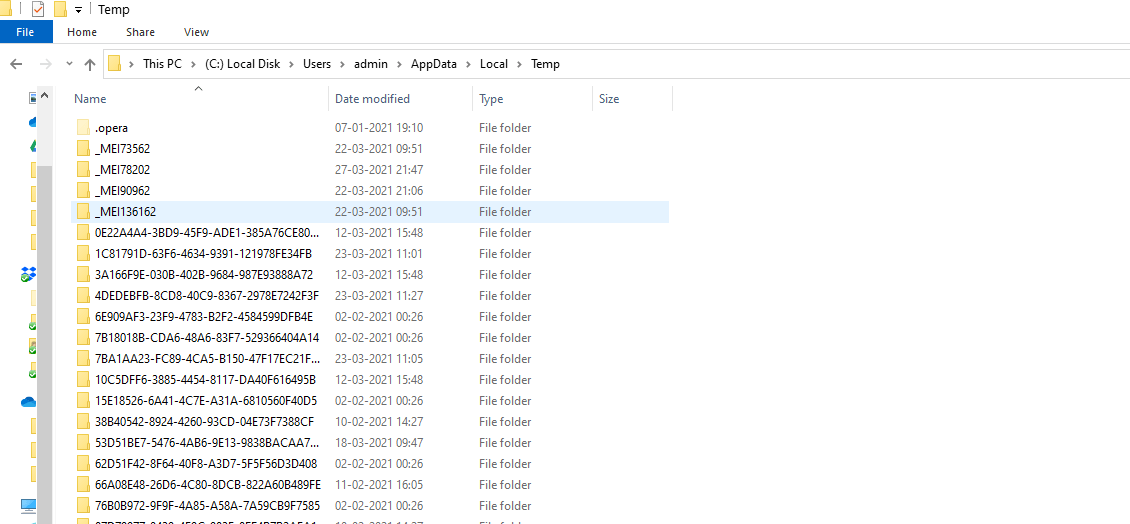
Something as simple as deleting temporary files can help you clear Photoshop scratch disk. Photoshop can leave a large number of temporary files on your computer. When you remove such temporary files, you can clear space not just for Photoshop scratch disk but also for several other programs on your computer. Here are the steps to do the same –
1. Open File Explorer
2. Type C:\Users\Your Username\AppData\Local\Temp in the address bar
3. Locate files starting with Photoshop Temp and then shift+delete all
How Much Scratch Disk Do I Need?
In case you don’t make any significant changes and usually work with the default brushes, preferences, and patterns, 1.5GB of scratch disk space is enough. But, if you use a lot of filters, use more dense layers, use complex background images, then you might need a larger scratch disk, many times the size of your original file. In generality, photoshop reserves 1 GB on the non-boot drive and 6 GB on boot drives so that even if a drive runs out of storage space, the issues on the operating system can be prevented.
Wrapping Up
We hope that the solutions above will help you resolve the “Scratch disks are full” error in Photoshop. And, if they did, do let us know which of the above methods helped you. For more such troubleshooting and interesting content, keep reading Tweak Library. You can also find us on YouTube, Facebook, Instagram, Twitter, Flipboard, Pinterest, Linkedin, and Tumblr.
Next Readings:
How Safe Is Deleting Duplicate Files In Windows 10?
7 Best Junk File Cleaners for Windows 10
How to Identify and Delete Unwanted Files on Windows PC
Deleted Files and Folders On Windows Keep Coming Back, What Can Be Done?
How To Find Corrupted Files & Delete Bad Files On Windows?


Leave a Reply