The thought of resetting a Mac to its default factory settings can only strike your mind if either it has started performing way too slow or you are selling your Mac. If you are experiencing issues on your Mac and thinking to buy a new one, consider for a factory reset first and ensure that you have cleaned all the data it contains, if you are anyday thinking to sell it off.
How Helpful Is Factory Reset?
A factory reset is quite helpful and beneficial in fixing any malfunctioning Mac. A confirmation to factory reset your Mac will delete all its data and apps and restore your device to its original, default state.
All of us, even I have heard the phrase numerous times whenever I come across a phone that’s stuck or a computer that doesn’t respond. The phrase says ‘Just turn it off and back on again. Surprisingly, this hack comes out to be the fruitful one as most of the basic device glitches gets resolved by this hack.
If you are stuck at a point where your Mac isn’t responding to your commands or is behaving abnormally, it’s the high time to opt out for a Factory Reset.
How To Factory Reset A Mac To Its Default Settings?
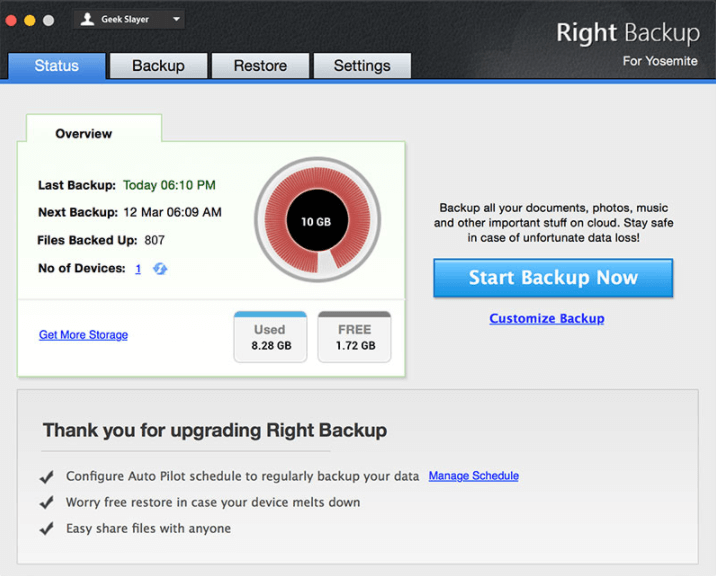
Before you think of resetting your Mac, ensure that you have backed up all your important data. For this you can use Right Backup- a cloud storage that can be accessed anytime and from anywhere. Right Backup provides you with the best features including:
- Automatic Backup to safeguard all your important files.
- Secure storage using 256 AES encryption.
- Anytime and anywhere access for data stored on the cloud.
- Restore backed up files in a go.
Click here to Download Right Backup
Once you’re ready to factory reset a Mac, follow the steps below:
Step 1: Turn off your Mac and restart it.
Step2: Now, immediately press and hold keys- Command+R. Hold these keys until you see either Apple Logo or a spinning globe animation.
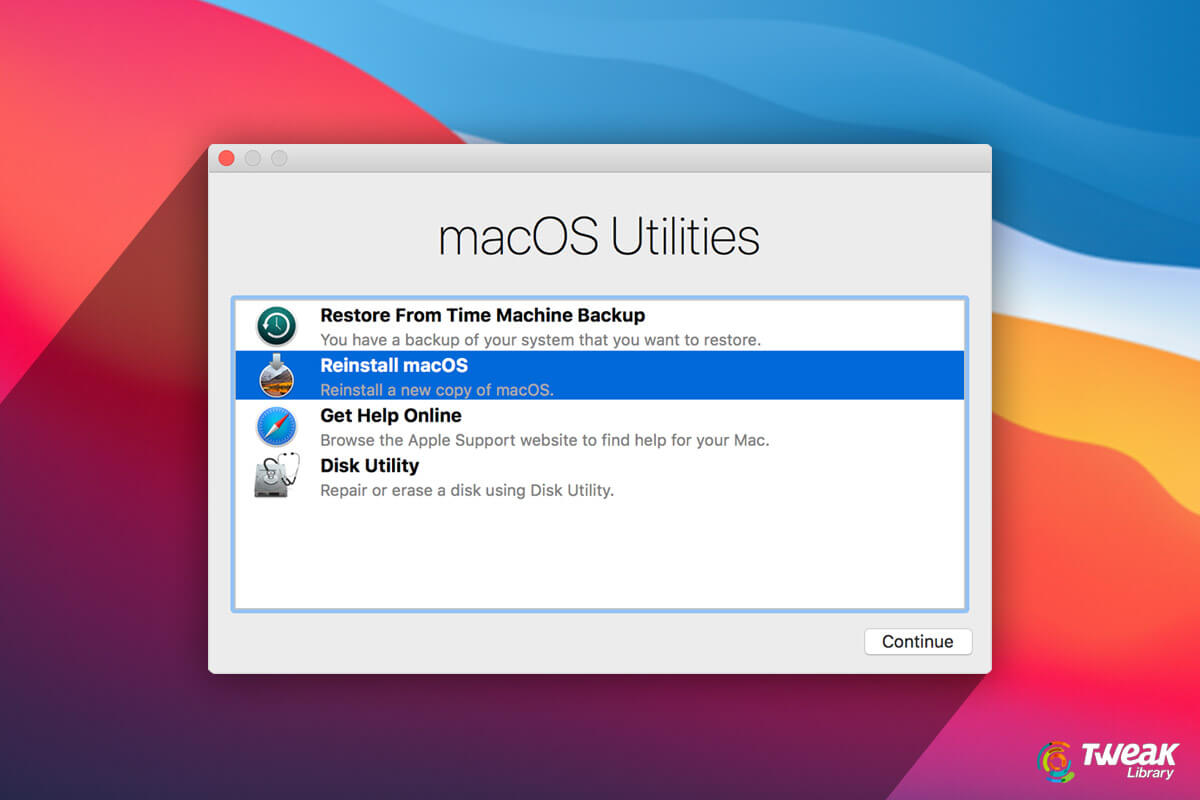
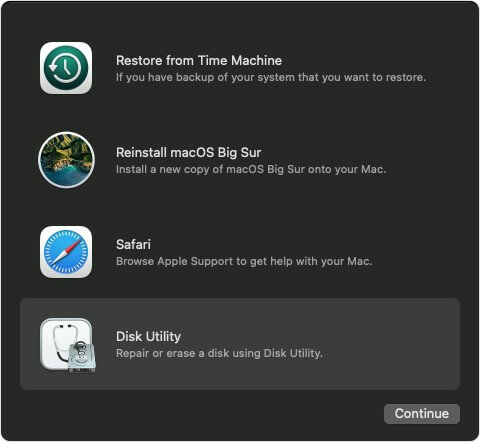
Step 3: After a few seconds, you’ll see a macOs utility window on your PC. This is called Recovery Mode.
Step4: From the options, choose Disk Utility and click on Continue.
Step 5: On the next window, from the menu section, click on View > Show all devices.
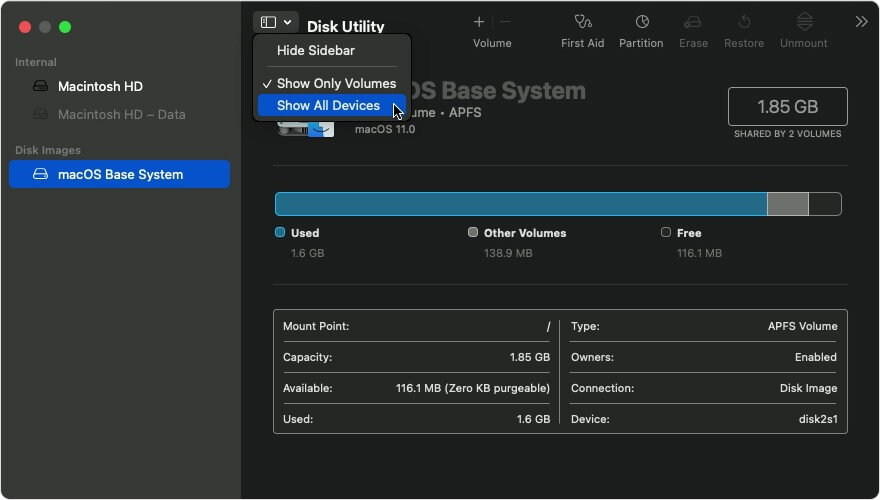
Step6: The Disk Utility’s sidebar shows all the active disks and volumes. Choose the one you wish to remove or you can also opt for complete cleaning. To delete the whole disk, choose the topmost tab and click on the Erase button from the menu bar located at the top.
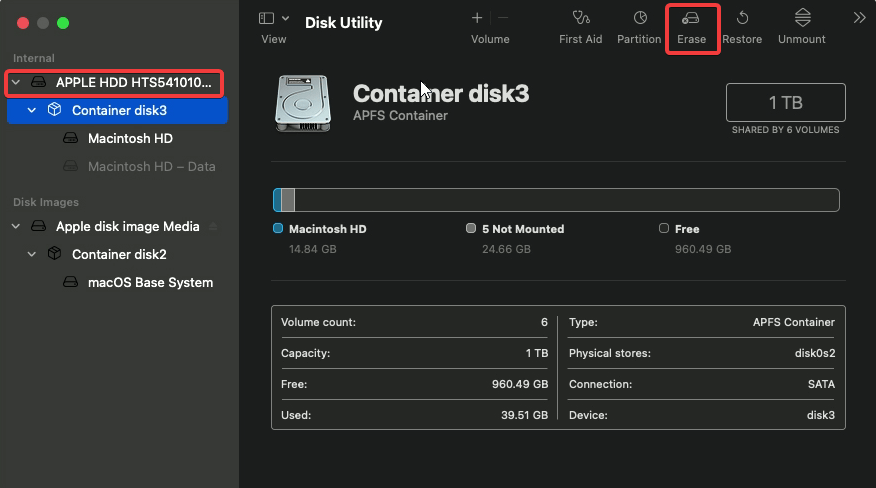
Step 7: When you click on the Erase button, you get a few fields to fill-in. It includes:
- Fill in the disk name. Ensure that for better quality you just copy the name your disk already has and paste it.
- Choose a format. Disk utility will check for the compatible format automatically.
- Choose the scheme, if asked. In most cases, it should be the GUID Partition Map.
Step8: Now, click on Erase.
Step 9: Wait for the process to finish. Once done, you’ll see the Apple logo at the top left corner. Click on it to Quit Disk Utility.
Now that you have erased everything or factory reset a Mac, you can now choose to either restore the backed up data from Time Machine or Reinstall macOS to get a new copy of Mac.
Easy, isn’t it?
Considering resetting a Mac due to its performance? Wait! A tune-up utility can help you fix the issue and you won’t have to factory reset a Mac for the same. We recommend using a complete macOS utility to optimize its performance and boost its speed.
Disk Clean Pro- An Advanced Mac Cleanup and Utility Tool

Click Here to Download Disk Clean Pro

Disk Clean Pro is an advanced macOS utility that helps you clean your Mac and optimize it for a speedy performance. It further scans your complete system for malware, adware, spyware and other threats that are a risk to your system and data. Not only system cleaning, this tool further provides a complete optimization segment that includes logs cleaner, junk cleaner, duplicates finder, shredder and more. Here’s what else Disk Clean Pro has to offer:
- One-click care scanning.
- Detects and deletes all sorts of infections including spyware, adware and malware threats.
- Helps you scan and clean junk files that cover unnecessary space.
- Helps you secure all the sensitive information.
- Clear the space occupied by unwanted and duplicate files.
Wrapping Up:
So, this guide on how to factory reset a Mac includes the best cloud backup tool, stepwise instructions to factory reset a Mac, and an advanced Mac utility tool for better performance.
If you are considering your Mac’s slow performance a reason to factory reset, we recommend you to run a scan through Disk Clean Pro. It will help you fix the issue. If it is any other reason, you can factory reset your Mac using the manual instructions explained above. Do not forget to backup your data using the best cloud storage tool- Right Backup.
Check out this guide and let us know of any queries or suggestions in the comments section below.
Keep reading Tweak Library for more Mac optimization blogs. You can reach out to us through our Instagram, Facebook, and YouTube channels.
Recommended Readings:
Easy And Quick Ways To Sync Android with Mac in 2021
How To Remove Programs From Startup On Mac?
A Novice Mac User? Here’s How To Zoom In And Out On Mac
Here’s How to Run Windows Programs on a Mac
How to Show Hidden Files on Mac


mariya jonsan
I will definitely try these steps and reset my Macbook.