None of us can deny the importance of personal data that we have in our computer or mobile devices. And this is the reason that a lot is discussed about backing up of the data so that in the unavoidable circumstances of a device crash or a ransomware attack or theft you can get back your data easily. Now with cloud backup programs coming into picture the backing up and restoring of data has really become easy, fast and reliable. But for this new way of backing up data and then restoring at the time you need you need an active, affordable and above all high speed Internet connection. Therefore still many users prefer the conventional method of backing up data on an external drive.
And if you are a Mac user then the easiest way for you to backup all your photos, music, apps, documents to an external storage device is using Time Machine, a built in utility that comes with your macOS. How? That we are going to learn in this article.
Backup your Mac Using Time Machine
Note: The only prerequisite for creating a backup through Time Machine is an external hard drive.
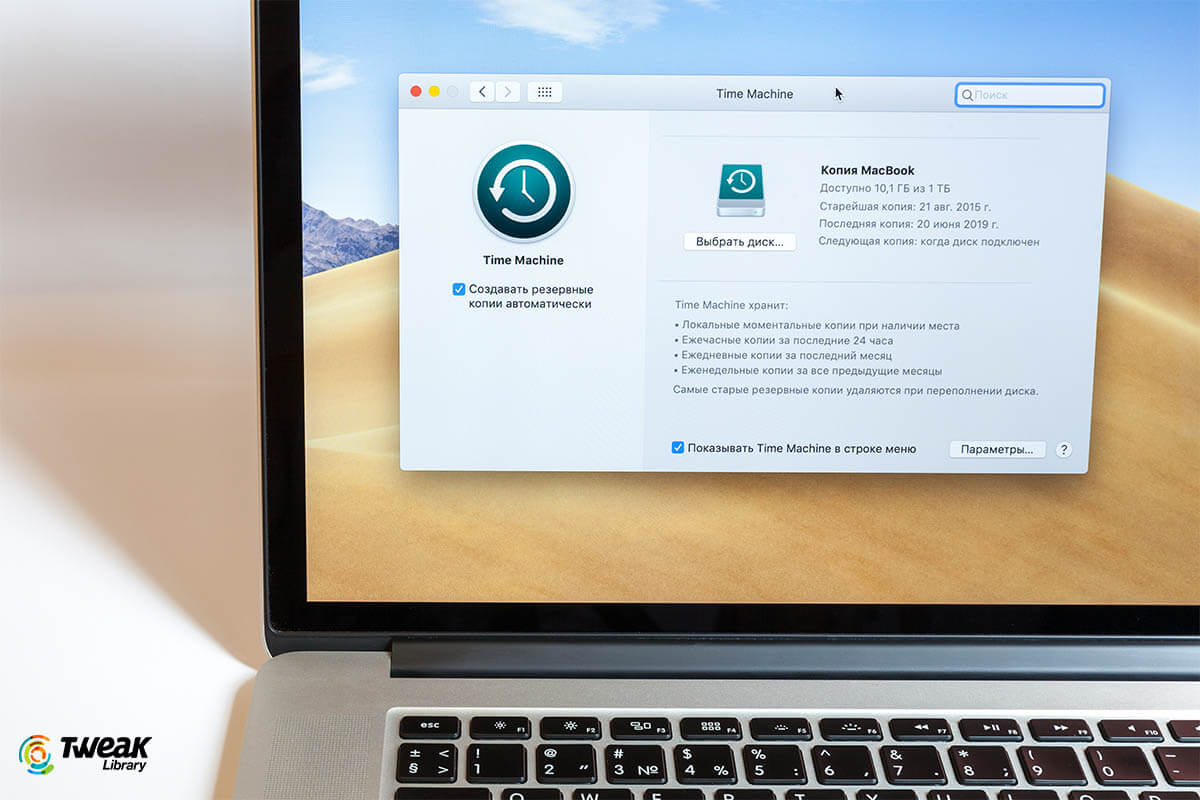
Basically, when Time Machine backup is first enabled on Mac, it automatically starts backing up all your data like documents, photos, music and apps to an external connected storage device. And, once the initial backup completes, Time Machine keeps on updating the backup by scanning your Mac for the latest or deleted or revised files on a per hour basis.
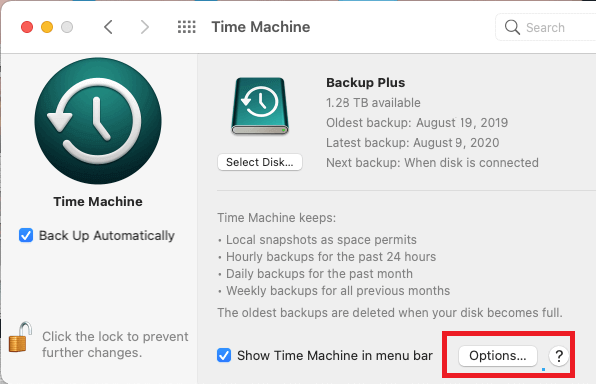
Moreover, as per the storage space available on your external hard drive, Time Machine automatically creates hourly backups for the past 24 hours, daily backups for the past month and weekly backups for all the previous months. And, if the External Storage device is full, Time Machine removes the older backups automatically to create space for daily backups.
Which Storage Drive is used for Time Machine Backup
Time Machine can create backup to any Storage Device which is connected to your Mac, via FireWire Port of your Mac, Thunderbolt or the USB of your Mac.
Apart from this you can use a Network-attached storage device that supports Time Machine over SMB to create Time Machine backups. Another Mac on the same network can also be used to store Time Machine backup.
AirPort Time Capsule, or an external drive connected to an AirPort Time capsule or AirPort Extreme Base Station (802.11ac) is another additional option to create backup via Time Machine.
Bonus Tip: For the optimum use of Time Machine backups, the storage space of an external drive should be greater or at least equal to the storage capacity of the Hard Drive attached to your Mac. This will allow Time Machine to save multiple versions of any data or file, which in-turn will help you to recover your files as per their previous version or state.
Note: If the attached Storage device is not in the right format, Time Machine will prompt you to Format the Drive.
What’s Included and What’s Not in Time Machine Backup?
As per stated on Apple support page, you can use Time Machine to back up all files except the ones that are part of the macOS installation. These include music, photos, apps and documents. And as discussed earlier, when you enable Time Machine it automatically backs up the data of your Mac.
However, when it comes to backing up your Photos library, although Apple suggest you to back up your Photos library locally using Time Machine(even though you have backed them on iCloud) but some test and user results suggest that instead of automatically backing up your Photos library through Time Machine it is advisable to backup it manually. This is because, when you backup your Photos Library through Time Machine, it completely misses out the database folder within the library that stores all vital metadata. And this causes problems while restoring the data from Time Machine backup.
Also Read: How to Backup iPhone Photos to Google Photos
Enable Time Machine Backup on Mac
To start with the process, first connect an external storage device to your Mac and follow the instructions listed below to enable Time Machine Backups on your Mac.
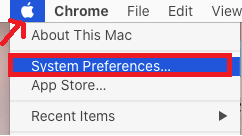
1. On the top-menu bar click on the Apple Menu icon. Now from the drop-down menu select System Preferences. This will open the System Preferences window.
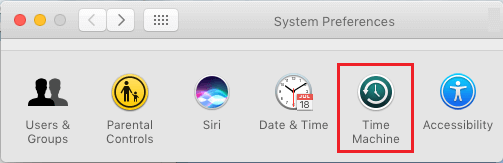
2. On the System Preferences screen, click on the Time Machine option.
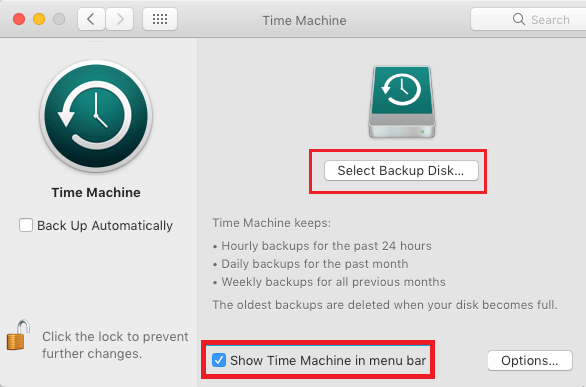
3. Now on the Time Machine screen, click on the Select Backup Disk button on the right side.
Note: Make sure to check the option, Show Time Machine in the Menu bar to access Time Machine in future from the menu bar. Also, make sure to check the Back Up Automatically option.
4. Now On the next screen, select the External Hard Drive that is connected to your Mac and click on Use Disk button.
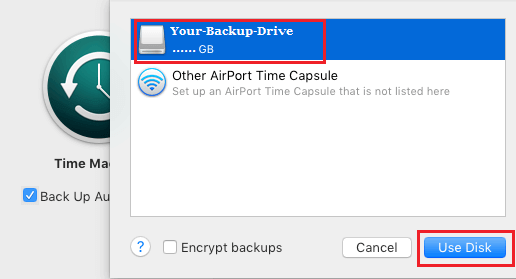
If the format of the attached external Drive is incompatible with macOS, then you will receive a prompt to Erase the Disk.
5. Now wait for all the files of your Mac to be backed up to the External Drive. The initial backup will take longer to complete as compared to subsequent backups.
Note: After the initial backup, the process of backing up data in future will be automated that will continue in the background, as long as the backup external disk remains connected to Mac.
Exclude Files From Time Machine Backup
As discussed earlier Time Machine (by default) automatically backups all the files of your Mac to the assigned external device.
Although, continuing with this default setting will help you in restoring all the files of your Mac whenever required from a Time Machine Backup, however, this will back up a lot of data on a day to day basis.
So to avoid this you can exclude some specific files or folders of your Mac from Time Machine Backup by following the steps below.
1. On the top-menu bar click on the Apple Menu icon. Now from the drop-down menu select System Preferences. This will open the System Preferences window.
2. On the System Preferences screen, click on the Time Machine option.
3. Now on the Time Machine screen, click on the Options button located at the lower-right corner of the screen.
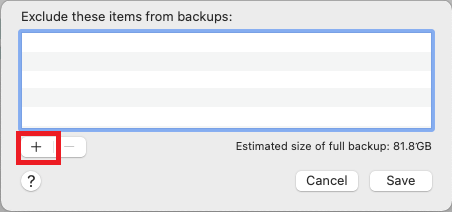
4. On the Exclude Items screen, click on the + button at the bottom left.
5. Now, on the next screen, select the files or folder that you do not want to be backed up on Time Machine Backups. Once selected click on the Exclude button. You can exclude entire Documents, Applications, Downloads, and Desktop along with User Folders.
6. Click on the Save button to save the list of folders that are excluded from Time Machine Backup.

Once done the items added to the exclusion list will not be included in the Time Machine Backups.
Also Read: How To Delete iPhone Backups On Mac
Remove Files from Exclusion in Time Machine
In the future if you want to backup the entire Mac then you can remove the folders that you have added in the exclusion list of Time Machine backup. To remove the folders and files from the exclusion list follow the steps listed below.
1. On the top-menu bar click on the Apple Menu icon. Now from the drop-down menu select System Preferences. This will open the System Preferences window.
2. On the System Preferences screen, click on the Time Machine option.
3. On the Time Machine screen, click on the Options button.
4. Now On the next screen, select all the Items that you want to remove from the Exclusion and click on the’ – ‘button.
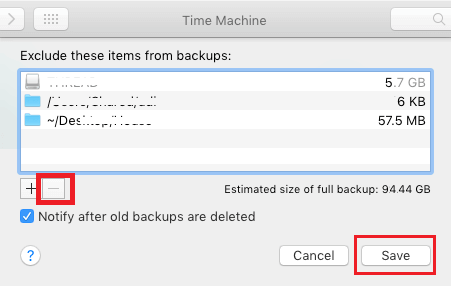
5. Once done, click on the Save button to implement the changes.
Now the removed items will again be included in Time Machine Backups.
Advantages of Time Machine Backups
The main advantage of Time Machine is that it backs up the data automatically in an optimized way. This means only at the initial setup the backup of your entire disk will be created, and after that Time Machine will just copy the revised and new files instead of copying the data all over again. This will not only make the subsequent backup quick and fast but also optimize the storage space on your hard drive.
Another advantage of Time Machine backups is that users have an option to either backup the entire drive or exclude some specific folders. Moreover, since the backup is on a physical drive you do not have to pay for the internet charge that occurs due to downloading and uploading of the data.
Wrapping Up
So folks this is how to backup your Mac using Time Machine. If you have any further questions, suggestions or feedback regarding the article then do share them in the comments section below. Also if you have any question on restoring your data then check our article How To Restore Mac From Time Machine Backup


Chris Smith
Doesn't it come pre-enabled by default when you first use your Mac?