Windows 10 is a popular operating system and has an upper hand over its counterparts. One of the reasons for its popularity is how it provides prudent defense against unforeseen events. For instance, you can create timely system restore points. Thereby, allowing you to roll back changes in case an update may leave your computer a bit buggy. But, what if you hit the option and find that System Restore is not working on Windows 10? Jitter not! We’ll be covering all the effective methods that’ll help you resolve the issue in no time. But, first thing’s first –
What Is System Restore In Windows 10?
System Restore is a utility in Windows 10 which takes a snapshot of your computer’s registry, software, driver configuration, and other crucial system files. It is advisable to create restore points timely so that in case of computer crashes, buggy updates, or even during reinstallation you can restore your computer back to the time when all the above settings were working just fine.
What To Do If System Restore Is Not Working On Windows 10 –
We have outlined some of the effective steps you can undertake, in case the System Restore option stops working on your computer –
| Table Of Contents |
| 1. Have You Enabled System Restore In The First Place?
4. Choose Another System Restore Point 5. Try Using The Safe Mode For Running System Restore – It Works |
1. Have You Enabled System Restore In The First Place?
If Windows 10 System Restore is not working, chances are you may have forgotten to enable the function on your computer. Here is how you can enable System Restore on your computer –
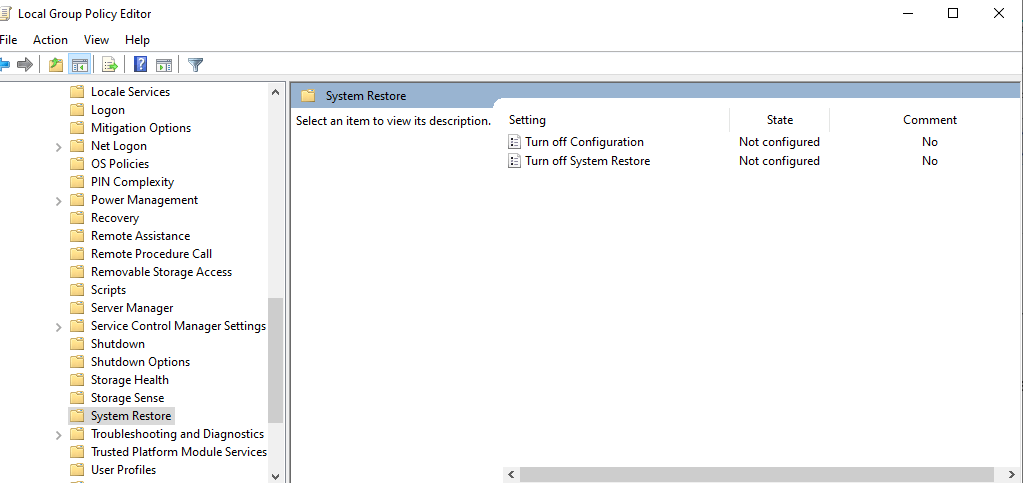
1. Open the run dialog box by press Windows + R keys
2. Type gpedit.msc
3. Navigate the following path using the left-hand pane
Computer Configuration > Administrative Templates > System > System Restore
4. Set Turn off Configuration and Turn off System Restore settings to Not Configured
2. Do You Have Enough Space?
For Windows 10 System Restore to work correctly and properly, you might have to increase the disk usage space. This is because System Restore usually uses three to five percent of space on each of your disks.
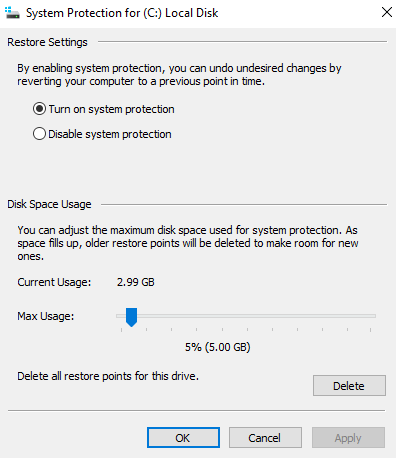
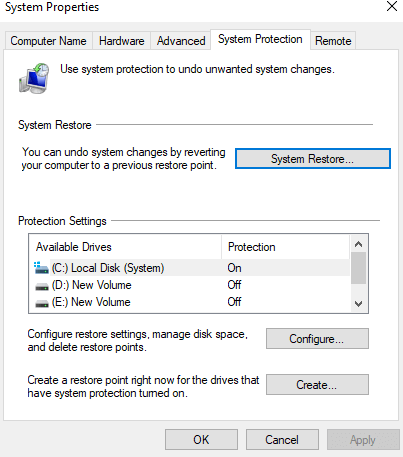
1. In the Windows search bar type System Protection
2. Select Create a system restore point
3. Click on Configure
4. Increase your Disk Usage Space if it is less than or even equal to 300 MB. It is recommended that you at least allocate 4 GB of space
3. Use A Third-Party Software
In case you are still not able to use System Restore on Windows 10, you can install third-party software like Advanced System Optimizer which has several tools to optimize and clean your PC for best performance. It even has a Backup & Restore module which lets you take a backup of important system files and you can restore them when in need. Here is how you can use this module –
Want to know more about Advanced System Optimizer, here’s a comprehensive detail –
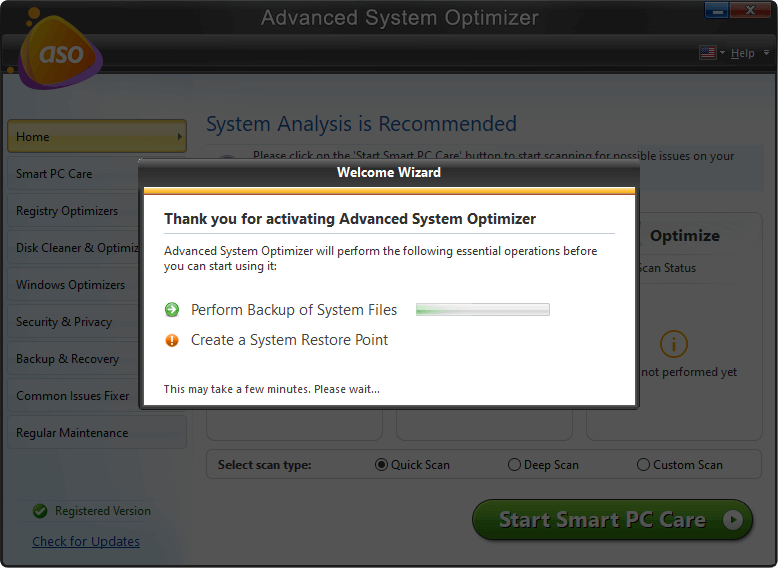
1. Download and install Advanced System Optimizer

Read Full Review on Advanced System Optimizer
2. From the left-hand pane click on Backup & Recovery
3. Click on System Files Backup and Restore
4. Click on Take Backup Now
5. Choose the drive for taking the backup and then click on Start Backup
In case of an emergency, you can revert the system to the last configuration.
4. Choose Another System Restore Point
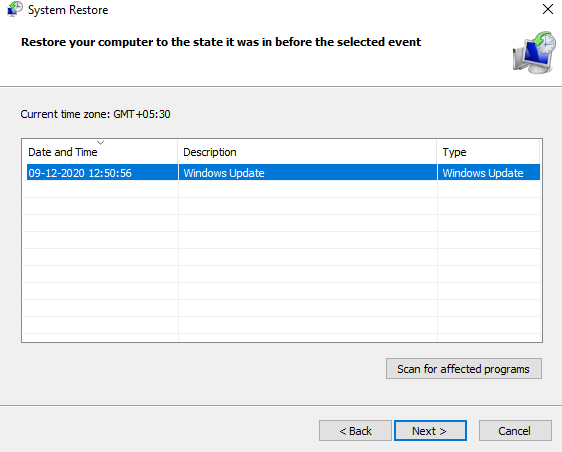
It is quite possible that the System Restore point that you have chosen is corrupt. In that case, you can choose another restore point.
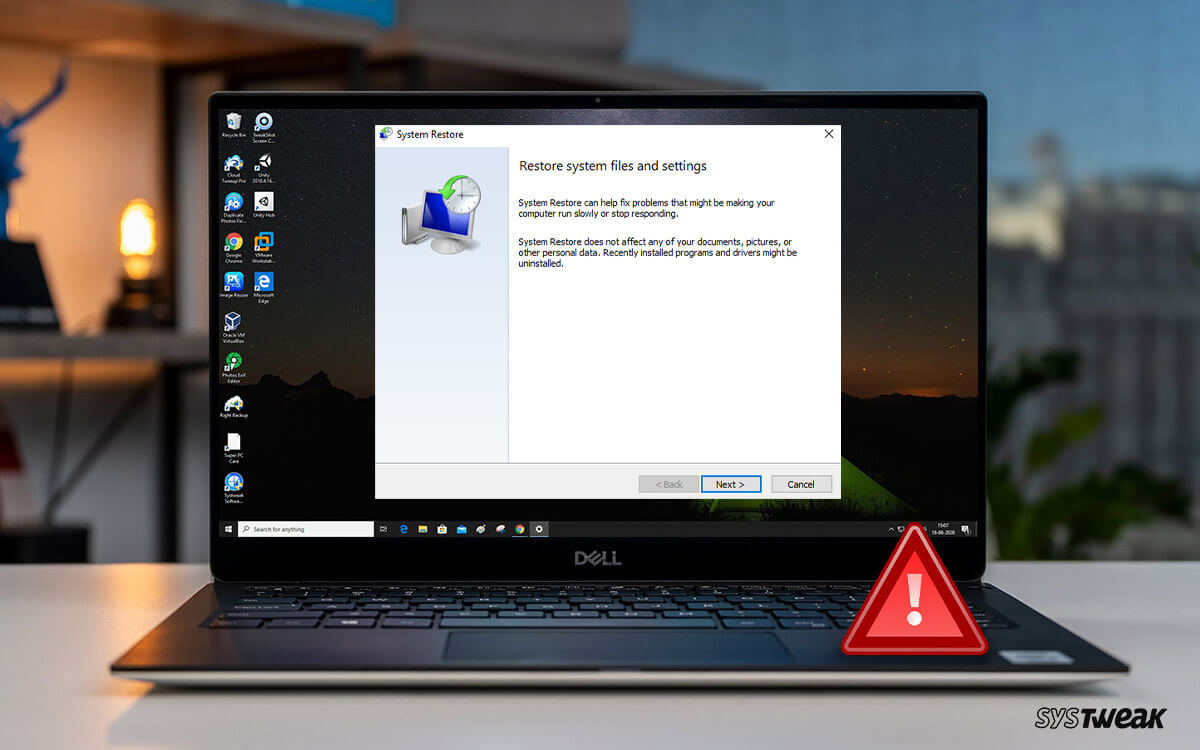
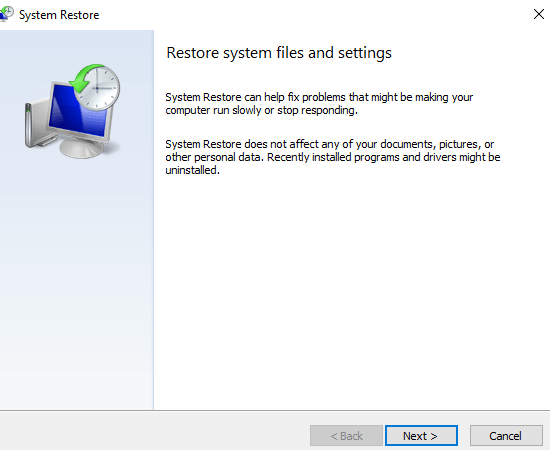
1. In the Windows search bar type System Restore
2. From the right-hand pane under Create a restore point select Open
3. Click on System Restore
4. Click on Next
5. You can choose another restore point (in case you have created one before) and then again click on Next
Here’s How You Can Create a System Restore Point in Windows 10
5. Try Using The Safe Mode For Running System Restore – It Works
We’ll quickly outline the steps on how to enter the safe mode. for more information on the safe mode you can click here.
1. Press Windows key + I for opening the Settings
2. Click on Update & Security and then select Recovery
3. Choose Restart Now and then select Advanced Options
4. Click on Troubleshoot
5. Go to Advanced Options and then click on Startup Settings
6. Click on Restart and choose F4 to enter Safe Mode
Here’s a neat little trick to enter Safe Mode quickly. You can simply press F8 at the time your computer is booting and enter the Safe Mode. Once, you have entered the Safe Mode, repeat the steps mentioned in Point No.
Wrapping Up
In case the System Restore is not working on Windows 10 or even Windows 10 recovery not working on Windows 10, the above-mentioned workarounds would help resolve the issue. If you found the blog helpful, do upvote it and let us know in the comments which of the above workarounds worked out for you. Till then keep reading Tweak Library.
Recommended Readings:
How to Use System Restore in Windows 10
System Crashed: Is There Any Tool To Recover Word Document?


Gajendra singh
I was facing this issue. Thanks for this guide