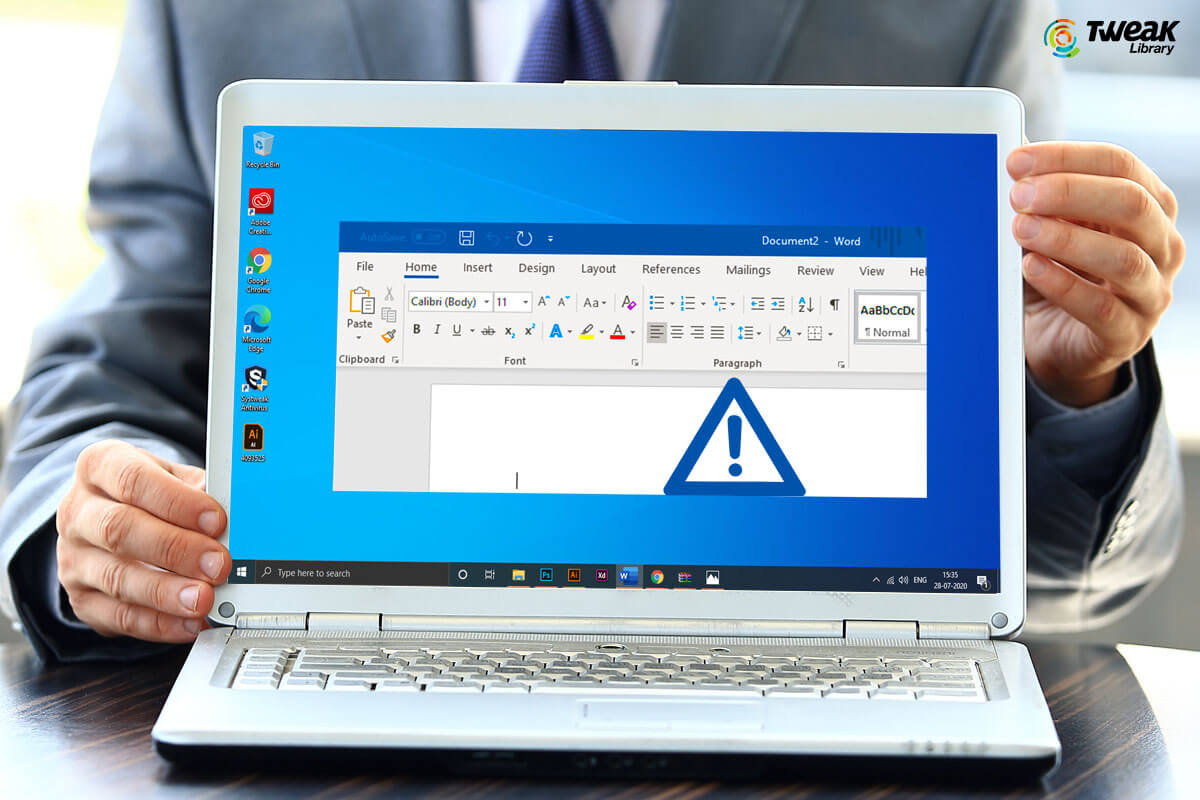
Recently, I experienced a sudden system crash and I don’t know what has happened. My important files and word documents are saved on my system hard drive. Is there a way to recover my files back? If you have come across a similar issue like mine, this article is for you. A system crash comes with a different feeling of fear and anxiety. It is because it involves risk of losing data and important files.
Like earlier days, recovering lost files is no longer a difficulty. Today, we have multiple hacks and efficient data recovery software to help us get back the deleted files. Wondering how to get back files after a system crash?
Note: At first, you’d be required to check if only your system display crashed and not the hard drive. If you have a broken or crashed hard drive, there is no chance to get back the data even using any data recovery tool or so. Also, you can get back the unsaved word document using a few hacks. Check this article further to know more.
How To Recover Word Document After a System Crash
If you have experienced a system crash, and evaluated your hard drive to be fine. Getting back all your files is an easy process when you use an automated data recovery tool like Advanced Disk Recovery. As we already mentioned above, recovery tools are only helpful if your hard drive is intact and in working condition.
1. Use BIOS Utility
Many times you misunderstand system crash while it just doesn’t boot for that moment. What should you do to combat this error? When you find your system is not bootable, it is due to corrupted or damaged files, system glitch, malware or DLLs. In such cases, you can recover and restore word documents or other files using the BIOS utility. Follow these steps below:
- Plug-in USB drive to dead system.
- Turn on your system, and enter the Boot menu by pressing F12 and choose USB installation media.
- After this, you can enter Automatic Repair setup.
- When you see this, it will show you Automatic Repair has failed/couldn’t repair your PC. Click on Advanced Options.
- From the window that appears, click Troubleshoot.
- Again, click Advanced Options.
- Choose Command Prompt.
- On the Command Prompt window, type in exe and hit Enter.
- When you see Notepad open, click on File > Open.
- Click on this PC and change the file type to All Files to access them.
- Next, you have to right click on the selected file, choose Send to and select the external drive.
Disclaimer: This method is usually not worth it if you want to recover data in the C: drive.
2. Use Your Hard Disk As An External Drive
After a system crash, if your hard drive is fine and in working condition. You can detach it from the problem system and connect it to another laptop or PC using a USB cable. Once connected, you can find it in This PC section. Choose the files you want and copy them to the local storage of the connected laptop. That’s it.
3. Recover Word Documents Using Advanced Disk Recovery
If you want a hassle free data recovery, use Advanced Disk Recovery- the best tool to recover and restore deleted data. This tool is the best bet when it comes to recovering long lost important files and data. Keep tools like Advanced Disk Recovery handy so that you can recover maximum files through its deep scan process. Here’s how to use Advanced Disk Recovery:
- Click on the button to Download Advanced Disk Recovery .

- Once installed, open the app and select the areas to be scanned for deleted files and folders i.e. Hard Drive, CD/DVD, Removable or Partitions and click on Start Scan Now.
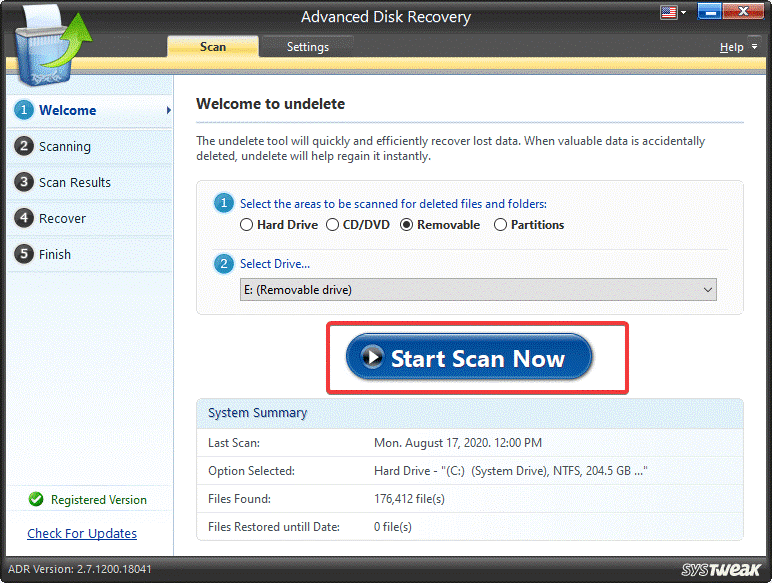
- In this case, you are required to scan the Hard Drive as your system is crashed and you want data from it. (Make sure that your hard drive is connected to the laptop as an external device).
- Proceed further and choose the scan type out of Quick Scan and Deep Scan. Click on Deep Scan for a thorough recovery of the files and data stored on that particular hard drive. Then, click on Scan Now

- Now, wait for the scan to complete. Once scanned, you will see a list of files that can be recovered. Mark and Select the data you wish to recover, Preview them all and click Recover.
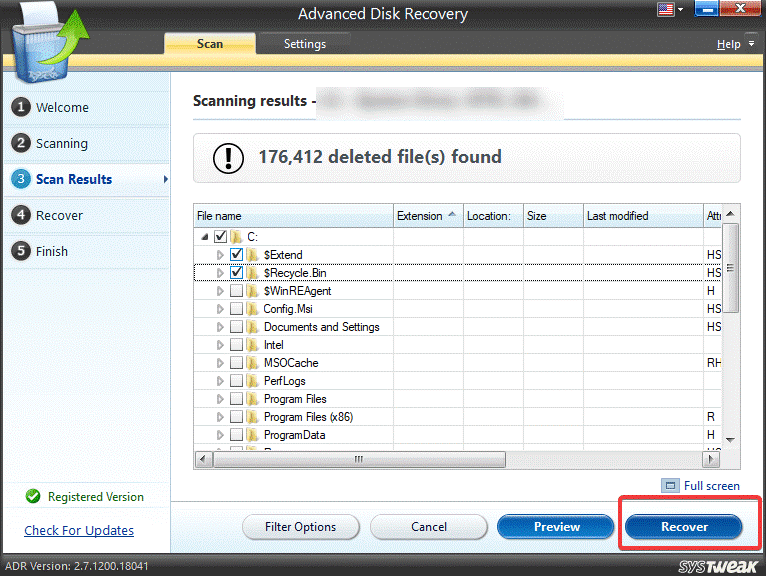
- You’ll see a dialog box asking you to select the location for recovery. Ensure that you select a location other than the one you are currently using. And click OK.
- Next screen will show you data recovery in the process. Wait for it to complete. Once the recovery process ends, click Finish.
That’s it! You’ll have all your non-accessible data accessible now. If you want most of your data to be recovered, ensure that you have run Deep Scan. You can now check for the recovered data on your local storage.
Isn’t it quick and easy? Let us know which data recovery tool have you used in the comments section below or try Advanced Disk Recovery for better and instant results.
Till then, keep reading Tweak Library for more such content.


Swarnakshi
I accidentally lost my manuscript and tried the above steps mentioned on how to retrieve the doc. It worked and saved my doc.
Akshita Gupta
Hi Swarnakshi, We are glad that you could recover your document. :) Stay tuned for more troubleshooting guides on Tweak Library.