
We all are quite aware about the reasons why everyone of us must keep a proper Windows 10 backup. From accidentally deleting files to system crashing, anything can make you question why you didn’t create the backup in the first place. So, times when something goes haywire on your computer, you have the backup files to restore the system the way it was before.
Though these backup files are extremely important to be kept up, however, having too much of them becomes a pile of files. Data files that can store a good amount of size on system drive that you haven’t any idea about. This is why it’s very important to keep only the ones that are updated and necessary for your system. Anything that isn’t important needs to be flushed away so that the unnecessary stuff is out of the system.
Pile Up Backup Files and How Do We Put An End to Them
Automatic System Backup is one of those important aspects you need to consider so that the files don’t pile up. Even if those are backup files, it’s very necessary to keep only the ones that matter. Because keeping every one of those can be a questionable moment for your system, memory wise. Especially drives that have lesser size as compared to the other drives, will fill up easily due to piles of update and backup files. So your first task would be to delete backup files on your Windows PC as mentioned below:
How to Delete Backup Files in Windows 10 PC
Like any other issues your Windows system face, backup files deletion can also be taken care of by using the in-built features. Yeah!! The Windows operating system is filled with features that can help with various issues the system faces. So again, the in-built features come to the rescue when you are trying to delete backup files from the WIndows 10 PC.
Method 1: Delete Windows Image Backup File
Thanks to those in-built features Windows 10/8/7 offer to the users, that are helpful in issues like deleting the backup files. Backup & Restore is one of those utilities or aspects that helps you create files backup automatically. All you need to do is, schedule the auto backup setting and everything will be done accordingly. So in case Windows 10 backup drive is almost full, below is the way to delete backup files:
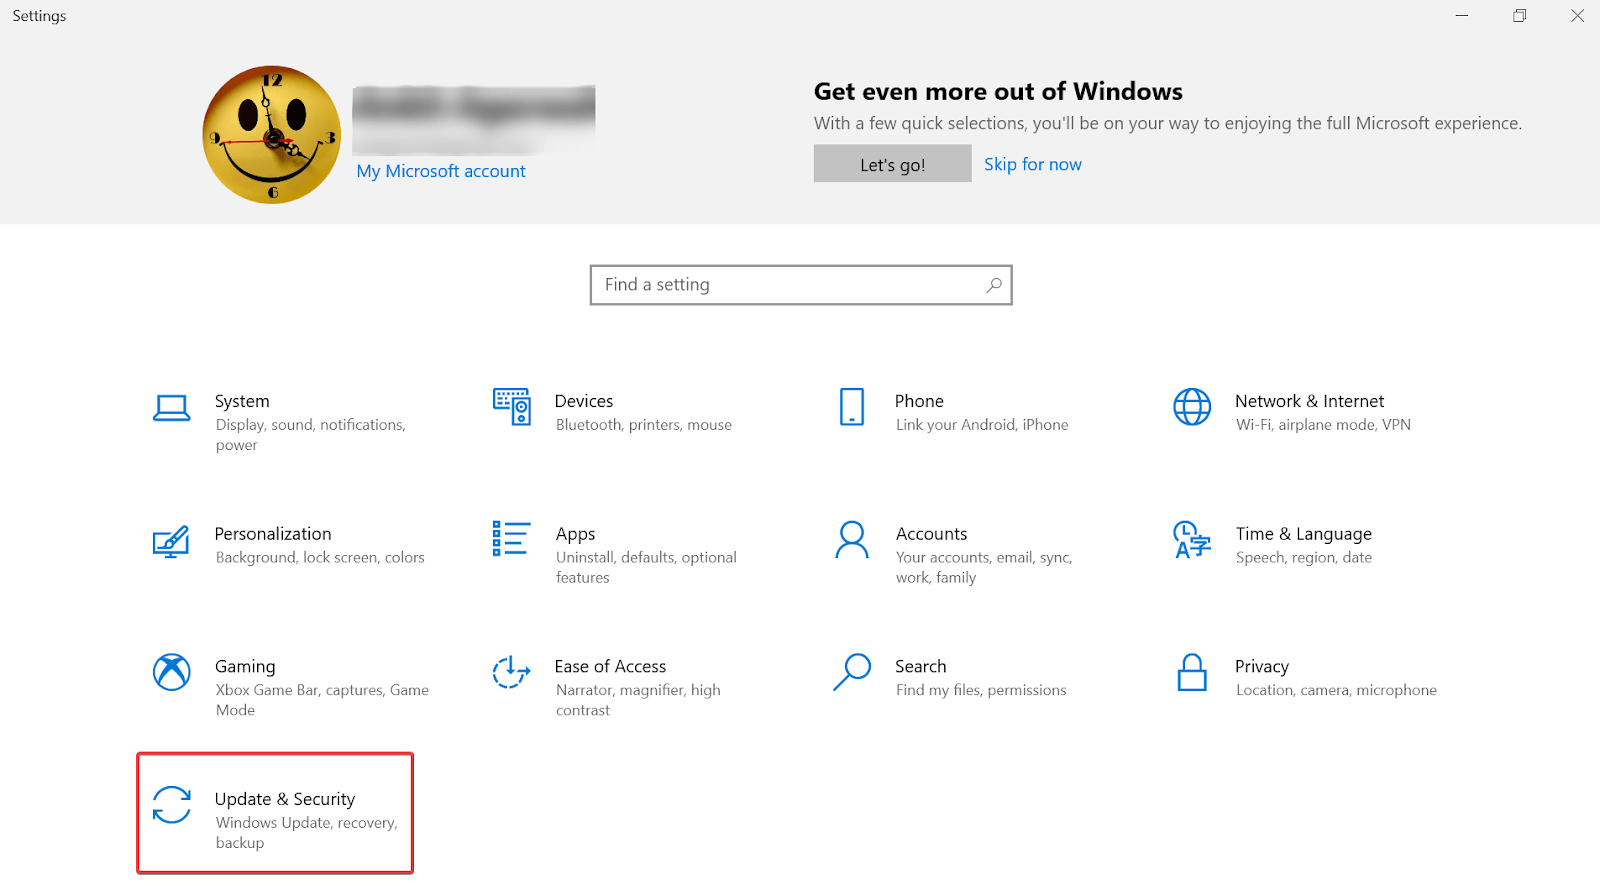
1. Navigate yourself to the Update & Security section (via Settings page).
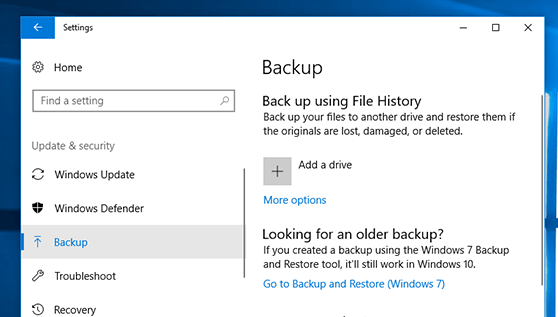
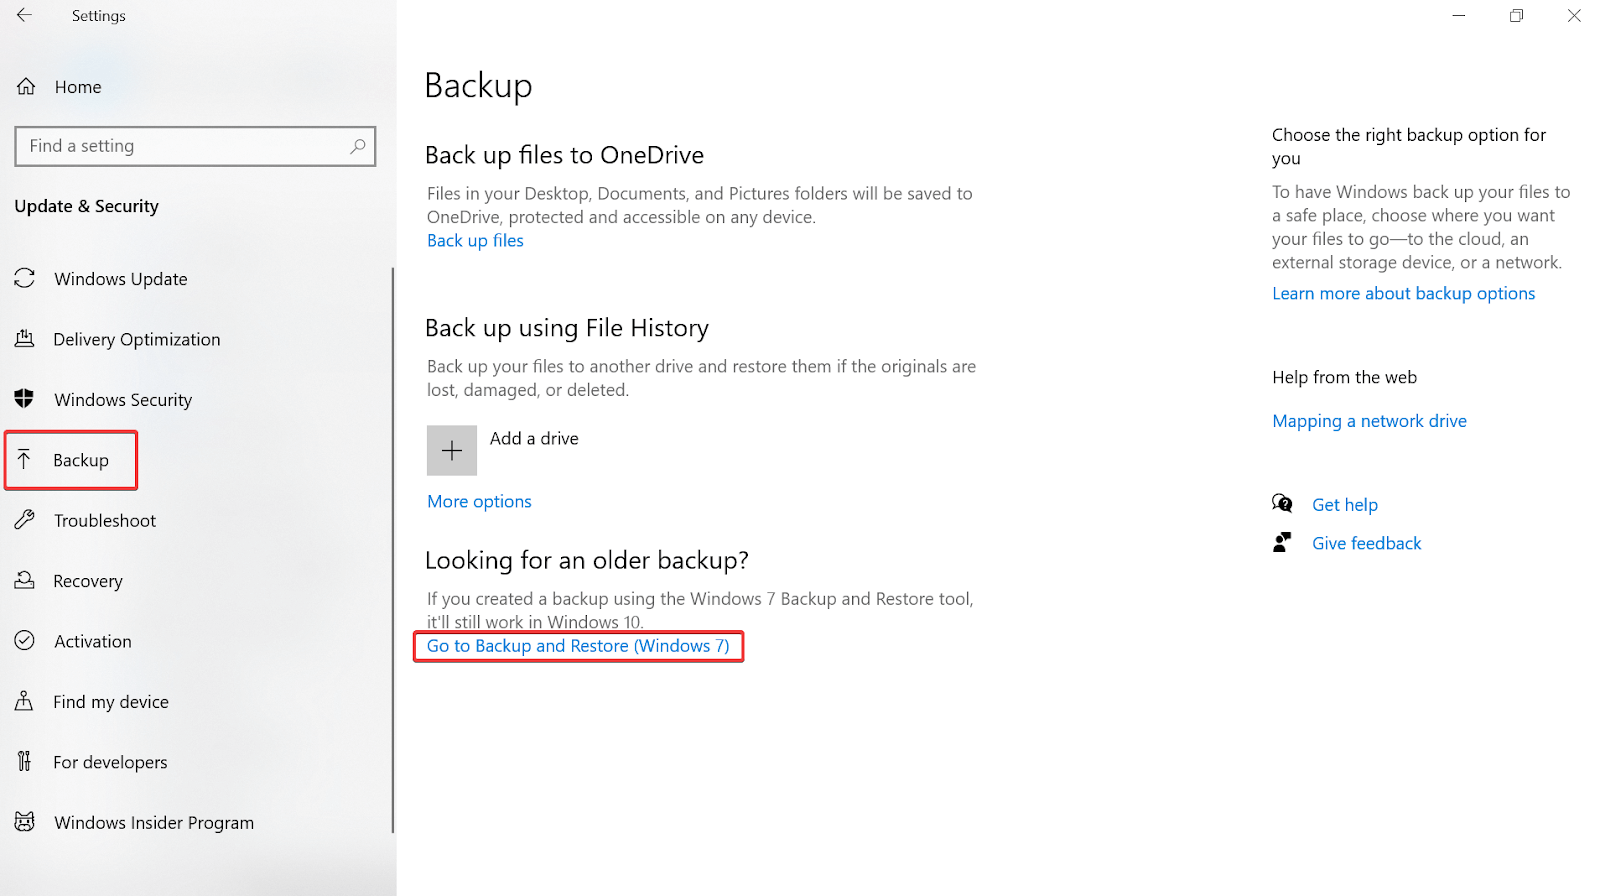
2. Under the section, you need to tap on the Backup tab (from the left side on the screen).
3. Now you look for the “Go to Backup and Restore (Windows 7)” that you will find on the bottom of the screen.
4. A new window will pop up where you will need to tap on Manage Space under Backup
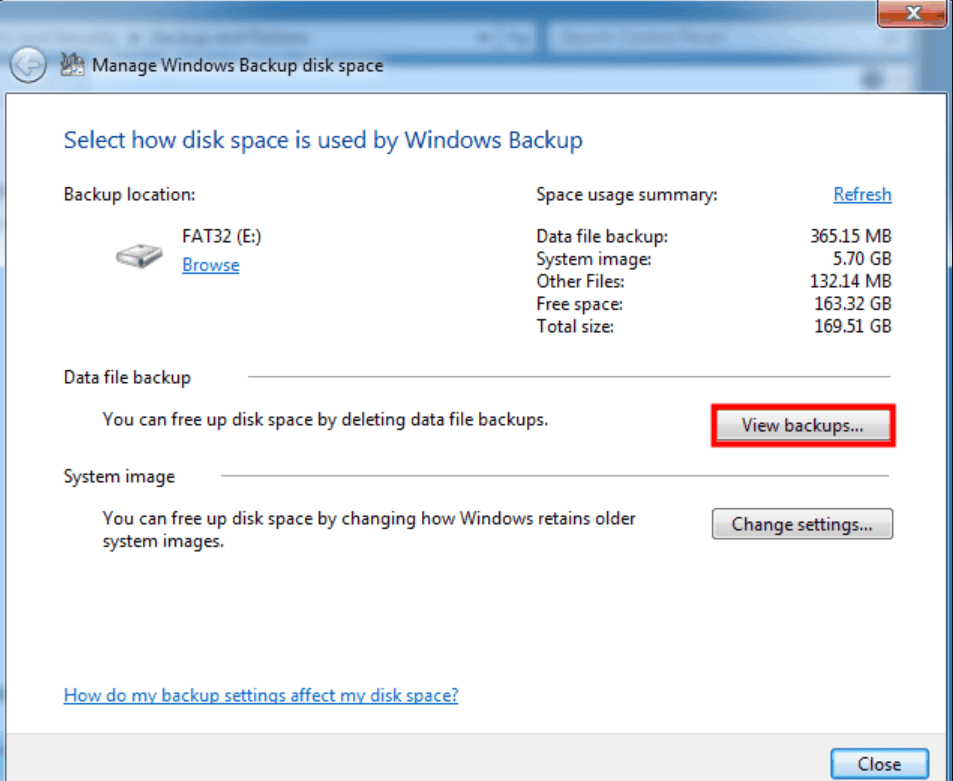
5. Following the above steps, you need to tap on the “Manage Windows Backup disk space” (another new window will pop up in front of you).
6. On the next page, the Windows feature will show you two different options that will help you free up space on the backup disk (Data file backup & System image).
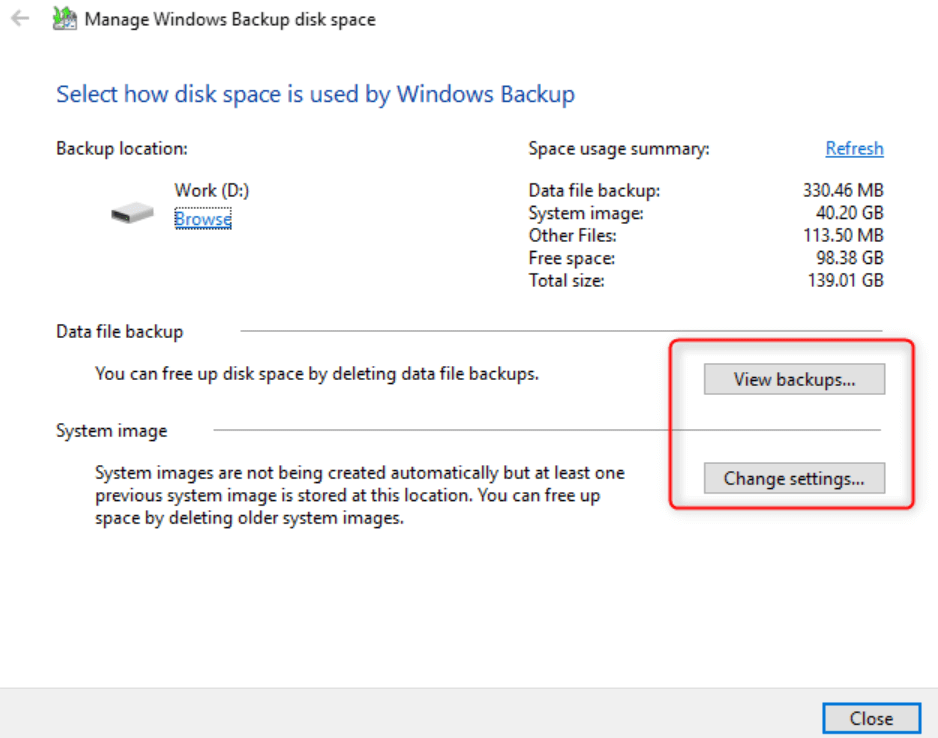
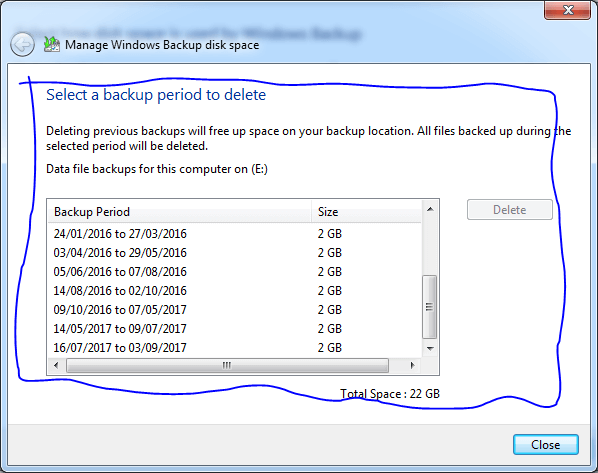
7. So if you go ahead with choosing View backups under Data file backup, the tool will ask you to narrow down the backup period.
8. Please know that selecting the backup period on the page will help you delete the Windows backup files. So please be extra cautious while selecting the period as it must be an old one.
9. Or instead of Data file backup, you choose Change Settings under System image, the process of deleting backup files would differ a bit.
10. On condition that you tapped on Change Settings, another window will appear with different options to make space on your system.
11. Those different options will either let the system manage space for backup history or keep the latest one only so that backup files have as less as possible space covered.
12. The very first option will be selected by default where everything happens automatically. However, it comes with a limited space coverage and once it reaches to 30% capacity (for backup files or system images), it starts deleting older system images automatically.
13. However, if you select the second option of keeping the latest image only, all you need to do is, just choose the most appropriate one and that’s it.
Following the above method will minimize the space that;s been covered by system images and backup files (that are unnecessary). So if you just follow the guidelines and solutions given by Windows only, you will always have the latest system image and everything else will be flushed away. Simple as that!!
Also Read: How Does A Data Recovery Software Work?
Method 2: Delete File History Backups (Old)
One of the amazing features Windows offers to the users is let you backup all your documents including every possible media on the system. And things are so related that as soon as the data increases in those folders, you have to clear out the old backup files before the backup drive is full. Because you can’t take the risk where you aren’t able to create file backups anymore. So in order to keep things flawless, you need to delete old backups to keep the file history backups running as below:
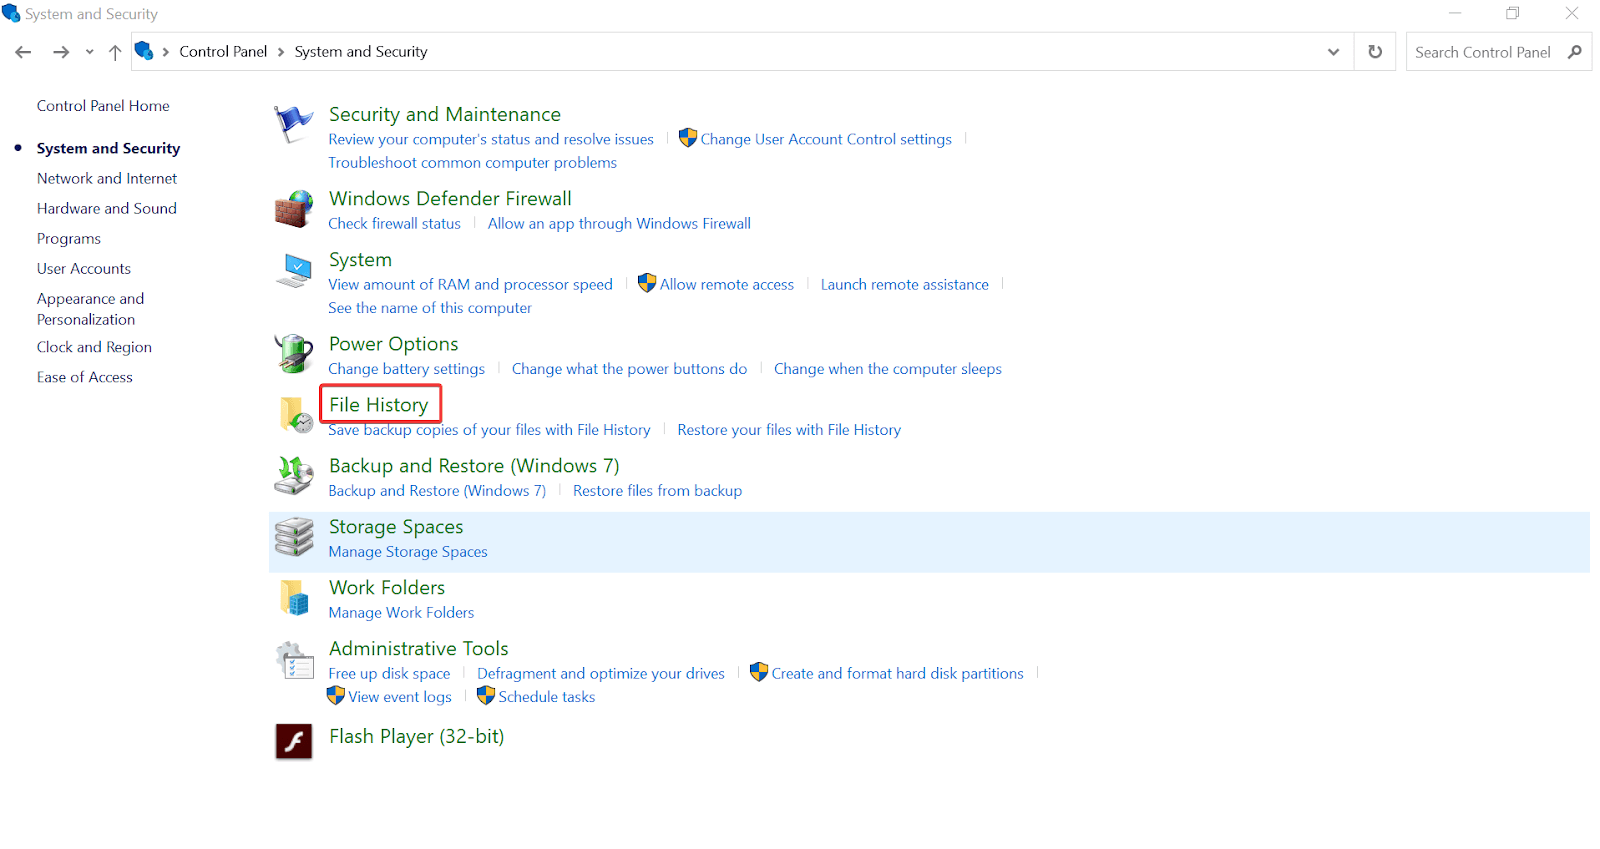
1. Navigate yourself to the Control Panel on the system and tap on the System & Security section.

2. Under System & Security, you need to look for File History and tap on the same.
3. There are good chances that File History would be off so let’s start with toggling on the switch.
4. Here you need to choose the Advanced Settings option in the list (from the left side of the screen).
5. Another window will pop up where you need to look for the Clean up versions command and once you find it, tap on it.
6. A new small confirmation window will pop up where you need to choose the appropriate option among the options in the list.
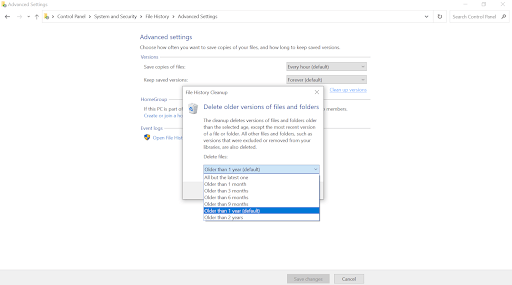
7. Post selecting the option, tap on Clean up and within a while, your system will again have more space than before.
How to Manage Windows Backup Files Properly
Why does things go haywire when it comes to managing the backup files is because we cannot identify which one to keep or remove. So first of all, you need to create the backup in a way that you can segregate them easily. To do so, we highly recommend you go with Right Backup from Systweak.
Yeah!! A third party tool or software that’s one of the most effective and reliable software for your media files on Windows 10 PC. All you need to do is, go to the official website and download Right Backup on your computer.
Click Here to Download Right Backup


Considering that you have successfully downloaded and installed Right backup on your system, let’s go ahead and create proper and managed backup first.
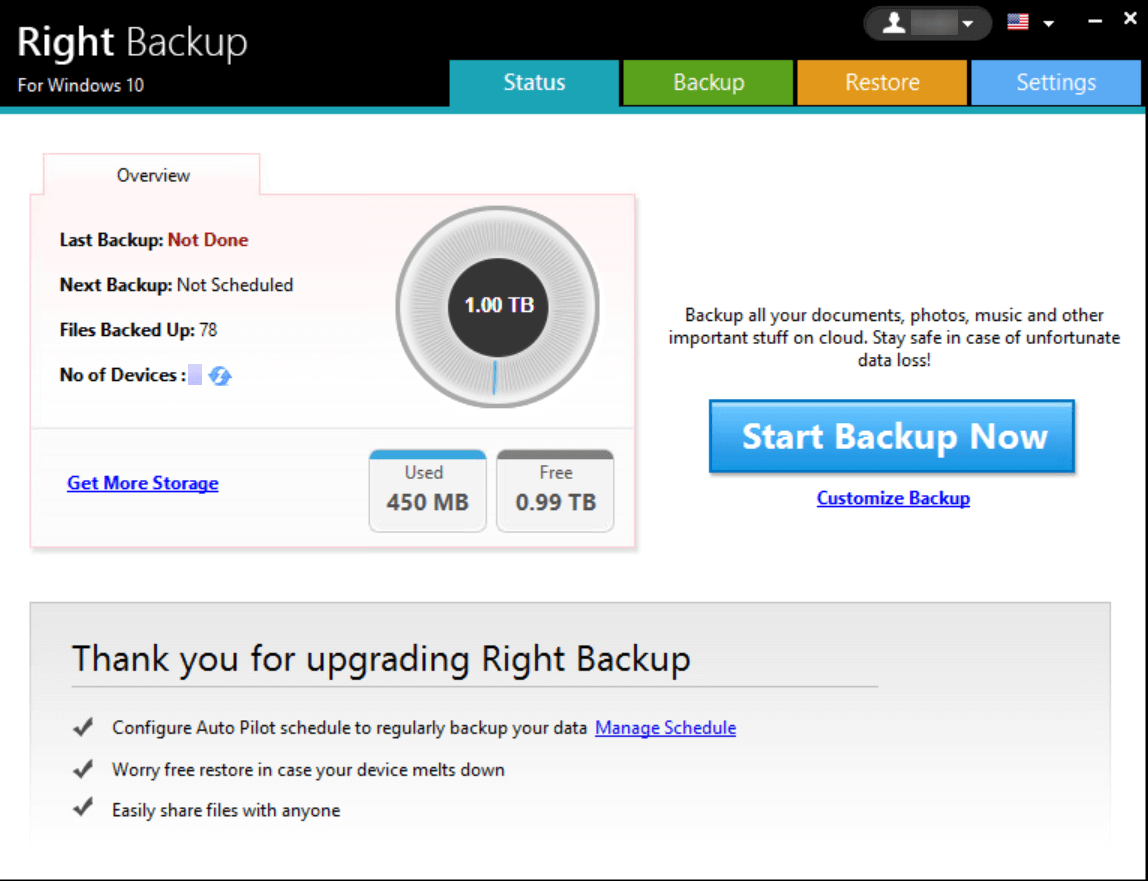
1. On the above homescreen, you need to tap on Start Backup Now and it will auto analyze everything that needs to be backed up.
2. Or else, you can tap on Customize Backup and choose the location and files that you wish to create a backup of.
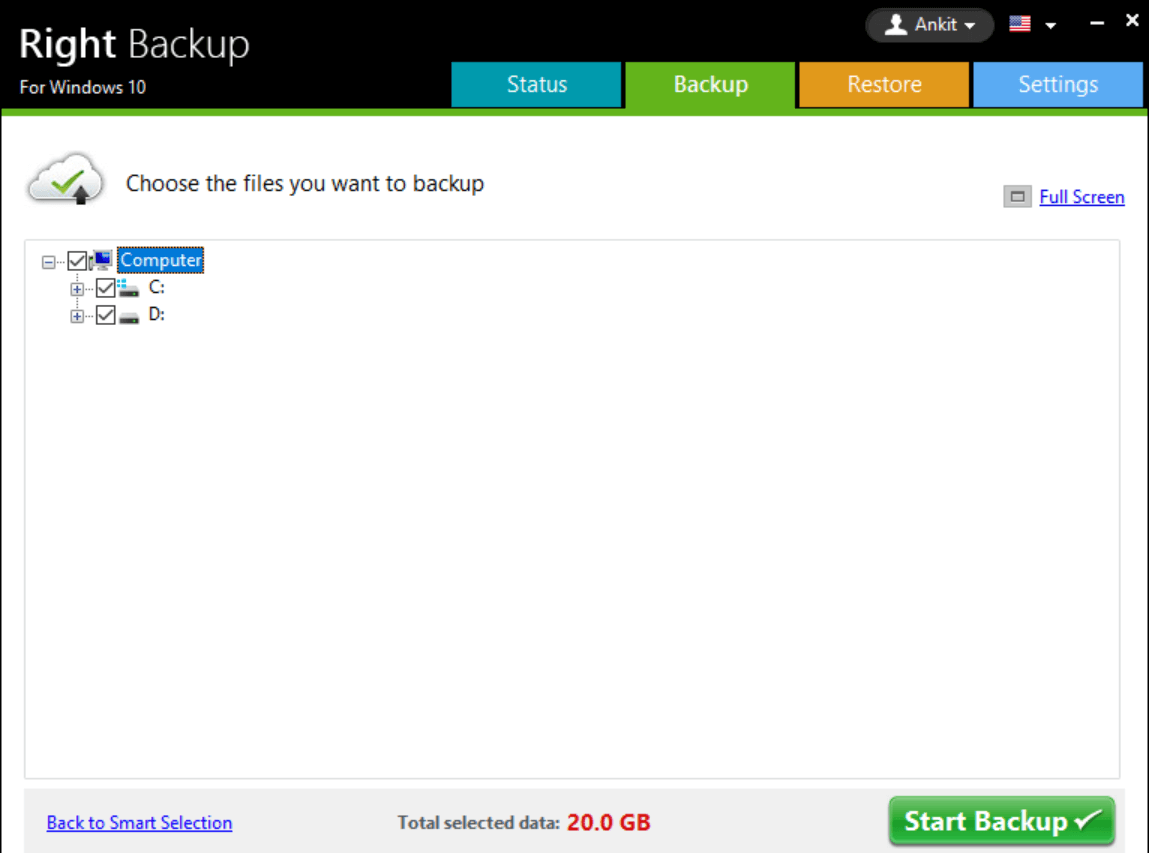
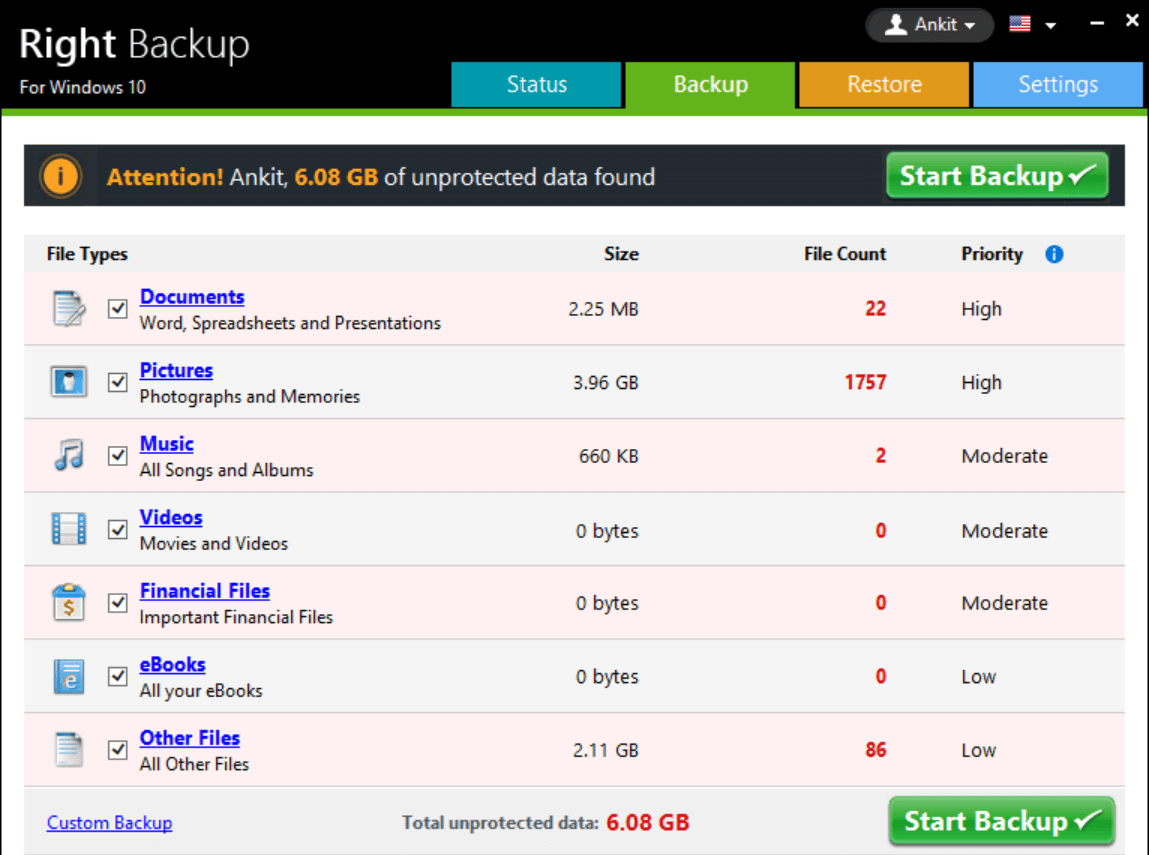
3. So let’s start with tapping on Start Backup Now and let the tool segregate every one of those media sections properly (along with every other detail that’s required).
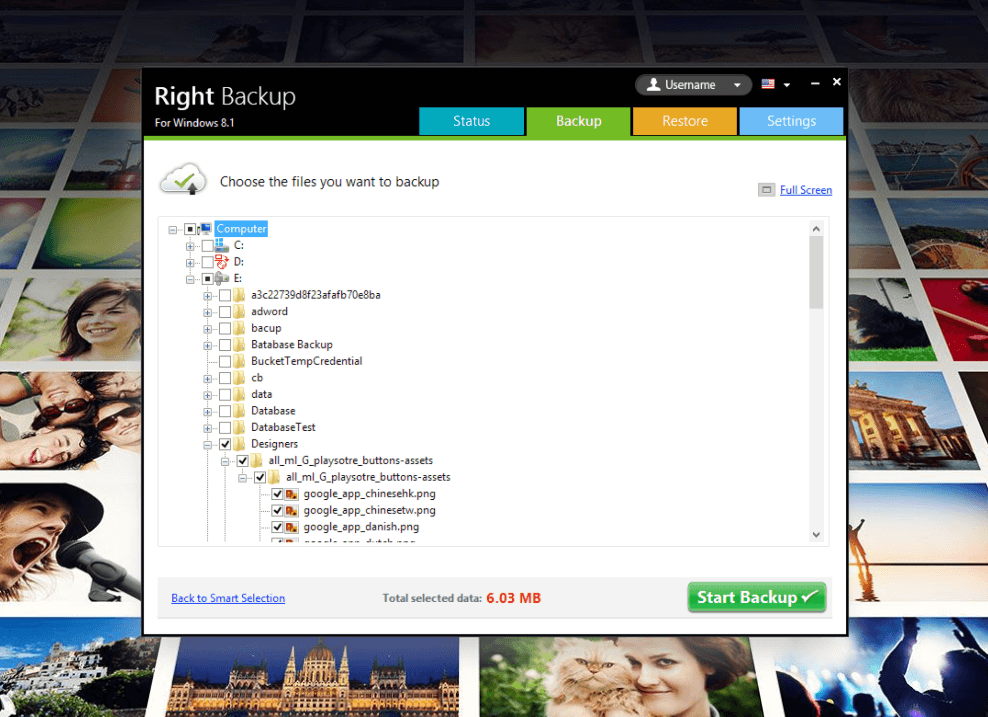
4. From the list, if you wish to uncheck anything, feel free to do so and after the final selection, tap on Start Backup.
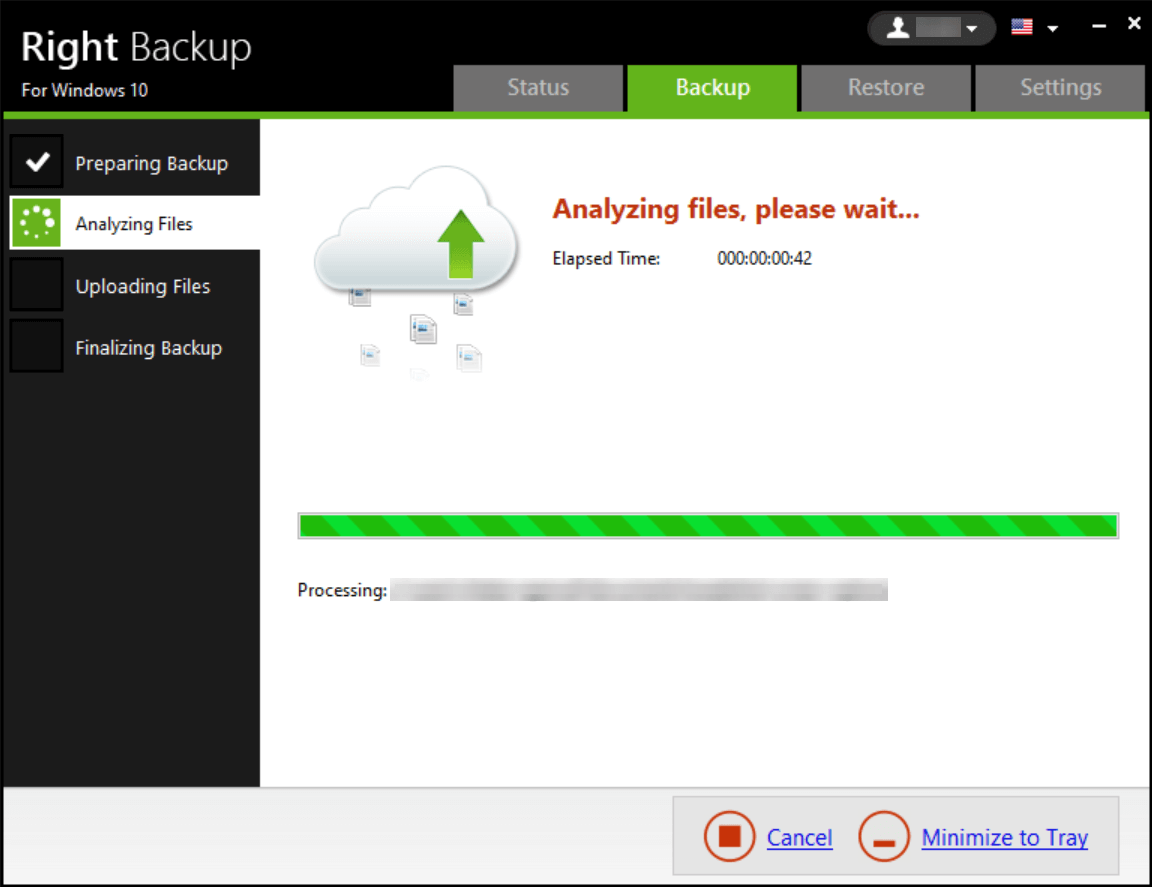
5. Right Backup will start analyzing files and soon, the backup process will be completed (going through different phases of uploading and finishing it up).
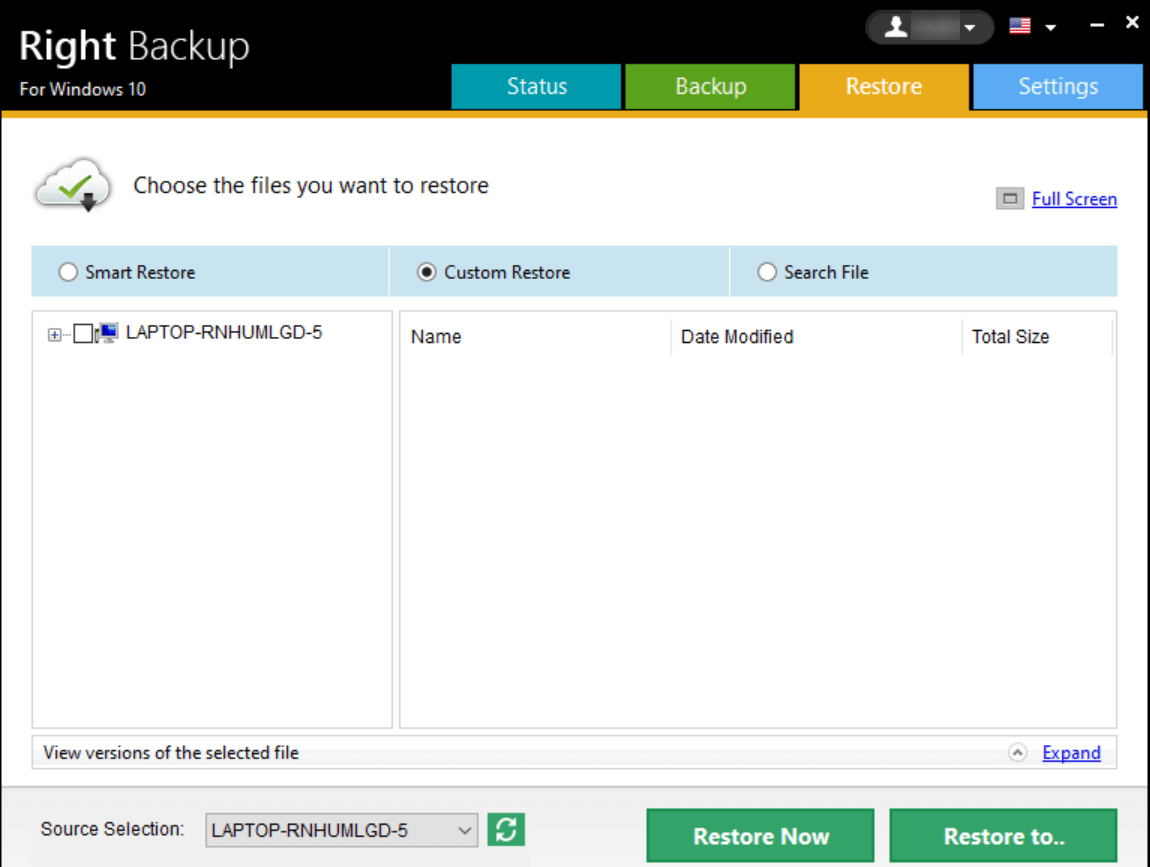
6. After successful backup, you can restore the backup files on whatever path you wish to in simple ways.
7. Just tap on the Restore tab and go through the easiest navigation to select the backup file to restore them onto the particular location (Restore to.. and choose the drive).
Now that we are assured that the backup files have been saved on an external drive, we can easily delete one that’s stored in the system. Because there is no use of keeping it onto the system as an unnecessary file. Whenever or if your system goes through a situation where you have lost all your important data, you can always access the external drive to get back those files that had been lost or deleted (accidentally).
So backing up files onto the system and transferring them to the external hard drive is extremely important. As once you lose everything that’s on the system, there are chances that backup files will also vanish. However, if those are saved onto the external hard drive, you might not lose the data and get everything back just by connecting the same to the system in no time.
And don’t forget about the Auto Backup Scheduling that will be amazingly convenient for you. All you need to do is, tap on Manage Schedule (onto the homescreen) and it will lead you to the above mentioned page.
According to your convenience, you can choose the date, backup type, time, and other factors. And after finalizing everything, tap on Apply which will help you get the backups done automatically without manual interruptions.
Wrapping Up
Deleting backup files on your system is as important as creating the backup (system image or backup files). And what if all those things have been scheduled and pre-decided so that you won’t have to worry about the backup. However, creating too much backup and not deleting the unnecessary files can pile up files from KBs to MBs and then GBs. So you need to be extra cautious to keep deleting backup files as soon as you create the latest one. Doing so will keep a track of the latest backup files or system image files and it will be easy for the user to access it as well.
Go through the above methods to delta the backup files as well as Windows system images in the easiest ways possible. And don’t forget to use the Right Backup tool to create managed backup and restore files to the external hard drive to keep everything flawless and smooth.
Next Readings:
What To Do When Windows Defender Keeps Deleting Files?
External Hard Drive Is Not Showing Up On Windows 10?
Fixed – Can’t Access Device Manager In Windows 10


Mansi Vijay
I think using a professional file recovery tool is the best bet to manage files.