Are you getting 100% disk usage notification on your Windows 10 machine? Is your computer’s performance slow and sluggish in spite of a new Windows 10 device? Thinking, what’s going on?
Worry not, we will help you fix 100% Disc Usage on Windows 10.
Windows 10 100% Disk Usage: Resolved!
Living life to the fullest is a great philosophy for you but not for your hard disk. Therefore, when you get 100% disk usage notification don’t ignore it instead find the culprit and take immediate action.
To know what can make system using 100% disk and how to fix 100% disc usage on Windows 10 read further.
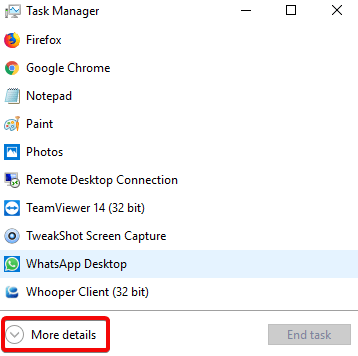
Before we begin let’s learn how to open Task Manager. As it will help us to know the root cause of 100 percent disk usage problem.
Right click on the Windows TaskBar > Task Manager > Click on down arrow More details > Process > Disk.
Ways to fix Windows 100% disc usage problem on Windows 10:
List of Contents
- 1. Check Disk for error
- 2. Check your PC for viruses or other threats
- 3. Disable Windows Search – Boost Windows 10 Performance
- 4. Disable Service Host Superfetch
- 5. Check for Flash and disable it
- 6. Tweak Skype Settings
- 7. Fix AHCI Drive
- 8. Steam can cause 100% disc usage
- 9. Disable Diagnostic Tracking in Windows 10
- 10. Check Windows Update for High Disk Usage
- 11. Reset Your Virtual Memory
- 12. Activate High Performance Mode
- 13. Install the Latest SATA Drivers
1. Check Disk for error
When you get 100% disk usage notification the first thing to do is to head to Task Manager.
To do so, right-click the Taskbar > Task Manager > More details > Process > Disk.
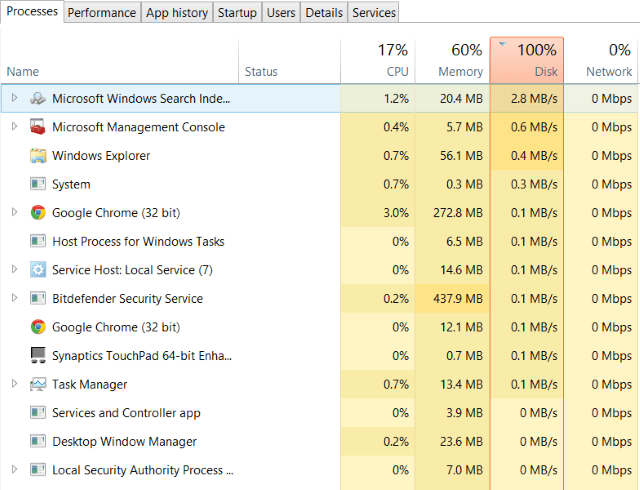
Here, you’ll be able to see Disk column in red indicating there’s a problem with hard disk.
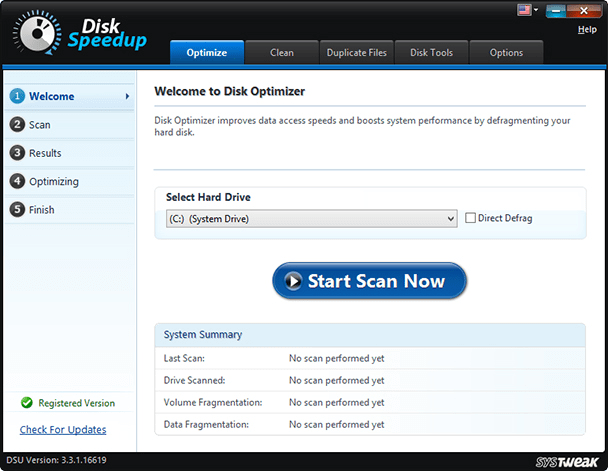
To resolve this you can either use Disk Speedup a tool that will check disk for errors, repair file system issues, defragment hard drives, wipe out junk, and make your hard disk last longer. Or can follow the manual steps to fix disk errors.

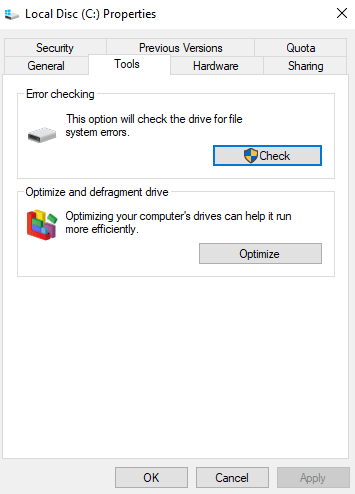
Open Windows Explorer > This PC > unhide disk partitions > right-click on C: > select Properties.
In the new window that opens click Tools tab > click on Check under Error checking. In the new window click Scan drive, wait for the scanning to finish. You may need to restart the system for full disk repair. This should help in fixing the error.
2. Check your PC for viruses or other threats
If you see your drive constantly working at or near 100% without any reason check your PC for viruses or malware infections. As malware, viruses are one of the common reasons for 100% disk usage on Windows 10. You can use Microsoft’s default Windows Defender or can use your trustworthy antivirus program to scan your system for malware issues:
Settings > Update & Security > Windows Defender > Open Windows Defender > Full
However, if you do not have one try using Systweak’s Advanced System Protector. A tool that scans your system drive for any problems. This might take a while as your drive is near 100%, so wait for the scan to finish.

If threats are detected by Advanced System Protector clean them and them and reboot the PC. After this check your drive’s performance. Hopefully, disk 100% on Windows 10 should be resolved, if not, then malware wasn’t the reason, so read further.
Also Read: How To Fix Mouse Not Working On Windows 10 PC
3. Disable Windows Search – Boost Windows 10 Performance
A bug in Windows 10 results in search loop that can increase the load on system drive resulting in 100% disk usage message. Therefore to prevent this from happening and to fix disk 100% on Windows 10 open elevated Command Prompt. For this click Start button > type cmd > right-click > Run as administrator.
Here type net.exe stop “Windows search.” This will stop Windows search command.
In addition to this, disable Windows Search or Indexing. To do so, press WIN+R > type services.msc > press Enter. Here, look for Windows Search > double-click on it. This will open Windows Search Properties window. Here under Startup type click down arrow and select Stop.
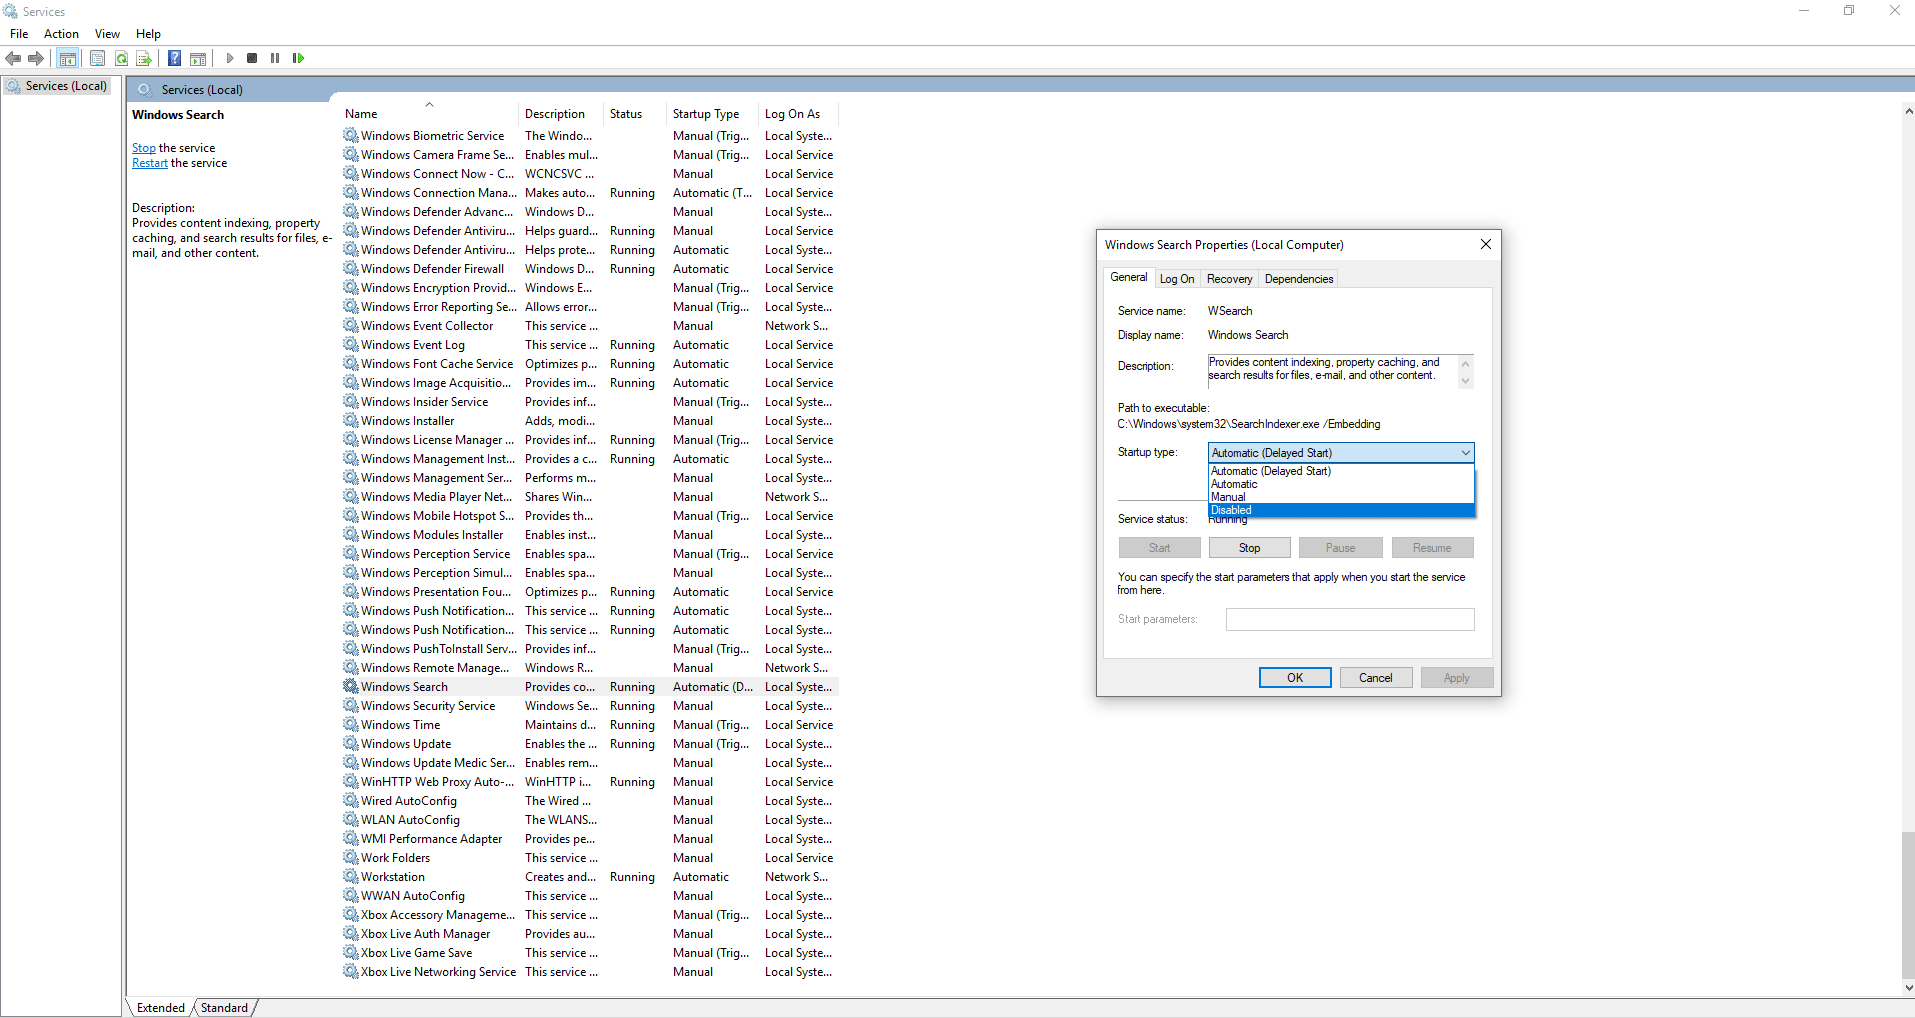
Click OK to save changes.
This should improve your Windows 10 performance. If not, let’s move to the next method.
4. Disable Service Host Superfetch
The next thing or another Windows 10 feature that can cause Windows 100% disk usage is service host superfetch.
To handle this, open elevated Command Prompt (follow the steps explained above) and type: net.exe stop superfetch

Wait for a while so that the command can be processed. Now see if the problem is resolved.
5. Check for Flash and disable it
Another common reason of 100% disk usage on Windows 10 is Flash. Although, Adobe plans to kill this multimedia plugin in 2020, but until then you’ll need to force kill it. To do so, open your Google Chrome web browser menu > Settings > Show advanced settings locate Privacy section > click on Site settings > search Flash > toggle it to Block sites from running Flash.
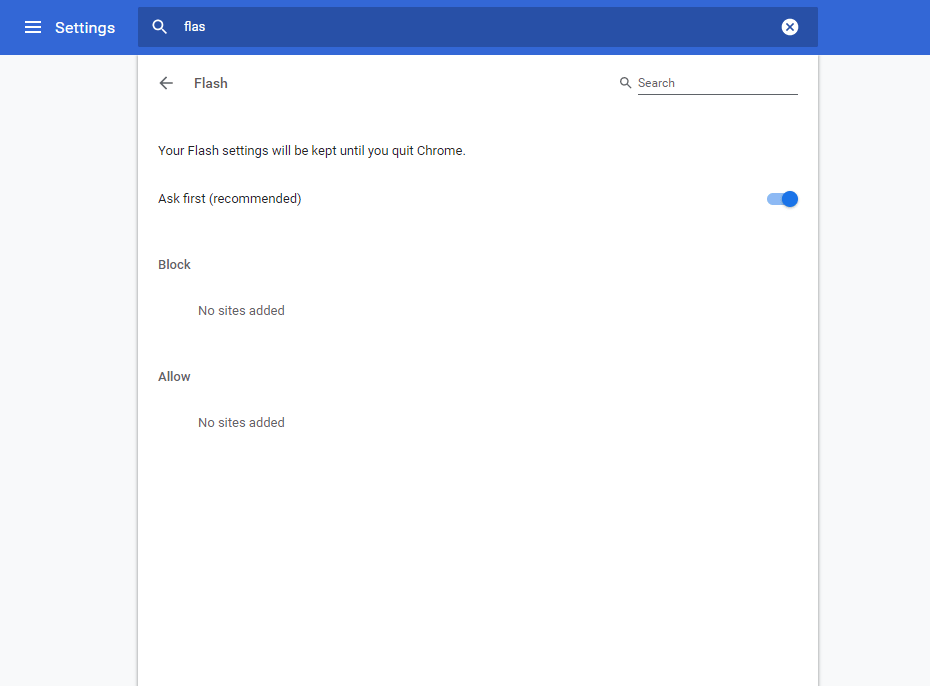
Restart the browser and check if disk running at 100% notification has disappeared or not.
If this doesn’t work, try using a different web browser. See our guide best web browsers for Windows 10.
6. Tweak Skype Settings
Skype is a widely used application by Windows 10 users and sometimes it is the reason for 100% disk usage on Windows 10. To find out if Skype is behind it, you’ll need to check if Skype is running. If running head to Task Manager to Quit the application.
Next, press WIN+R > paste: C:\Program Files (x86)\Skype\Phone\ > Ok.
Here look for Skype.exe > right-click > Properties > Security tab > click Edit > select ALL APPLICATION PACKAGES.
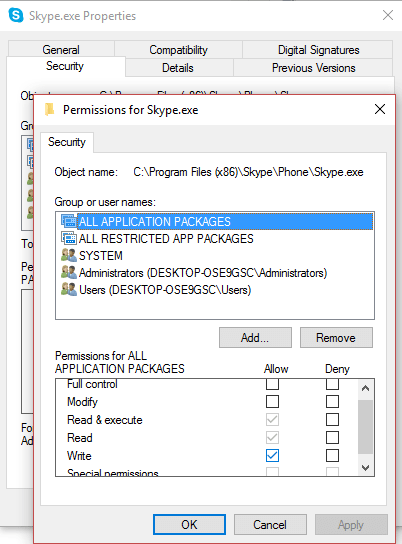
Check the box next to Write > click Apply > Ok. Head back to see if things change.
Nothing changed? 🙁 Continue reading…
7. Fix AHCI Drive
Sometimes system drivers can cause 100% disc usage on Windows 10 as they are incompatible. One such driver is StorAHCI.sys. A driver intended to connect storage devices to PC or laptop through Advanced Host Controller Interface PCI-Express.
Since you are reading this, it seems the problem is not yet resolved. To fix problem StorAHCI.sys driver problem you can use Advanced Driver Updater. A tool that will help you fix all driver related problem.
However, if you want to resolve the firmware bug in StorAHCI.sys driver manually open Device Manager.
For this open run window by pressing Windows + R key. Next type devmgmt.msc and press enter. Now under Device Manager window unhide IDE ATA/ATAPI Controllers. If you see AHCI Controller entry, double-click it > click on the Driver tab > Driver Details.
If you see C:\Windows\system32\DRIVERS\storahci.sys, it means your Windows 10 is affected by the bug. Close driver details box and click on the Details tab. Here under property click the down arrow and select Device instance path > right-click on the value list and Copy it. Paste the content in Notepad.
Next, open registry editor via Run Window. Press WIN+R > type regedit. Navigate to: HKEY_LOCAL_MACHINE\System\CurrentControlSet\Enum\PCI\.
Now press CTRL+F to open the find window and paste the copied string to open correct AHCI Controller, followed by the random number.
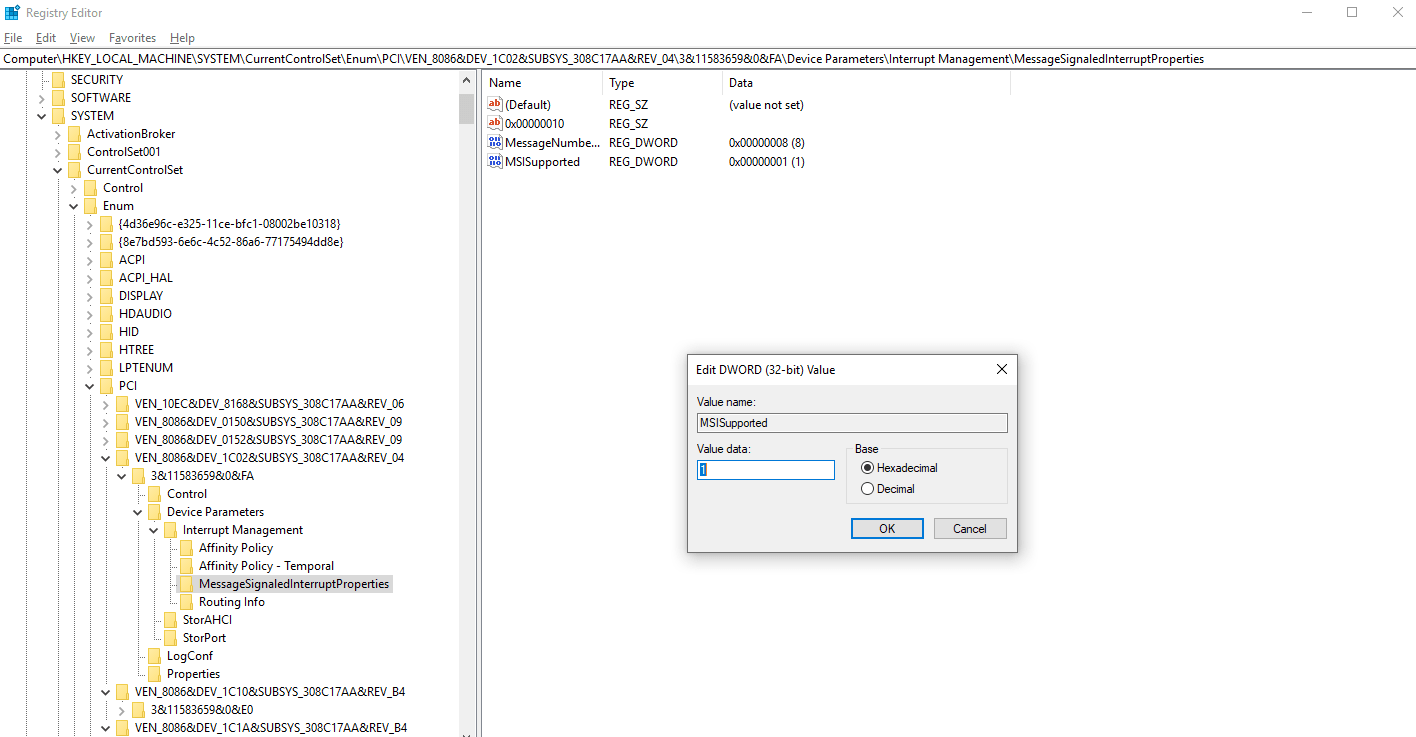
Next, unhide Device Parameters\Interrupt Management\MessageSignaledInterruptProperties you should see MSISupported listed in the right-hand pane. Double-click it, and change the Value data: to 0. Click OK and restart Windows.
Check if the problem is resolved. If this doesn’t work then something else might be the reason behind 100% disc usage message.
If you are a gamer and use Steam then you need to check it as it can be maxing out the HDD.
Also Read: How To Fix Bluetooth Not Working on Windows 10?
8. Steam can cause 100% disc usage
To resolve 100% disk usage caused by Steam clear Steam cache.
To do so, make sure Steam is not running. If it is running use Windows 10 Task Manager and force close Steam software.
Next, open Run window by pressing WIN+R, here enter steam://flushconfig

You’ll see a dialogue box, asking you to proceed with deleting content, click OK to proceed.
Note: Deleting cache will have no effect on the games and saves.
9. Disable Diagnostic Tracking in Windows 10
Finally, it’s worth checking out diagnostic tracking in Windows 10 as many a time it has been found to be the cause of 100 disc usage on Windows 10.
To stop this service you’ll need to open elevated Command Prompt.
For this, click Start > type cmd > right click on the first result Command Prompt > Run as administrator.
Right.
Now in Command Prompt window type sc config “DiagTrack” start= disabled
sc stop “DiagTrack”
This will stop the running service.
![]()
In addition, to this go to Settings > System > Notification & actions. Here toggle off Get tips, tricks and suggestions as you use Windows.
![]()
This will surely improve the performance and will resolve the issue.
Apart from these possible fixes try implementing these following fixes too.
Windows Update, Virtual Memory, High Performance Mode are also some of the possible reasons that cause 100% disc usage on Windows 10.
10. Check Windows Update for High Disk Usage
100% disc usage notification that you see on Windows 10 can be caused due when Windows Update refuse to download.
To resolve this close all the running processes—shut down all running application and wait for the files to download. After the download your PC’s might require a restart.
11. Reset Your Virtual Memory
Sometimes virtual memory – combination of RAM and hard disk space also causes 100 percent disc usage message on Windows 10. To fix his you’ll need to reset virtual memory for this follow the steps below:
- Press Windows + Pause/Break keys together to open System screen.
- Click on Advanced System Settings in the left pane.
- In the new window click on the Advanced tab > under Performance click Settings.
- Here you’ll see another Advanced tab, with a section labeled Virtual memory. Click Change and uncheck the checkbox next to Automatically manage paging file size for all drives.
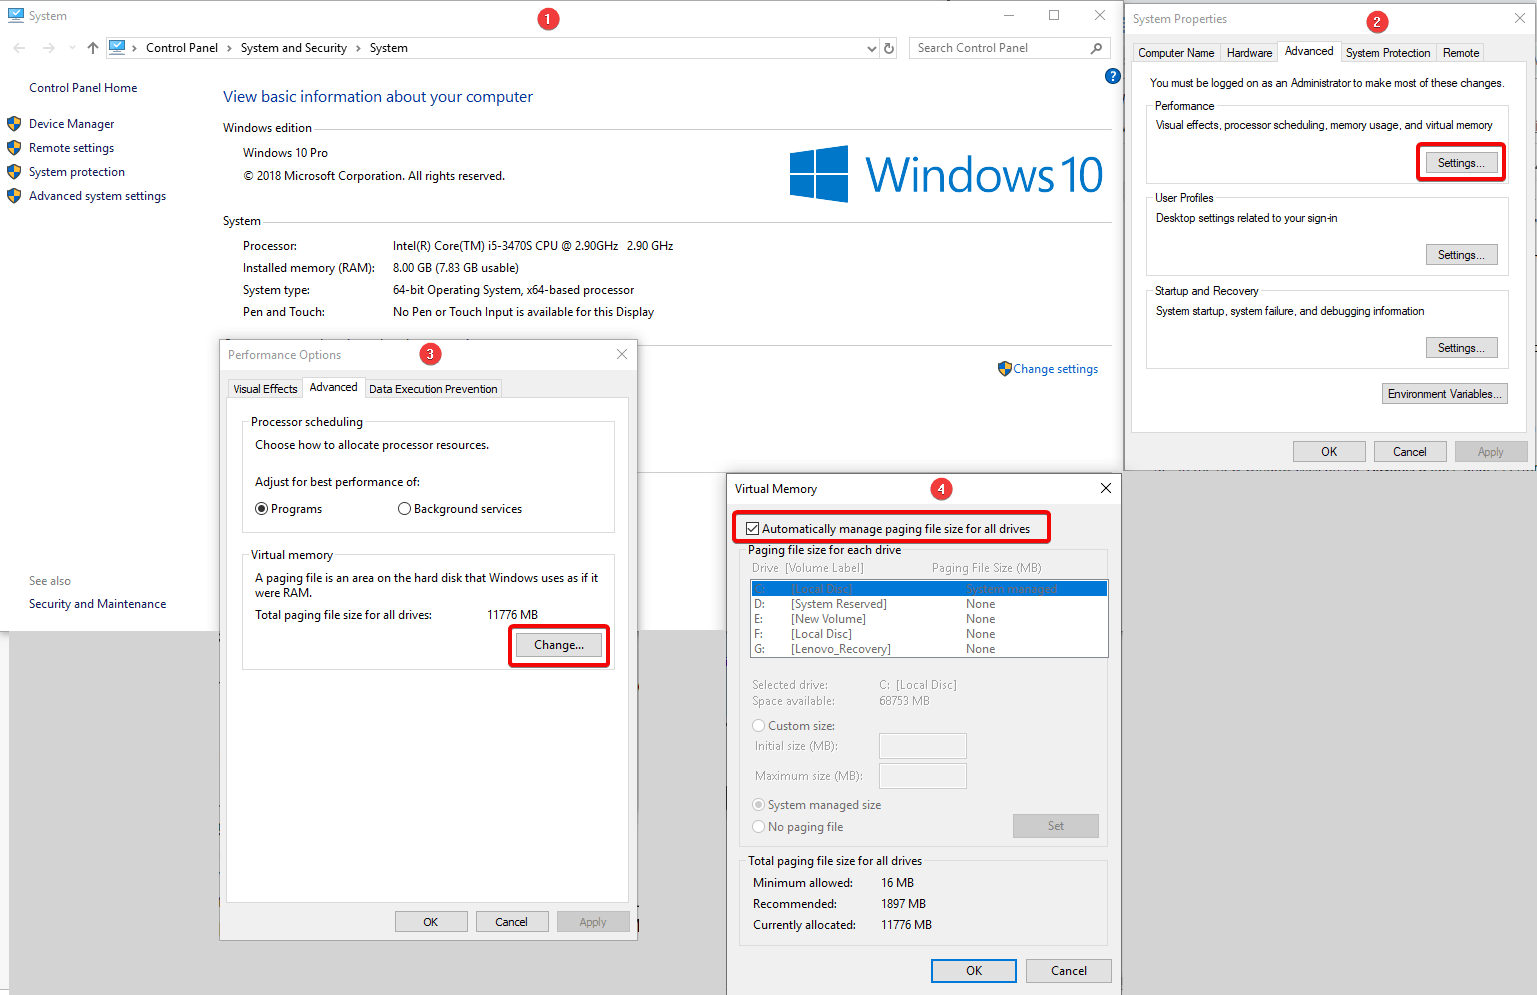
Now you can customize the size of virtual memory. For this select the drive on which Windows is installed, it is (usually C:) > Custom size. Here, add an Initial size and Maximum size; both are measured in MB rather than GB. Once done click Set > OK to continue.
After this clear previous data stored in virtual memory. For this press WIN+R to open the Run window. Here, enter temp to open temp directory. Now select all the file and tap Delete to remove all temporary files.
12. Activate High Performance Mode
One final thing you should try is to switch to high performance mode. Usually standard power modes are behind the 100% disk usage error message. Therefore, to fix it switch to high performance mode. For this press WIN+X > Power Options. Now click Additional power settings > High performance > OK.

If you don’t see this option create a custom power plan by click on Create a power plan, option present in the left pane. Select High performance > give a name to the power plan > tweak any personal power settings. This should fix 100% disk usage issue.
13. Install the Latest SATA Drivers
A storage device driver can cause 100% disk usage error, and as Windows 10 uses SATA connections for hard drives, SSDs, and optical drives. If the drivers aren’t up to date, the disk usage error can occur.
To fix this upgrade to latest SATA drivers.
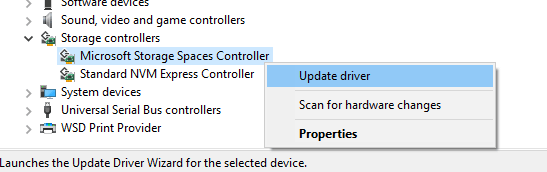
For this press WIN+X > select Device Manager > expand Storage controllers > identify the correct controller for your SATA devices > right click > Update driver > Browse my computer for driver software option > Let me pick from a list of available drivers on my computer > choose Standard AHCI Controller. You’ll now be able to see the difference in Windows 10 performance.
To bring this to effect restart your system.
If you can’t try using Advanced Driver Updater, a smart and advanced tool to update to most compatible and up to date driver.
In the end we can say under normal usage, disk load cannot be close to 100%. But if you ever come across this notification you can try the fixes described above to resolve 100% disc usage message on Windows 10.


Leave a Reply