
VPN is such an important component if you are surfing the internet. It helps you preserve your online identity by concealing your IP address and uses algorithms because of which no one can track your web activity. But, just like any other technology, even a VPN has its share of problems. One such problem is VPN error 807 on Windows 10.
What Is VPN Error 807?
A VPN error 807 may occur on your Windows 10 PC when there are latency issues with your internet because of which you might lose connection to the VPN server. The error could also appear if the VPN server has reached its maximum capacity.
How To Solve VPN Error 807?
1. Try A Different VPN Service
Even if after trying every trick in the hat, you still get VPN Error 807 on Windows 10, you can try switching to another VPN client. Here is a list of some of the best VPNs for Windows 10. You can choose a VPN like Systweak VPN which is easy to setup and exhibits the following features:

- 4500+ servers in 53+ countries spread across 200+ locations
- No DNS leaks
- Military grade AES – 256 – encryption
- Presence of IKev2 and Open VPN protocols
- Stringent no-logs policy
- Availability of kill switch
- Supports Windows 10/8.1/8/7 (both 32 and 64 bit)
Price: $ 9.95 per month and $ 71.40 per year. If you purchase the yearly subscription, you get 3 months free
Click Here to Download Systweak VPN

Read Full Review of Systweak VPN
2. Check Firewall
Sometimes the Windows firewall may not allow your VPN to pass through because of which VPN error 807 might occur. Disabling your firewall may help you resolve the issue. To disable the firewall, here are the steps –
Method – 1: Disable Firewall
Disabling firewall can be an option if the connection between your VPN and computer was interrupted due to some reason –
1. In the Windows search bar type firewall and choose Windows Defender Firewall
2. When the Windows Defender Firewall window opens select Turn Windows Defender Firewall on or off from the left hand pane
3. Click on Turn off Windows Defender Firewall (not recommended) fro both Private network settings and Public network settings
4. Click OK to apply and save changes
Now check if you have been able to fix VPN Error 803. If yes, it means the issue was caused by Windows firewall.
Method – 2: Add Exception
Don’t want to disable firewalls? Not an issue, you can instead add your VPN in the exclusion list which should help you form the connection between your computer and your VPN –
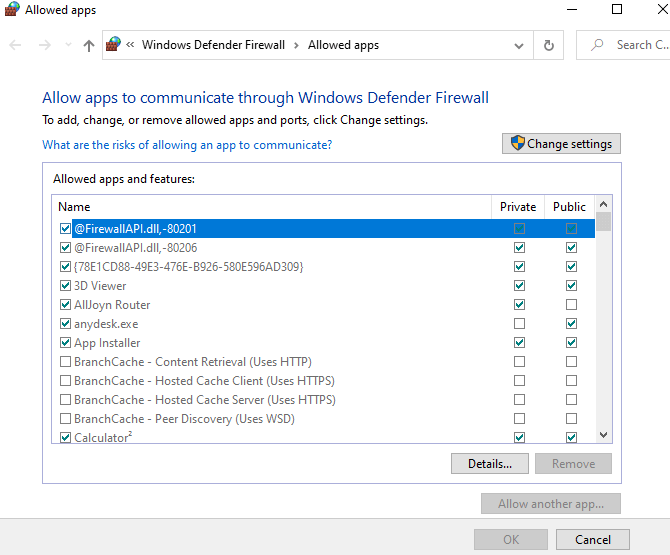
1. In Windows search bar type Allow an app through Windows Firewall
2. Click on Open from the right-hand side
3. You should land on the following path –
Control Panel\All Control Panel Items\Windows Defender Firewall\Allowed apps
4. Click on Change Settings and then opt for Allow another app
5. Choose your VPN and then click on Add
6. Click on OK
3. Run A DISM Check
Sometimes VPN error 807 may occur on Windows 10 if there is a presence of corrupted system files. Such corrupted files can be resolved by performing DISM scans –
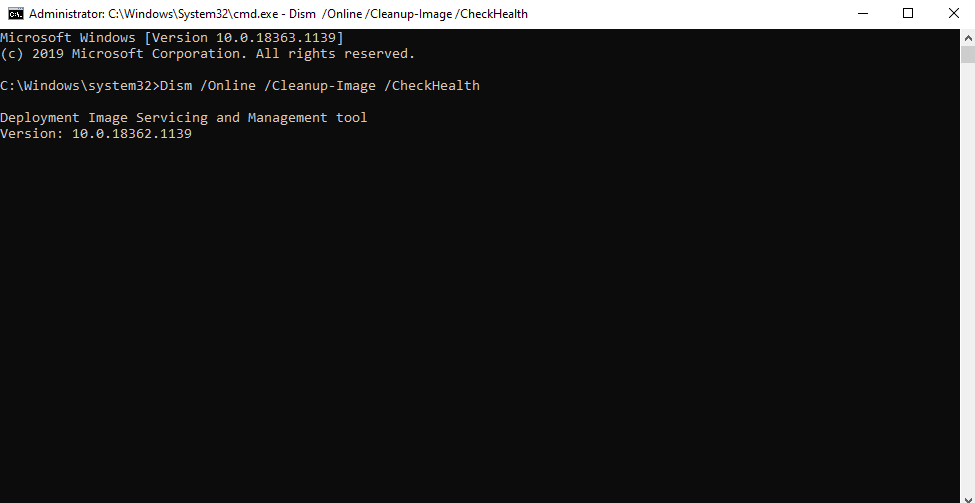
1. Open the Run dialog box by pressing Windows + R keys and type cmd
2. Select Run as administrator from the right-hand pane
3. When the Command Prompt window opens type the following command
Dism /Online /Cleanup-Image /CheckHealth
4. If the above step returns any corruption sign, you might be required to do a more comprehensive scan. For this type Dism /Online /Cleanup-Image /ScanHealth which will check for wider corruption scope and report any errors in a log file. You can find a log of errors at – C:\Windows\Logs\CBS\CBS.log or C:\Windows\Logs\DISM\dism.log
5. Last but not the least, to rectify errors and perform repair type or copy paste the below mentioned command in the command prompt –
Dism /Online /Cleanup-Image /RestoreHealth
Note: It is advisable to let the scan finish completely and not terminate it in between.
4. Uninstall And Then Reinstall VPN Service

Even if after performing the above workarounds, you are not able to resolve the issue, you can try freshly reinstalling the VPN. This might be able to help you get over the VPN error 807 on your Windows 10 –
1. Type Control Panel in the Windows search bar
2. Click on Programs and Features
3. From the list of programs click on your VPN
4. Click on Uninstall from the top
5. Visit the official website of VPN and reinstall it
5. Try Changing The Server Location
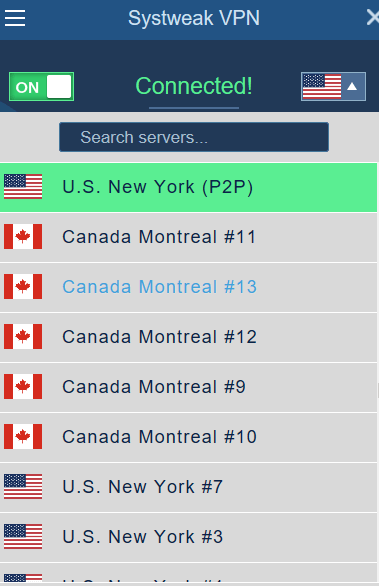
It could be that the server that you are trying to connect is facing some problems and sometimes all it would take to resolve the issue is to change the server location. So, choose another server. More preferably choose a server closer to you.
1. Log into VPN
2. Toggle the connect switch to the right to the right to connect to the VPN
3. From right-hand side choose another server location
6. Tweak VPN Settings
The VPN error 807 can be resolved by making slight tweaks to the security settings of your VPN. More specifically, we shall be making changes to the protocols. So, head to the settings of your VPN and change the connection type to PPTP or Point To Point Tunneling. Now check if you have been able to resolve the issue.
7. Reset Your Network Adapter
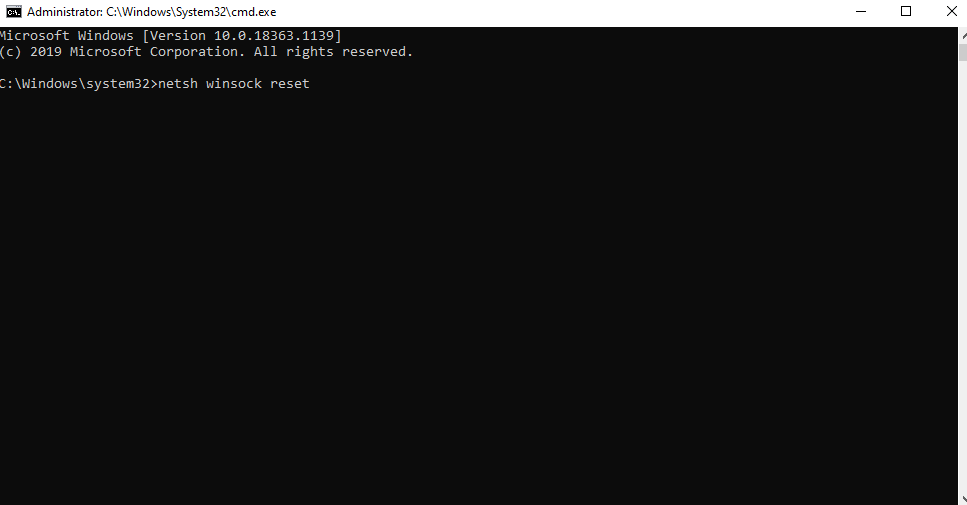
1. Open the Run dialog box by pressing Windows + R keys and type cmd
2. Select Run as administrator from the right-hand pane
3. When the Command Prompt window opens type the following command
netsh winsock reset
4. Restart your computer and check if the issue is resolved
8. Restart Your Router
A simple step that can help you resolve the VPN error 807 is restarting your router. A quick restart would help the router get rid of all glitches which might be causing the aforementioned issue.
Conclusion
Do let us know in the comment section if the above workarounds helped you form a connection and helped you resolve VPN error 807 on Windows 10. For more such content keep reading Tweak Library.


Leave a Reply