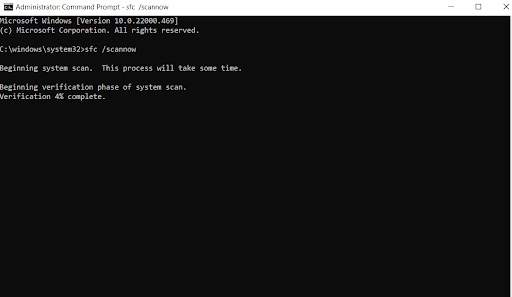
The SFC command in the command prompt is considered a panacea for various issues. More specifically, the sfc /scannow command scans all protected system files and replaces all corrupted files with a cached copy. It helps resolves issues such as but not limited to –
We’d again like to mention that these are just a few of the many instances where the sfc /scannow command in the Command Prompt is used.
However, while using the SFC command, many users get the “Windows resource protection found corrupt files but was unable to fix some of them” error. If you are facing the same issue, you have come to the right place. Here we will look at possible ways you can deal with the issue.
But, before delving into the solutions, let’s quickly have a look at some of the reasons due to which this issue may surface. These reasons would also frame the base for our solutions as well –
Also Read: System Service Exception Stop Code in Windows 10
Reasons for “Windows Resource Protection Found Corrupt Files” Issue –
- Bad sectors are often associated with “windows resource protection found corrupt files” error and here a bad sector removal utility is one of the fast ways to deal with the issue
- False positives returned by your Antivirus software or when the uninstallation of your Antivirus program left remnants. Here an uninstaller software can help get rid of Antivirus completely
- The corruption is beyond the SFC command in a normal environment as such Windows Recovery Environment can be brought into force
Also Read: Windows 10 Settings App Not Opening
Fix The Windows Resource Protection Found Corrupt Files Issue
1. Run DISM Command
If the SFC utility doesn’t do the job properly, DISM can be brought into effect. The DISM or Deployment Image Servicing and Management uses the Windows Update component to replace corrupt files. While using the DISM command, we urge you to have a stable internet connection.
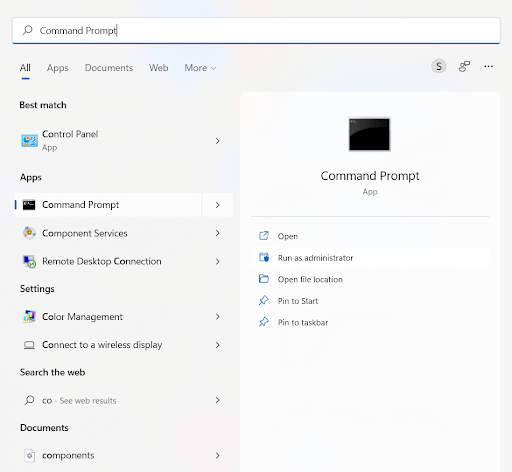
- In the Windows search bar, type Command and then select Run as administrator from the right-hand side

- When the Command Prompt window opens, type
dism /Online /Cleanup-Image /RestoreHealthand press Enter

2. Run SFC and DISM Command In Safe Mode
If either the SFC or DISM command fails to do their job in the normal mode, you can either enter the safe mode or the Windows Recovery Environment and run the command prompt to execute both the DISM and SFC commands.
- Enter Safe Mode
- Enter the DISM command that we have mentioned above
- Apart from that also run the sfc /scannow
Repeat the Same Process In Win RE (Windows Recovery Environment)
You can also run SFC and the DISM command while in the Windows RE environment. In Windows 11 you can reach the Windows RE by –
- Heading to Settings by pressing Windows + I
- From the right-hand side, click on Recovery
- Next to Advanced Startup press the Restart Now button
- When the blank screen disappears and options appear click on Troubleshoot
- Next, click on Advanced Options
- Click on Command Prompt and enter the SFC and DISM commands
Also Read: Issues With Windows 10 Dark Mode
3. Restart Your PC
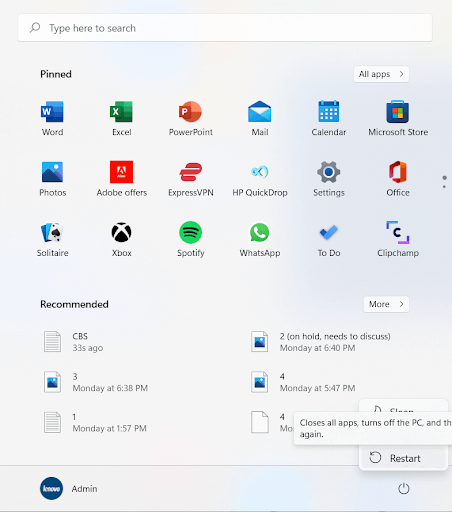
Sometimes you do not advanced measures to resolve the issue. All you need is simply restarting your computer once and you will be surprised that often it fixes many a great problem.
4. Check and Fix Bad Sectors On The Hard Disk
We have already covered a blog on how to repair bad sectors on a hard drive. But, if the emergency is dire, you would need a tool that can fix bad sectors in a snap and one such tool is Disk Speedup.
Disk Speedup is widely touted as one of the best disk defragmenter tools for Windows but it can also fix a myriad of hard disk issues, one of which is bad sectors. To use Disk Speedup –
1. Download, run and install Disk Speedup and select the drive you want to scan
Complete Review on Disk Speedup
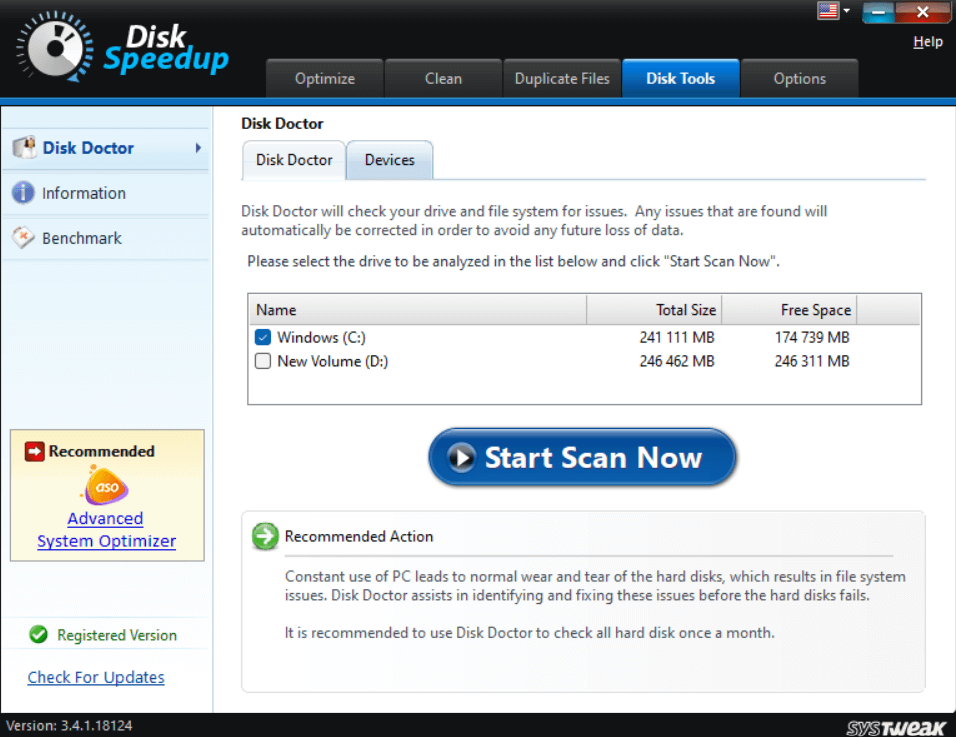
2. Launch the application and then click on the Start Scan Now button
3. Click on the Clean System button
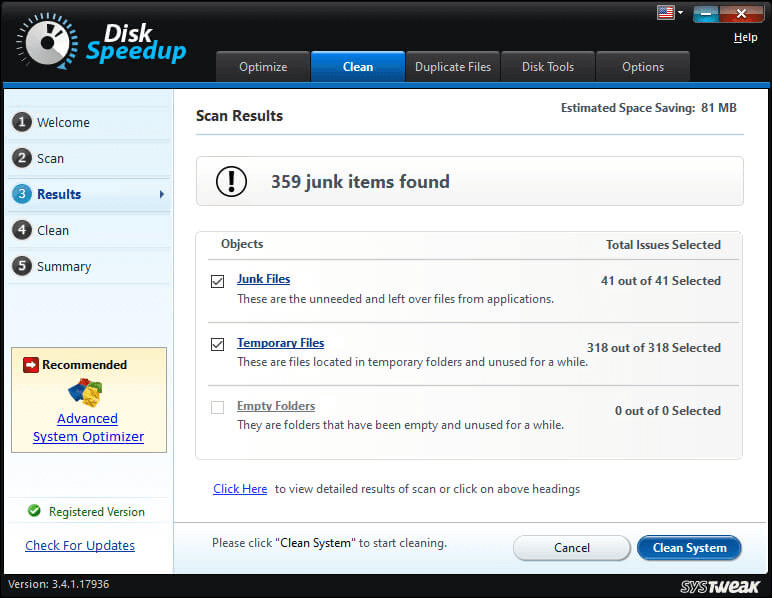
4. You can even click on the Disk Tools tab and follow the on-screen instructions to resolve the issue
Now, check if you have been able to resolve the “Windows resource protection found corrupt files” issue.
5. Check CBS.log File Manually
If you look closely into the error you may find a line saying that Details are included in the CBS.log…
Let’s listen to the error and see what can be done next. By that we mean we shall be entering the CBS.log file location and look into the matter –
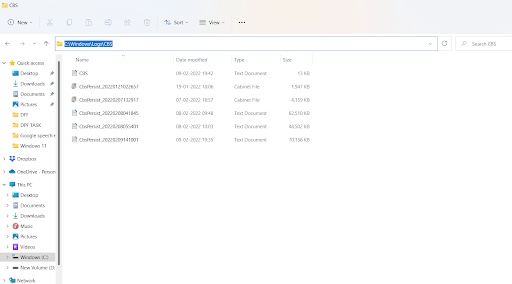
- Open your File Explorer by pressing the Windows + E key combination
- In the search bar type C:\Windows\Logs\CBS and press Enter

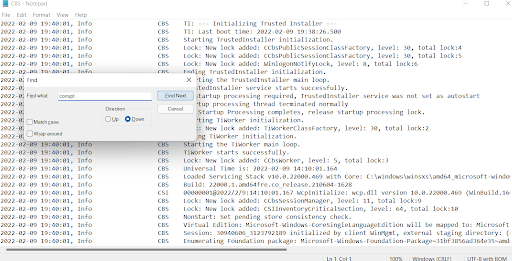
- Double-click on the cbs.log file and press CTRL+F and type corrupt. This way you will be able to find all those corrupted files which the SFC command couldn’t rectify

- For a particular kind of corrupt file, you can head to the search engine and ascertain how you can resolve the issue for that particular corrupt file
6. Did You Try To Uninstall Your Antivirus?

What’s with that? You might ask. You may even wonder that yes, I did uninstall and the Antivirus is nowhere to be seen, then what? Sometimes, things may not be what they seem. It could be that your installation was incomplete and hence you are getting false positives. To rectify this, first, open the file location of your Antivirus and delete all the files present there. Secondly, employ an uninstaller utility that will further ensure that you have completely uninstalled the Antivirus program with no remnants whatsoever.
Wrapping Up:
Were you able to fix the “Windows resource protection found corrupt files” issue? If yes, do let us know which of the above ways helped you fix the issue. For more such tech-related content and more exhaustive troubleshooting guides, keep reading Tweak Library.




Leave a Reply