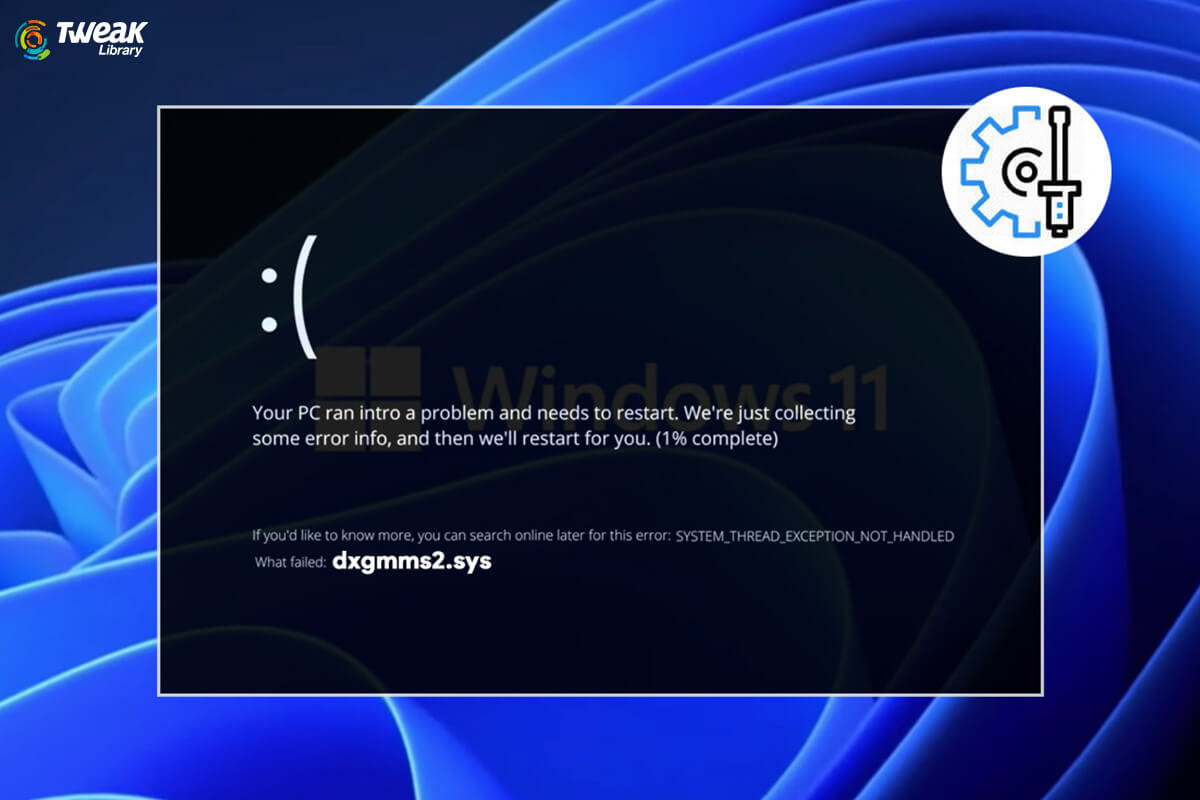
Going by the title of this post, the first question that might have intrigued you is what is dxgmms2.sys? And, if it is an error? Dxgmms2.sys is a crucial Windows file that helps render graphics on your system. You might now have a brief idea that graphics are crucial when you are watching videos or playing games on your computer, especially high-end games.
Possible Causes of dxgmms2.sys Error?
Dxgmms.sys stands for DirectX Graphics MMS system file. As the name suggests, it is a system file. At any instance, if it cannot handle the graphics rendering process, you would likely see a stop code: SYSTEM_THREAD_EXCEPTION_NOT_HANDLED along with the dxgmms.sys file name. Before, we discuss the ways you can tackle the issue, let’s have a look at the possible causes of dxgmms2.sys issue –
- Outdated BIOS
- Corrupted graphics cards driver
- Dysfunctional hard disk or RAM
- TDRdelay set to lower
- A problem pertaining to hardware acceleration
Also Read: Error Code 0xc00000e9 in Windows 10 resolved
Ways To Fix dxgmms2.sys Error On Windows 11
List of Contents
– Check The DirectX Diagnostic Tool
Getting a hint from the name of the system file itself i.e. DirectX Graphics MMS system file, you might as well check if there is an error related to DirectX Graphics APIs. For that, you can run the Direct X Diagnostic Tool –
- Press Windows + R to open the Run dialog box
- Type dxdiag and press enter
- When the window opens, click on the Display tab
- Focus straight at the bottom of the screen i.e. under the Notes Act upon the mentioned problem
– Update BIOS
One of the first things that you should do to fix the dxgmms2.sys issues on your Windows 11 PC are to update your BIOS. For this, head to your model’s official website. For example, many HP users who have Windows 11 desktops or laptops have reported this issue. So, if you are an HP user, you can visit HP’s official website. Look for any BIOS versions for your model number.
Next, download this update that will appear in the form of a zipped file. Go ahead and extract all the contents. Before going forward and updating your system’s BIOS, we urge you to go through the procedure as per your model and make and also refer to our post that talks at length about how you can update BIOS in Windows.
Also Read: How To Check BIOS Version In Windows
– Use A Stable Version of Windows 11
While many current laptops and desktops come pre-installed with Windows 11, many users might have installed Windows 11 via Windows 11 insider developer’s build. Now, if you have gotten hands-on Windows 11 via the latter option, you might have fetched an unstable version. The developer builds (not all of them) are reportedly causing software issues. So, how do you find out what version of Windows 11 you are using? Here are the steps –
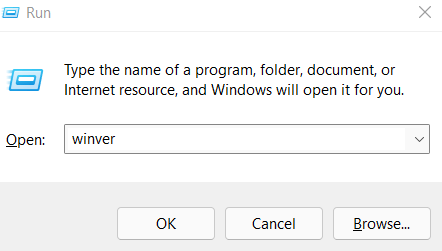
- Press Windows + R keys to open the Run dialog box
- When the dialog box appears type winver and press Enter

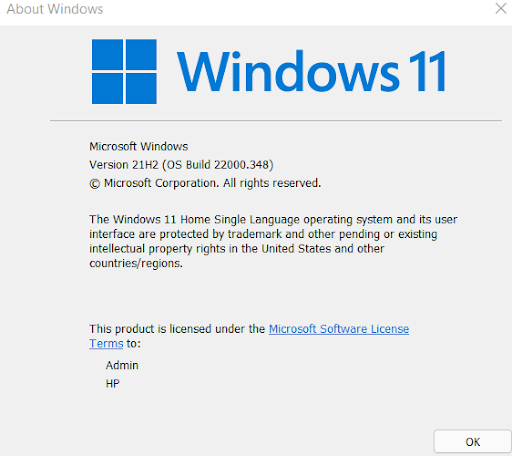
- In the About Windows window, you will be able to check your Windows 11 version along with its build
- What you have to do is, search if it’s a developer’s build or a stable build. It is highly recommended that you install a stable build only
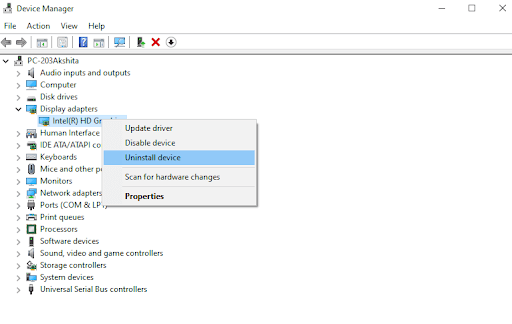
– Uninstall and Reinstall Graphics Card Driver
If the culprit is your graphics card driver, you can try uninstalling and reinstalling your graphics card.
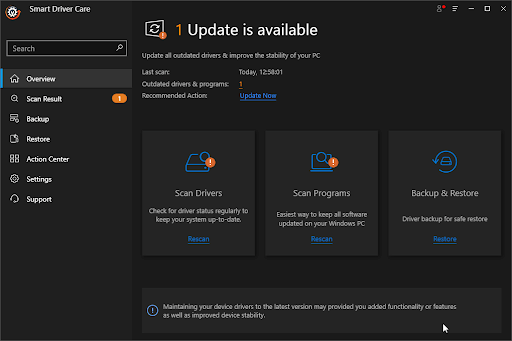
To make things easier, you can always count on a driver updater tool that will be able to look for the right graphics card driver and then install it for you. In fact, unlike the manual ways, you can use a driver updater tool like Smart Driver Care and even schedule a driver scan as per your needs. Apart from that, you can even take a backup of your graphics driver beforehand that you can restore, in case of an emergency.
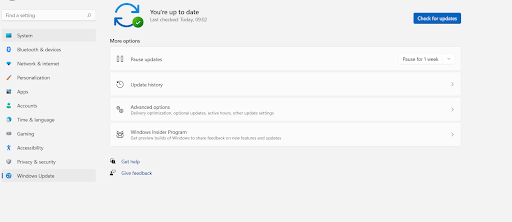
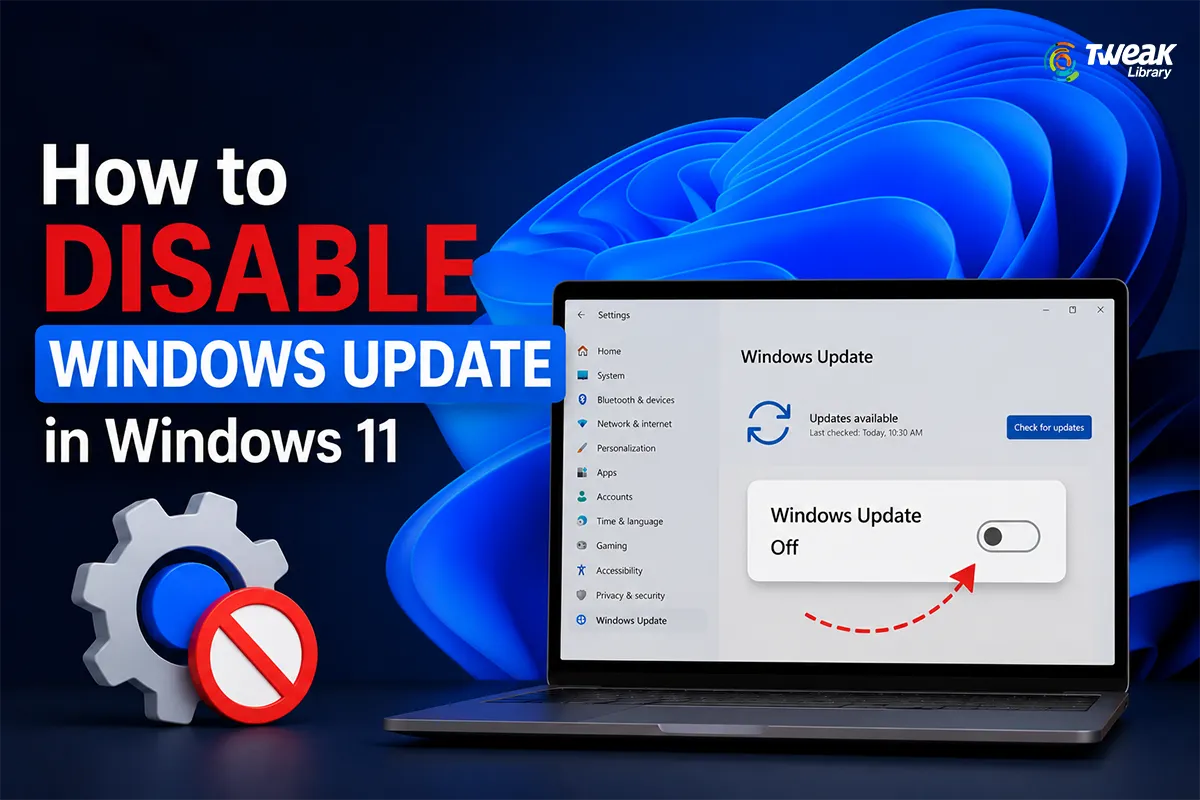
– Update Windows
Quite possibly, you are running an older version of Windows because of which you are facing the dxgmms2.sys issue on your Windows 11 system. A quick update might be able to resolve the issue. To update Windows 11-
- Go to Settings by pressing Windows + I keys
- From the left-hand pane, click on Windows Update which is the last option
- Click on Check for updates
- If there are any updates fetch them
– Use A Third-Party Software To Get To The Core of The Problem
Sometimes manual ways of resolving the dxgmms2.sys issue might not work. And, because the aforementioned issue can also occur because of a dysfunctional hard disk or RAM, you can take the help of a Windows cleaning and optimization tool like Advanced System Optimizer which would effortlessly help you get to the core of the issue.
What is Advanced System Optimizer?
Advanced System Optimizer is one of the best RAM and junk cleaning tools. The various inherent modules also help you tune up your computer for optimum performance. The best part is that it works for all major versions of Windows (including the current Windows 11). To know the tool better, you can check out our review of Advanced System Optimizer.
How To Use Advanced System Optimizer?
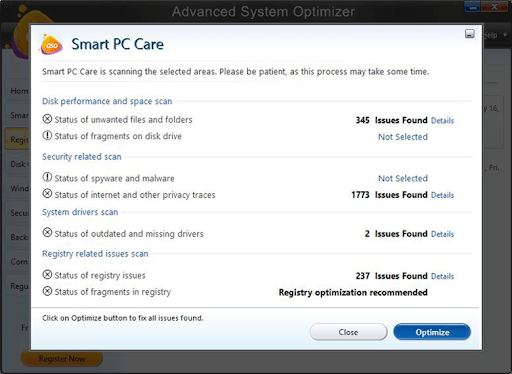
While several powerful modules can help you clean your computer as well as improve its performance, here is how you can use Advanced System Optimizer to scan for any possible issues that might be causing dxgmms2.sys –
1. Download, install and run Advanced System Optimizer
Click Here to Download Advanced System Optimizer

2. From the left-hand side, click on Smart PC Care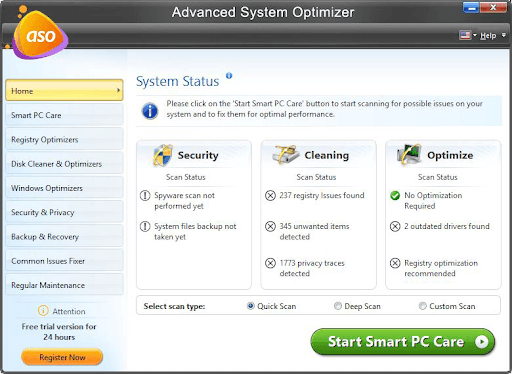
3. Choose scan type – Quick Scan, Deep Scan, and Custom Scan
4. Click on the Start Smart PC Care from the bottom and wait for the scan to complete
5. Once the scan is finished, click on Optimize from the bottom right corner of the interface
Wrapping Up:
Doesn’t matter if you are facing the blue or black screen of death because of this aforementioned issue, you now have some of the best ways to deal with the dxgmms2.sys error in Windows 11. Do let us know in the comments section if you have been able to successfully resolve the dxgmms2.sys error in Windows 11. For more such troubleshooting guides, how-to’s, reviews, and other tech-related fun stuff keep reading Tweak Library.

Leave a Reply