Need room for important files? Here’s how to delete files and folders from Windows 10.
A new system runs perfectly fine, but after some time it tends to slow down. All-important operations you want to perform on your system take ages like opening a web page, files, accessing photos, and so on. They all take a lot of time. Not only this, the system hangs now and then, thus deteriorating productivity.
There is not just one reason that hampers your system’s performance but there are a bunch of hurdles that contribute to this event. In this blog, we will closely examine them and will learn the best ways to fix this slow system speed and reclaim space on the hard disk.
Best Ways to delete files and Folder in Windows 10: –
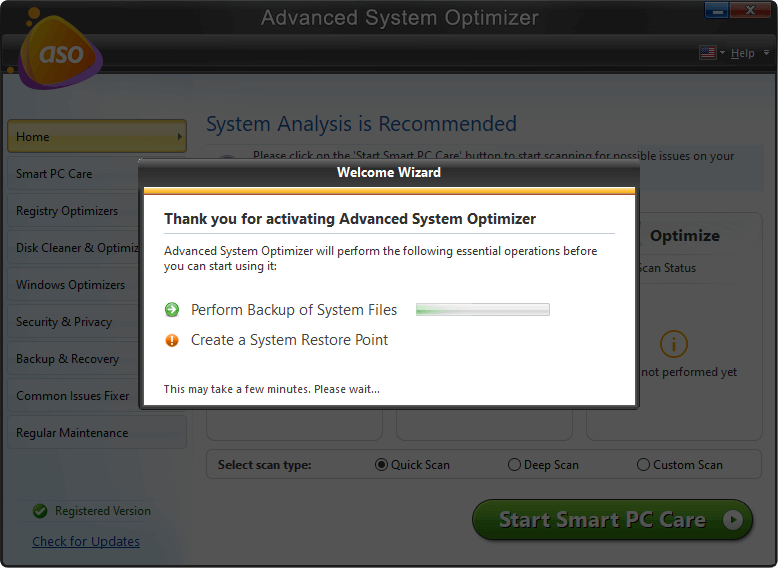
Before we learn how to delete temp files, folders from Windows 10, remember doing so manually isn’t the best way. Therefore, if you want to automate the process and clean unwanted files safely try using Advanced System Optimizer – Best PC Cleaner Software for Windows.
Click Here to Download Advanced System Optimizer

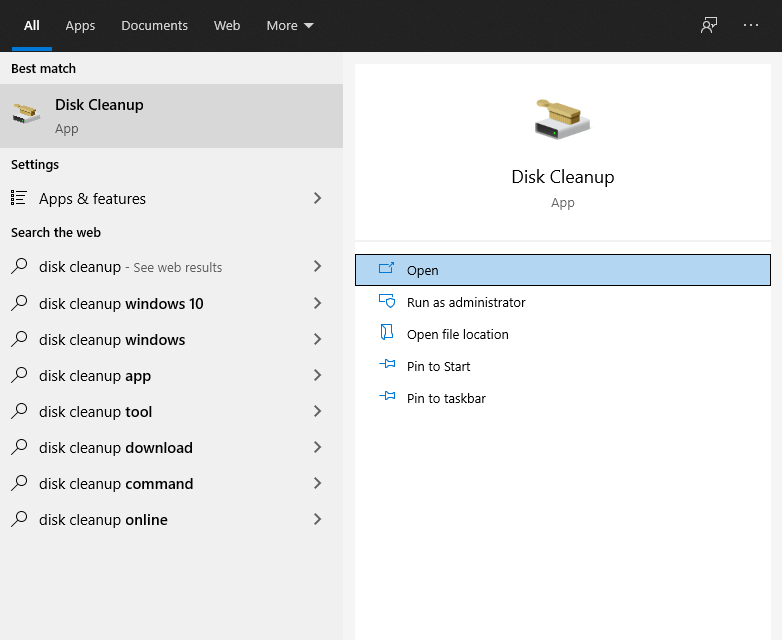
1. Disk Cleanup
It is the best way to clean all the temporary files, cache, and unnecessary files which are no longer needed on the system. It helps speed up the performance of the computer.
There are two ways to delete it: –
One is manual which is time-consuming because you will have to locate the items and then delete them. Also, the chances of losing important data increase.
Secondly, you can use Disk Cleanup an automatic process that will not only save time but will also save you from accidentally deleting important files.
To run Disk Cleanup and Delete Unwanted Files and Folder, follow the steps below:
1. Type Disk Cleanup in the Windows search bar and click to open it.
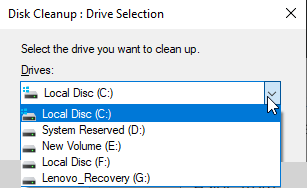
2. Once open, click the down arrow to select the drive you want to scan > Ok.
3. This will open the Disk Cleanup window. Here you will see different categories of files you can delete. Checkmark the box next to them.
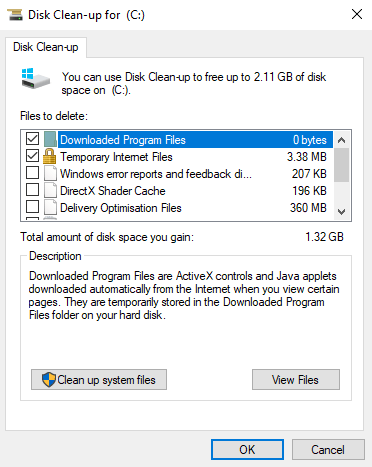
4. Wait for the Disk Cleanup to perform the task.
2. Disable the Hibernation
Hibernation mode is identical to sleep mode, except it takes storage space to save the work allowing you to resume from where you left. Certainly, this occupies space on the hard disk therefore, if you don’t use hibernation can disable it via CMD (Command Prompt) to clear disk space.
To learn to disable hibernation, follow the steps below:
Note: Hibernation file is located under C:\hiberfil.sys
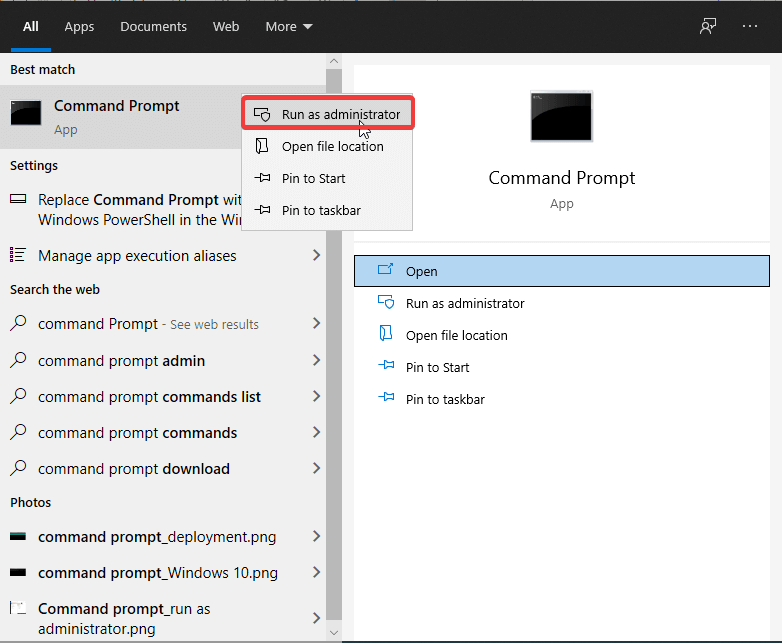
1. Type Command Prompt in Windows search
2. Select the search result > right-click > Run as administrator.
3. Here type exe /hibernate off > Enter
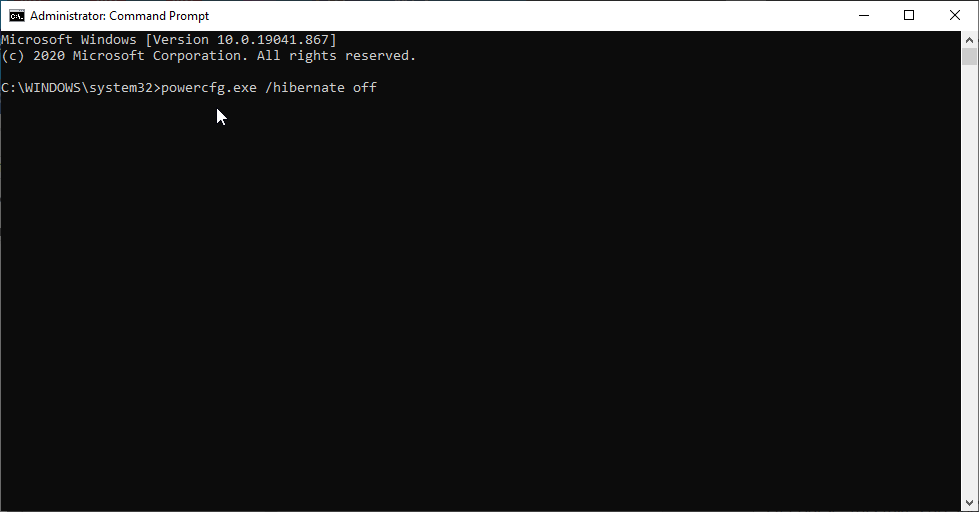
4. That’s all, hibernation will now be disabled.
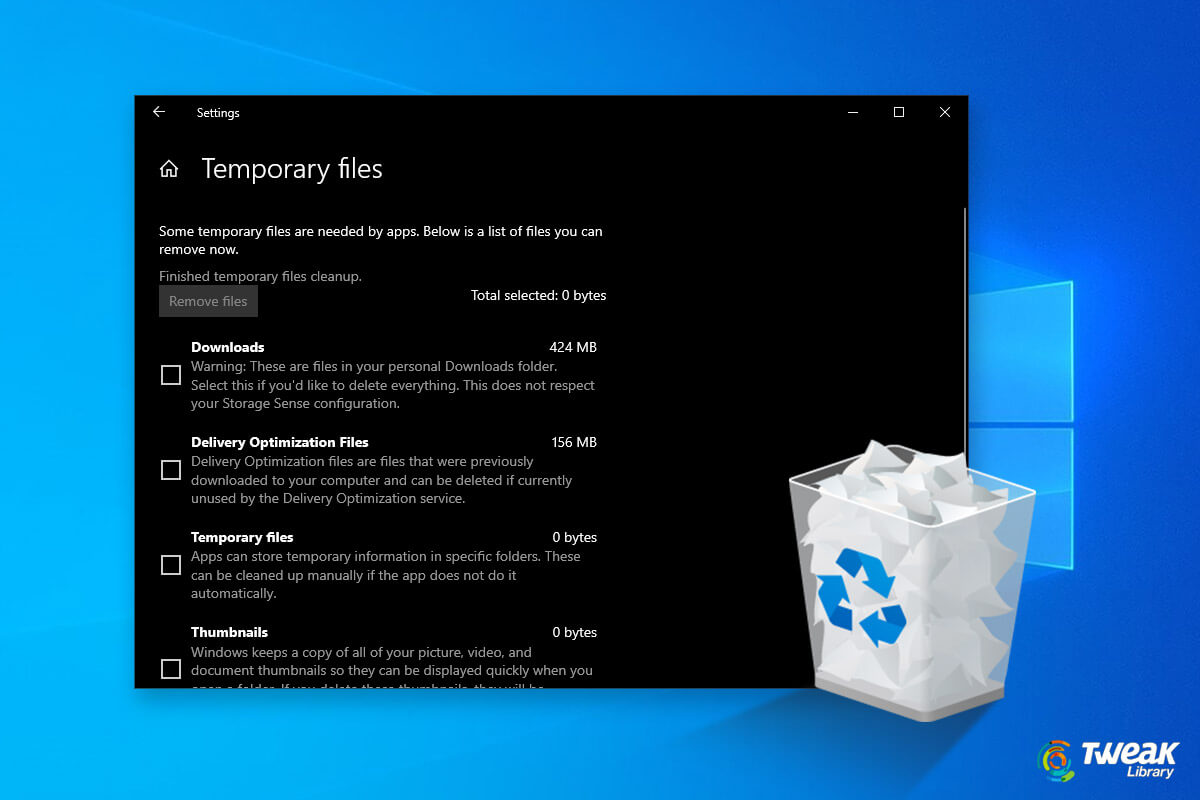
3. Deleting Windows Temp Files
To open applications quickly, Windows create temp files. But these files take unnecessary space therefore, deleting temp files is recommended.
To delete temp files, follow the steps below:
1. Press Windows + R to open Run window.
2. Type %temp% >Enter.
3. Select all the files that you see under this folder and hit Delete.
This will remove all temporary files, helping recover storage space.
Note: You might get a message that files are in use. This means some applications are using the files, press Skip to proceed and remove the remaining files.
This way, you can remove temp files from Windows 10.
4. Empty Recycle Bin
Recycle Bin is a location on your computer where all deleted files on windows 10 end up when you delete them or until you restore them. To view items moved to Recycle Bin, double click the folder and check all the items. Once you are sure that all items are unwanted, follow the steps to clean Recycle Bin.
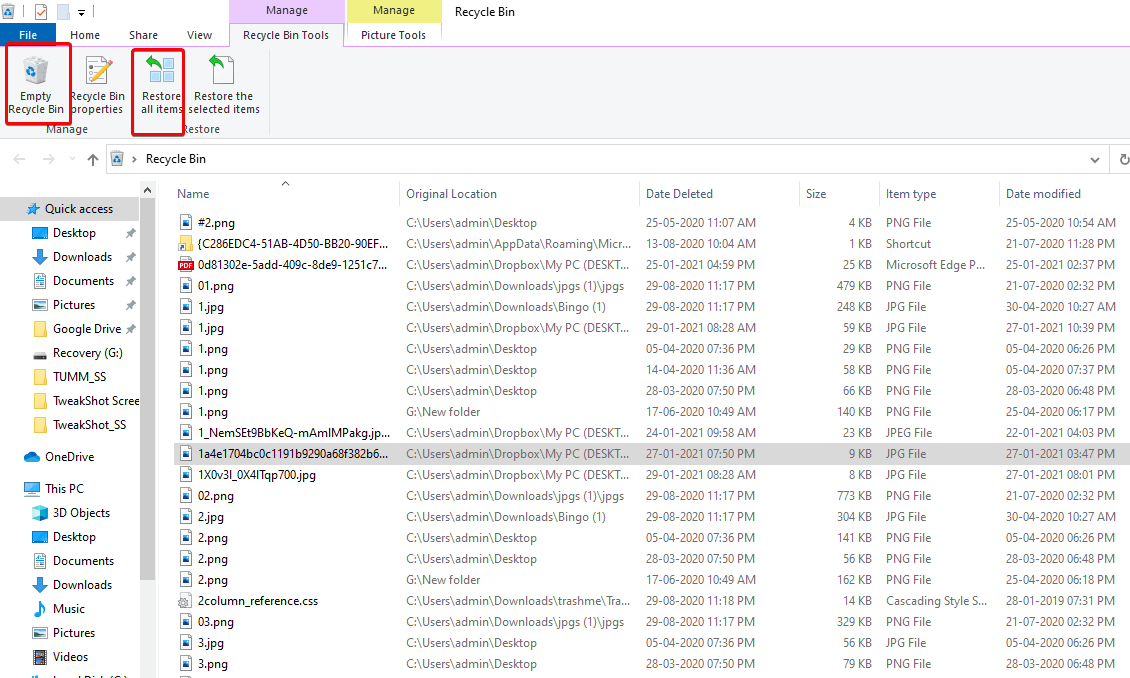
To clean Recycle Bin, follow the steps below:
1. Click Recycle Bin folder present on the Desktop.
2. Right-click > Empty Recycle Bin
Note: Once all the items present in the Recycle Bin are removed there is no way to restore them. This means, think before clicking Empty Recycle Bin.
5. Windows.old Folder
Whenever we upgrade Windows to a new version, the system keeps a copy of old system files in a folder called Windows. Old. This folder is used to get the previous version of Windows or any stary file in case you need it.
Although Windows automatically delete this folder after some time of upgrading you can remove it yourself if you are short of space.
To delete folder on Windows 10, follow the steps below:
1. Open Disk Cleanup as explained in step 1.
2. Click Clean up system files and wait for the scan to finish. Once the process is finished, look for the Previous Windows installation(s) and delete it.

Note: There’s a drawback of this step, if you want to recover the old data in case of any issue then you won’t be able to do that. So, make up your mind before proceeding with this step.
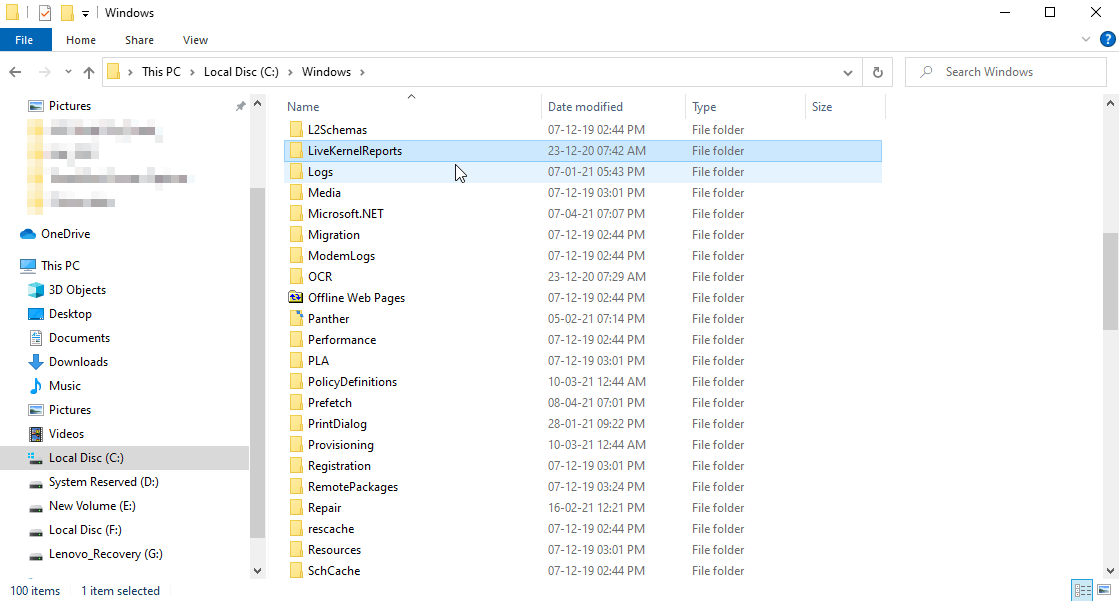
6. Live Kernel Reports
Another directory that you should remove when deleting unwanted files and folders to clear disk space is Live Kernel Reports. This folder stores dump files (that saves information about system crash). To delete the folder, head to C:\Windows\LiveKernelReports. Here you will see large files ending with a DMP extension. These files are safe to delete.
As a precautionary measure to delete such files we recommend using Disk Cleanup.
Note: Once you delete dump files you will not be able to get information about Windows crashes.
7. Uninstall unwanted applications
Many times we just download applications thinking we might use them. These applications over time take unnecessary space resulting in slowing down system performance.
To uninstall such software on Windows 10, you can either use Best Uninstallation Software for Windows or can follow these steps:
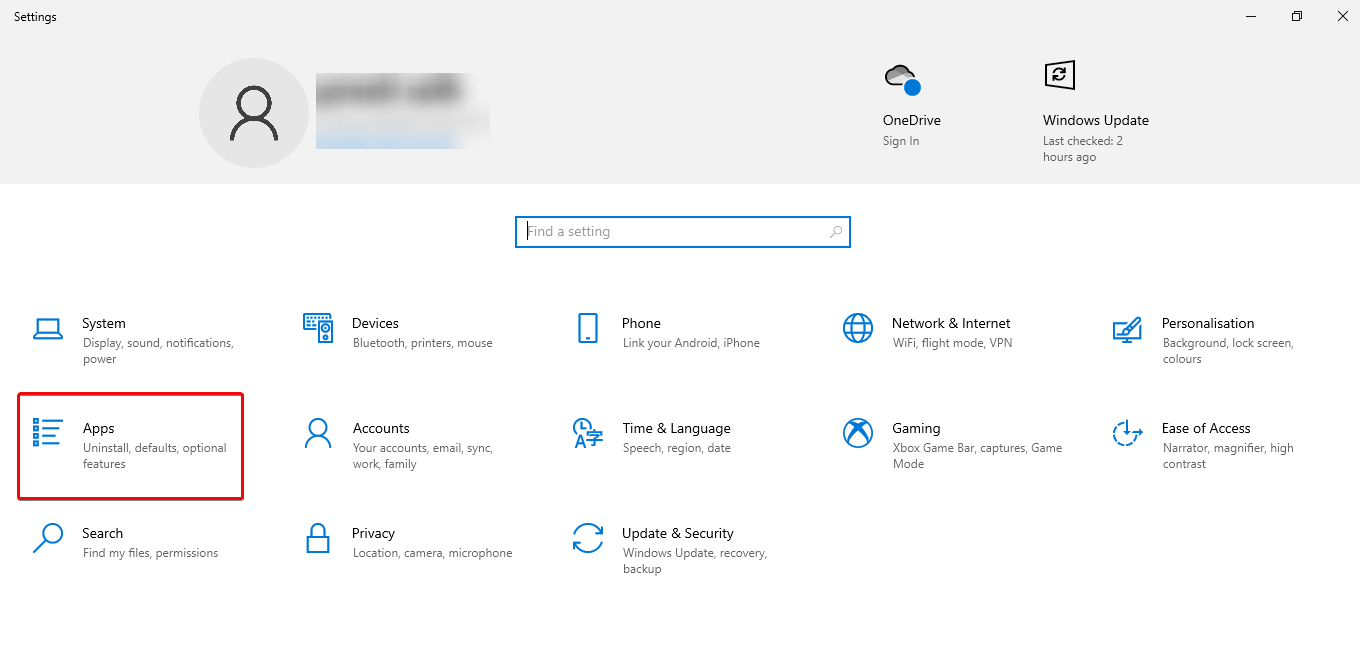
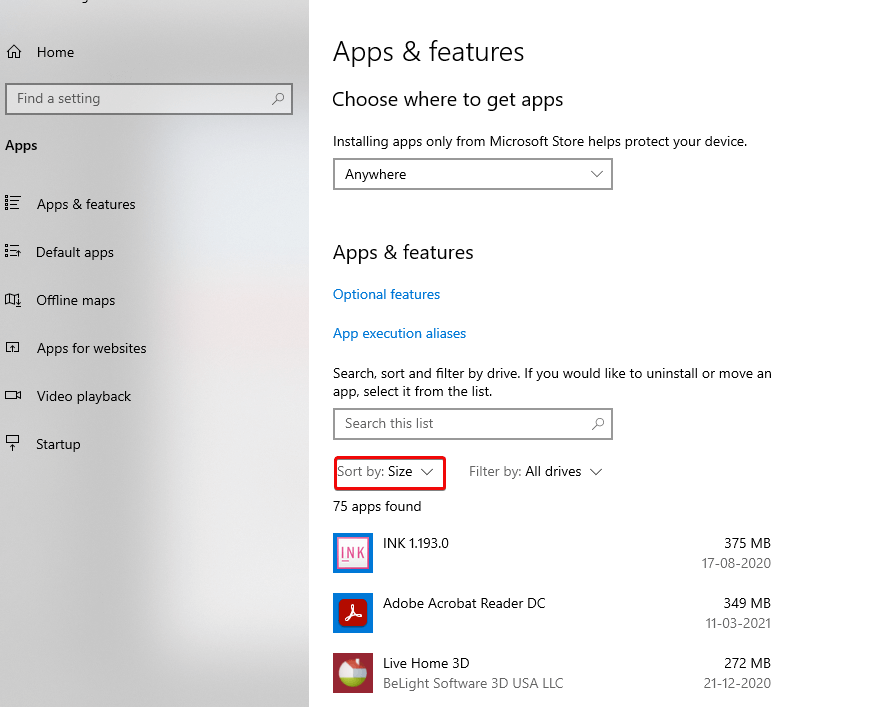
1. Open Settings> Apps> Apps & features.
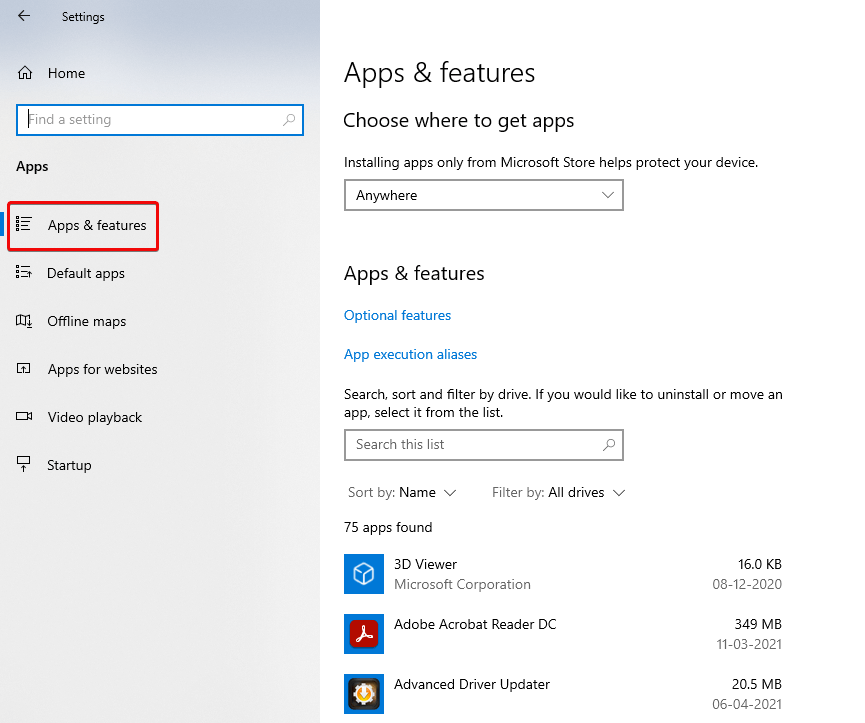
2. Use the “Sort by” filter and select the Size to identify the software which takes more space.
3. Select the item you want to remove and Uninstall it.
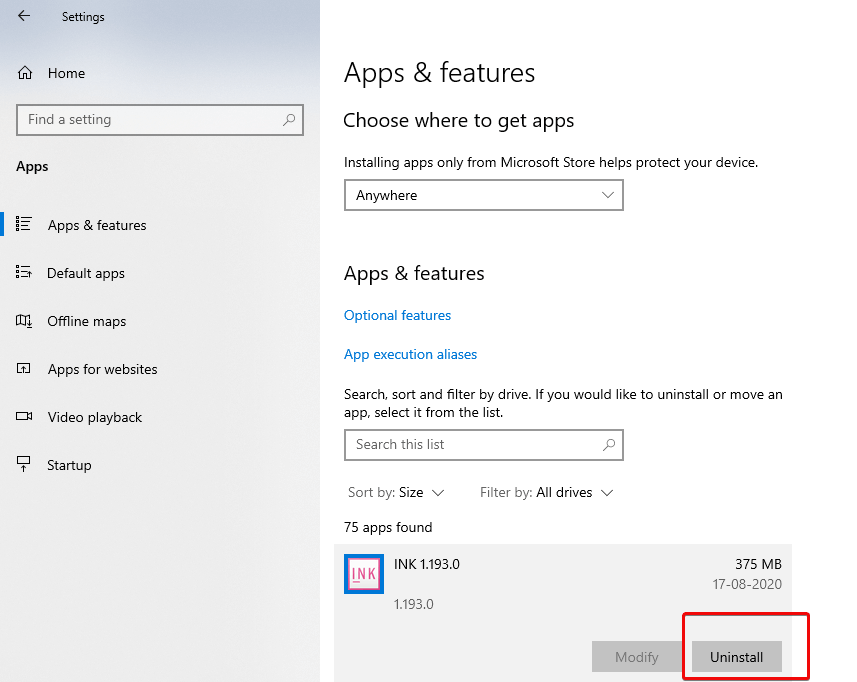
Once you complete the steps, repeat the same to remove all unwanted software.
8. By transferring content to an external drive
If the hard drive is still running low on available space, you can install an external drive to move and store files. You can even set up the system to make the external storage the new default to save files.
9. By using NTFS compression
NTFS (New Technology File System) which is a new technology introduced by Microsoft reduces the storage capacity of files as it compresses folders, files, or the entire drive.
To apply Windows 10 NTFS compression for a folder, use the following steps:
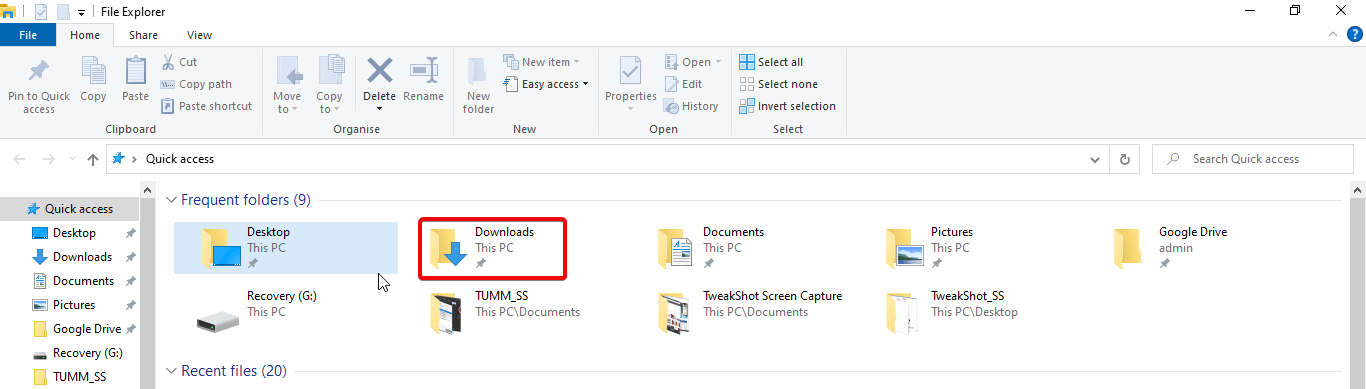
1. Open File Explorer and select the folder right-click > compress.
2. Select the Properties > Advanced.
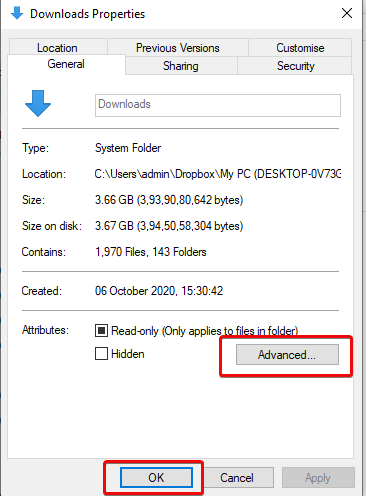
3. Check the Compress contents to save disk spaceoption> OK> Apply
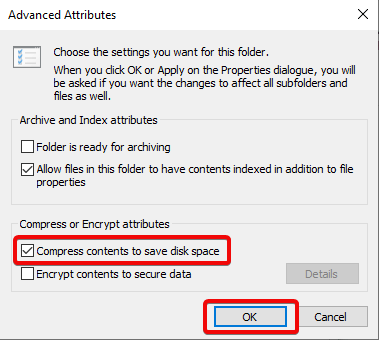
4. Check Apply changes to this folder, subfolders, and files option> OK> OK
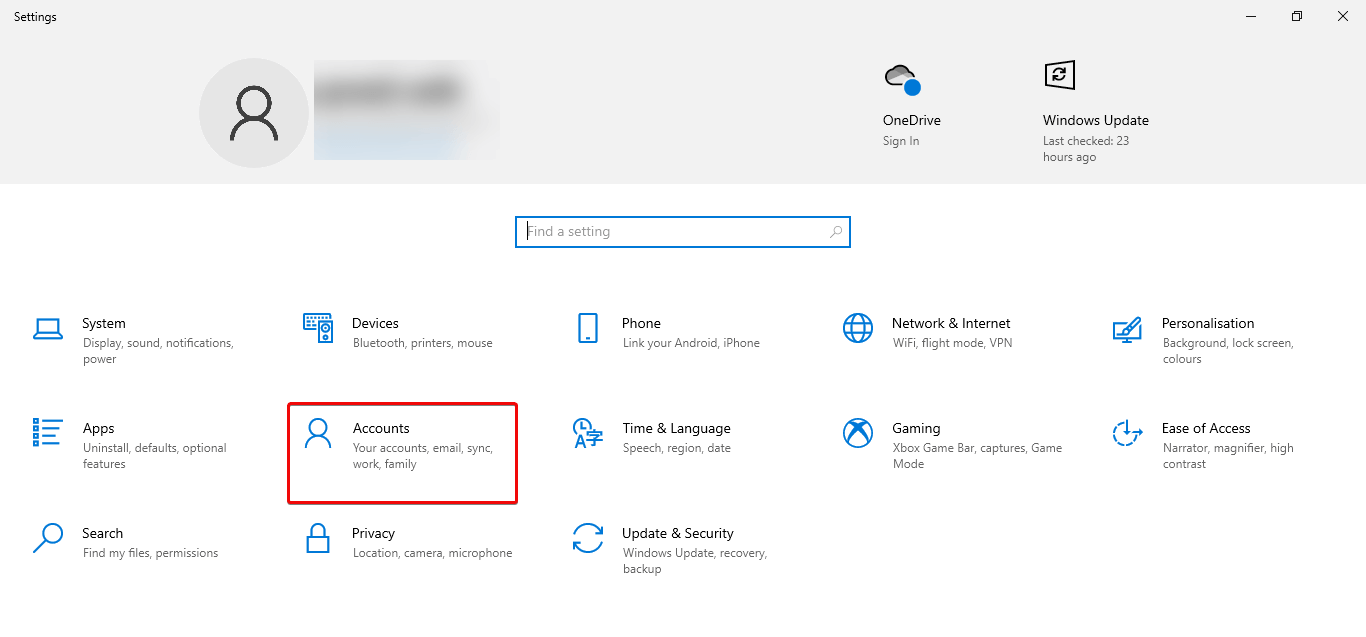
10. By removing users no longer sharing device
If you share your device with other people, then to free up space it is recommended to delete those users.
You can remove the user by following steps:-
1. Open Settings> Accounts> Family and other users
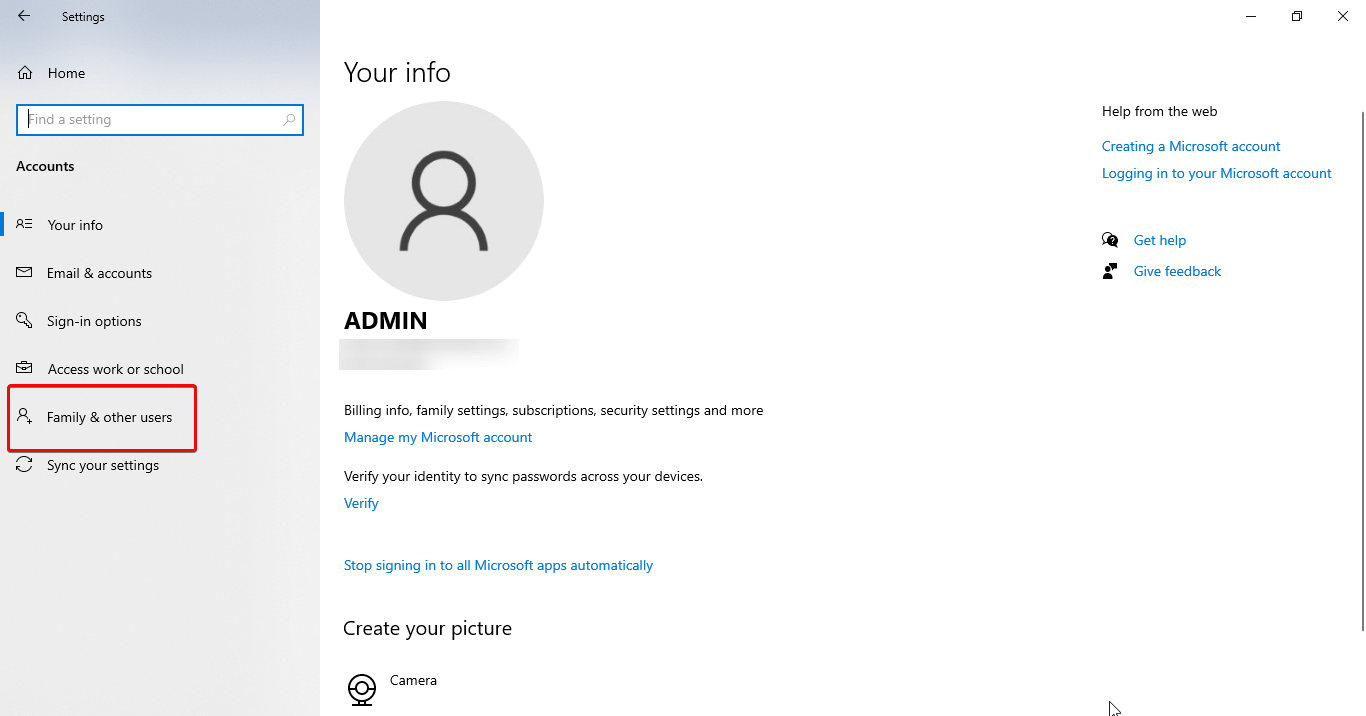
2. Select the account you want to remove.
3. Click Remove
4. Click Delete account and data
Note: Same steps needs to be copied to delete any remaining account
11. disabling the Reserved Storage option on Windows 10
One of the best features of Windows 10 is Reserved Storage, which enables a dedicated space for system updates, cache, and temporary files which curtails problems during updates & upgrades. But it occupies some space for performing this task.
If you wish to use the space which is used by this feature you can disable it.
But remember, once this feature is disabled, you will see the extra space only after installing the next release of Windows 10.
To disable Reserved Storage on Windows 10, use these steps:
1. Start>PowerShell
2. Right Click PowerShell and select Run as administrator
Type – Get-WindowsReservedStorageState > Enter
3. Next type Set-WindowsReservedStorageState -State disabled > Enter
After following these steps, Reserved Storage will be disabled on Windows 10, and you will recover the occupied space taken by reserved storage.
We hope after using these steps and deleting temp files from your Windows you can recover space on your Windows 10.
Next You May Like to Read:
How Safe is to Recover Deleted Files in Windows 10 Hard Drive?
Best Windows Recovery Options for Desktop Recovery
Tips To Recover Deleted Files From Recycle Bin


Leave a Reply