Many times we wonder how a remote connection can be established via the internet. But technological advancement has made it possible.
In Remove connection, a user can access another system or network remotely via the internet. Remote desktop can be used in different ways but the most common is the troubleshooting error on the target system.
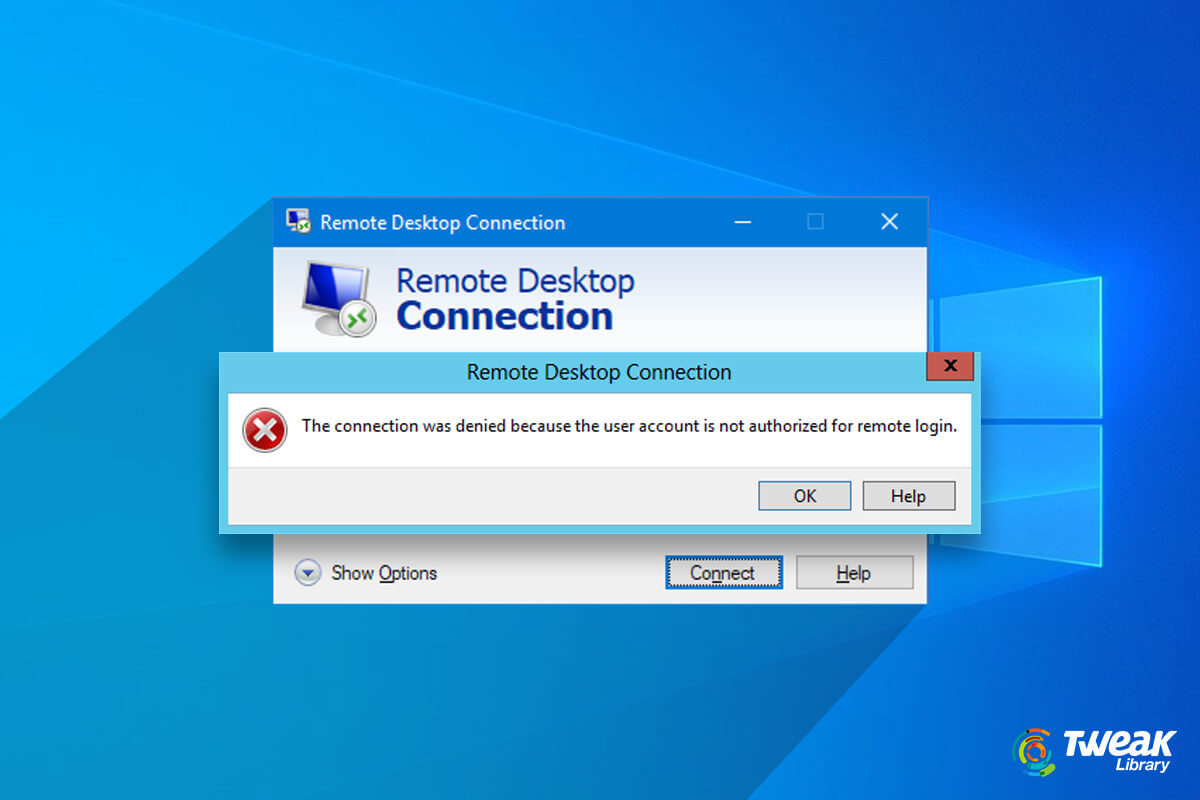
Sometimes while establishing a remote connection, you might encounter an error message – “The connection was denied because the user account is not authorized for remote login”. It generally occurs when permission to access the system remotely is denied by the target host. But this is not the only case when you get this error message, sometimes when permission is granted to remotely access the system then also this message pops up. And getting such error messages along with the following listed on Windows 10 is no exception: –
1- Missing remote desktop user group
2- Add a new user to the security group
3- Check remote desktop service
Here in this post, we will learn how to fix all of them. But before that, a piece of advice. To avoid facing such problems and other common Windows errors, one should keep the system optimized. This can be done manually, but it is time-consuming and most of us don’t even know how to do it. Therefore, we suggest you use Advanced PC Cleanup the best PC cleanup and tuneup utility. Using this extraordinary tool in no time, you can fix invalid registry entries one of the major reasons for The connection was denied because the user account is not authorized for remote login. Moreover, you can clean junk files, old downloads, detect and quarantine malware infections, and a lot more.
To give it a try, download it by clicking here. Also, you can read a comprehensive review of the product covered by us earlier.
Click Here to Download Advance PC Cleanup

Fix: User Account Is Not Authorized For Remote Login
1. Check remote desktop user group
If your user account by which you are trying to establish a remote connection doesn’t have the Remote Desktop Users group then you might face this problem.
Therefore, follow the below-mentioned steps to ensure that your user account is a Remote Desktop Users group member.
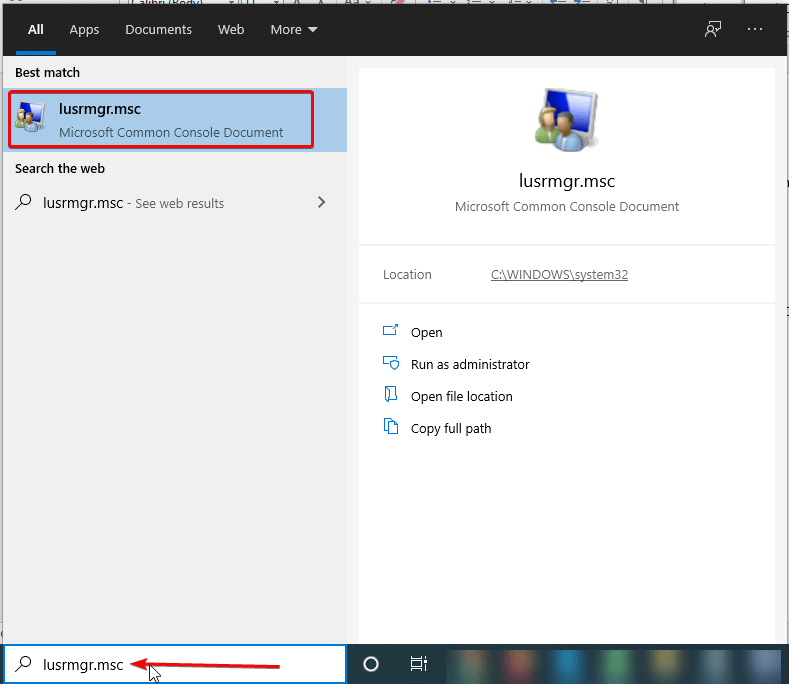
-Type and search lusrmgr.msc in the Taskbar search box.
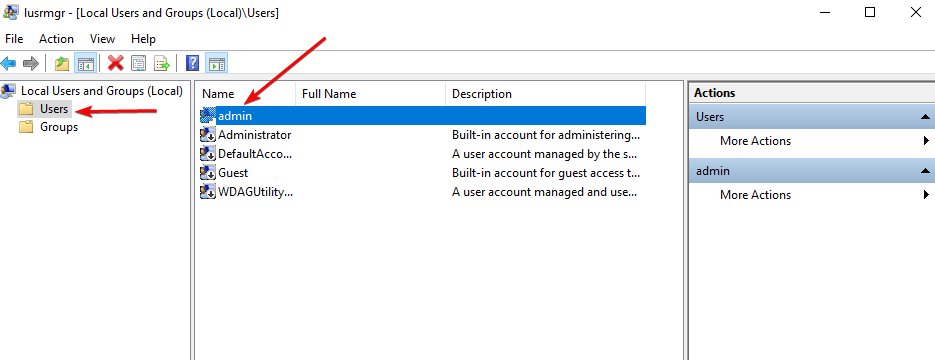
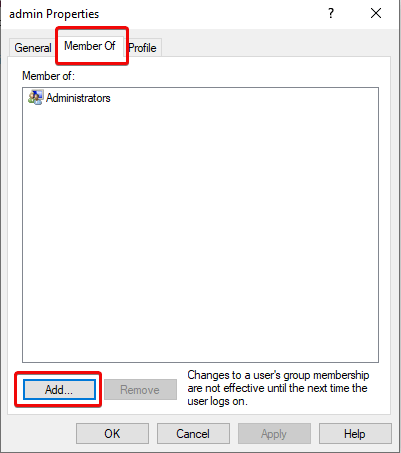
-After opening it, select Users > Admin> Switch from General tab to Member Of tab.

– If you are unable to find the Remote Desktop Users group under the Administrator, then you need to add it.
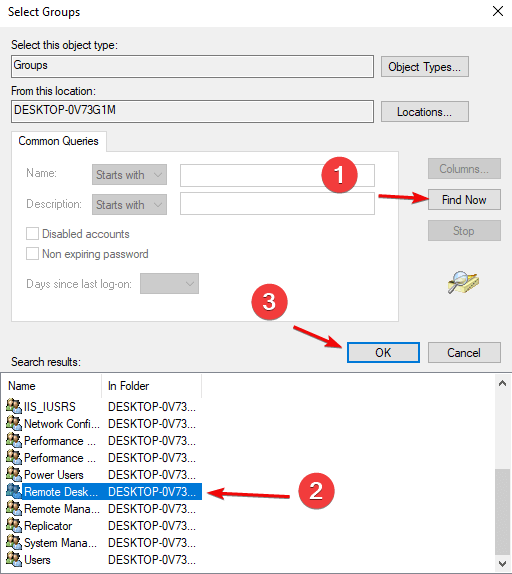
Steps for adding: – Click the Add button> Click the Advanced on next window> Find Now button
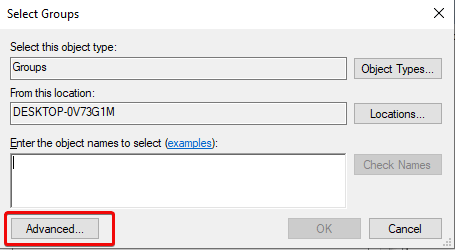
-Click on Find> Select Remote Desktop Users from the list > Click OK
2. Add User to a security group
This helps you to allow or block a user from logging on through Remote Desktop Services.
But you cannot perform this action If you do not have the correct setting.
To confirm this setting follow the below steps: –
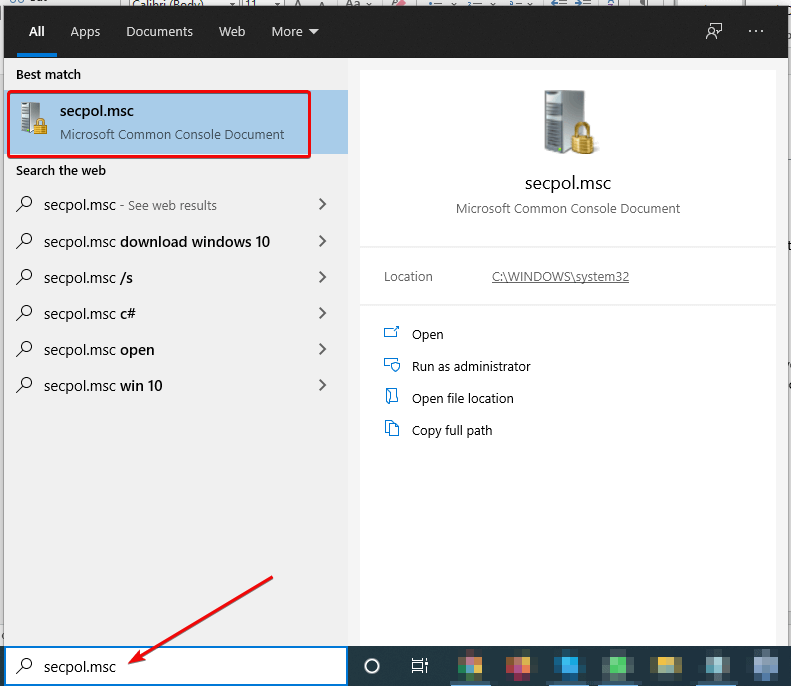
-Type command secpol.msc in the Start search box and hit Enter.
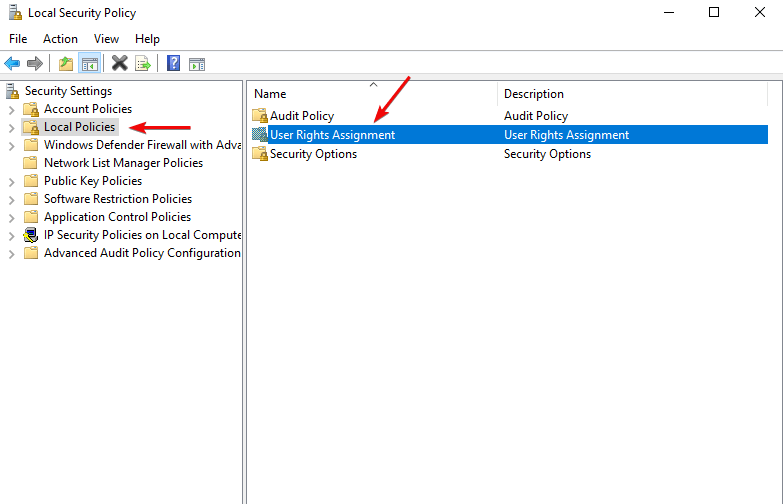
-Now go to Local Policies > User Rights Assignment (Double Click)> Allow log on through Remote Desktop Services (Double Click)
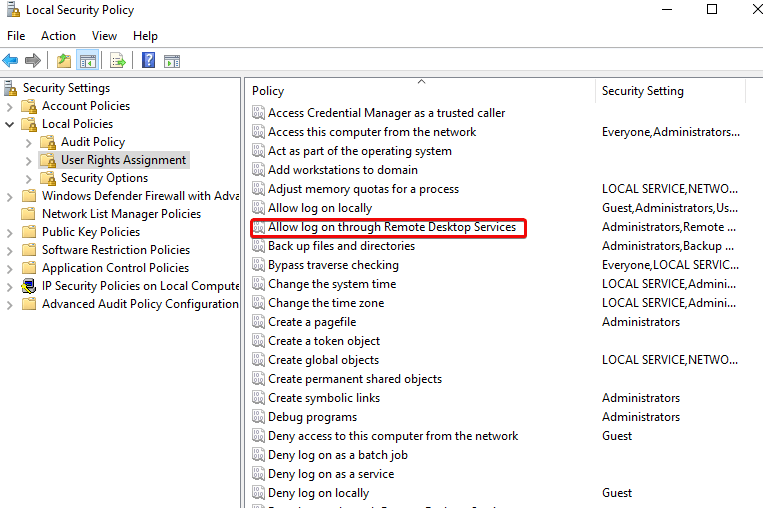
Here you will find Remote Desktop User under administrator
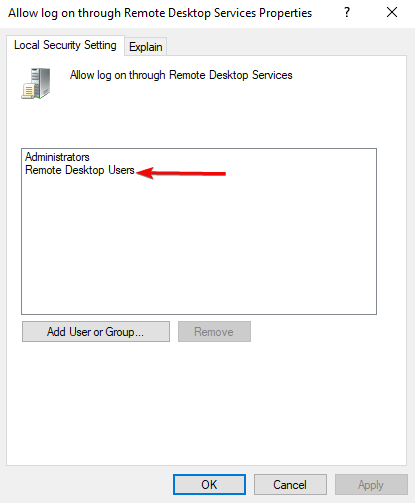
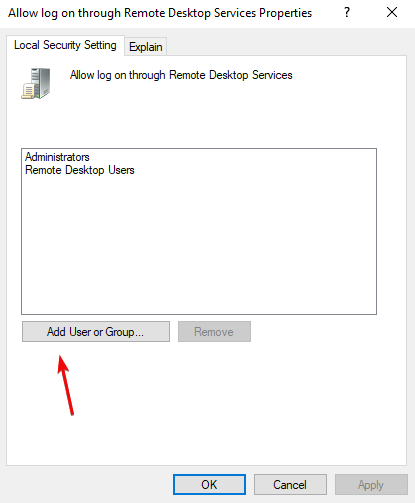
Note: – If you do not find Remote Desktop User under administrator then follow the steps.
-Click on Add User or group and enter Remote Desktop User > Click OK

Now Restart your computer and try to establish a remote connection
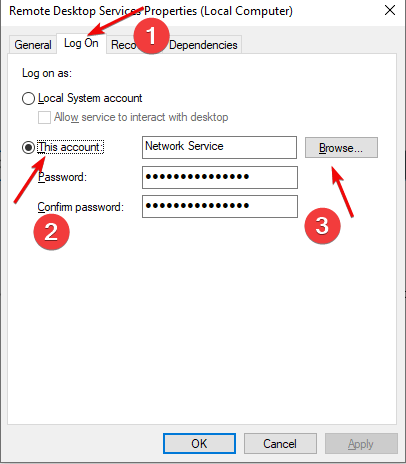
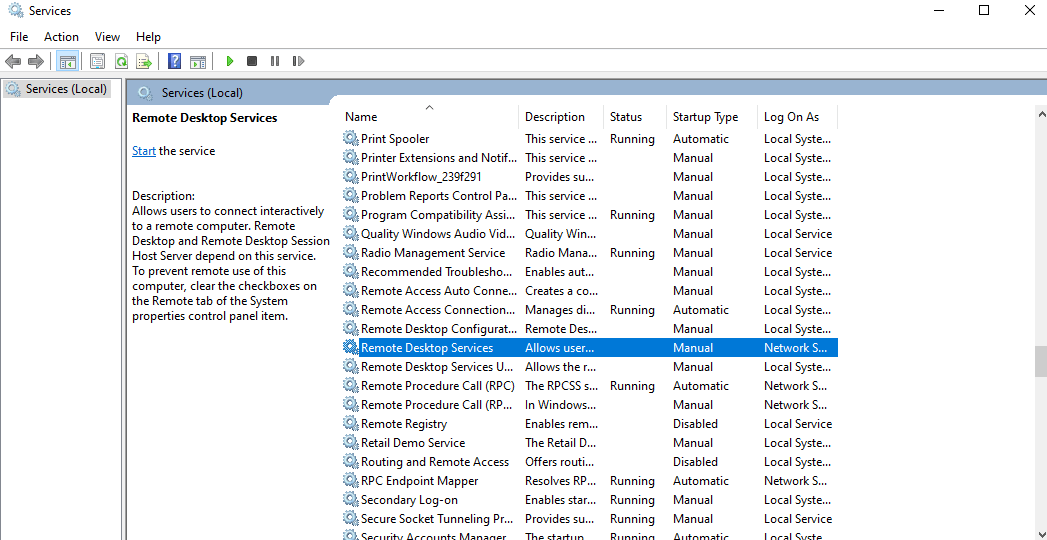
3. Check remote desktop service
This is an essential element that should be running and needs to be set up correctly if not set up.
Follow the steps below: –
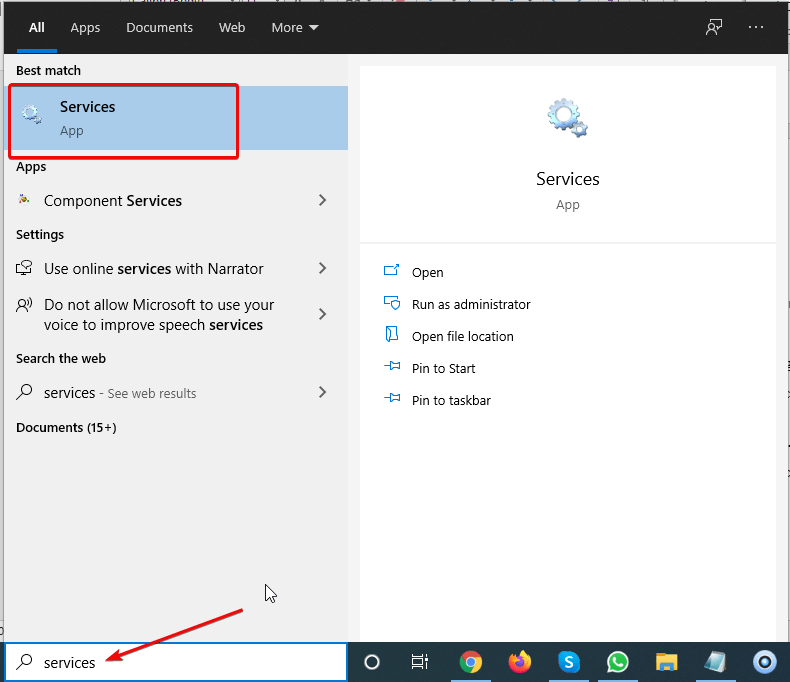
-Search for “services” in the Taskbar search box and open the Services Manager.
-locate Remote Desktop Services (Double Click)> Log On > This account> Browse
-On the next dialogue box, click Advanced.
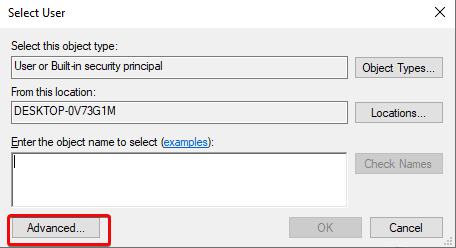
-Click Find Now button to search and select NETWORK SERVICE then double click on it and save the changes.
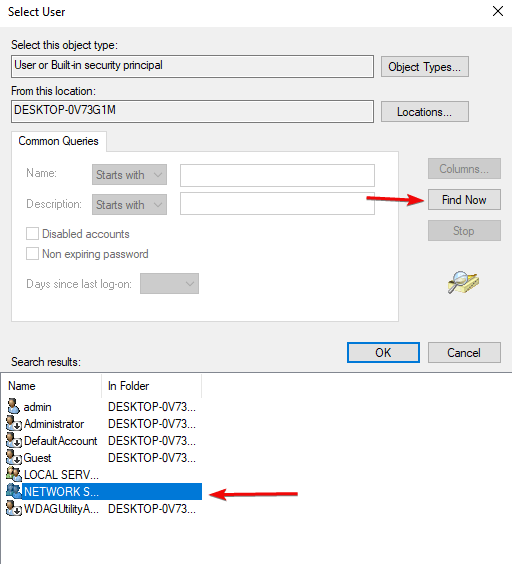
Now restart the system and check for the remote connection.
Conclusion:
We have discussed the major ways by which we can establish a remote connection in our system. We would recommend you try all the measures and keep your system optimized, do try Advanced PC Cleanup.
If you have any suggestions, then let us know in the comment box.
Next Readings:
How To Install Drivers Without Internet Connection
Does VPN Slow down the Internet? Speed Up VPN Connection
How to Increase Upload Speed on Windows 10


Leave a Reply