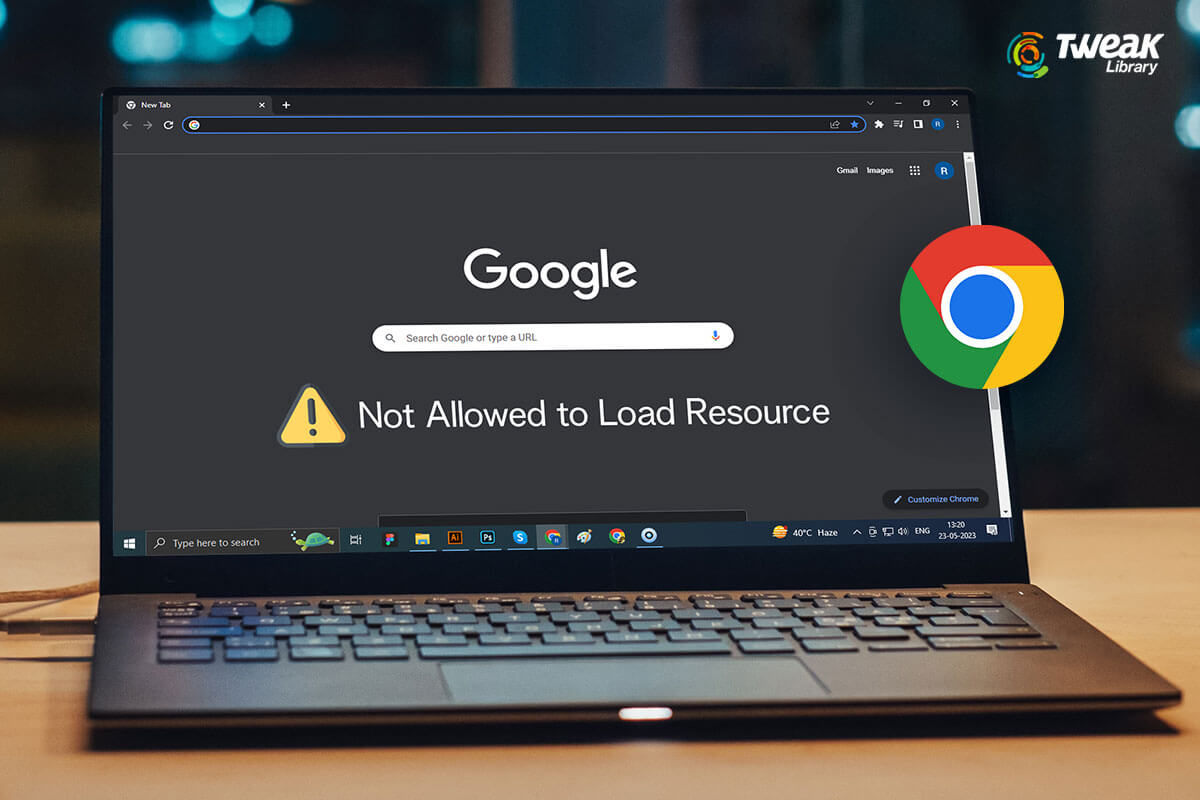
Some Chrome users are being prevented from loading local resources on the browser. This resource may be a text document, a PDF, or an image. Misconfigured browser settings are one of the main causes of the problem. We’ll discuss this in this post and examine what to do when Chrome is prohibited from loading local resources.
Also Read: Best Network Monitoring Tools And Software
How To Repair Unable To Load Local Resources In Chrome?
The first thing you should do is restart Chrome if it is not permitted to load local resources. Restarting will be sufficient if the problem is the consequence of some brief malfunctions. But if restarting the browser doesn’t work, try the instructions below.
Method 1: Temporarily disable the Chrome Security Settings
If Chrome suspects an image is infected with malware then it may block it and not load it. However, it’s possible that the virus detection algorithm used by the browser is flawed and your file is in fact completely safe. In that situation, we need to turn off Chrome’s security features before loading the file. Ensure the resource you are loading is malware-free, and turn the settings back on after loading the file. To accomplish the same, adhere to the following directions.
Step 1: Launch the Chrome browser on your PC.
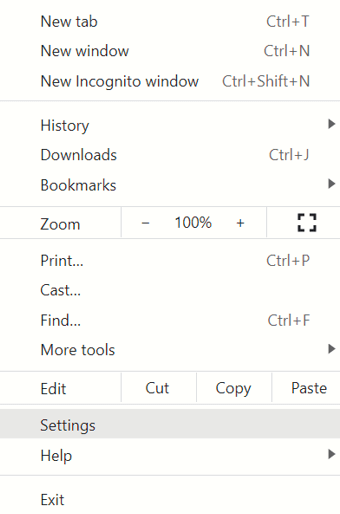
Step 2: Next click on the three-dot menu in the upper right corner of the Chrome window and choose Settings.
Step 3: On the Settings tab, click Privacy and Security in the left pane.
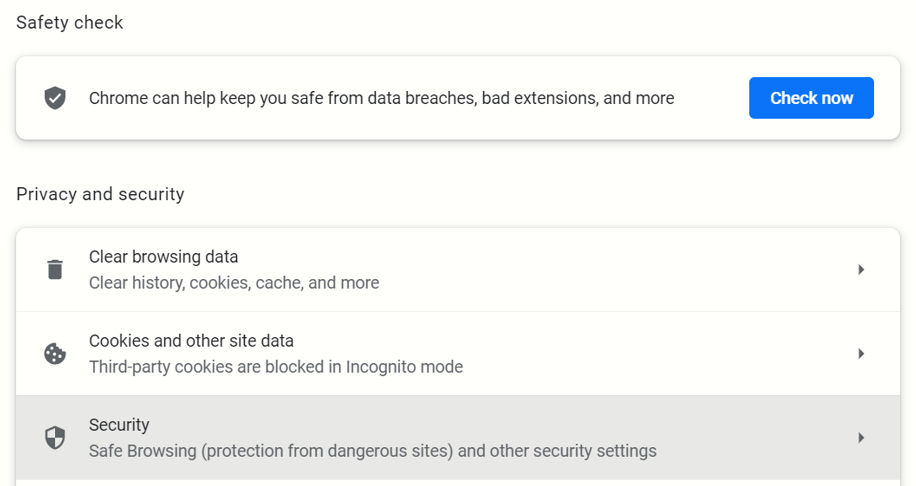
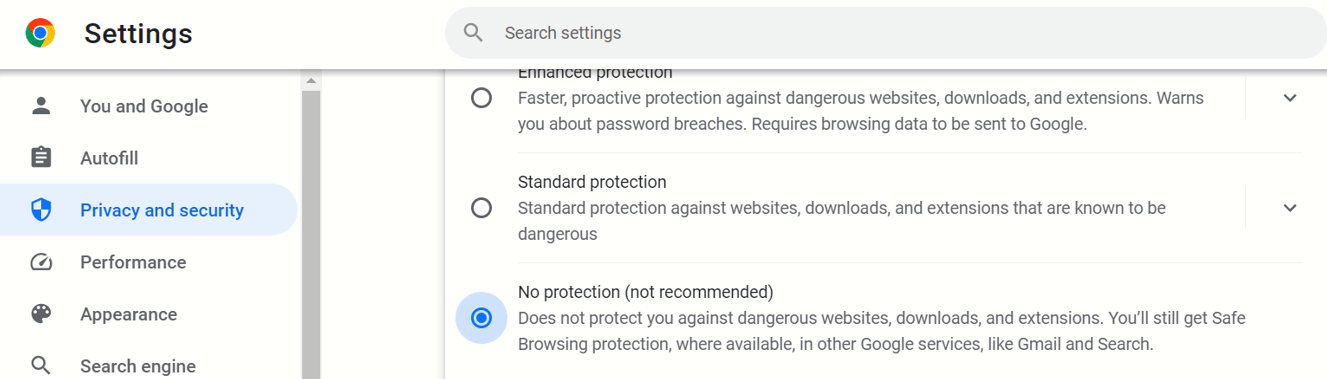
Step 4: Locate and click on Security and scroll down to the No Protection option.
Step 5: Finally, click the radio button next to No Protection.
After you have finished loading the resources, it would be preferable to turn on the security.
Also Read: Chrome Keeps Crashing On Mac. Here’s How to Fix It
Method 2: Alter The DNS Settings Of Your Computer
The Domain Name System converts domain names to IP addresses and vice versa. As soon as the DNS server discovers the proper IP address it will load the website. The Chrome browser may reject it if the computer is dynamically altering DNS for security reasons. So, to fix the issue, we can use Google DNS servers. This is the procedure:
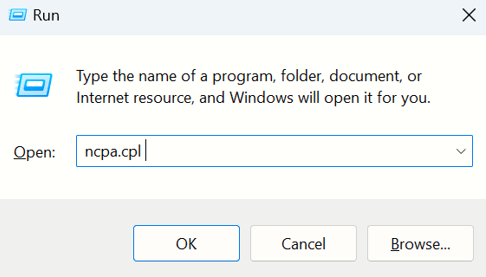
Step 1: To see the Run box, press the Win and R.
Step 2: Type ncpa.cpl in the text box and press Enter.
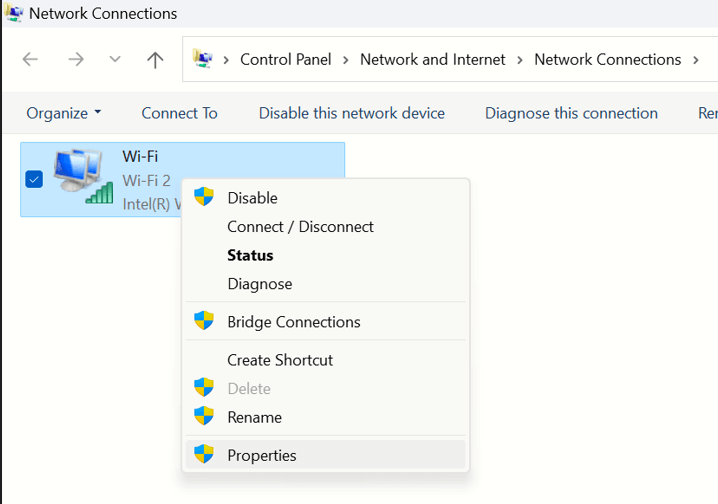
Step 3: The Network Connections window will now open.
Step 4: Select Properties by doing a right-click on the Network adapter.
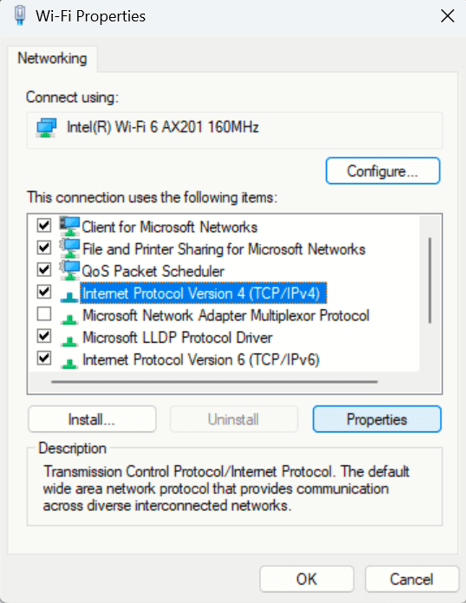
Step 5: Choose Properties from the Internet Protocol Version 4 (TCP/IPv4) menu by clicking here.
Step 6: Enter the following IP address and choose Use the following DNS server addresses.
Preferred DNS server: 8.8.8.8
Alternate DNS server: 8.8.4.4
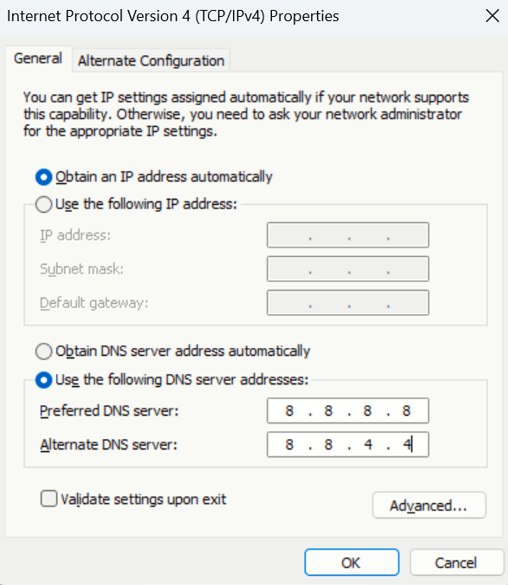
Step 7: To save the setting, click the OK button at the end.
Hopefully, the problem will be fixed after configuring the Google DNS address.
Also Read: 20 Best Google Chrome Security Extensions
Method 3: Remove DNS Host Cache
The built-in DNS cache server in Google Chrome will aid in enhancing page loading times. If the website’s developer changed the IP address, the cache will automatically load the old IP address and you can experience the aforementioned problem. In order to fix the problem, it is recommended to delete the host cache.
Step 1: On your PC, first launch the Chrome browser, then type the following into the address box.
chrome://net-internals/#dns
Step 2: You will get the option to clear the host cache after pressing the Enter key.
Step 3: Click on the Clear Host Cache button to remove the host cache files.
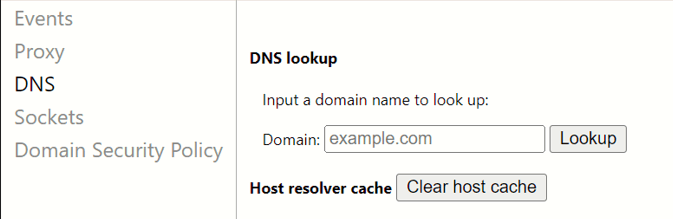
Step 4: Restart Chrome now and check if your issue has been resolved.
Method 4: Delete Chrome’s Cache and History
Last but not least, deleting Chrome’s cache and browsing data is our last choice if nothing else has worked. This is done to make sure that corrupted data is not the source of the browser’s odd behavior. Follow the instructions below to achieve the same results.
Step 1: Launch Google Chrome.
Step 2: Select Settings by clicking the three dots in the top right corner.
Step 3: Select the Privacy and Security tab on the window’s left side.
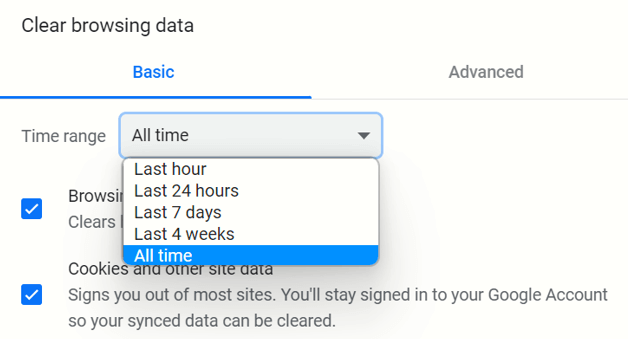
Step 4: Choose Clear browsing data.
Step 5: Alter the time range to All Time.
Step 6: Check the boxes next to Cached images and files, Cookies and other side data, and Browsing history.
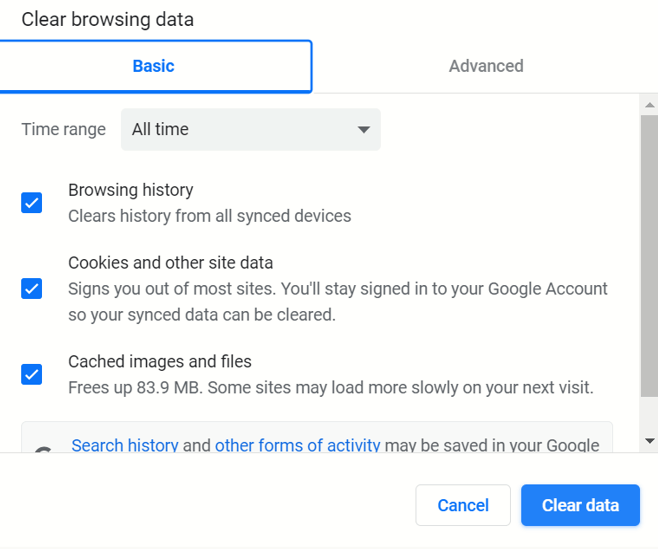
Step 7: Lastly, select Clear Data.
You must wait until the browser has cleared all of its data before checking to see if the problem has been fixed.
| Bonus: Use Advanced PC Cleanup To Remove Browser Cache.
Advanced PC Cleanup is a PC optimizing software that helps users to maintain their system by removing unwanted files, malware, redundant applications, and much more. It also helps to protect identity traces from malicious actors by removing the browser cache, cookies, temp files, history, passwords, and other private data. Hence, if you wish to get rid of your browser cache completely without any remnants then we suggest using Advanced PC Cleanup. |

Also Read: 10 Best Password Manager Extensions for chrome
The Final Word On Chrome Is Not Allowed To Load Local Resources
If Chrome is unable to load resources, you should restart both Chrome and your machine to begin debugging if the former doesn’t work. If restarting does not help, try the suggestions in this post to fix the problem.
Please let us know in the comments below if you have any questions or recommendations.
Next Read:
How To Disable Incognito Mode In Google Chrome
Ways To Fix Google Chrome Not Connecting to Wi-Fi/Internet

Leave a Reply