
Is Your Google Chrome not connecting to Wifi/Internet? However, other browsers like Microsoft Edge & Mozilla Firefox work perfectly fine with the same Wi-Fi/Internet connection.
Google Chrome is the world’s most popular web browser. And one of the reasons for its immense popularity is the ease with which it can be used across many different devices. One of the common problems that users come across when using Google Chrome on their desktop is that Google Chrome not connecting to WiFi/Internet despite having a good speed data connection.
Possible Causes Google Chrome Not Connecting to Wifi/Internet
This can be frustrating to its users when something like this happens: “Google chrome not connecting to Wifi (No Data Received Chrome).” However, there are many reasons why this may occur, and we would like to help you solve them so that you can go back to using your browser daily.
When it comes to this specific problem with Google Chrome not connecting to the internet, there could be several possible reasons behind this:
- Cache and Cookies collected by the browser.
- A Third-party Antivirus.
- Using outdated Google Chrome browser.
- Lots of Chrome extensions in the browser.
Read Also: How To Fix ChromeBook Won’t Connect To Wi-Fi
6 Ways to Fix Google Chrome Not Connecting to Wifi/Internet
List of Contents
In this post, we’re going to outline the best troubleshooting tips we’ve found that help with this issue. Without further ado, let’s get right to it:
Fix 1: Disable or Turn Off your third-party Antivirus
Sometimes, antivirus programs can get a little overzealous and will end up blocking anything that they feel might be suspicious. To make sure that’s not causing an issue, try turning them off for a moment to see if that is indeed the case and then try using Chrome again.
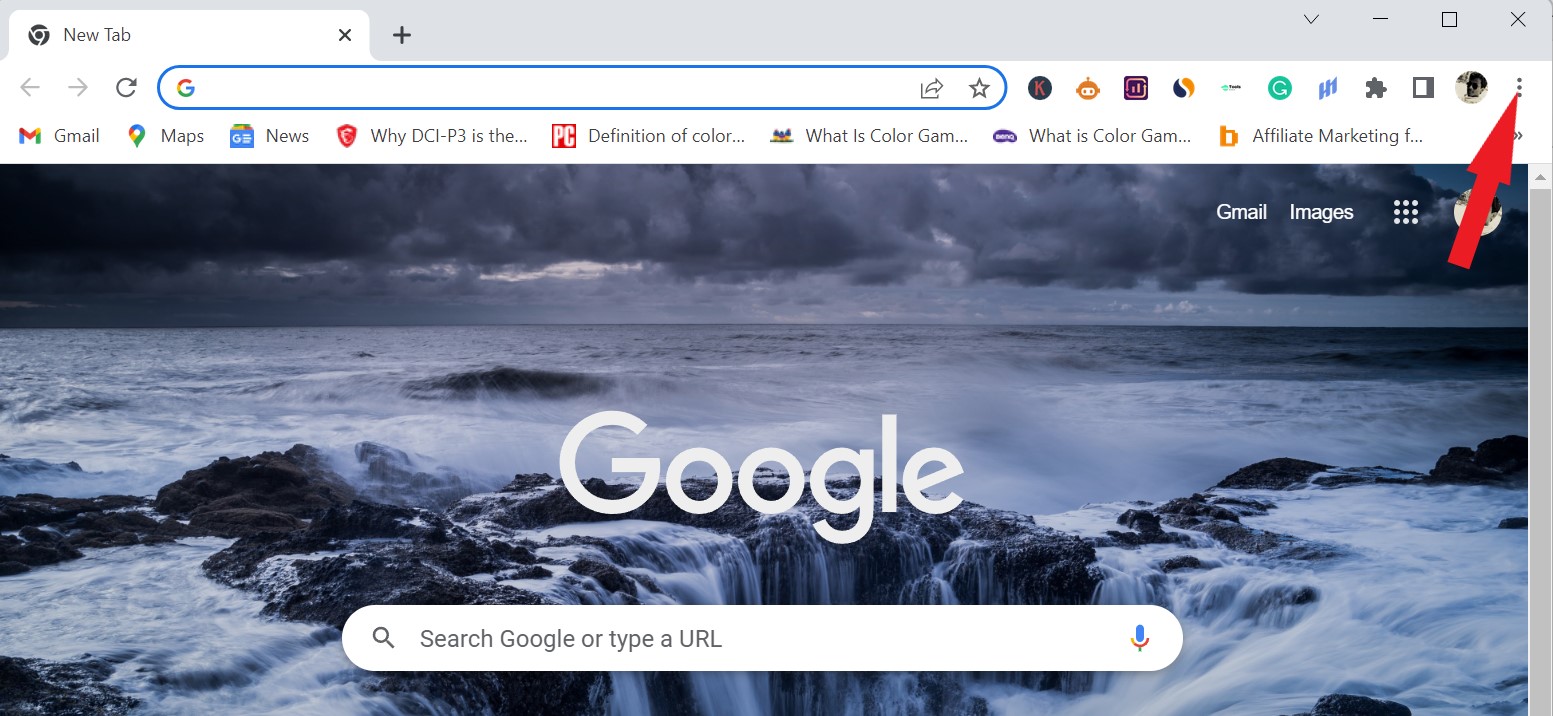
Fix 2: Update Google Chrome to the Latest Version
- First thing first, open your Google Chrome browser.
- From the top left corner of the window, click on the “Three Dot Menu” to open it.
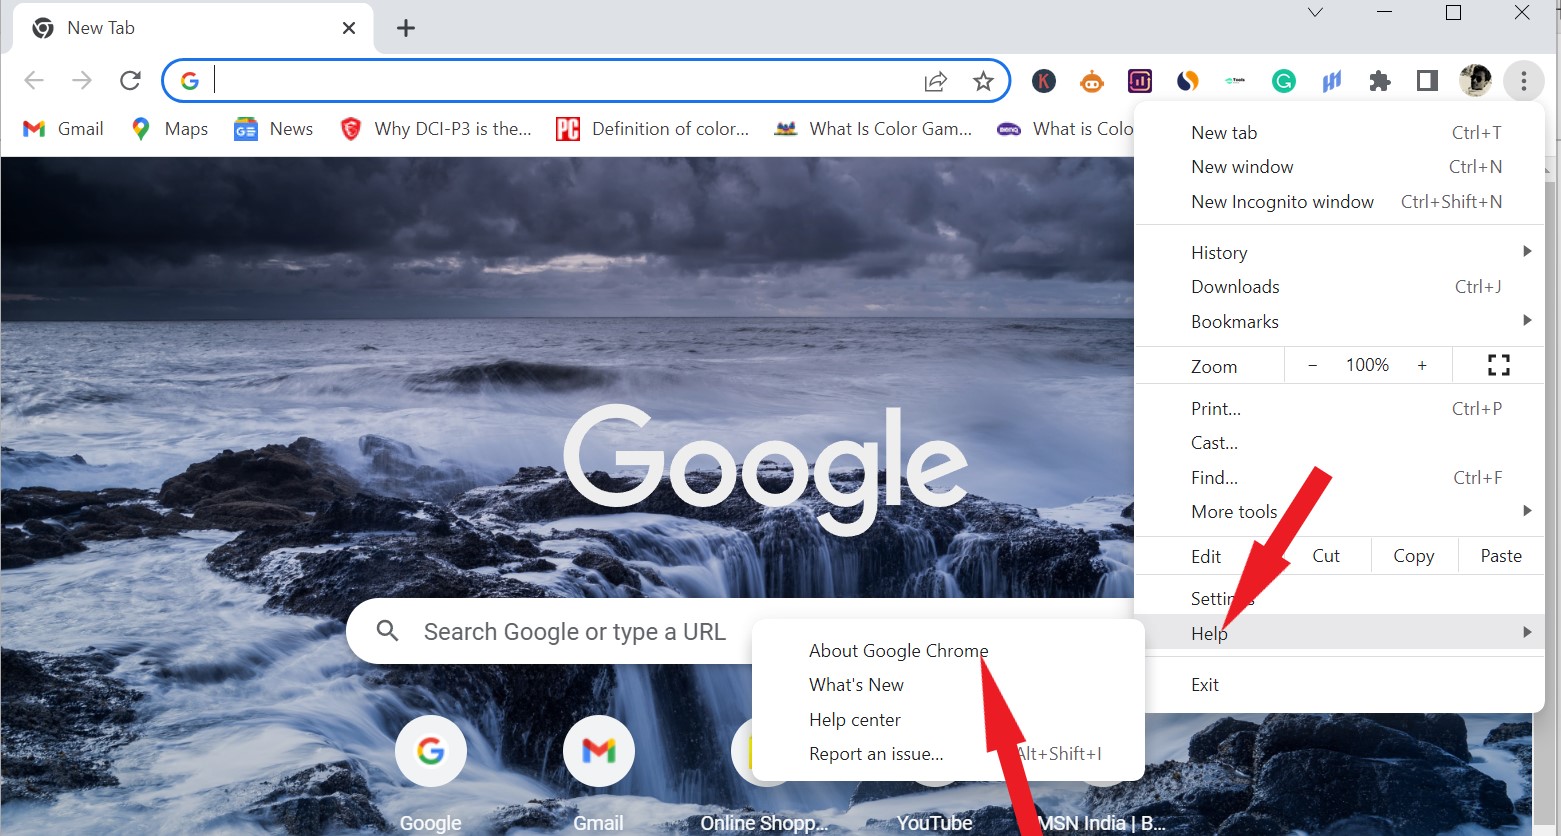
- Then select the option “Help” from the menu.
- Now click on the “About Google Chrome” option.
- Google Chrome automatically will update itself in case you are using an outdated version of it.
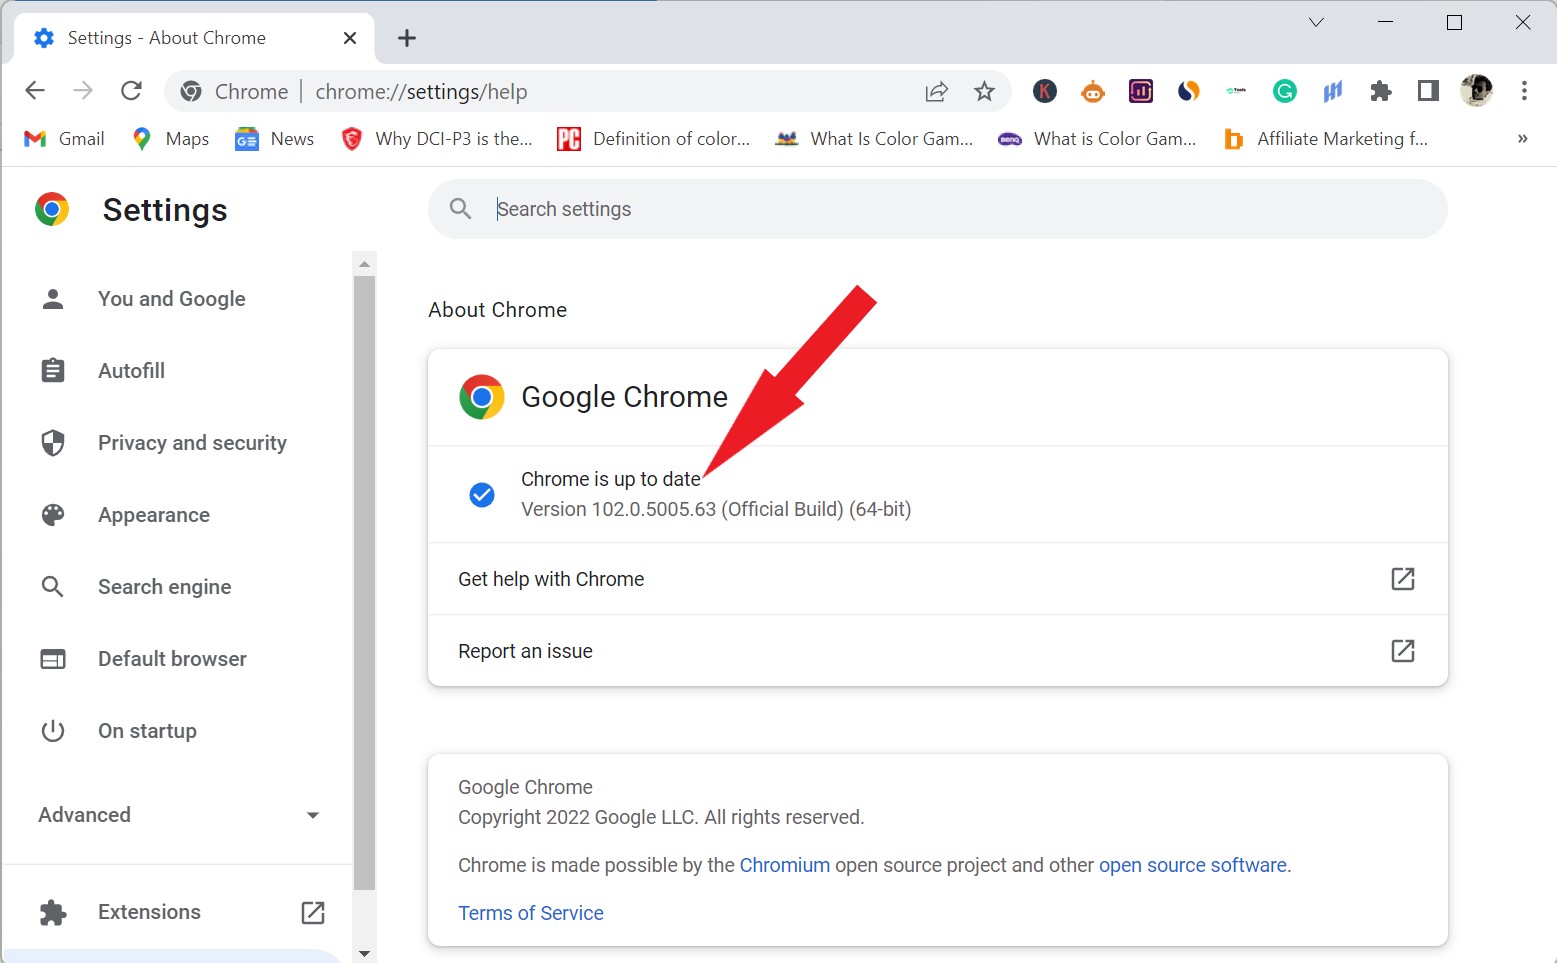
- Once Google Chrome done installing updates. It will ask you to relaunch the browser.
After launching the browser, check if the problem persists.
Read Also: How To Fix the Wi-Fi Connection issue in Windows 10?
Fix 3: Reset Google Chrome
- Open your Google Chrome browser.
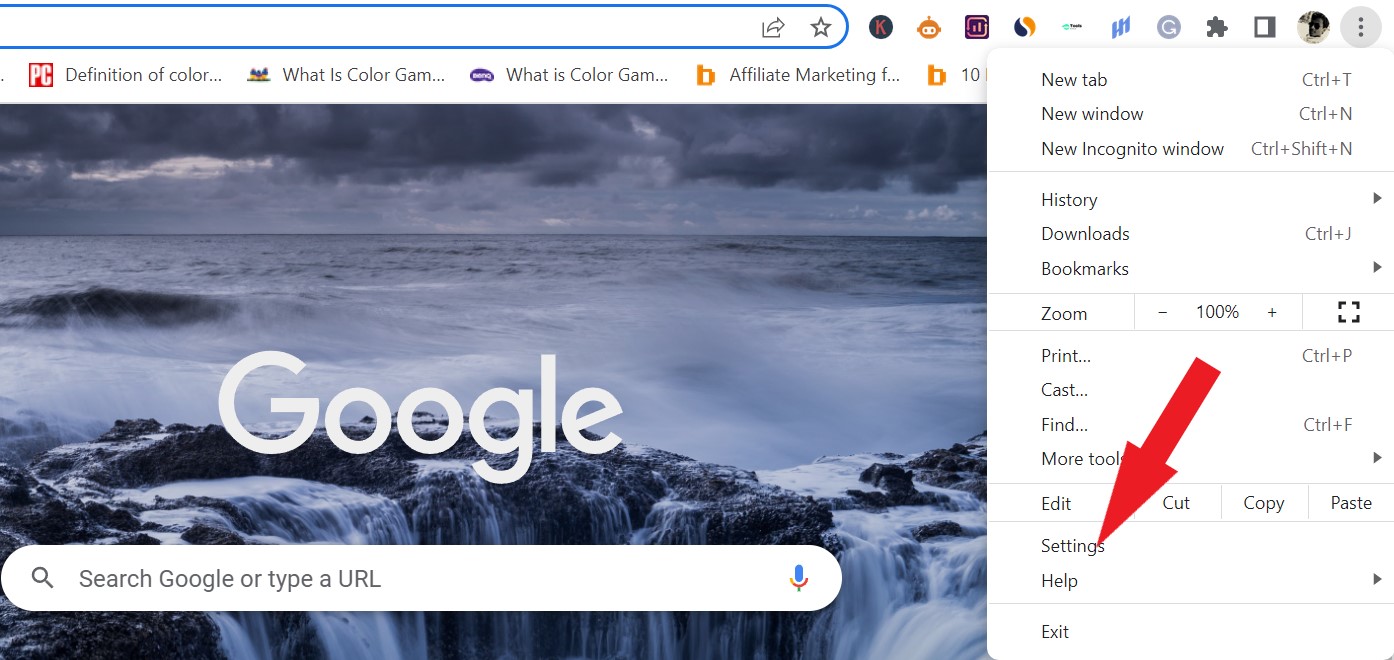
- From the top left corner of the window, click on the “Three Dot Menu” to open the drop-down list.

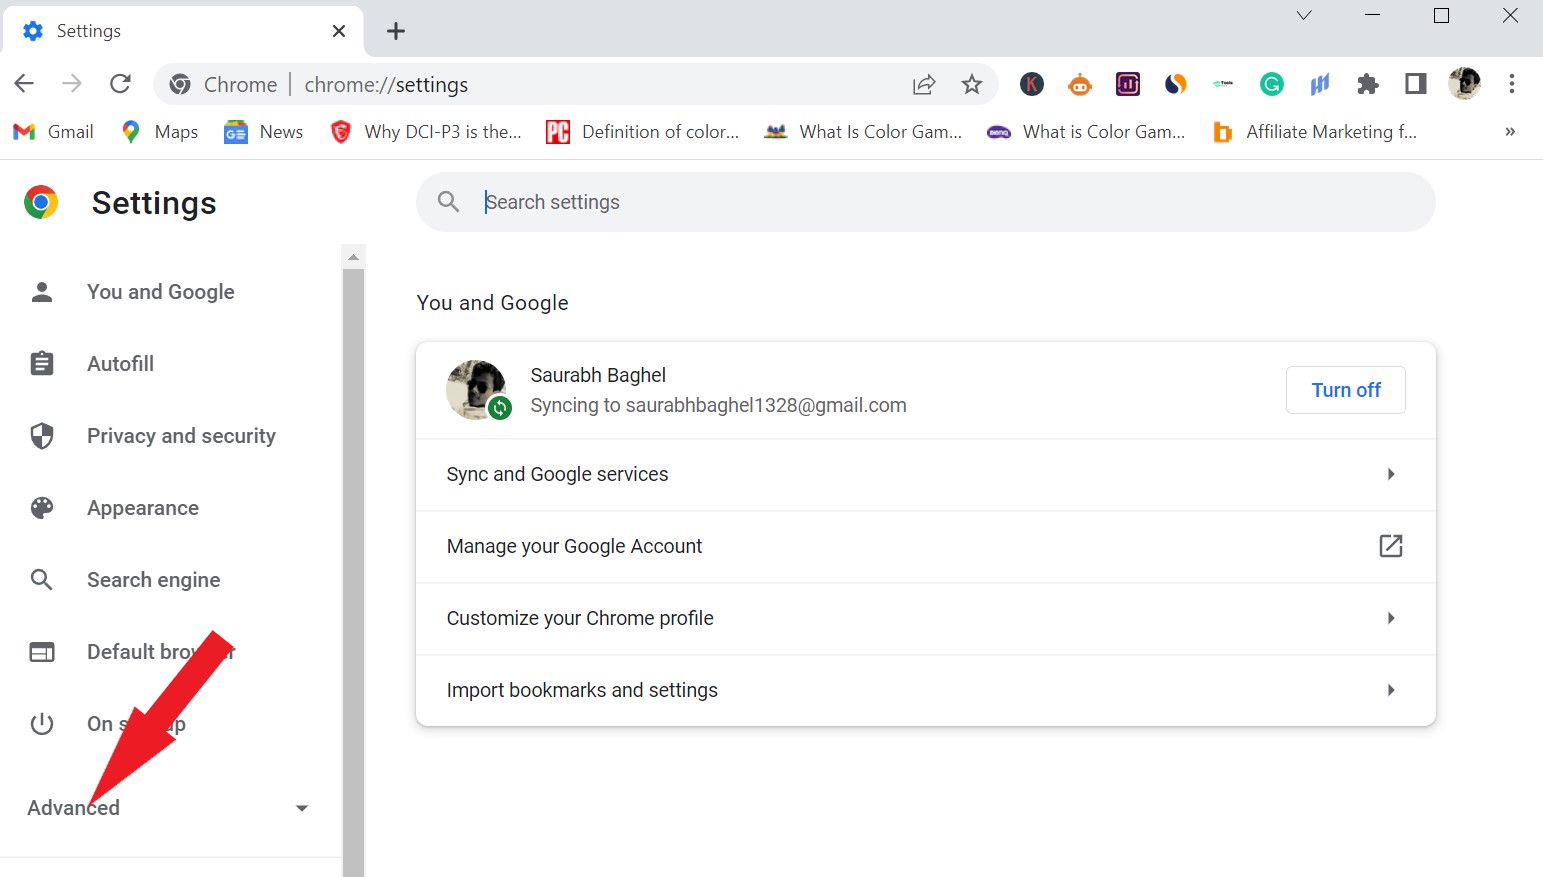
- Then select the option “Settings” from the drop-down menu.
- Click on the “Advanced” option from the table available on the left side of the settings page.
- From the advanced drop-down menu click on the “Reset and Clean Up” option.
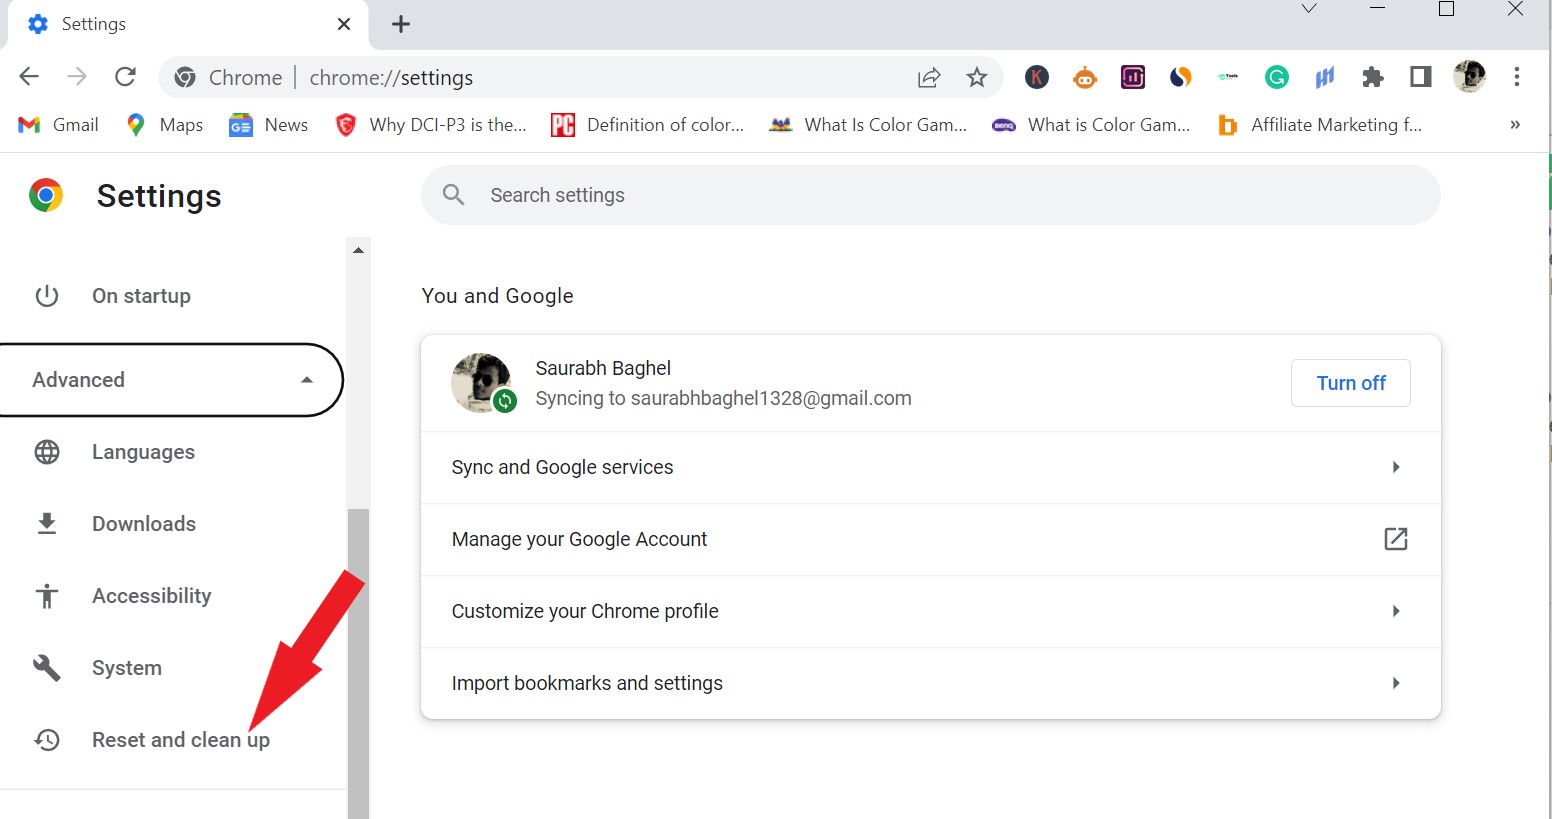
- Now click on the “Restore settings to their original defaults” option present on the right side of the screen.

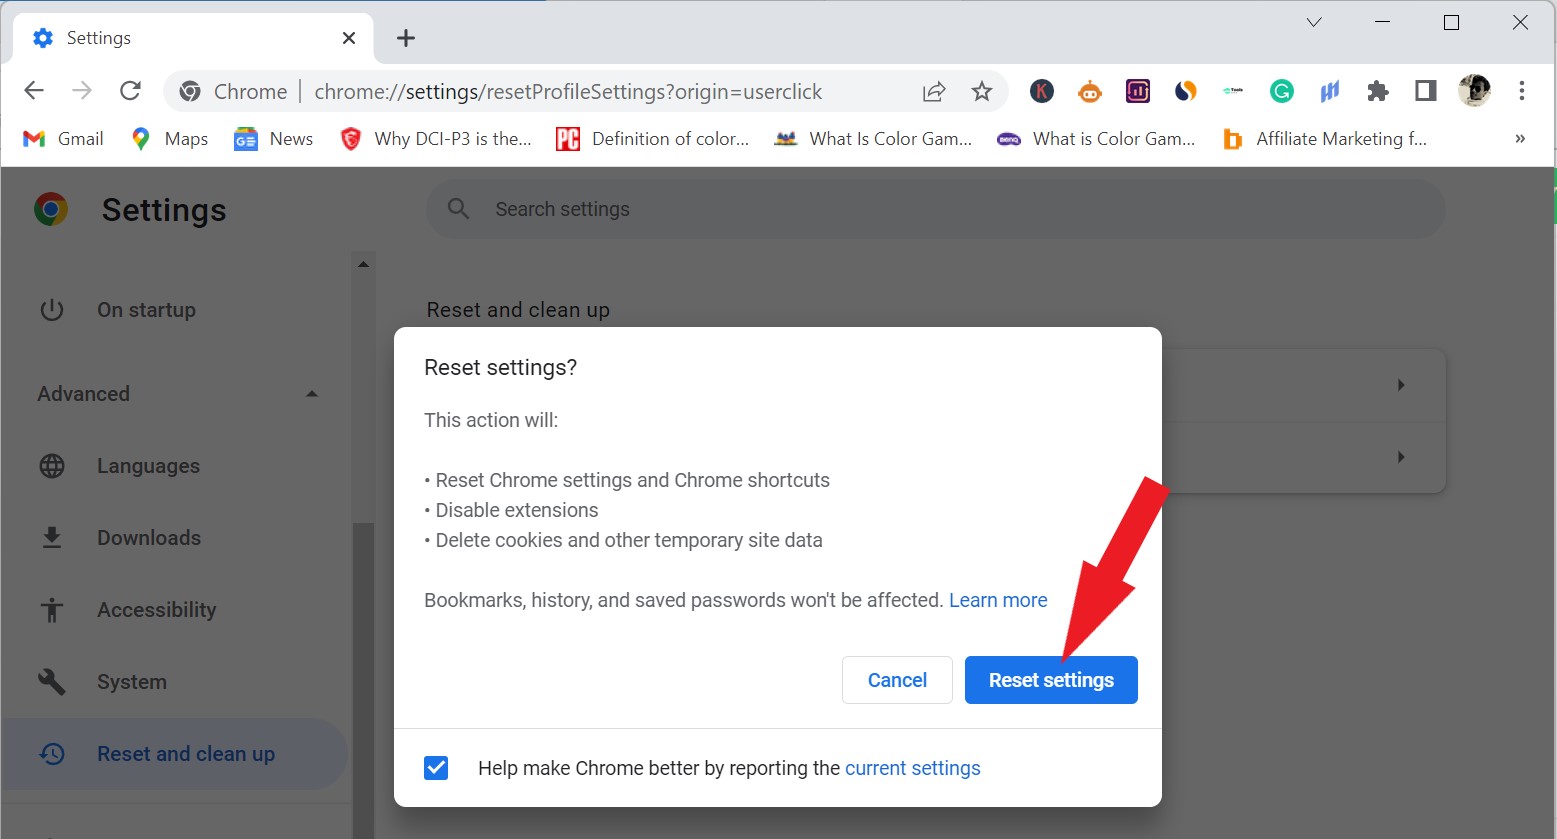
- For final confirmation, click on “Reset Settings,” and your Google Chrome browser will be reset to its default settings.
Fix 4: Disable Hardware Acceleration
- Open your Google Chrome browser.
- Now from the top left corner of the window, click on the “Three Dot Menu” to open the drop-down list.

- Then select the option “Settings” from the drop-down menu.

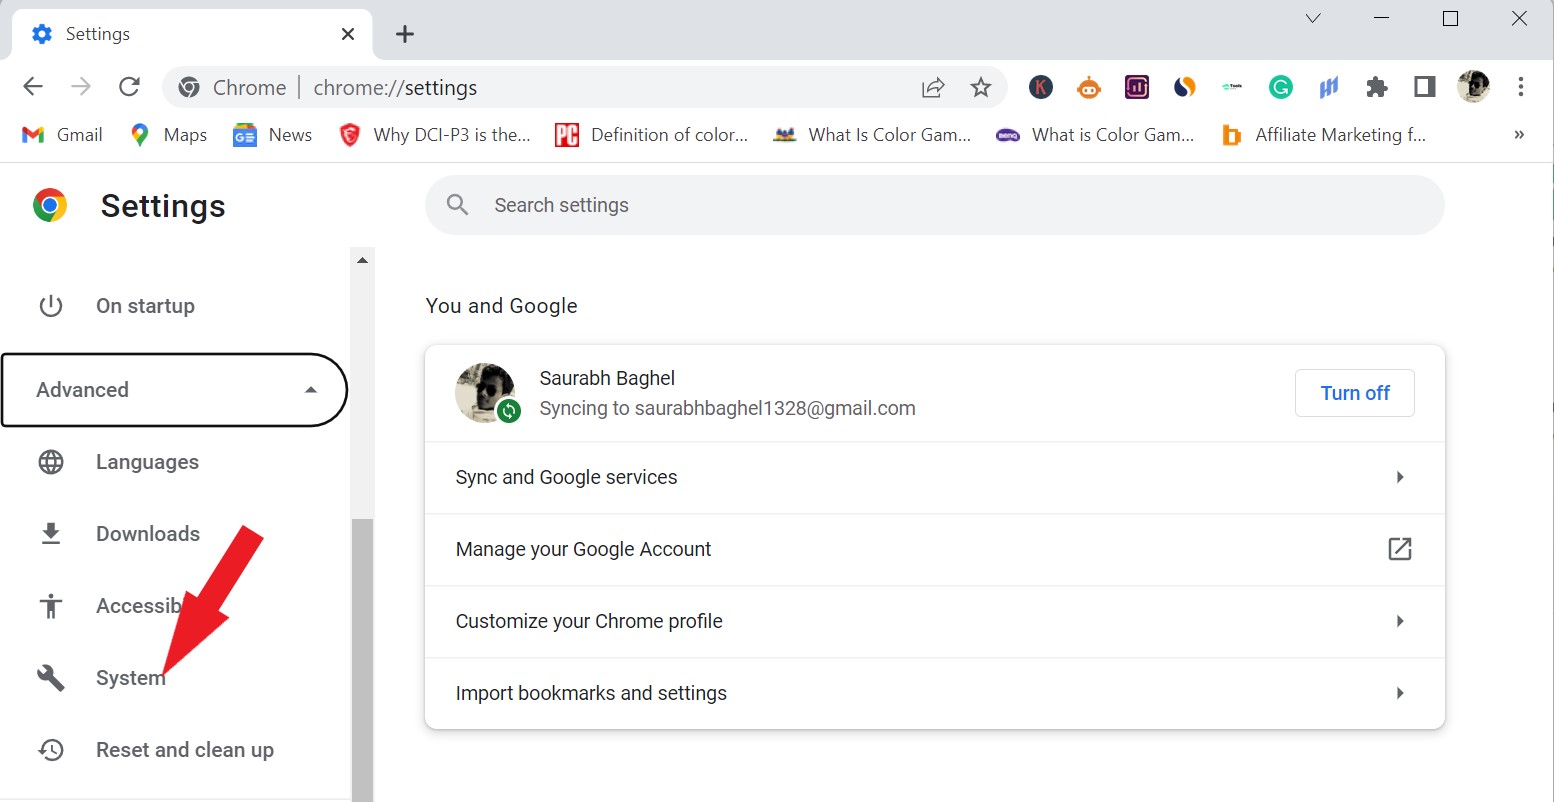
- Click on the “Advanced” option from the table available on the left side of the settings page.

- From the advanced drop-down menu click on the “System” option.
- Here you will see the “Use hardware acceleration when available” option present on the right side of the screen.
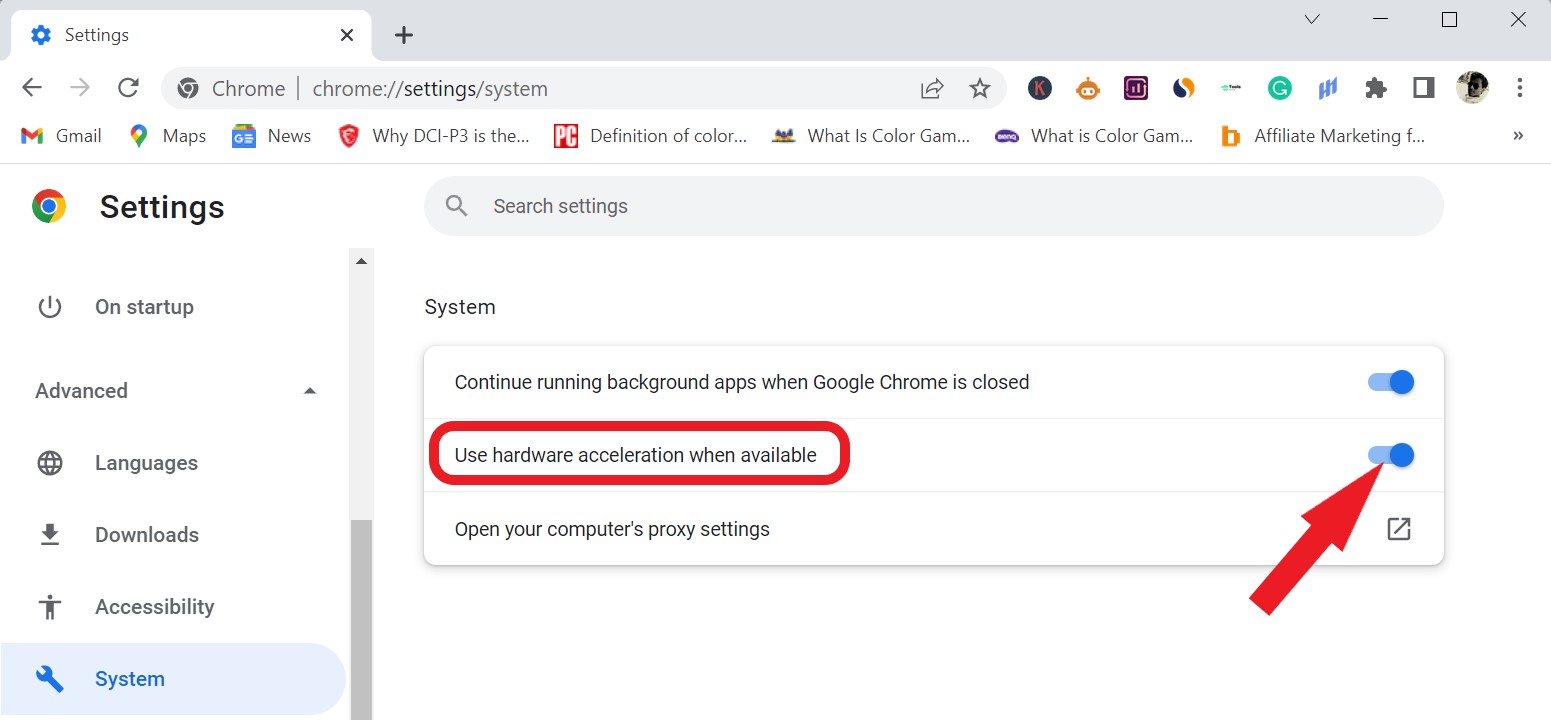
- Just slide the “Toggle Switch” into the “Off” position by clicking on it.
- Now click on the “Relaunch” button.
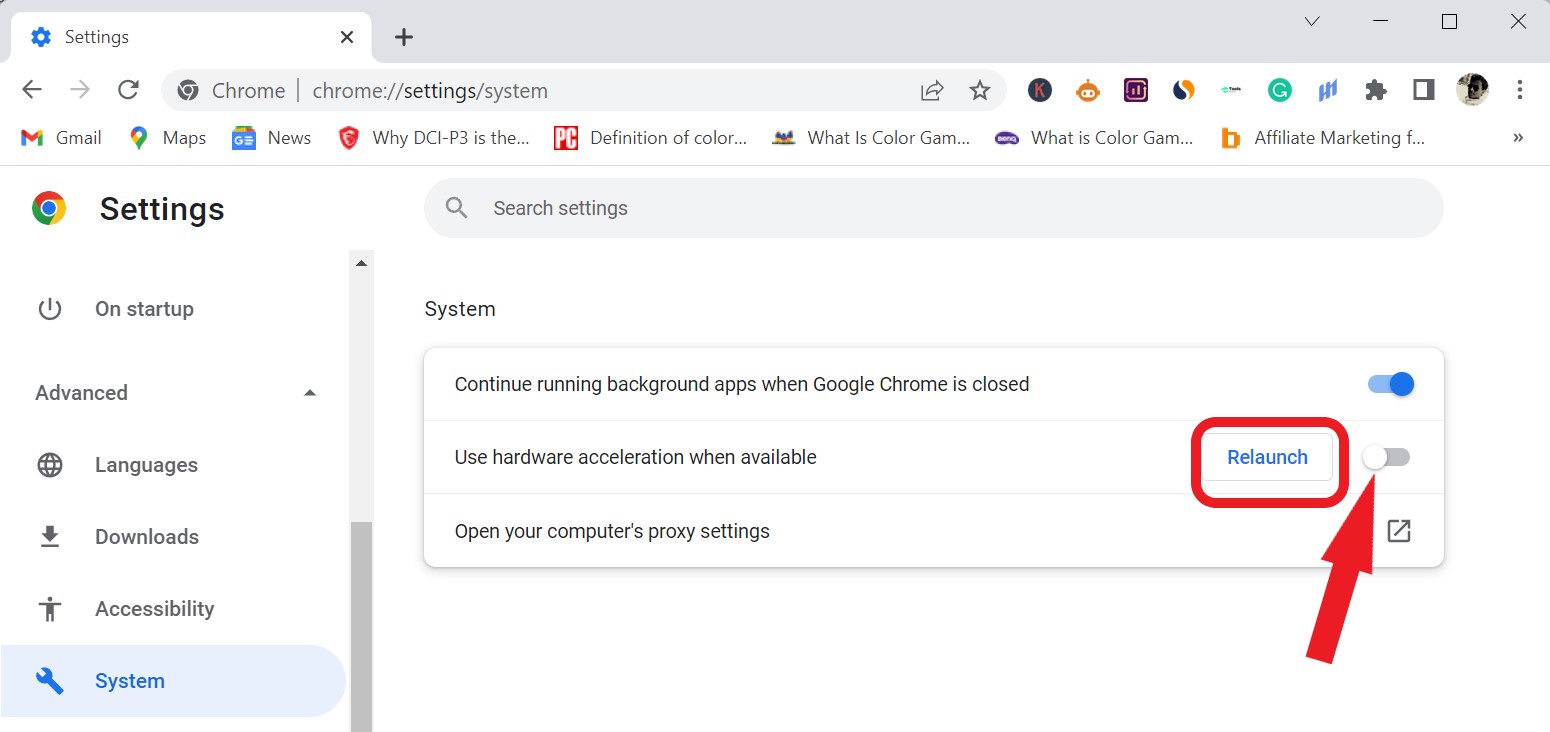
And see if Chrome cannot connect to the Wi-Fi/Internet problem is solved or not.
Fix 5: Change DNS Settings
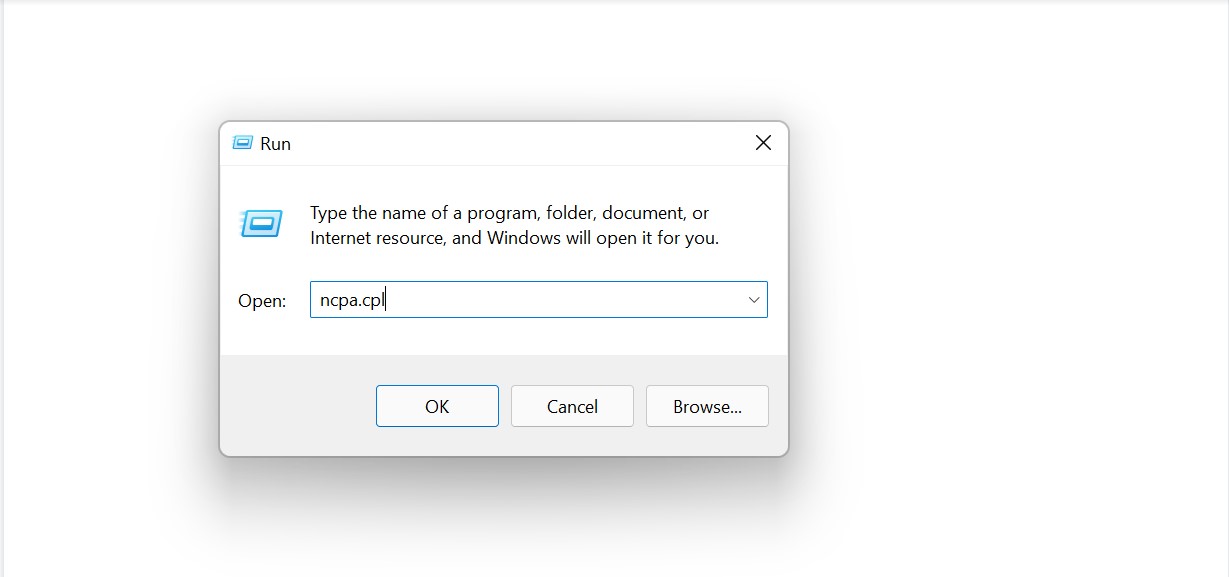
- Open up the “Run” dialogue box by pressing “Windows” and the key “R.”
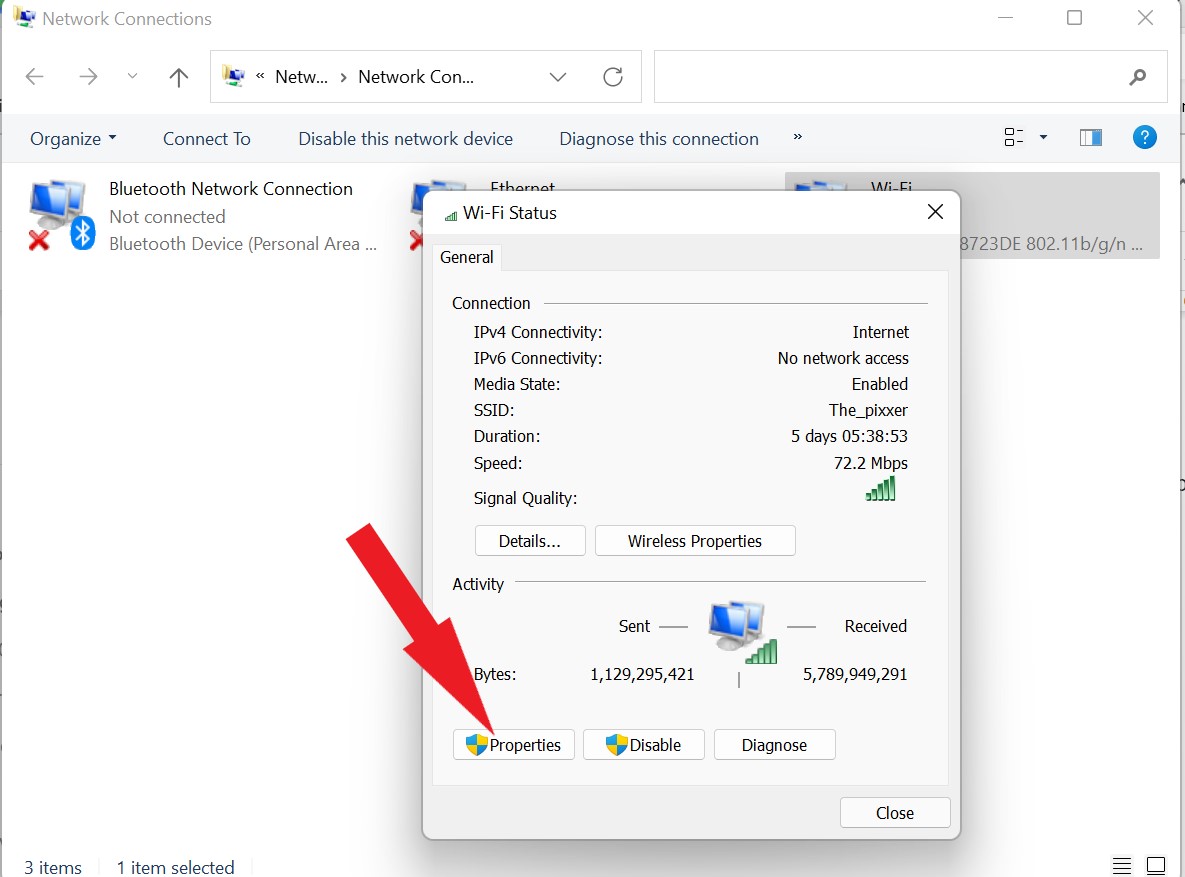
- Type “ncpa.cpl” to open the “Network Connections” window and hit “Enter.”
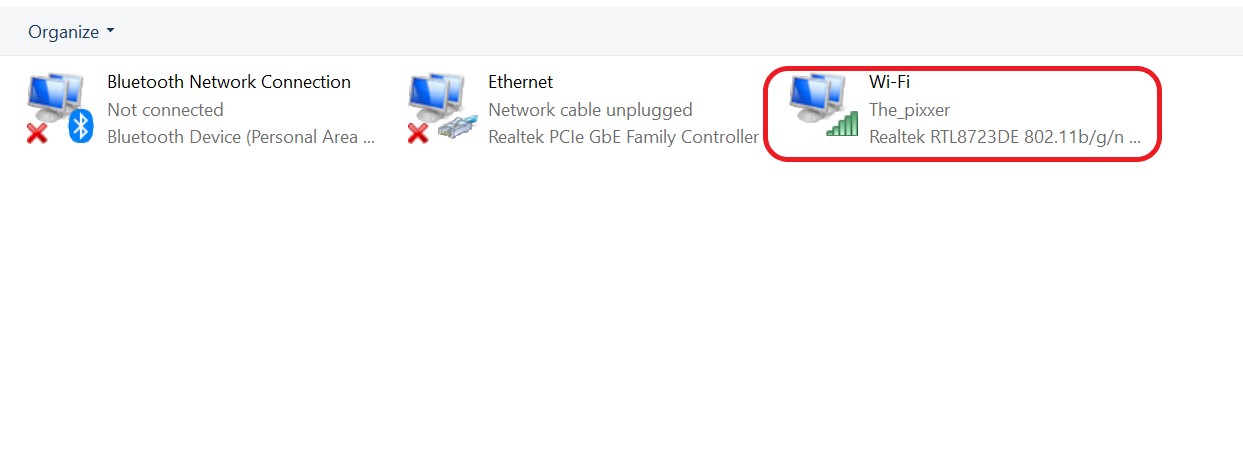
- Now “double-click” on the “Wi-Fi” option. And choose “Properties” from the prompt window.
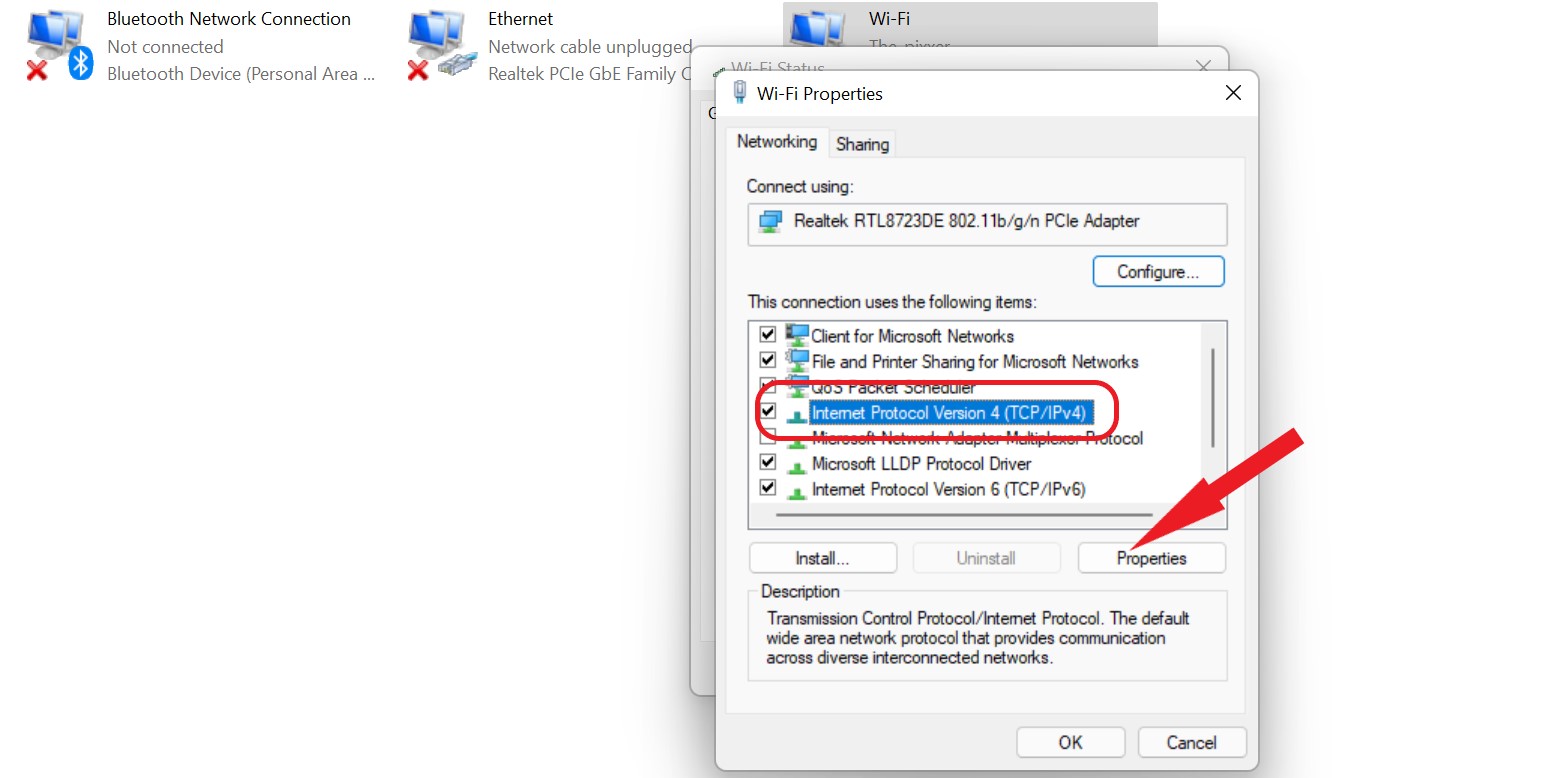
- Click on “Properties” and choose “Internet Protocol version 6 (TCP/IPv4)” from the “Networking” window and click on “Properties” of it.
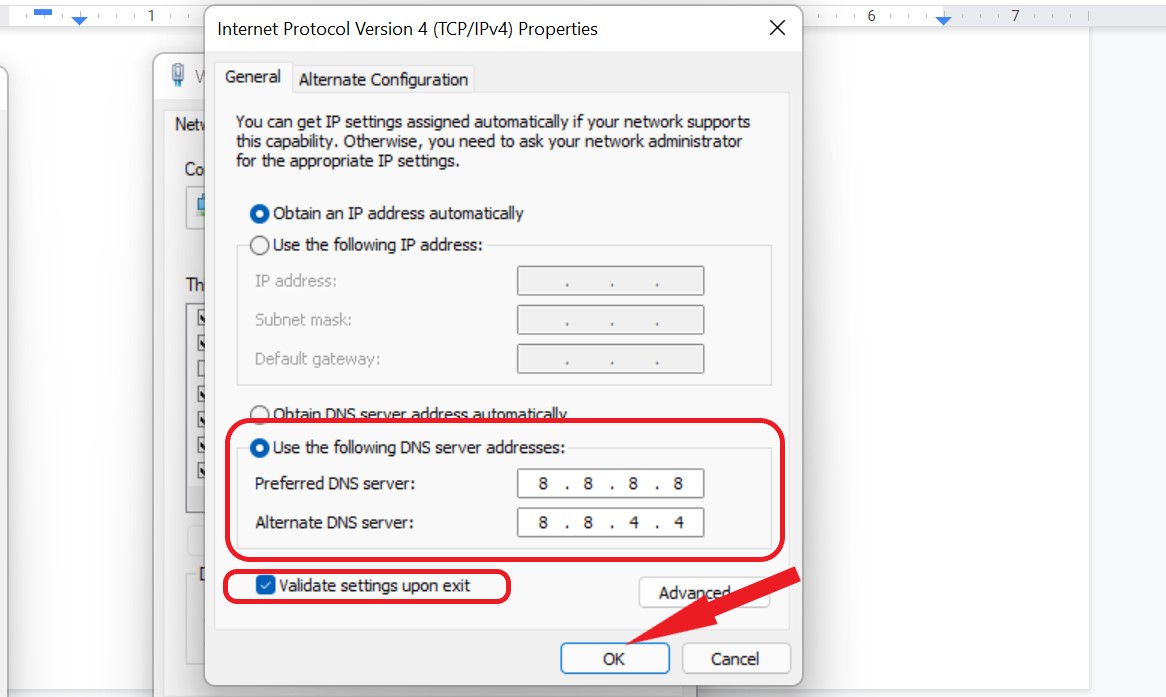
- Choose the “Use the Following DNS server addresses” option. Now in text fields adjacent to “Preferred DNS Server” & “Alternative DNS Server”, enter the values “8.8.8.8” & “8.8.8.4.4” respectively.
- Now check the box before “Validate settings upon exit” and press “Ok”.
Fix 6: Uninstall and Reinstall Google Chrome
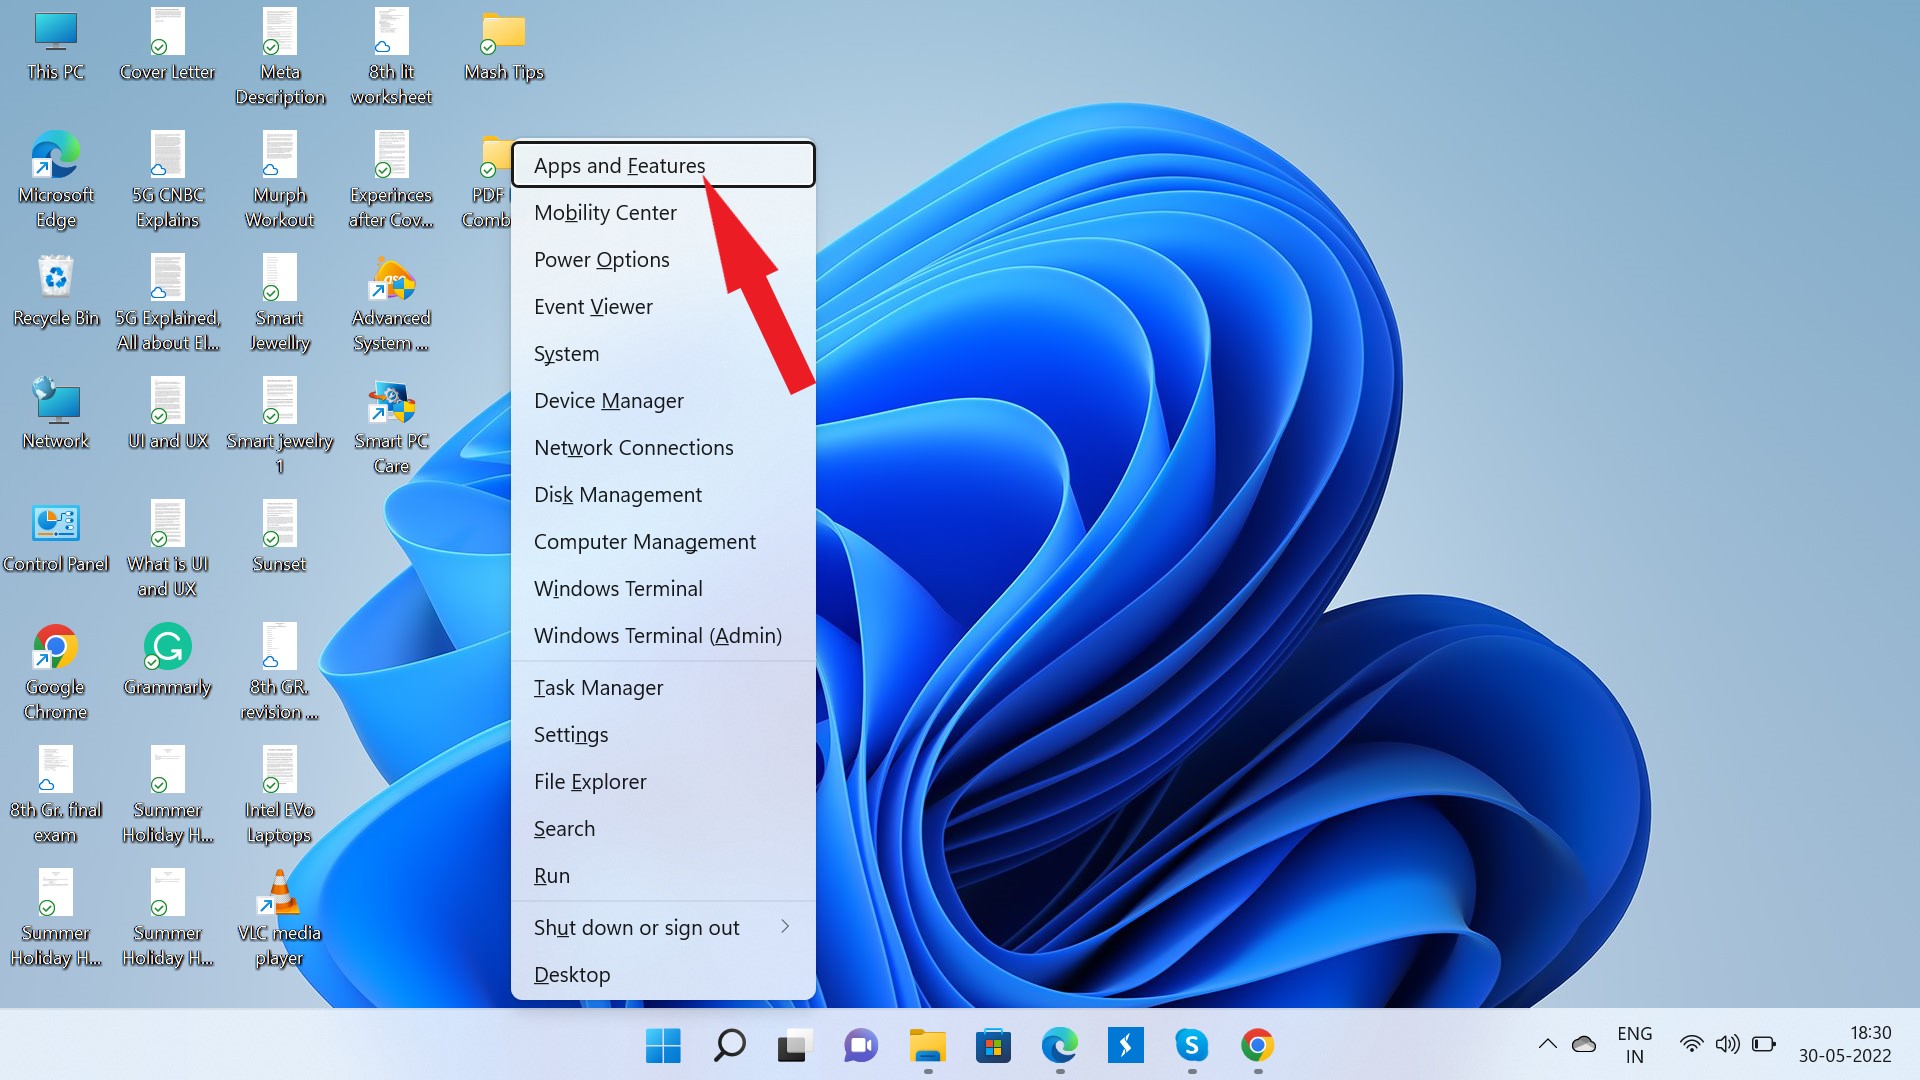
- Open the “WinX” menu by pressing the “Windows” key with the key “X”.
- Now select “Apps & Features” by clicking on it.
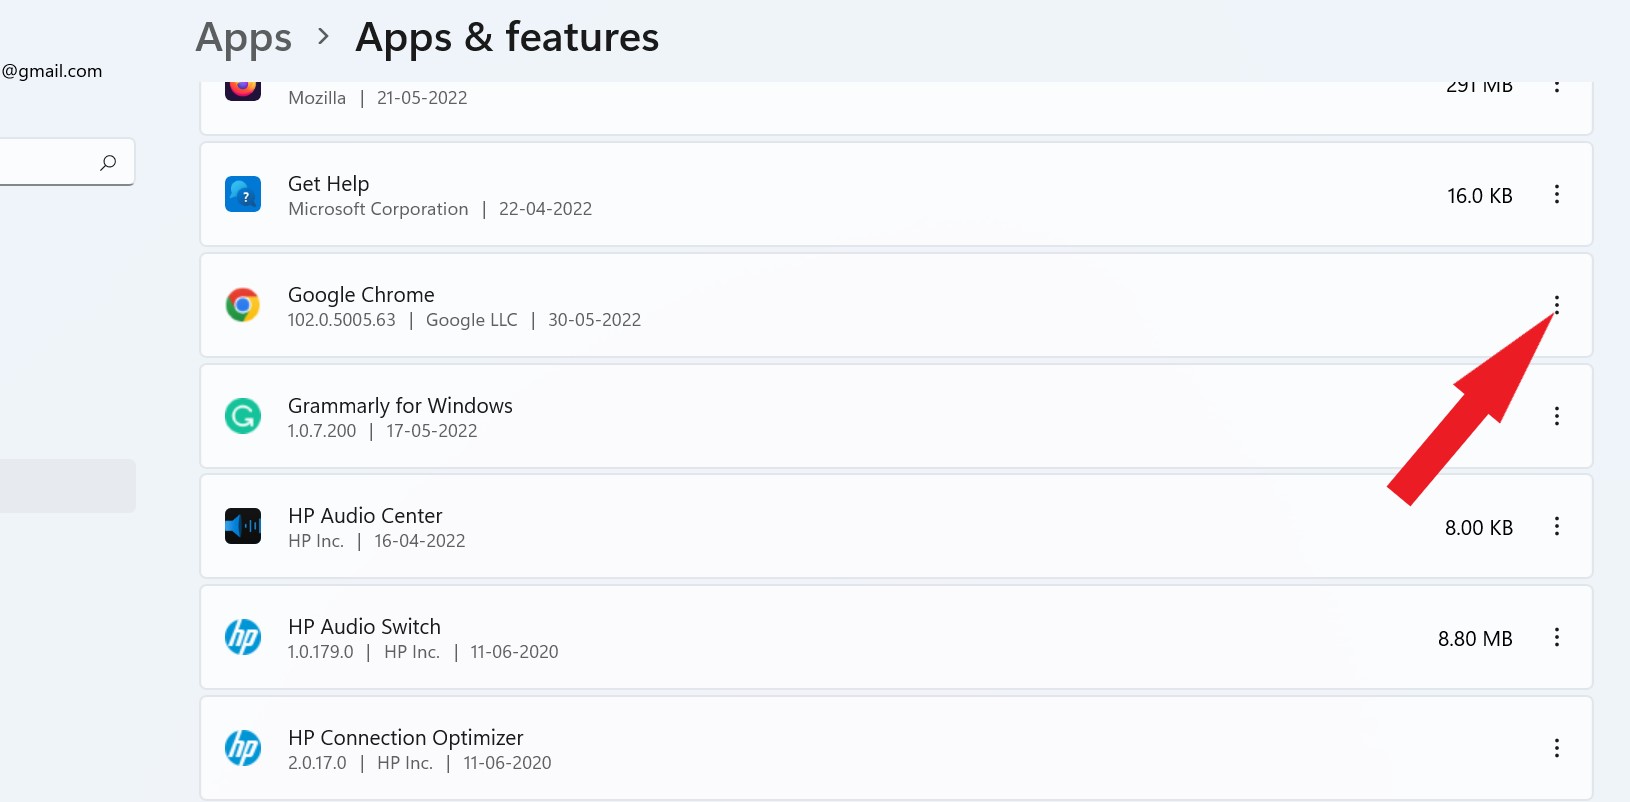
- In Apps & Features window, scroll down a bit and look for “Google Chrome” on the right-hand side of the screen.
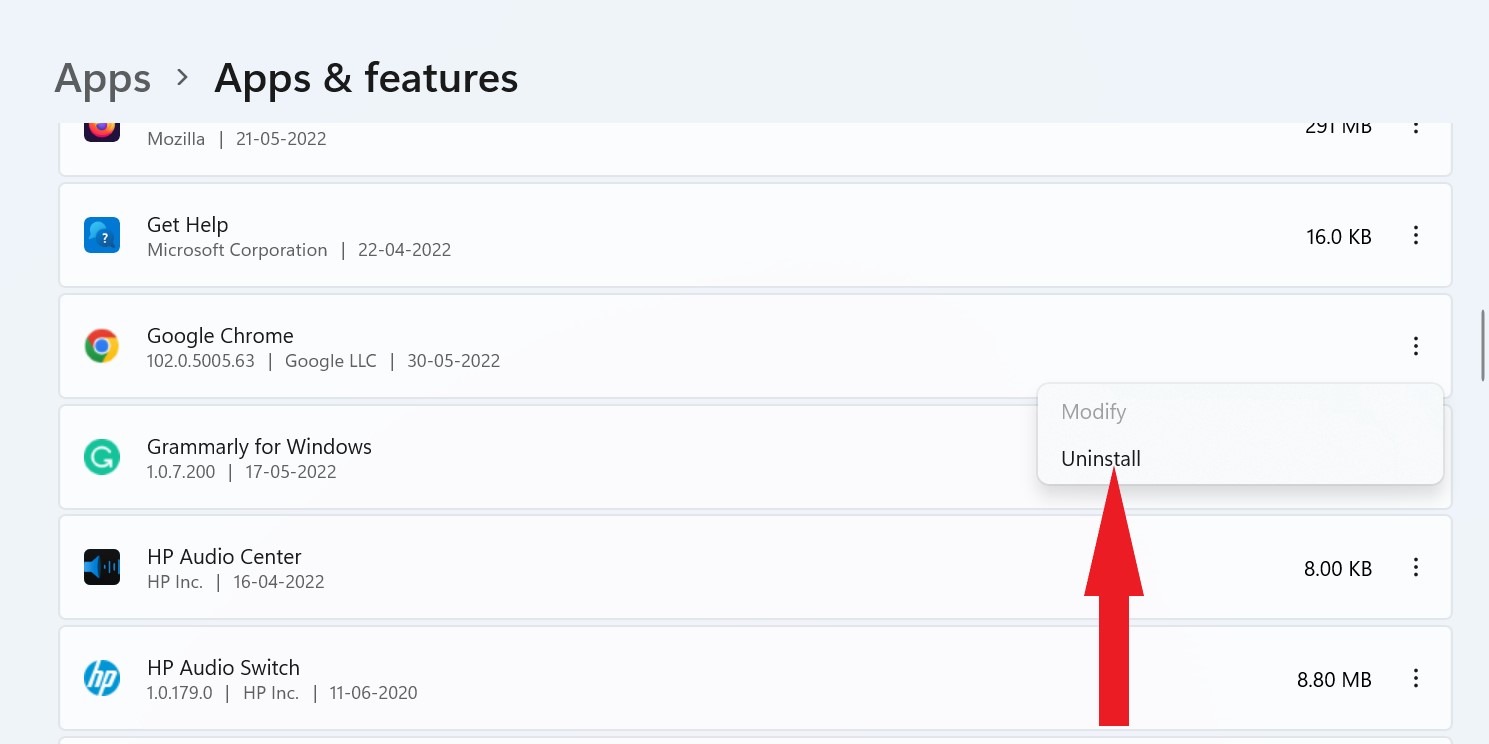
- Click on the “Three Dots” right in front of Google Chrome and tap on “Uninstall.”
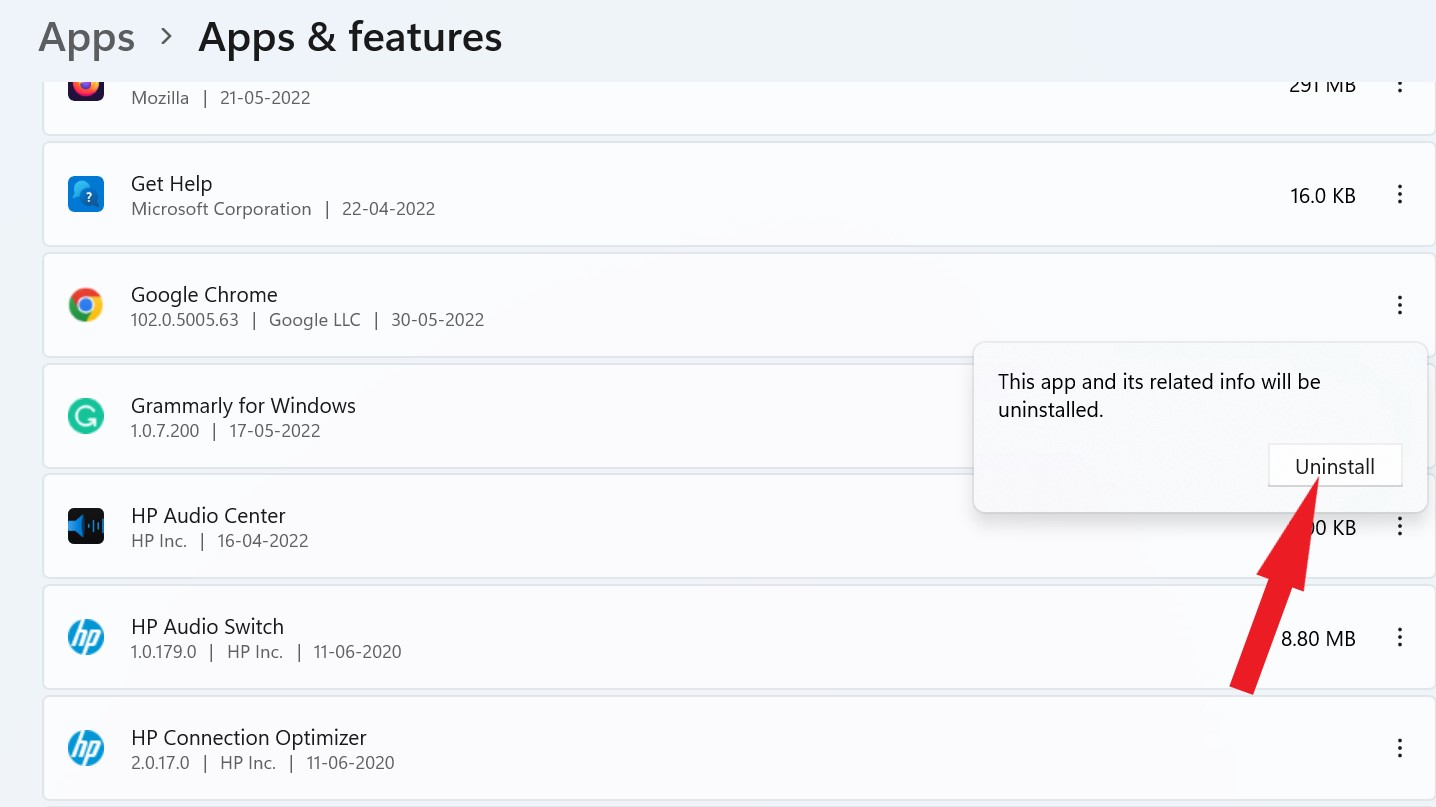
- For final confirmation again, click on “Uninstall.”
Install the latest version of Chrome on your device to get bug fixes and optimized performance.
To Wrap it Up
We hope that you will find this article useful, and one of the above solutions will surely fix the Google Chrome not connecting to Internet/Wifi problem in no time.
If you have any questions or suggestions related to this article, then feel free to contact us. We would be happy to help you. And if you know of any such fixes that I might have forgotten to mention, please tell that in the comment section below.


Leave a Reply