Chromebooks are user-friendly and powerful devices. The popularity of Chromebooks have increased over time with millions of users using it around the world. While the device is said to be a powerful machine to perform any task seamlessly, still it isn’t free of its own issues. It requires good Internet connectivity to perform different tasks, so if the connectivity is compromised or you may find it hard to connect your device to Wi-Fi, then the problem becomes serious.
How to Fix Chromebook won’t connect to Wi-Fi?
If you aren’t using offline apps, then you need to find a solution for this problem. To help you fix Chromebook won’t connect to Wi-Fi issue; here we have discussed various fixes. Well, all the discussed solutions are tested and suggested by professionals and Chromebook users. Let’s review more.
Solution 1: Check the Wi-Fi Connection
The first step you should follow is to check the Wi-Fi connection. To do this, follow these steps:
- At the right lower side of your desktop screen, you will find a Quick Settings Panel for your network, click on it.
- Here, it says Connected to (Network name).
- You need to disconnect the network To do this, go to Network > Disconnect, and then reconnect again.
- Alternatively, tap on ‘Not Connected’ icon and select the available network. Once done, input the credentials and click Connect.
You can also try to avoid router cable and use Ethernet cable to establish a stable connection with available Wi-Fi networks.
Solution 2: Restart Chromebook and Router

Next quick step you should follow is to shut down your Chromebook and switch off your router. It will perform a complete power recycle. This quick step will help you fix any connectivity glitches and helps you reconnect to a stable connection. Once you turn off your device and router, wait for a couple of minutes before restarting them.
Solution 3: Remove all preferred networks
Next is to remove all preferred networks. To do this, follow these steps:
- Type chrome://settings/clearBrowserData in your browser to remove cached data and cookies. Alternatively, press Ctrl + Alt + Del simultaneously to clear cached data and cookies.
- Next is to type chrome://settings and press Enter.
- Here, you need to click the network that appears.
- Now you will see Preferred Networks option click on it.
- From here, delete all available networks.
- You are done!
Solution 4: Run Chrome Connectivity Diagnostic App
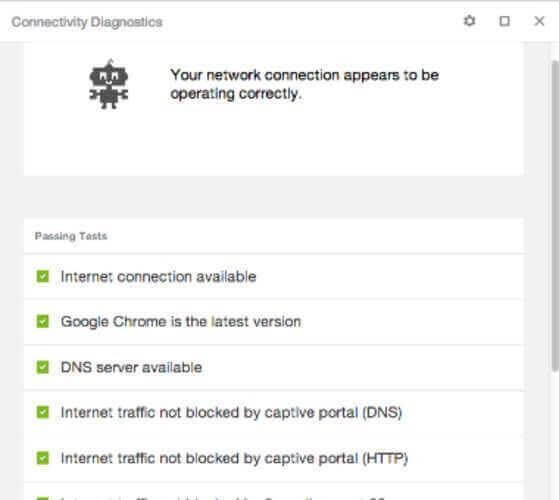
You can find Chrome Connectivity Diagnostic app in the form of Chrome extension. It is helpful tool to troubleshoot various performance issues on your Chromebook. In addition to other performance issues, you can also use this to check connectivity issues on your device. Run this app to check if there is any connectivity lag or unstable network or other issue that is causing trouble. It will help you fix Chromebook can’t connect to Wi-Fi instantly.
Solution 5: Reset Profile Settings
Resetting profile settings is another effective step you can follow to fix Chromebook won’t connect to Wi-Fi issues. You can follow this step to clear cookies, cached data, and deleting unnecessary extensions or browsing settings. To do this, type chrome://settings/resetprofilesettings in your browser and click on the Reset option. It will immediately help you fix the problem and keep your system back to normal performance. In fact, it will also help you speed up Chromebook performance to some extent.
Solution 6: Completely reset Chromebook
Next is to completely reset Chromebook. Wrong configuration, system file errors, or erroneous settings could cause trouble where your system can’t connect to WiFi. Before you reset Chromebook, we suggest you backup all files and data on your system. To do this, you can take backup on an external drive or on cloud servers. You can use the best data backup software to create backup copies of your existing data.
To reset Chromebook, press Ctrl + Alt + Shift + R keys simultaneously. Choose Restart and tap Powerwash > Continue. Follow the on-screen instructions to complete the process.
Conclusion
So, this was a quick discussion on how to fix Chromebook can’t connect to Wi-Fi. Do try these steps to fix the problem and don’t forget to share your experience in the comments below. If you have tried something else, do share that as well.
Next Read:
How To Speed Up Google Chromebook
How To Do Take A Screenshot On A Chromebook?


Leave a Reply