
You see an open Wi-Fi network and try connecting to it, but surprisingly failed to do so. And now you start thinking why your iPhone is not connecting to Wi-Fi. Is there some problem with your iPhone or is it the Wi-Fi network that is the culprit. Whatever be the reason, in this article we will try to find a solution for all types of iPhone Wi-Fi problems.
Also Read: Mac Not Connecting to Wi-Fi Network? Here’s How To Fix
Troubleshooting iPhone Wi-Fi Connecting Problems:
There can be several reasons for Wi-Fi not working on the iPhone, ranging from weak Wi-Fi signals to software glitches or may be hardware issues on your iPhone. But the good thing is that the iPhone Wi-Fi problem can be solved by trying some simple troubleshooting steps that we are going to discuss in our article.
Make Sure Airplane Mode is Turned Off
When Airplane mode is enabled it will automatically disable your cellular as well as Wi-Fi network including the Bluetooth.
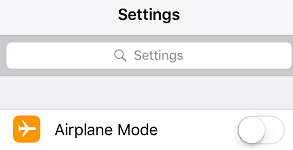
So first thing you need to make sure that the Airplane mode on your iPhone is disabled. In case it is enabled then turn it Off, and check whether it fixes the problem of the iPhone not connecting to Wi-Fi.
Make Sure Wi-Fi is Turned On
Before moving on to advance troubleshooting steps it is quite necessary to check the elementary things. So make sure that you have Wi-Fi enabled on your device. You can turn in on from Control Centre. For iPhone X and above, swipe down from the top right corner of the screen and tap on the Wi-Fi icon to enable it.
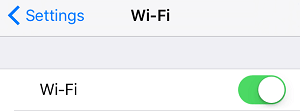
And in case Wi-Fi is already turned On then try disabling it, wait for 30-45 seconds and then turn it On again to check whether it resolves the problem.
Make Sure You Have Access to the Wi-Fi Network
If you are trying to connect to a password protected Wi-Fi network, then you need to have a password to access that network. A lock icon next to the Wi-Fi network confirms it is password protected. If you are trying to access any such network then first you need to type in the password. If you do not have one then unfortunately you can’t access that network.
Check your Modem/Router:
If your iphone is connected to Wi-Fi but no internet access then it means that it means that either there is a problem with the Router or with the network provider. Basically we never turn off our Router, but the fact is that like any other electronic device Router also needs a fresh start to resolve many network related problems. So to fix this, turn Off the Router, wait for 45 seconds and then turn it back On again to check whether it resolves Wi-Fi not connecting problem on iPhone.
Restart Your iPhone
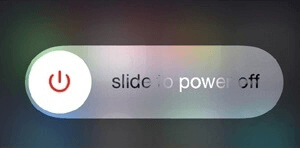
For many users restarting their iPhone has resolved Wi-Fi issues. If it had work for them then it might work for you as well. So power off your iPhone, wait for a few seconds and then turn it back on to check whether your iPhone is now able to connect to the Wi-Fi again.
Also Read: Tips To Keep Your Wi-Fi and Router Safe From Malware
Turn OFF Wi-Fi Assist
Apple has provided the Wi-Fi Assist feature on your iPhone so that the device automatically switches to a cellular network, when the available Wi-Fi connection is weak or poor.
On your device Wi-Fi assist feature is On by default. So the problem of the iPhone not connecting to Wi-Fi can be caused by this feature.
So let’s turn this feature Off to check whether it resolves the problem by following the steps below:
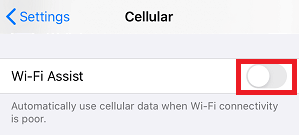
To disable Wi-Fi assist open iPhone Settings > Cellular > Turn Off Wi-Fi Assist by sliding the button to Off position located in front of Wi-Fi Assist feature.
Now try reconnecting to the Wi-Fi network again to check if the problem is resolved.
Forget Wi-Fi Network
Is your iPhone always automatically connected to a Wi-Fi network previously but now it is unable to do so? Then you need to forget that network and rejoin it again by following the below steps:
1. Open iPhone Settings and tap on Wi-Fi.
2. Now tap on your Wi-Fi network.
3. Now tap on Forget This Network option on the next screen.
4. On the confirmation box that pops, tap on Forget to confirm.
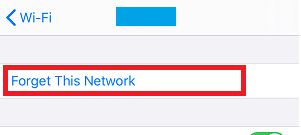
5. Wait for a few seconds and then tap on the available network again. Provide the password for the Wi-Fi network to check whether it fixes the problem of iPhone not connecting to Wi-Fi.
Turn Off Location Services For Wi-Fi
To boost location services your iPhone uses nearby Wi-Fi networks. Now on one side it improves the accuracy of location services on the other hand it may lead to the iPhone Wi-Fi problems.
So to fix this, let’s try turning off location services for Wi-Fi by using the method below:
1. Open iPhone Settings and tap on the Privacy option.
2. On the Privacy screen, tap on Location Services.
3. Now scroll down and tap on System Services.
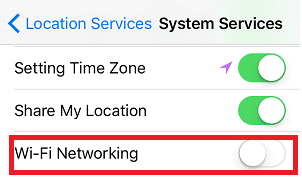
4. On the System Services screen, toggle off the button next to Wi-Fi Networking.
Reset Network Settings of Your iPhone
If any of your network settings is corrupted then it will stop the iPhone from connecting to Wi-Fi. Resetting network settings will flush the memory cache, DHCP settings and reset the network settings to default.
Note: Since this step will reset the network settings to default, all your paired devices will be unpaired and you need to type in the password again to connect a previously connected Wi-Fi network.
1. Open iPhone Settings and tap on the General option.
2. Scroll down to bottom and tap on Reset option.
3. Now on the next screen, tap on the Reset Network Settings option.
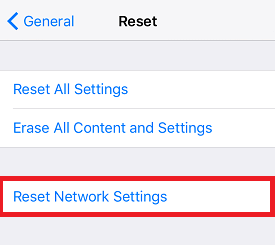
4. Tap on Reset Network Settings again in the confirmation pop up.
Now after typing in the Wi-Fi password check whether your device is able to connect to the Wi-Fi.
Renew DHCP Lease
To resolve iPhone Wi-Fi problems, you can also go for renewing DHCP Lease. What it basically does is provide you a new IP address and routing data from your Router. Although you can also set the IP address manually, if you do not know much about the network and its settings then it is better not to set IP manually.
This step comes handy if you are experiencing conflicts with other devices that are on the same network and leading to the problem of the iPhone not connecting to Wi-Fi.
1. Open iPhone Settings and tap on Wi-Fi.
2. On the next screen you can find all the available Wi-Fi networks. Now tap on the network you are connected to(it will have a blue check mark in front of it).
3. Now on the next screen tap on the Renew Lease option.
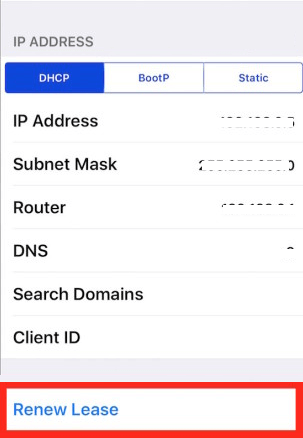
4. On the confirmation box that pop-up, again tap on Renew Lease to confirm.
Since renewing a DHCP lease helps in troubleshooting various network connectivity issues, we hope that it fixes the problem in your case as well.
Switch to Open DNS
If the DNS server of your Internet provider is going through issues or is down or is busy then also users either face the problem of Wi-Fi not working on iPhone or iPhone connects to Wi-Fi but gets no internet. To resolve this you can switch to Open DNS server or Google.
1. Open iPhone Settings > Wi-Fi > Select your Wi-Fi Network.> Scroll down and tap on Configure DNS option.
2. Now on the next screen, first tap on the Manual option and then tap on Add Server option.
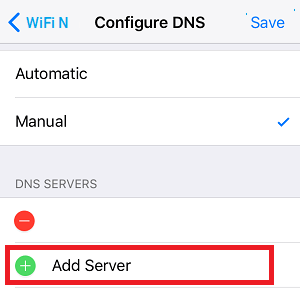
3. Type 208.67.222.222 or 208.67.222.220 if you wish to switch to OPEN DNS and 8.8.8.8 and 8.8.4.4 if wants to use Google DNS server
4. Tap on the Save button to save the changes.
Reset your iPhone to Default Factory Settings.
If all the above steps fail in resolving the problem of the iPhone not connecting to Wi-Fi then this is the last resort you can try before reaching an authorized Apple service store.
However please note that resetting the iPhone to factory settings will wipe all your device data.
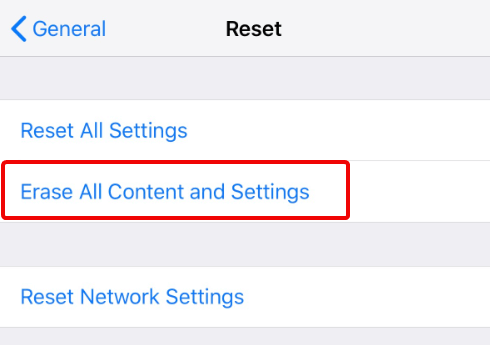
To reset iPhone to factory settings tap on Settings > General > Reset > Tap on Erase All Content and Settings.
Since this option will wipe all your data we suggest you to backup your data. You can below our two articles on
How to Backup iPhone/iPad Data on Computer Using iTunes
How To Backup iPhone/iPad Data On iCloud Using iTunes
And in case you are running out of storage on your iCloud then you can use a third party backup solution RightBackup to backup all your data.
Click Here To Download RightBackup


Contact Authorized Apple Service Center
There can be a hardware issue with your device (iPhone) itself which results in Wi-Fi not working on your iPhone. In such a case we recommend to you a local Apple Store or Service center and get it checked by an expert.
Wrapping Up
So folks, we hope that above listed steps have helped you in resolving the problem of the iPhone not connecting to Wi-Fi. Do let us know in the comment box below which of the steps worked for you. Also if you do not wish to miss any such troubleshooting articles then do follow us on our social media channels.


Leave a Reply