
Duplicate files are almost inevitable. Whether you create versions of files, copy-paste them to another folder, merge several folders, transfer files to another device, or import files from another device, duplicates are bound to arise.
But, the fact of the matter is that, if these go unchecked and if you don’t act upon them promptly and remove these duplicates, they’ll take up huge storage space. So much so, that there might be times when you might wonder where did my storage go or how did these duplicates arise.
There is yet another thing that we’d like to address and that is it is humanly tedious and a rather difficult task to lock horns with duplicate files. And, hence through this post, we are going to enlist some great ways that are going to speed up the very process of duplicate file finding.
Here’s Why We Are Stressing So Much On Finding Duplicate Files
When you have duplicate files neatly sorted right in front of your eyes in one place, you can easily and quickly decide which files to keep and which files to remove. Under no circumstances, will you find yourself at the brim of accidentally deleting any wrong files.
Best Ways To Detect Duplicate Files Fast –
– Sort Files Using File or Windows Explorer
This is a primary step in identifying duplicate files. Sorting duplicate files using several parameters in your file explorer is something that you should do once in a while. Sorting files based on several parameters can help you speedily zero down and identify duplicate files –
1. Open your File Explorer
2. Head to the folder where you want to detect duplicate files
3. From the Toolbar, click on the View dropdown and select details. Now, you don’t just have the files but a lot of other information pieces – name, date, type, size, tags, etc.
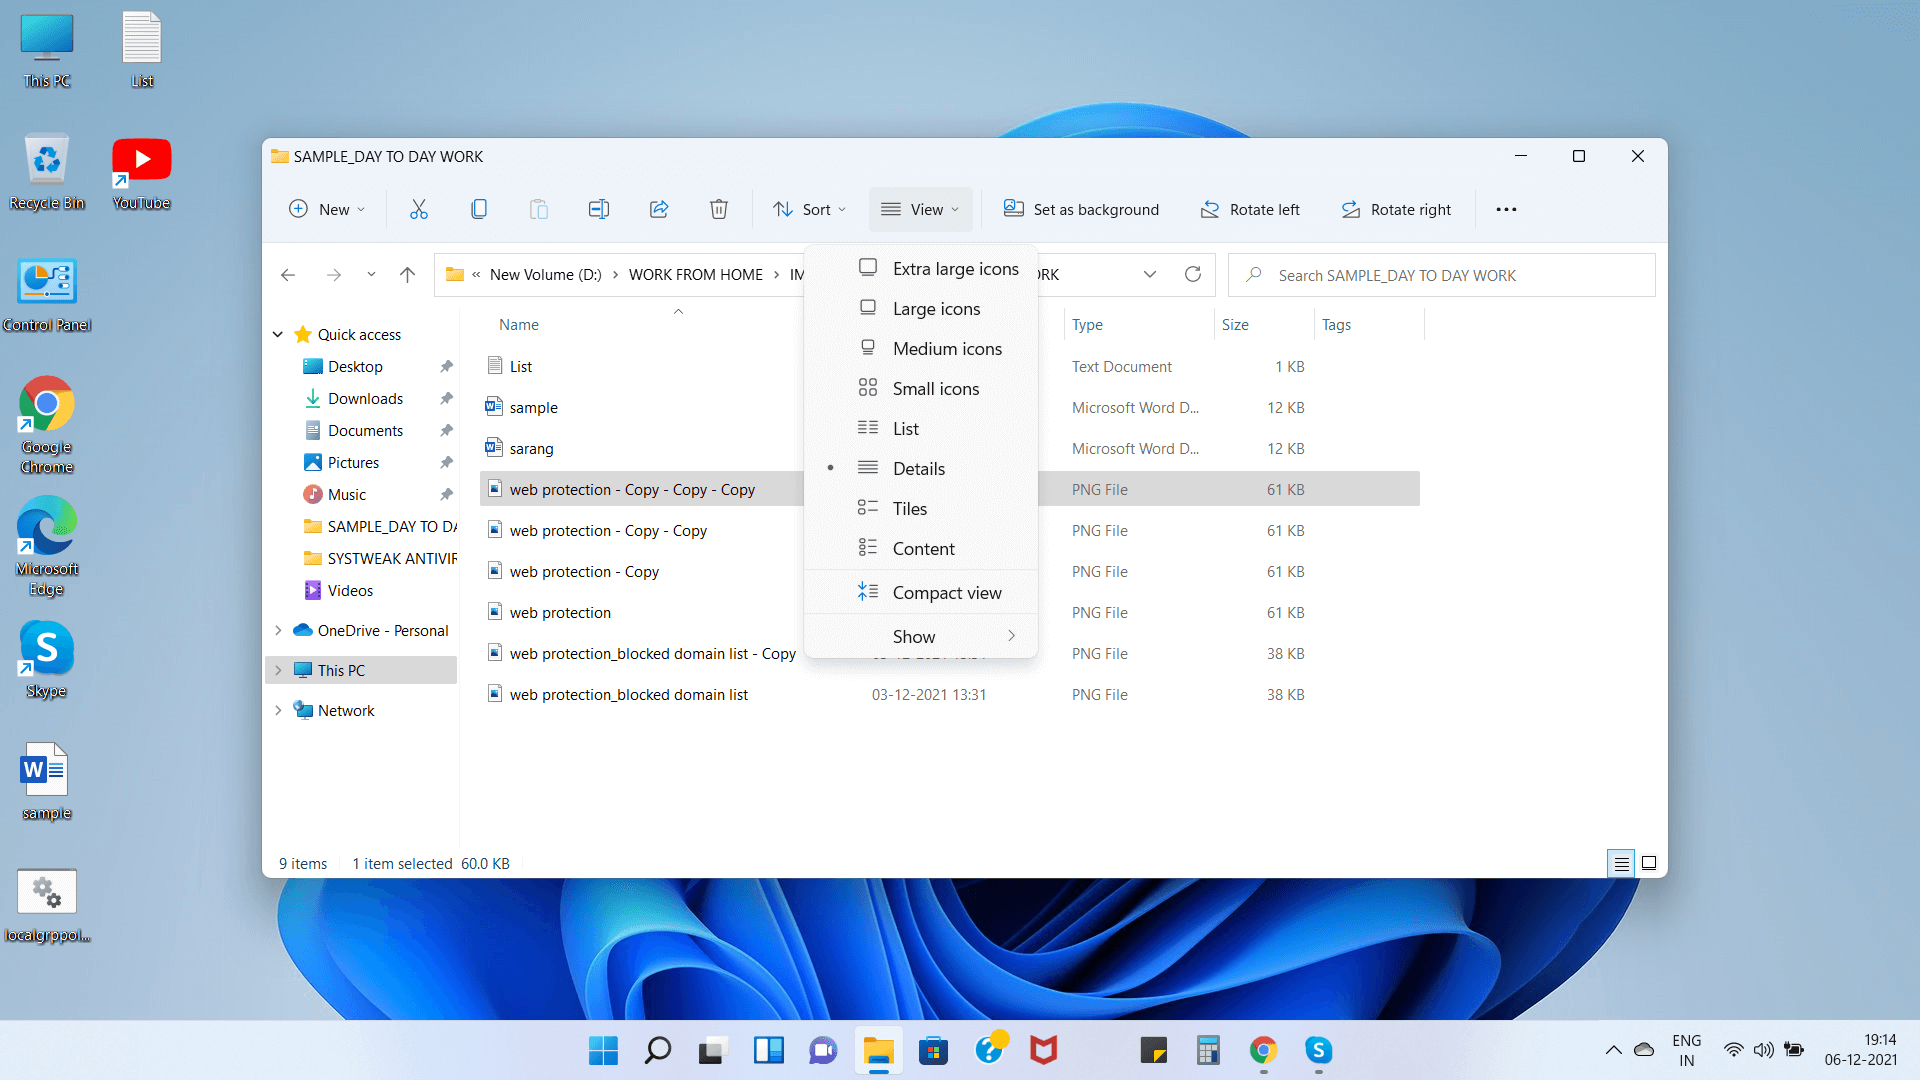
4. Next, again on your Toolbar, you will find a Sort dropdown, click on it. You can now sort files based on Name, Date, Type, Size, and several other factors.

5. This step will make it easy for you to compare files and you can, therefore, remove the ones that you find duplicated.
– Use Command Prompt To Delete Duplicates
If several files are suffixed with “-copy” and version number that you had created accidentally or intentionally, you can check and detect such duplicate files using the sort and view method we had explained just above. Once you have done that –
1. In the search bar, type cmd
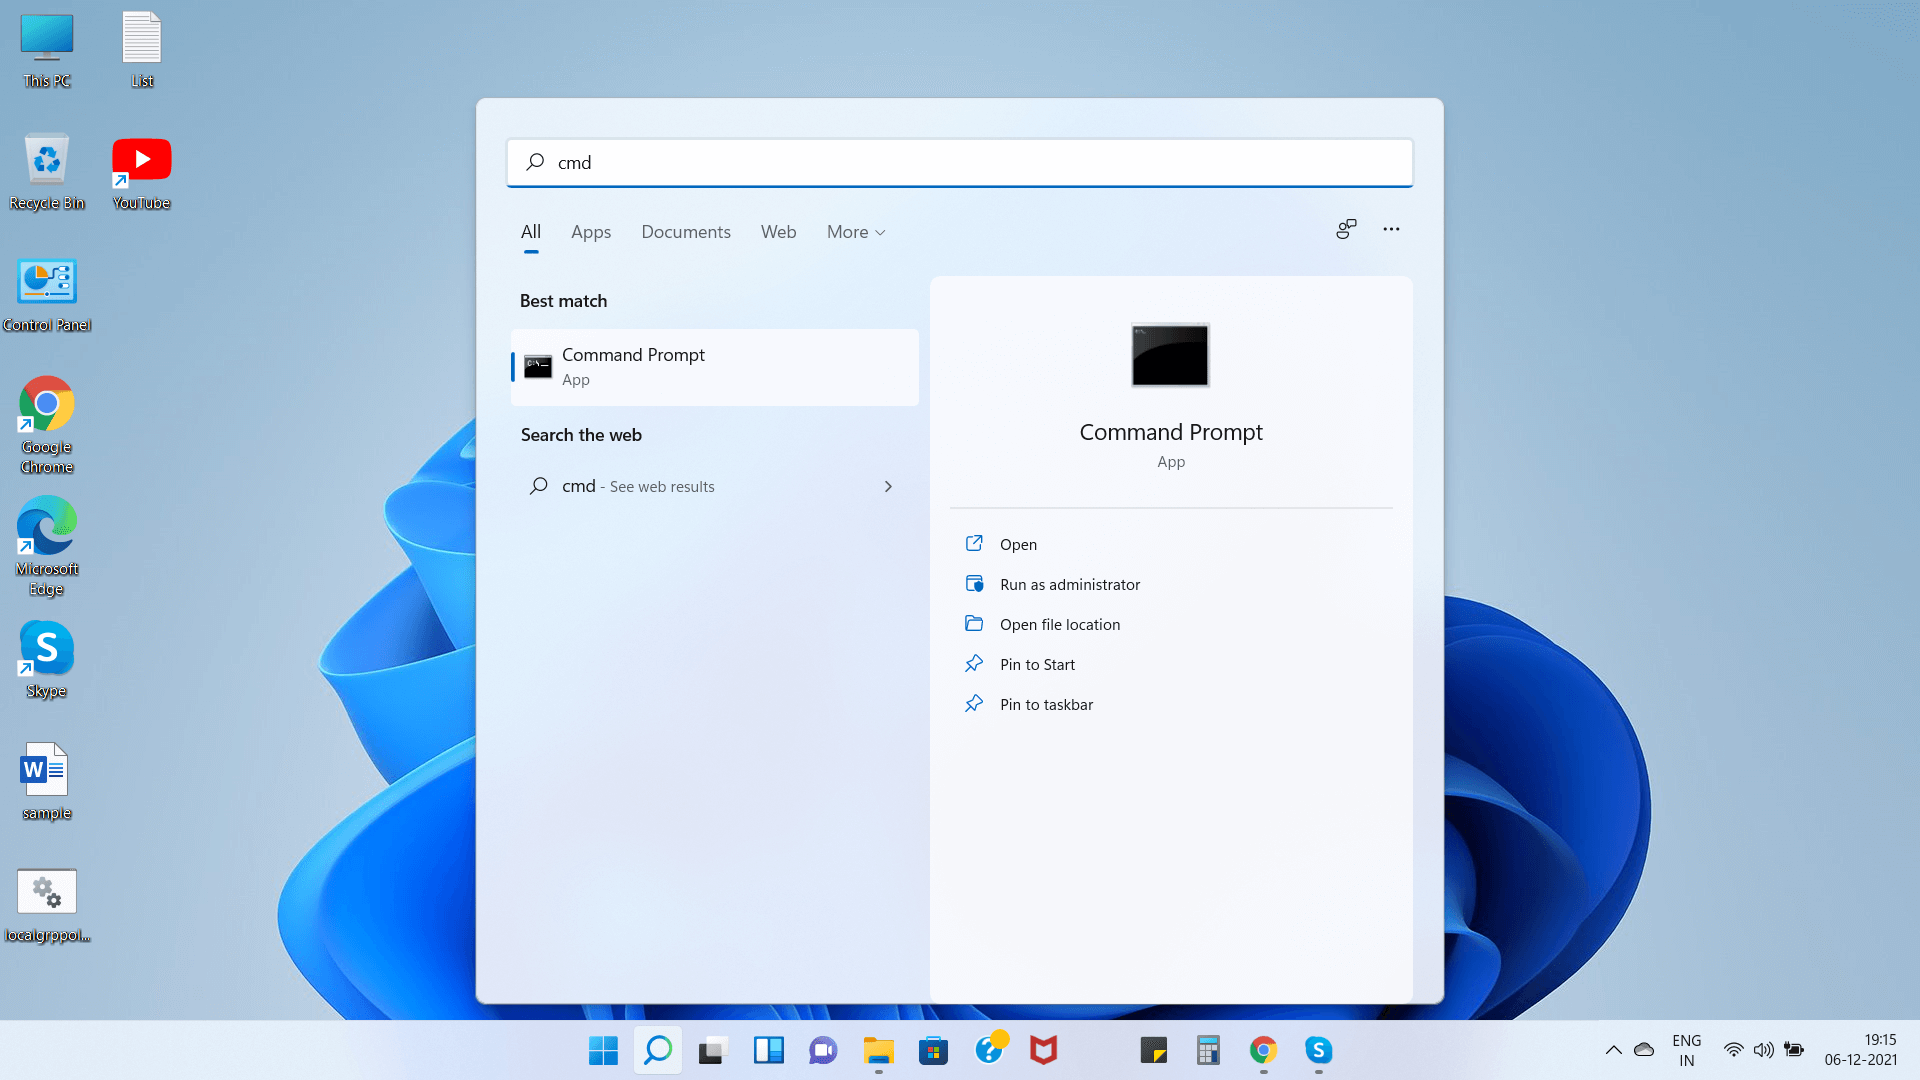
2. Select Run as administrator from the right-hand side
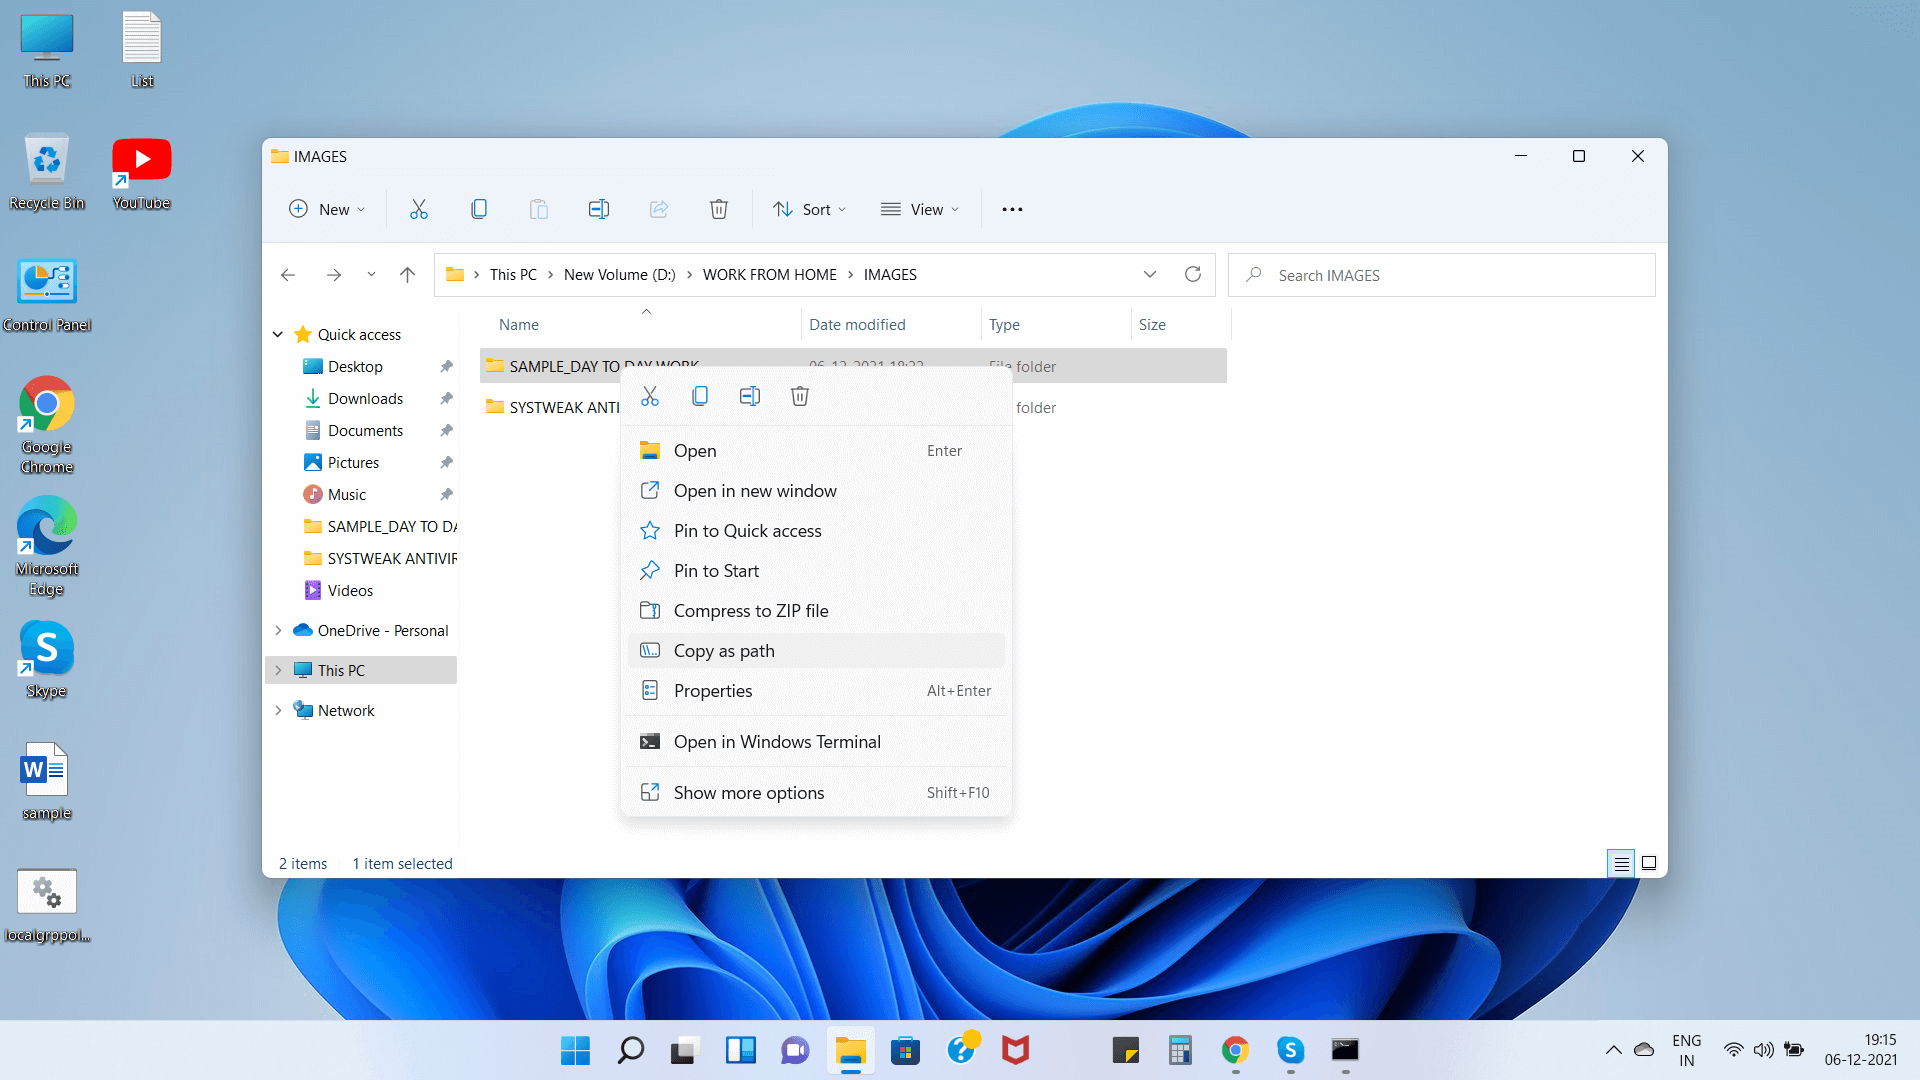
3. Head to the folder that contains duplicate files
4. Right-click on it and then select Copy as path
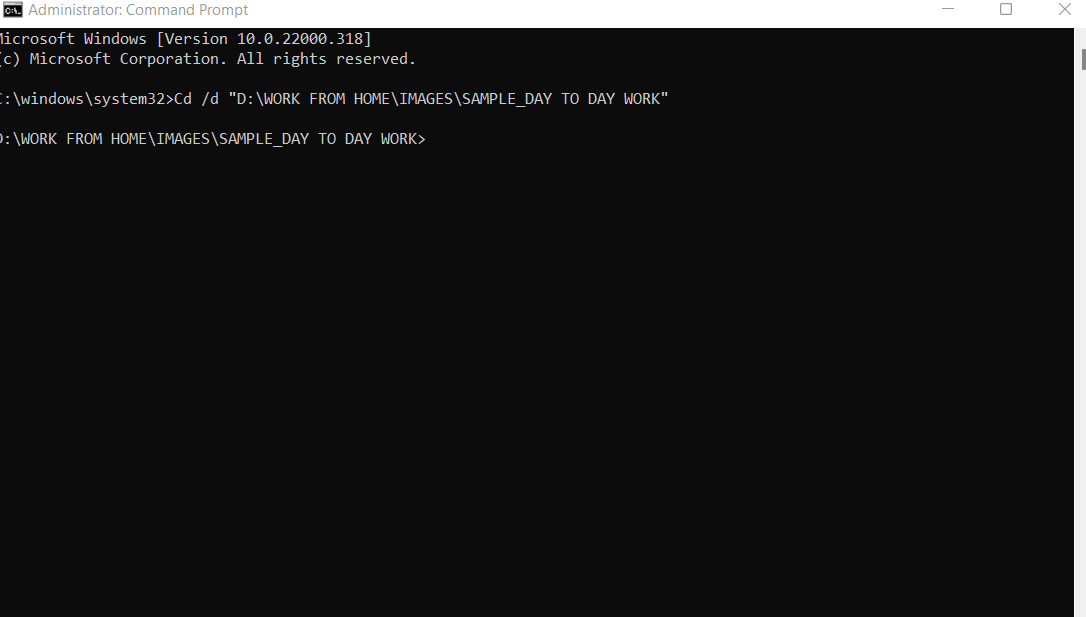
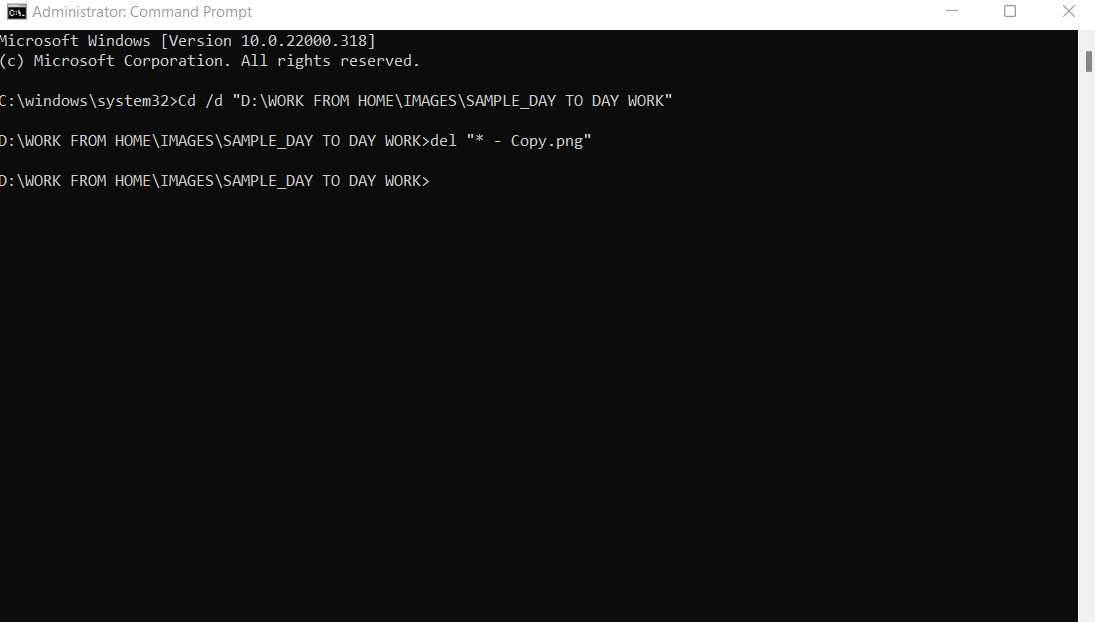
5. Come back to the Command Prompt window and type the below-mentioned command
cd /d "folder-location"
Make sure that you replace the “folder location” with the actual location that you have copied.
For example, this is what a path should look like:
Cd /d "D:\WORK FROM HOME\IMAGES\SAMPLE_DAY TODAY WORK"
6. Now type the below-listed command
del "* - Copy.(format of the file)"
But, before you type the command, keep these points for reference –
- Replace the format of the file with the file extension. E.g. – .docx, .txt, .jpeg, etc
- If the duplicate files have a number at the end, you will have to modify the command accordingly
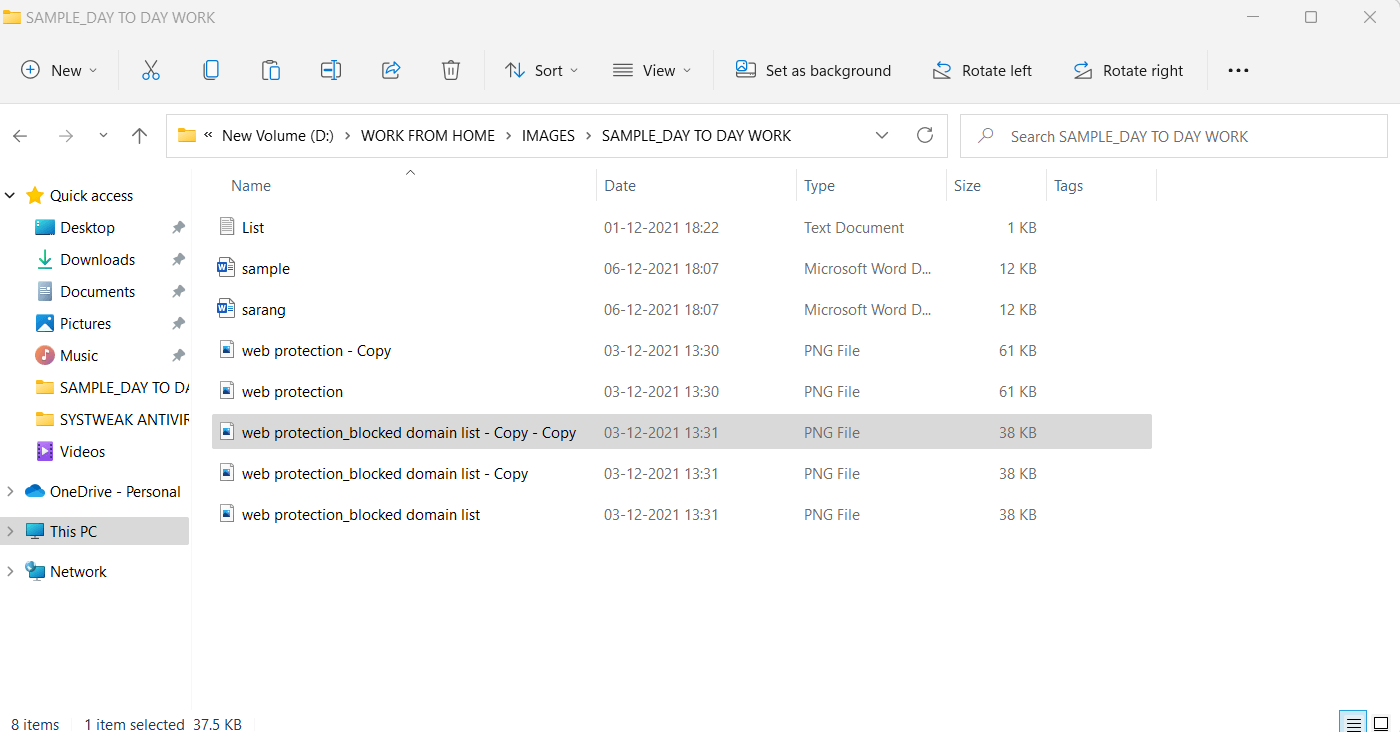
- What My Folder Looked Before
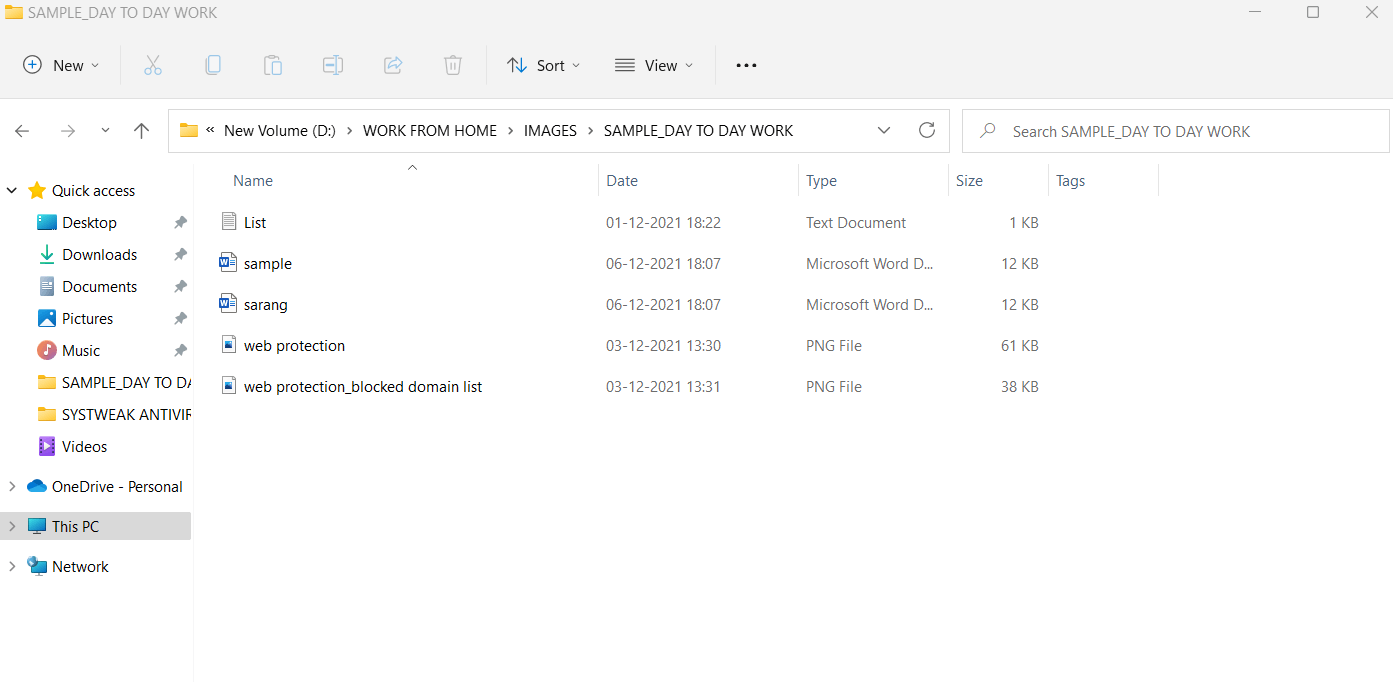
- How My Folder Looks Now
– Use A Duplicate File Remover Utility
There are times when it might be next to impossible to find which file is duplicate or not especially when you had made just minute changes because of which duplicate was created. This is when it is a wise move to not barge into duplicate files using manual ways and leave the task to a specialist duplicate finder and remover tool. One such tool is Duplicate Files Fixer. It helps get rid of similar and duplicate files.
What Makes Duplicate Files Fixer, The Best Utility To Identify And Delete Duplicate Files?
Duplicate Files Fixer comes with the functionality of auto-marking duplicate files automatically. Even after that, you can preview files before choosing to delete them. Here’s why Duplicate Files Fixer is the best way to get rid of duplicates and recover storage space.
Have duplicates in Dropbox and Google Drive as well, needn’t go anywhere else as Duplicate Files Fixer can help you get rid of duplicate files from Google Drive and Dropbox as well.
How Does Duplicate Files Fixer Work?
1. Download, install and run Duplicates Files Fixer
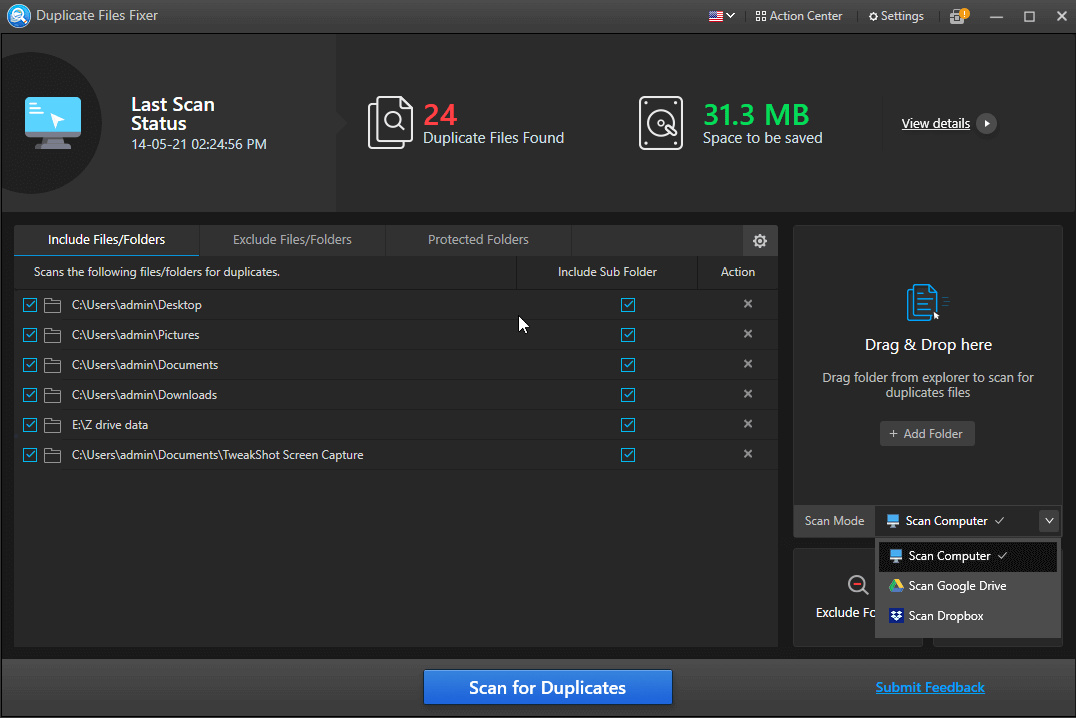


2. From the bottom, click on the blue-colored Scan for Duplicates button. Also, in case you want to scan Dropbox and Google Drive, you can refer to the screenshot just above and then permit Duplicate Files Fixer so that it can access folders in Dropbox or Google Drive.
3. Once you have the duplicates right in front of you, you can preview them.
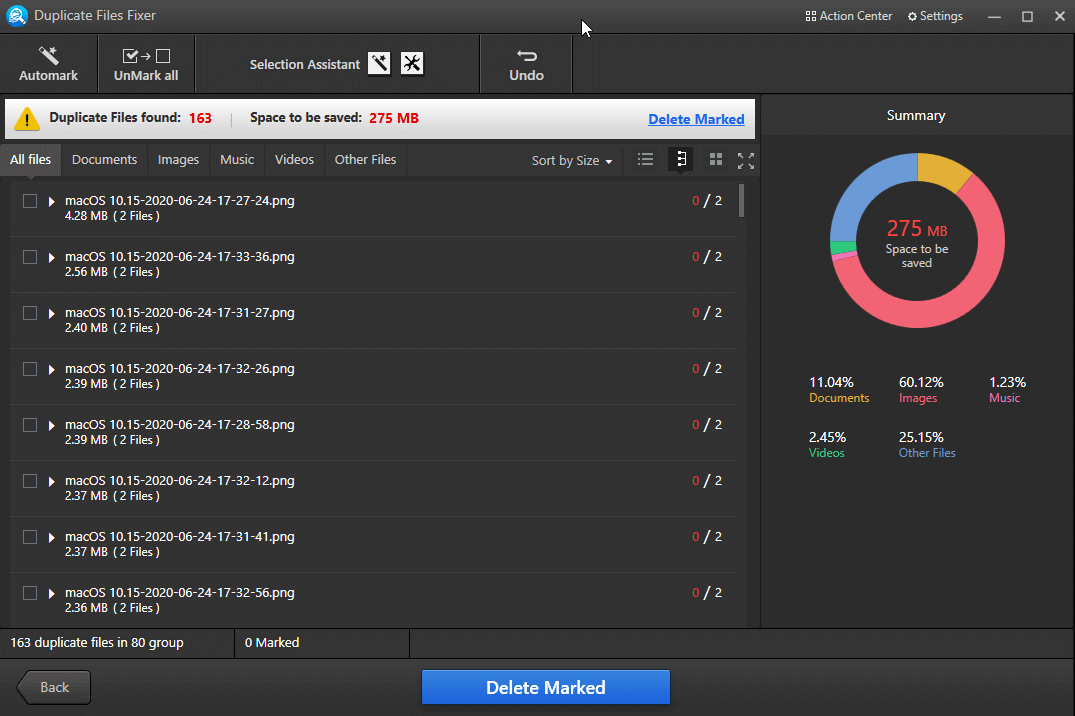
4. Here you can also choose to auto mark duplicates as well.
5. Once sure of the files you want to delete, click on Delete Marked.
Wrapping Up
In case you are in a situation, where you are very low on your disk space and you immediately need to find and delete duplicate files, we’d suggest that you let a duplicate finder utility like Duplicate Files Fixer do the job. Hope that you have found value in this blog. For more such content, keep reading Tweak Library.


Grey Shepard
it just freezes when finished looking for duplicates but I cannot erase duplicates