
Under normal circumstances when you upgrade to Windows 11, all your files will be transferred automatically. However, in case of incompatible hardware, conflicting applications, or even insufficient memory, you might lose data. This is why we highly recommend that you backup your data beforehand before making the move.
Still, if you are in a situation where you have upgraded to Windows 11 and seem to have lost files, worry not! You have stumbled on the right post. Here we will discuss ways in which you can restore files lost during an upgrade to Windows 11.
Also Read: How to Upgrade Windows 10 to Windows 11
How To Recover Lost Files After windows 11 Update
Use A Data Recovery Software
The easiest and a sure shot way to restore files lost because of Windows 11 is to use a data recovery tool.
Advanced Disk Recovery is one of the best data recovery tools. It can help you recover lost or deleted videos, audios, documents, and all the other files. Moreover, it can help you sail through various data loss conditions like the one here where you have lost files while updating your existing Windows to Windows 11. Here are the steps that will help you recover lost files & videos.
1. Download and install Advanced Disk Recovery
Click Here to Download Advanced Disk Recovery

2. Select the drive from which you had lost data
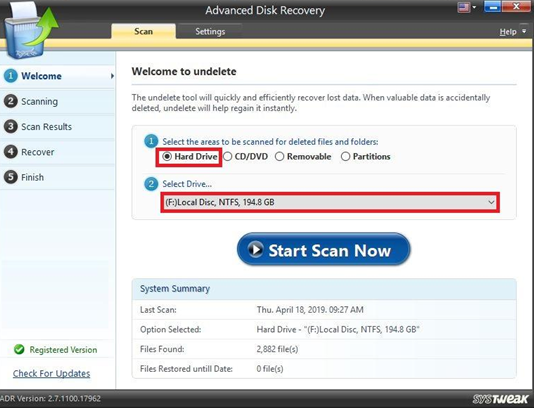
3. Click on Start Scan Now and wait for the process to complete
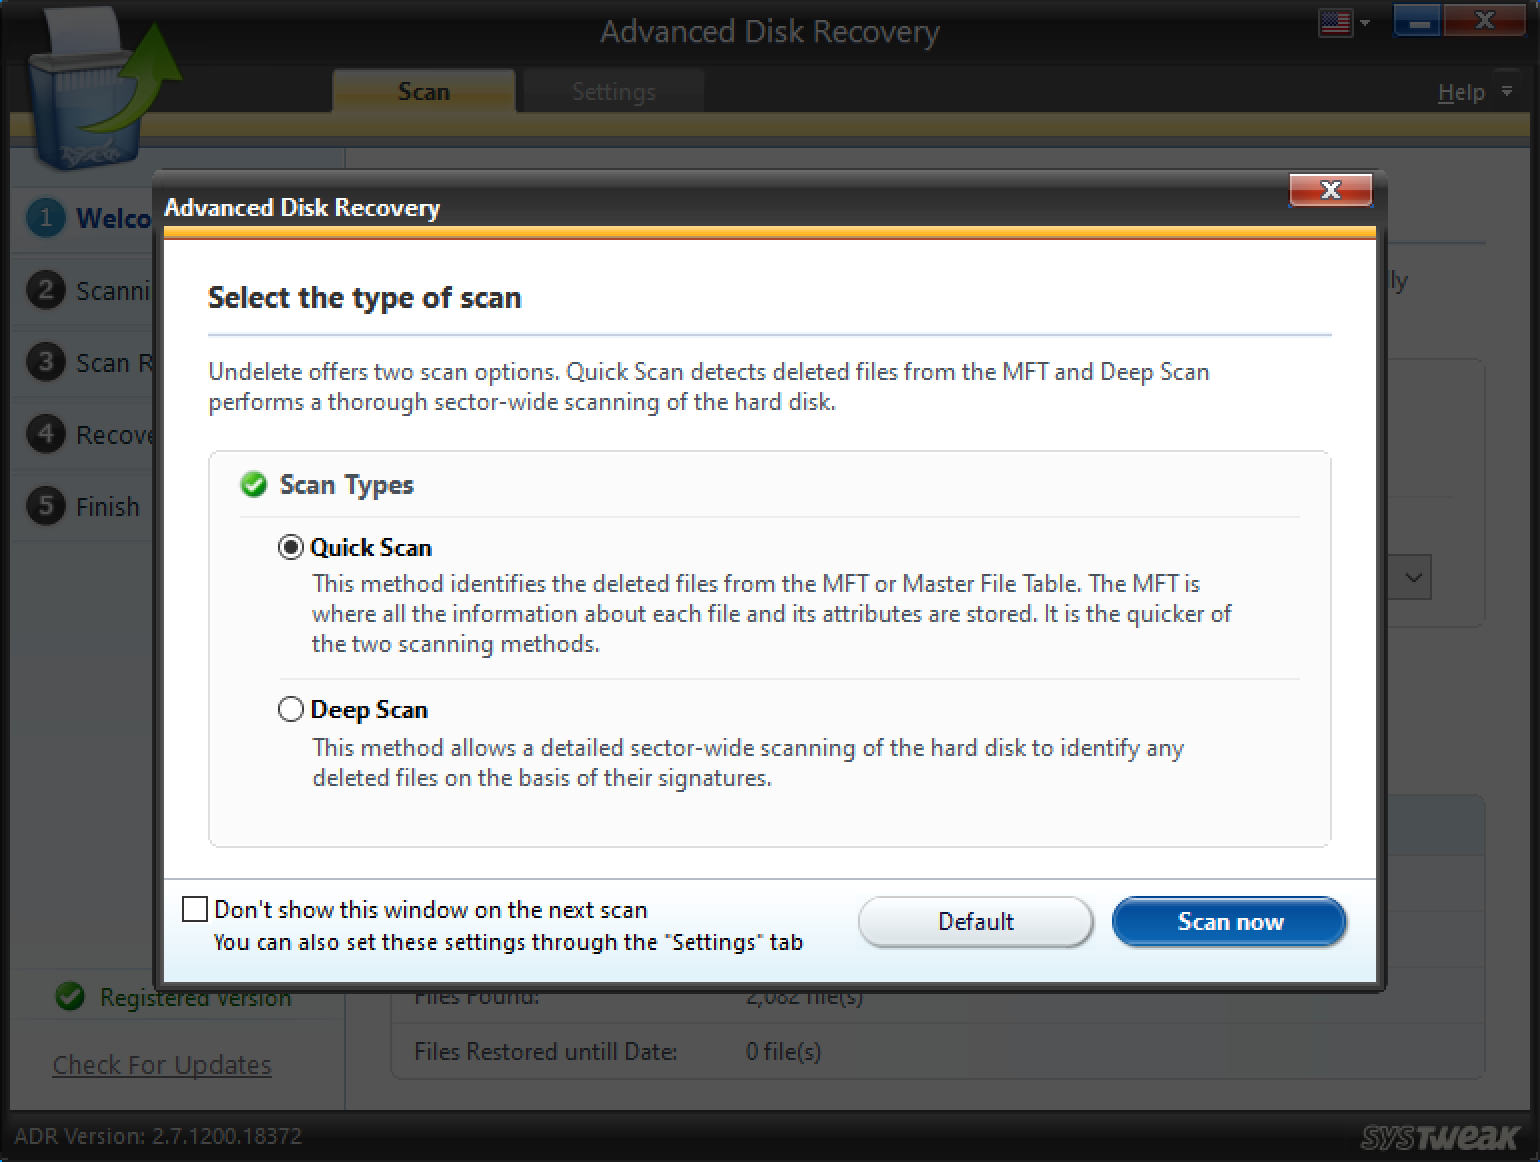
4. Select mode of scan i.e. Quick or Deep
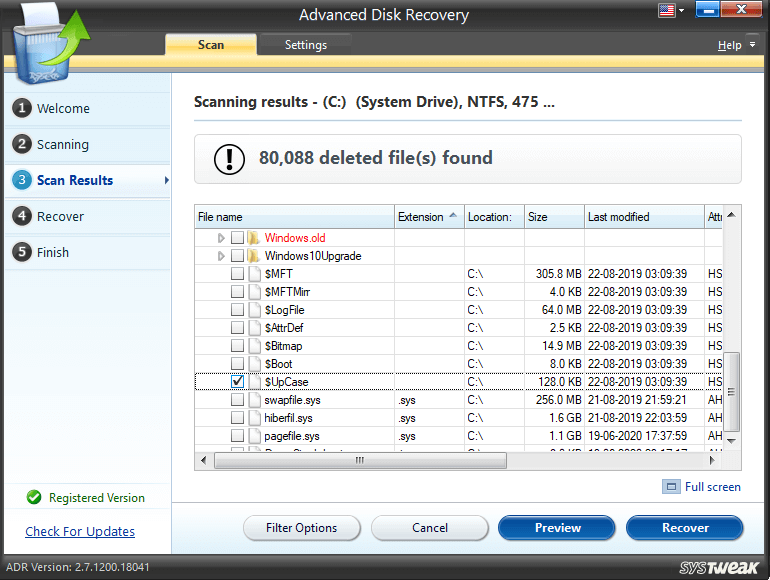
5. You can even apply several filter options and zero down on the right files

6. From the list of files select the ones that you want to recover and then click on Recover
Note: It is important that when choosing a location to restore files, you don’t select the same location from where the files were originally lost.
In case you have lost precious photos instead of documents or any other files, you can take the aid of Photos Recovery. Again, immaterial of the situation or device, Photos Recovery ensures that you can get back lost images. We have already covered a holistic review of the tool, so do check it out. Here is how Photos Recovery can help you recover accidentally lost photos with ease –
1. Download and install Photos Recovery
Download Systweak Photos Recovery

2. Select the drive from which you had lost photos
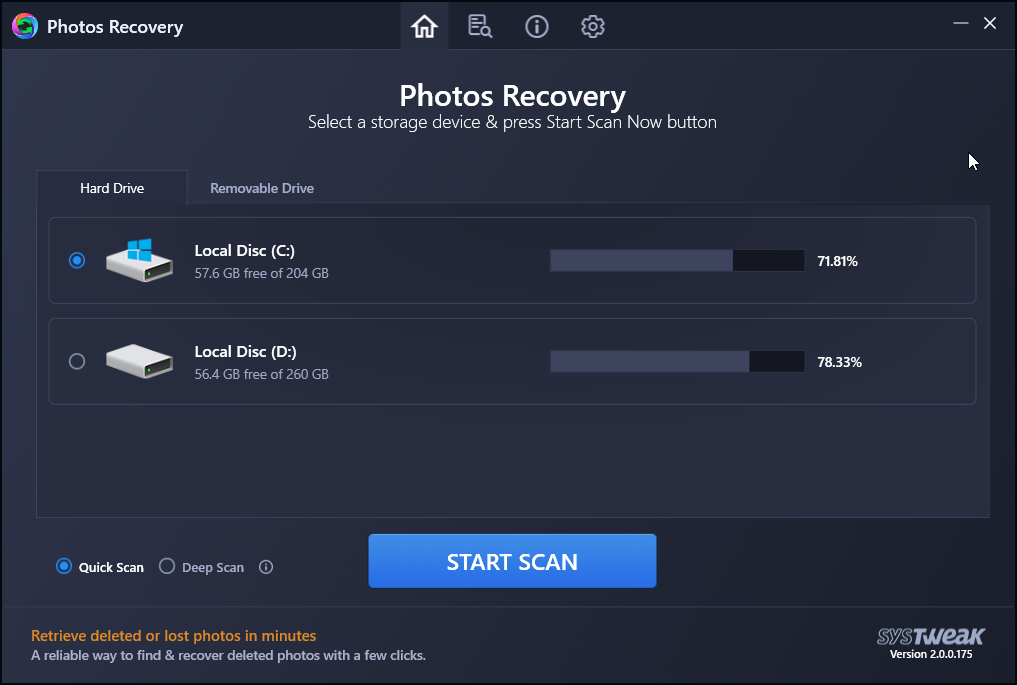
3. Click on the Start Scan button and wait for the program to look for deleted or lost images
4. A list of images will now appear. You can preview the images and select the lost images that you want to recover

5. Click on Recover
Also Read: How to Find Large Files and Free Up Disk Space
Retrieve Lost Files With Backup
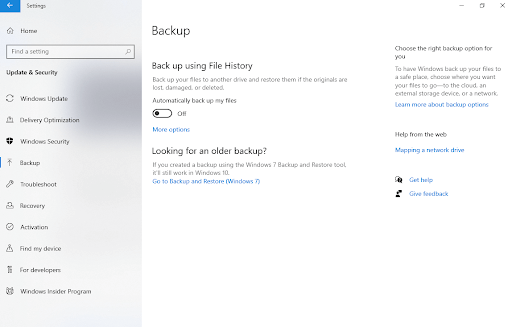
If you had created a backup before in Windows 10, you can retrieve it in Windows 11 by following the steps mentioned below –
- Press Windows + I and open Settings
- Select Update & Security
- Click on Backup and then Backup and Restore (Windows 7)

- Next select Restore my documents and follow the instructions that appear next
Take Help Of Search in Windows 11
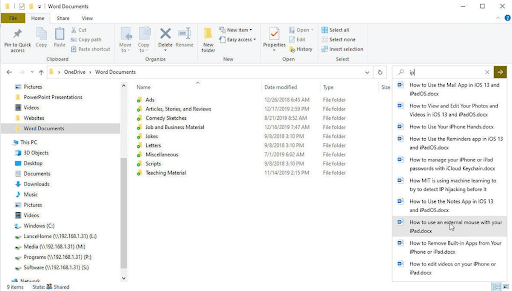
Quite possibly, after the update to Windows 11, your files have moved to a different location. Provided you are in the right user profile, you can take the help of search in Windows Explorer and restore files during upgrade to Windows 11. The steps for the same are outlined below –
- Open This PC
- Head to the drive from where the files were lost (in case you are aware of the exact location), if you are not aware, simply type the name of the file in the search bar
- In case you have forgotten the name of the file, you can instead type the extension in the search box. For example – .exe, .jpeg, etc
Check If Your Files Are Hidden In The File Explorer
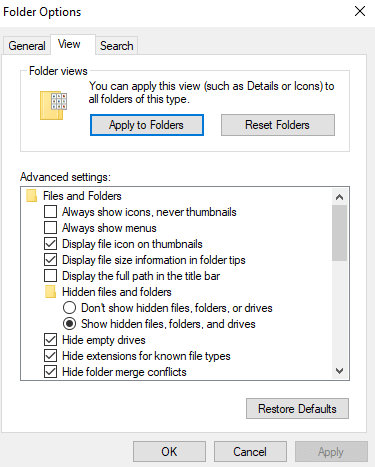
Again, your files may have been hidden after you have upgraded your Windows to Windows 11. So, you can follow the steps listed below and check if your files are lost or if they are hidden –
- Open File Explorer
- Click on Options
- Next, click on the View tab
- Scroll down and under Hidden files and folders, click on Show hidden files, folders, and drives
- Click on Apply and then OK
Wrapping Up:
Do let us know if you have been able to push yourself out of this dire situation using the ways and methods mentioned above. We’d also like to know which of the above methods was able to retrieve files lost because of an update to Windows 11. For more such content, keep reading Tweak Library.


Leave a Reply