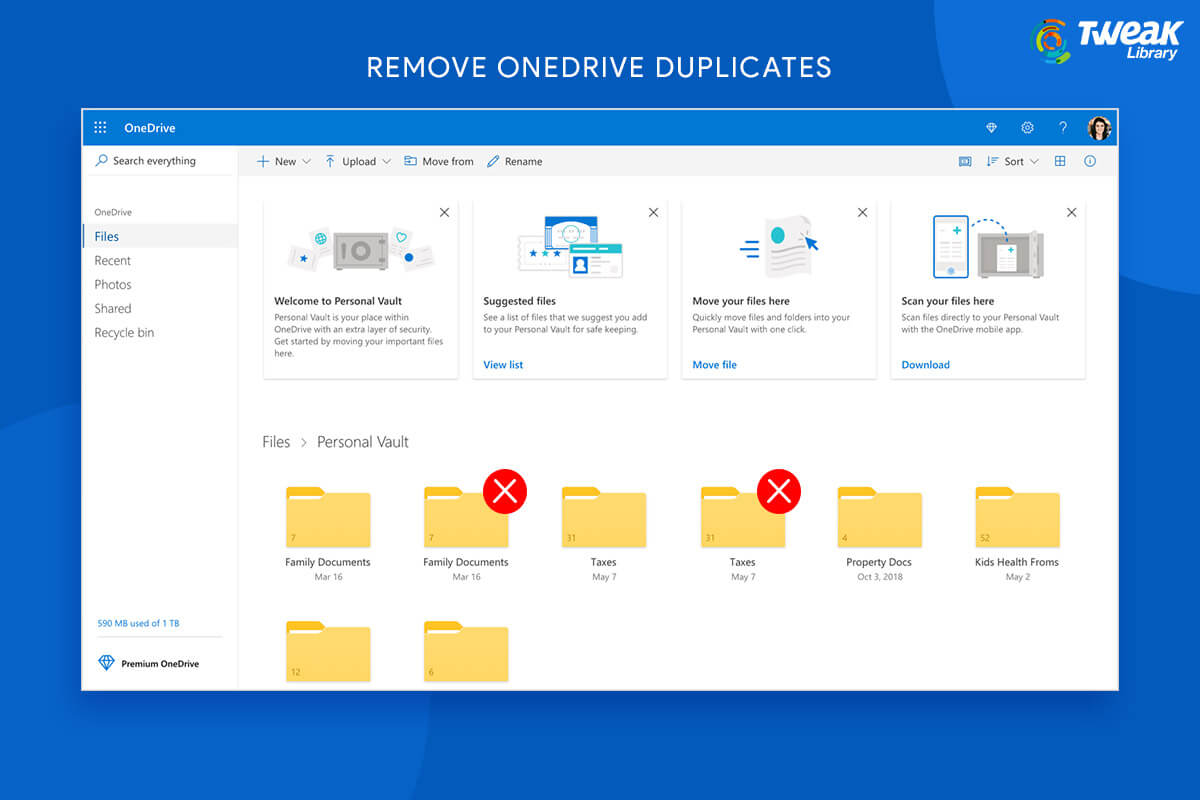
OneDrive is undoubtedly one of the best and the most preferred cloud storage mediums for both Windows and Mac operating systems. However, it is far from perfect and one of the problems that users often face is when OneDrive creates duplicate files. This makes it tough for a user to select the right file to work on. In this blog, we’ll discuss some ways you can tackle this issue and stop OneDrive from creating duplicate files whether on a Windows computer or laptop or Mac.
Also Read: Use Microsoft OneDrive For Business – A Cloud Storage Platform
Fix – OneDrive Creating Duplicate Files On Windows and Mac
OneDrive is Creating Duplicate Files With “Desktop Computer” As Suffix
On A Windows 10 PC –
Oftentimes refreshing the credentials on your Windows PC can help stop OneDrive from creating duplicate files with your computer name added as a suffix. Here are the steps you can follow to resolve the issue:
1. Click on Start
2. Type Credentials Manager in the Windows search box and press Enter
3. Click on the Open option from the right-hand side
4. Next, click on Windows Credentials

5. Locate OneDrive Cached Credentials
6. Remove that particular entry
7. Restart OneDrive again
Mac –
Quite a similar problem can occur on your Mac as well. You may observe that OneDrive is creating duplicate files on your Mac. In such a scenario –
1. In the Spotlight search type Keychain
2. Select Keychain Access
3. Alternatively, if you are unable to see the Keychain under the spotlight, select the Utility folder and open Keychain Access
4. Look for OneDrive
5. Then, locate OneDrive Cached Credential entry and delete it
6. Run OneDrive once again
Unlink OneDrive
Depending on where you are facing the issue – on your Mac or Windows, you can try unlinking OneDrive. You can then follow this step by restarting your computer, or Mac and then check if still OneDrive is creating duplicate files or not.
Unlink OneDrive on Windows
1. Right-click on the OneDrive icon on the Taskbar (system tray)
2. Click on Help & Settings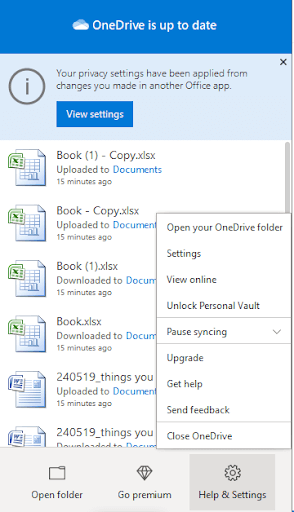
3. Click on Settings
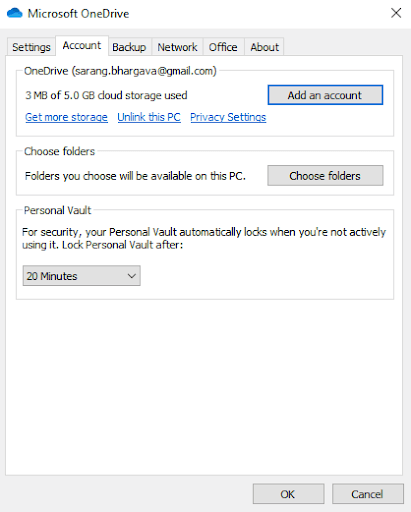
4. Click on the Account tab
5. You will now find the option to Unlink this PC
Now relink OneDrive again and check if the issue has been resolved or not.
Unlink OneDrive on Mac
1. Tap on the OneDrive icon in the menu bar
2. Go to Help & Settings
3. Go to Preferences > Account > OneDrive
4. Click on Unlink This Mac
Relink OneDrive again on Mac and check if the duplicate files are still being created or not.
Use A Third-Party Utility To Get Rid of Duplicate OneDrive Files on Windows and Mac
If the above steps don’t seem to be working, you can try using a third-party duplicate file remover utility that will help you find duplicate files in no time at all. Here is a list of some of the best duplicate file remover tools for Windows and Mac. Duplicate Files Fixer, for instance, is one of the best utilities that can help you find and delete duplicates from all corners of your PC or Mac. The tool intelligently looks for both similar and identical copies and allows you to remove them.
Let’s have a look at some of the best features of Duplicate Files Fixer –
- Preview scanned files before deleting them so that you don’t accidentally remove the correct file
- Auto-mark files so that you don’t have to individually mark files for removing
- The tool also supports external storage devices as well. So, you don’t just get to delete files from your computer but from other devices as well
- You can even set auto-marking priorities as well
How Does Duplicate Files Fixer Work?
Click Here to Download Duplicate Files Fixer for Mac


1. Download and install Duplicate Files Fixer
2. You can either drag and drop your OneDrive folder into the interface, or you can click on the ‘+’ icon at the right-hand side of the interface
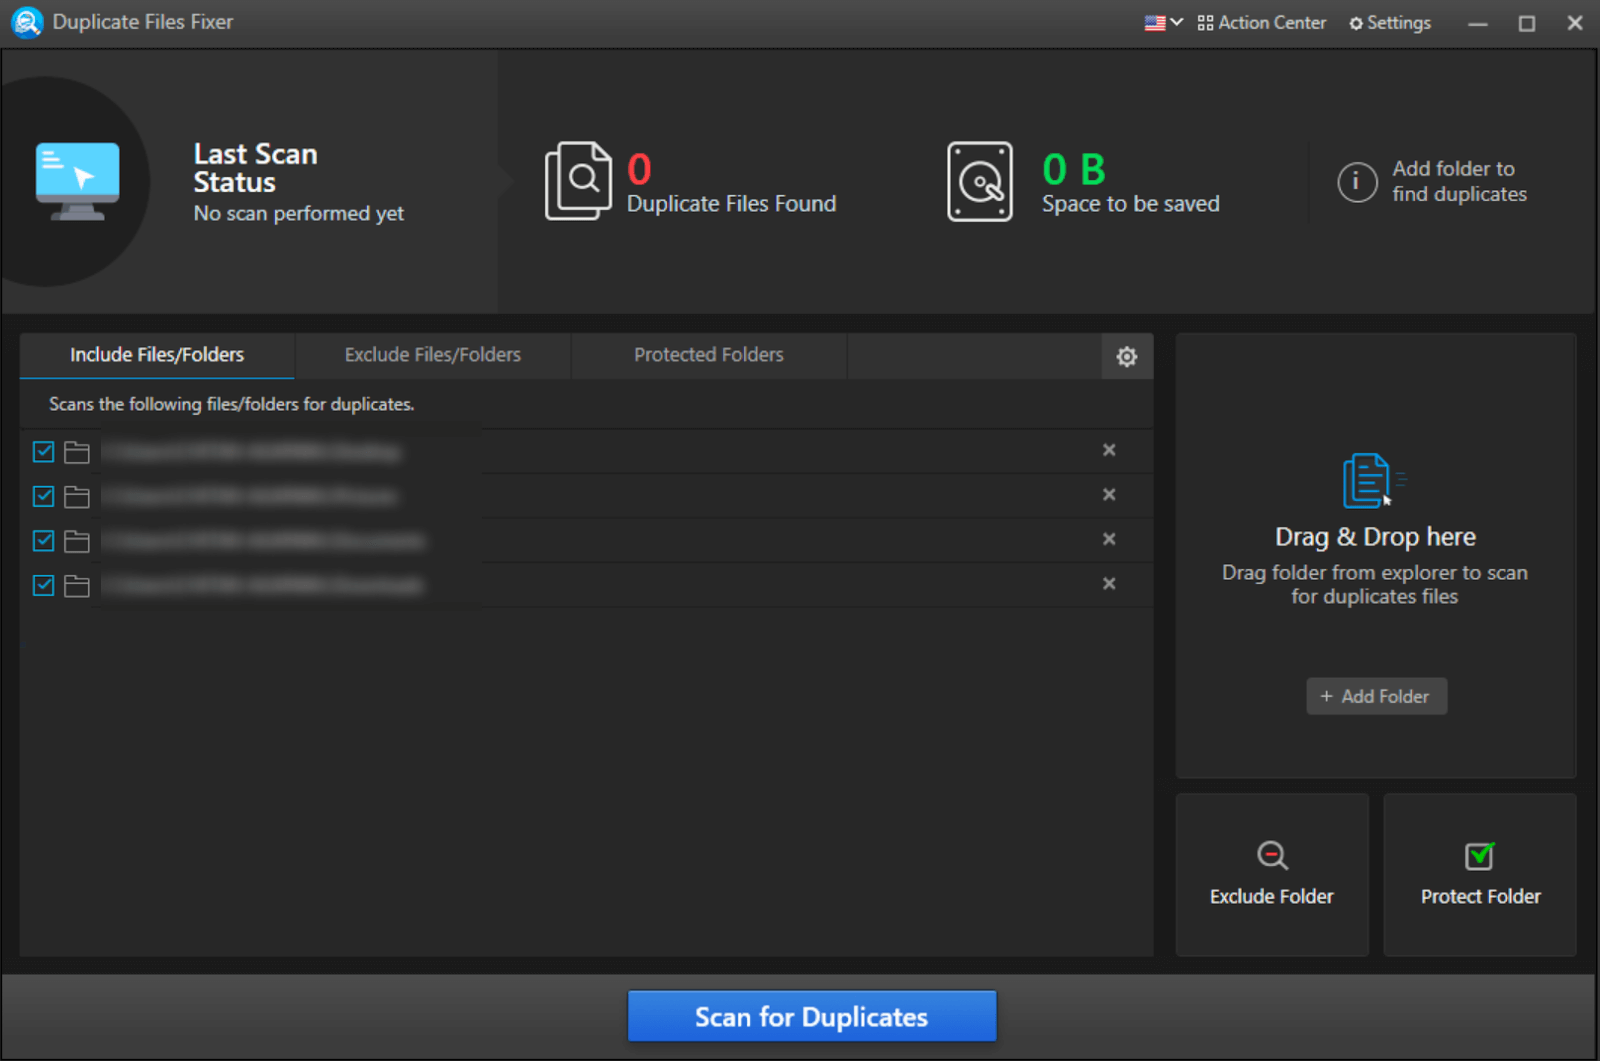
3. Click on the Scan for Duplicates button and wait for the process to complete
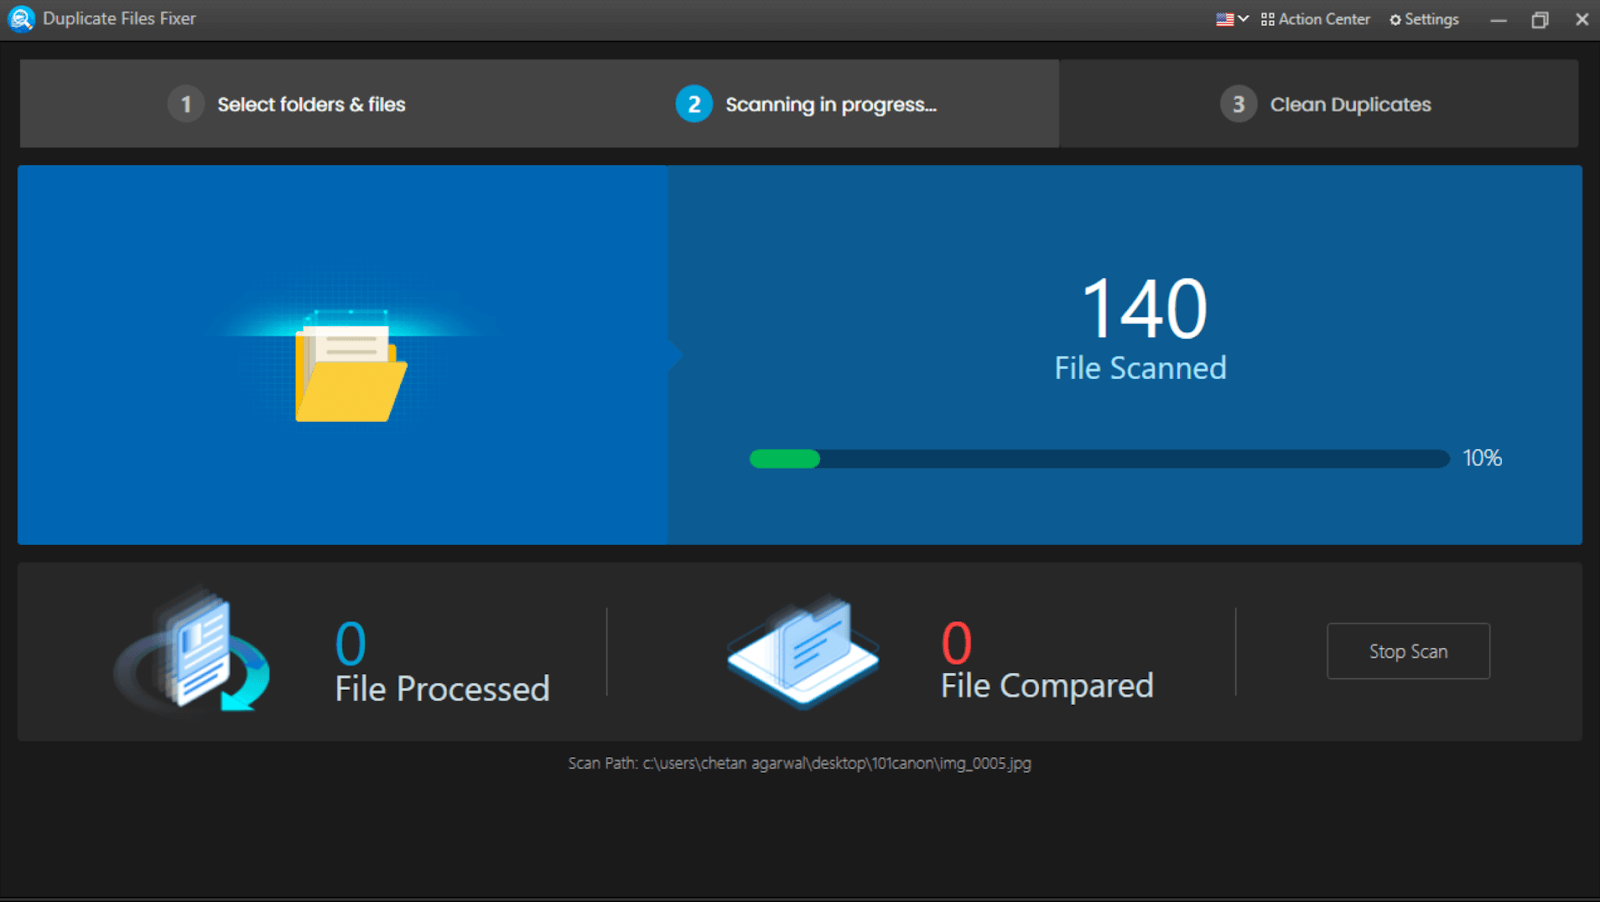
4. You will now be able to see the duplicate files
5. Here, the easiest way is to click on the Automark option at the top which will automatically mark the right duplicates. However, you can individually go through files and then check or uncheck them
6. Once sure of the files you want to delete, click on the Delete Marked button at the bottom of the screen
That’s it! In no time, you will be able to get rid of all the duplicate files on OneDrive. Alongside, you can even check how much storage space you have been able to recover in the process.
Wrapping Up:
So, in case OneDrive is creating duplicate files whether on your computer, laptop or Mac, needn’t panic. Try the above-mentioned steps and we hope you won’t be bothered by duplicate files again. If you found the blog to be helpful, do give it a thumbs up and for more such content, keep reading Tweak Library.

Leave a Reply