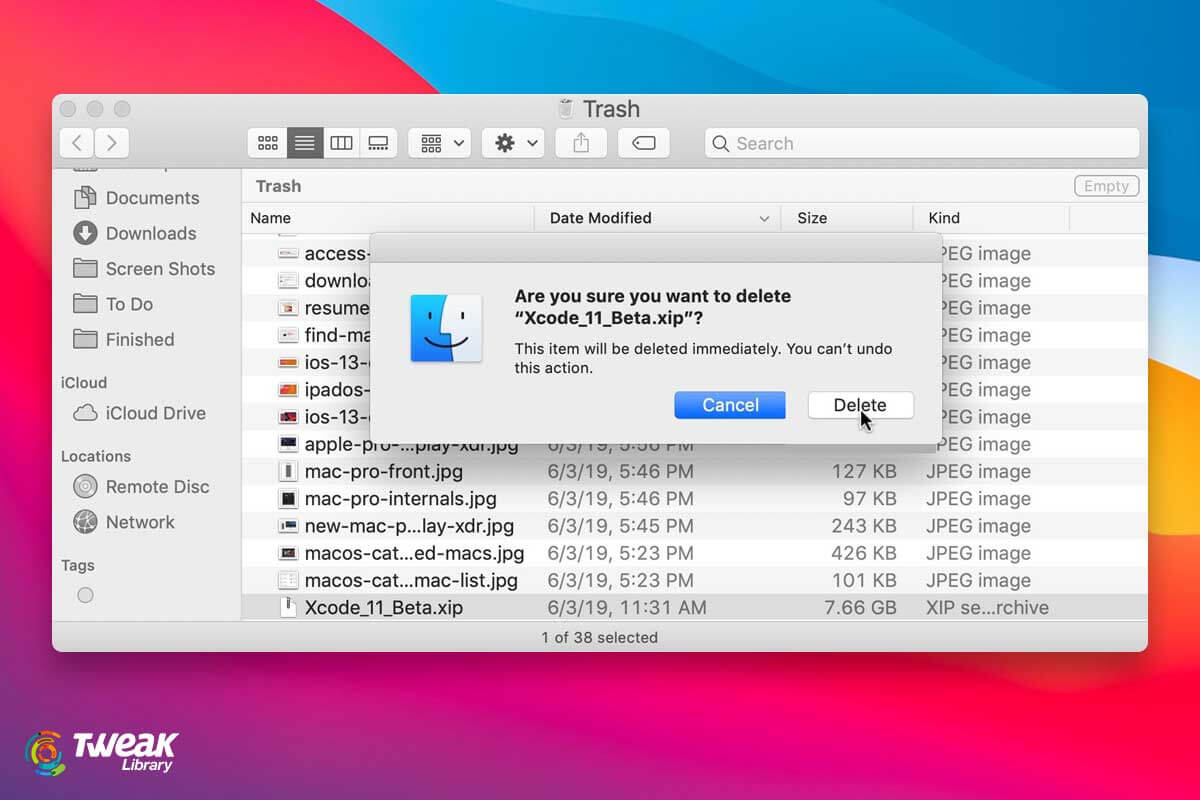
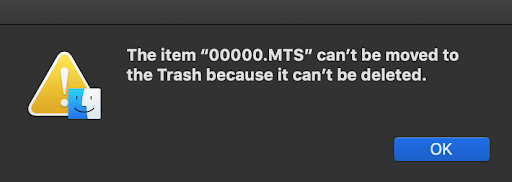
Ever found yourself stuck in a situation where you tried moving a file to the bin, only to receive the message – “The item <> can’t be moved to the Trash because it can’t be deleted.”
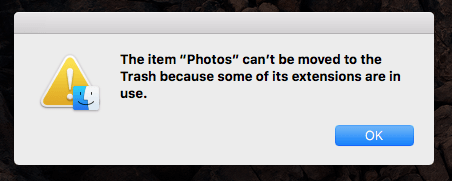
There can be different reasons for this error – like either the file is in use, locked, or you don’t have permission to edit the file in question. Whatever the reason maybe, there are ways to deal with every problem.
Here in this post, we will cover ways to delete files from your Mac that refuse to be moved to Bin.
Disclaimer – The steps explained below will help remove third-party apps. If you are facing a problem in uninstalling any pre-installed app, we suggest you contact the corresponding developer or can contact Apple support.
Fix – “File in Use” Error
When trying to delete an app if your Mac displays “file in use,” it means the application is running. Therefore, to fix this issue and delete the file in question, we need to exit the app and all its related processes. To learn how to do that, follow these steps:
1. Click the “Apple” logo present at the top left corner of your Mac’s menu bar.
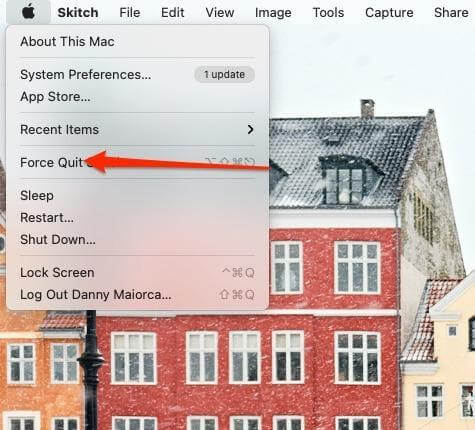
2. Select “Force Quit.”
3. Review the apps and locate the one, you want to move to trash.
4. Select it and click the “Force Quit” button.
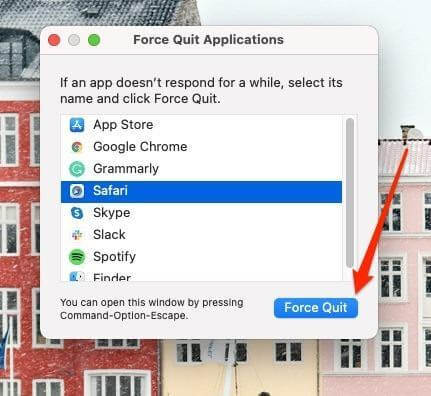
Note selecting the apps and clicking Force Quit will make you lose any unsaved work within the application.
5. Once the app is exited, try moving the app to Bin.
6. It should now move to Bin without giving the File in Use error message.
1. Writer’s Tip:
|
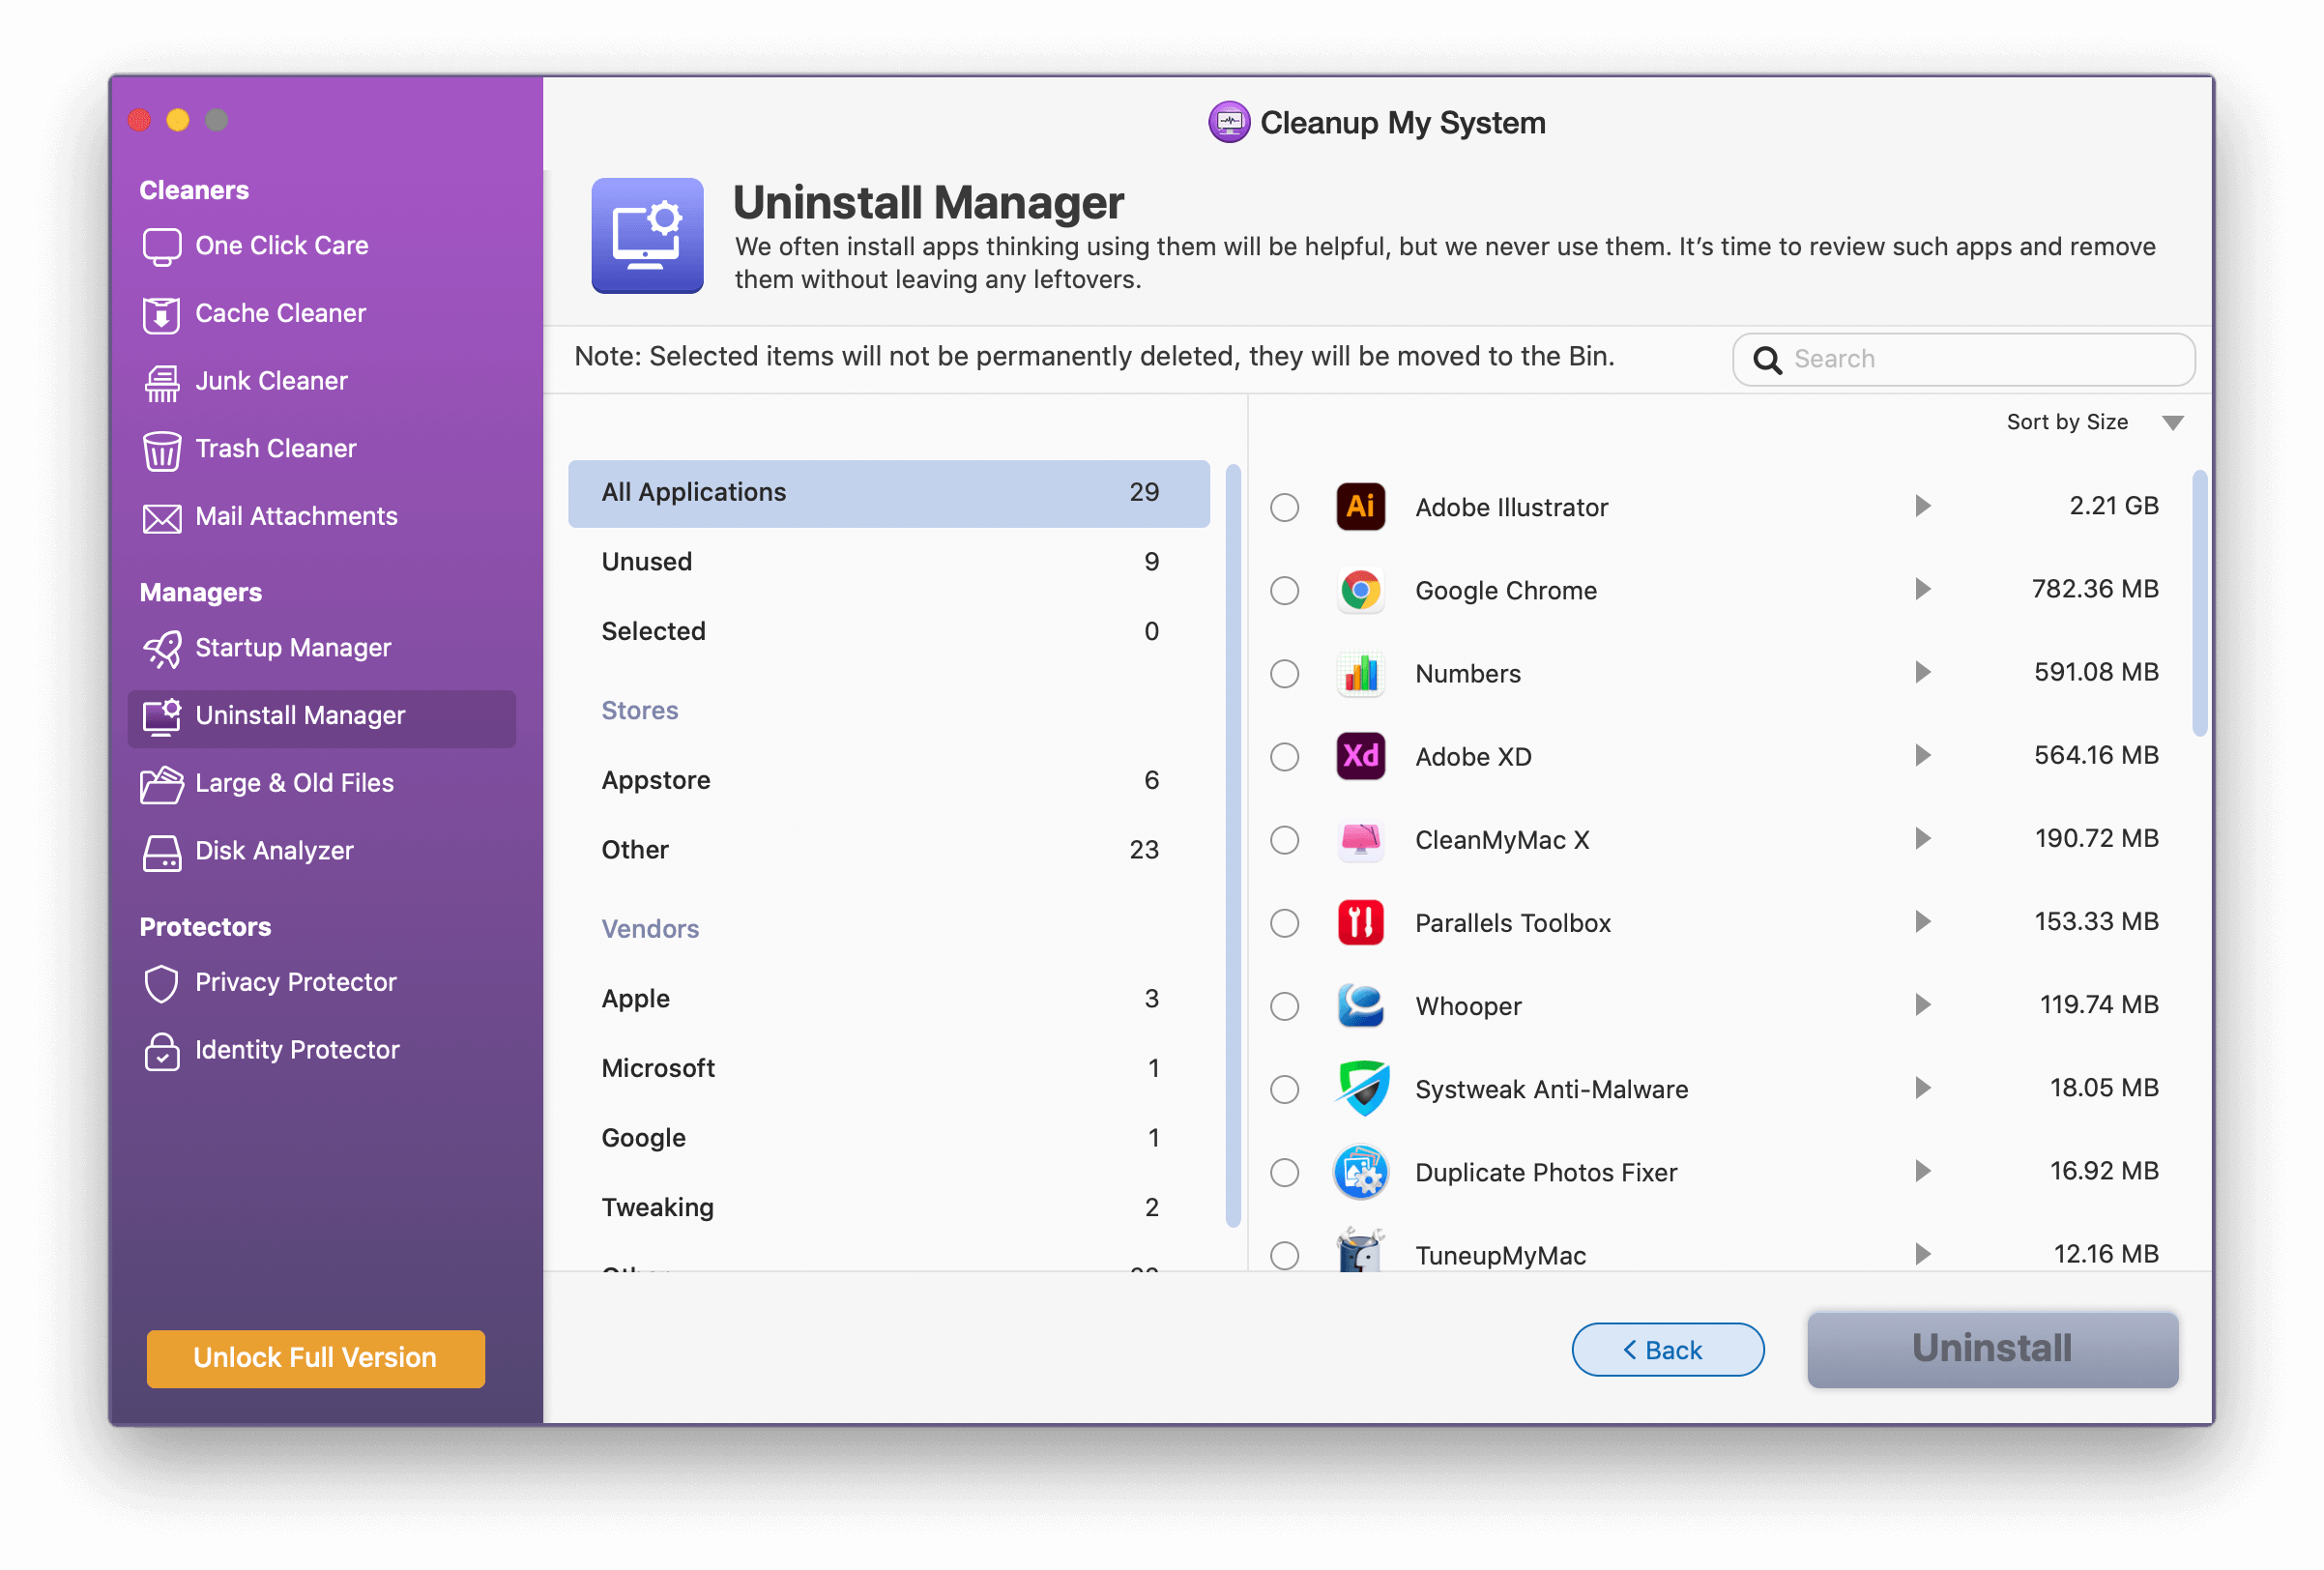
There can be several reasons for uninstalling an app and most of us think dragging the app to the Trash Bin is enough. Well, that’s certainly not enough! Because manually moving an app to Bin doesn’t remove all corresponding files (in most cases). Therefore, the best way to uninstall an application along with its belonging files is to use the top uninstall manager. Fortunately, we have an app that helps do it and it is called Cleanup My System. Using its Uninstall Manager module, you can easily uninstall an app from your system. To use it, follow these steps: 1. Download and install Cleanup My System on your macOS. Click Here to Download Cleanup My System! 2. Navigate to the Uninstall Manager module from the left pane.
3. A list of all the installed applications will prompt on your screen under different categories. 4. Select the app you want to delete and hit the Uninstall button. 5. That’s it, this way you can easily remove an app and its associated files from your Mac. Alongside this, you can also check out the list of best uninstall managers for Mac covered by us. |

This is it, using these simple steps, you can delete files that won’t get deleted. We hope you managed to move the apps to Bin using the steps explained above.
Now that the files are deleted, you won’t want them to sit in the Bin and eat up storage space, right? The best way to avoid this is to empty trash. In addition to this, you can also remove junk files and other unwanted data that take unnecessary space.
For this, you can try using Cleanup My System. The best Mac optimization utility that helps clean junk files, identify large and old files. Also, it helps empty trash without any issues.
To use it follow these steps:
1. Download and install Cleanup My System.
Click Here to Download Cleanup My System!
2. Launch the Mac cleanup tool.
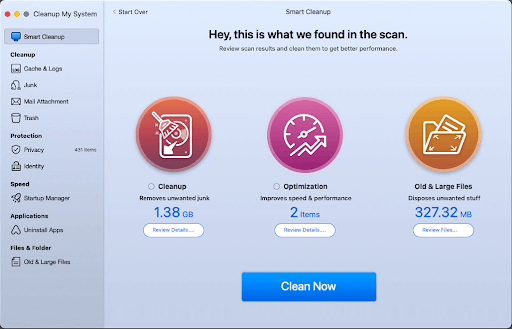
3. You can navigate to the One-Click Care module or take the help of separate modules to comprehensively clean and optimize your Mac.
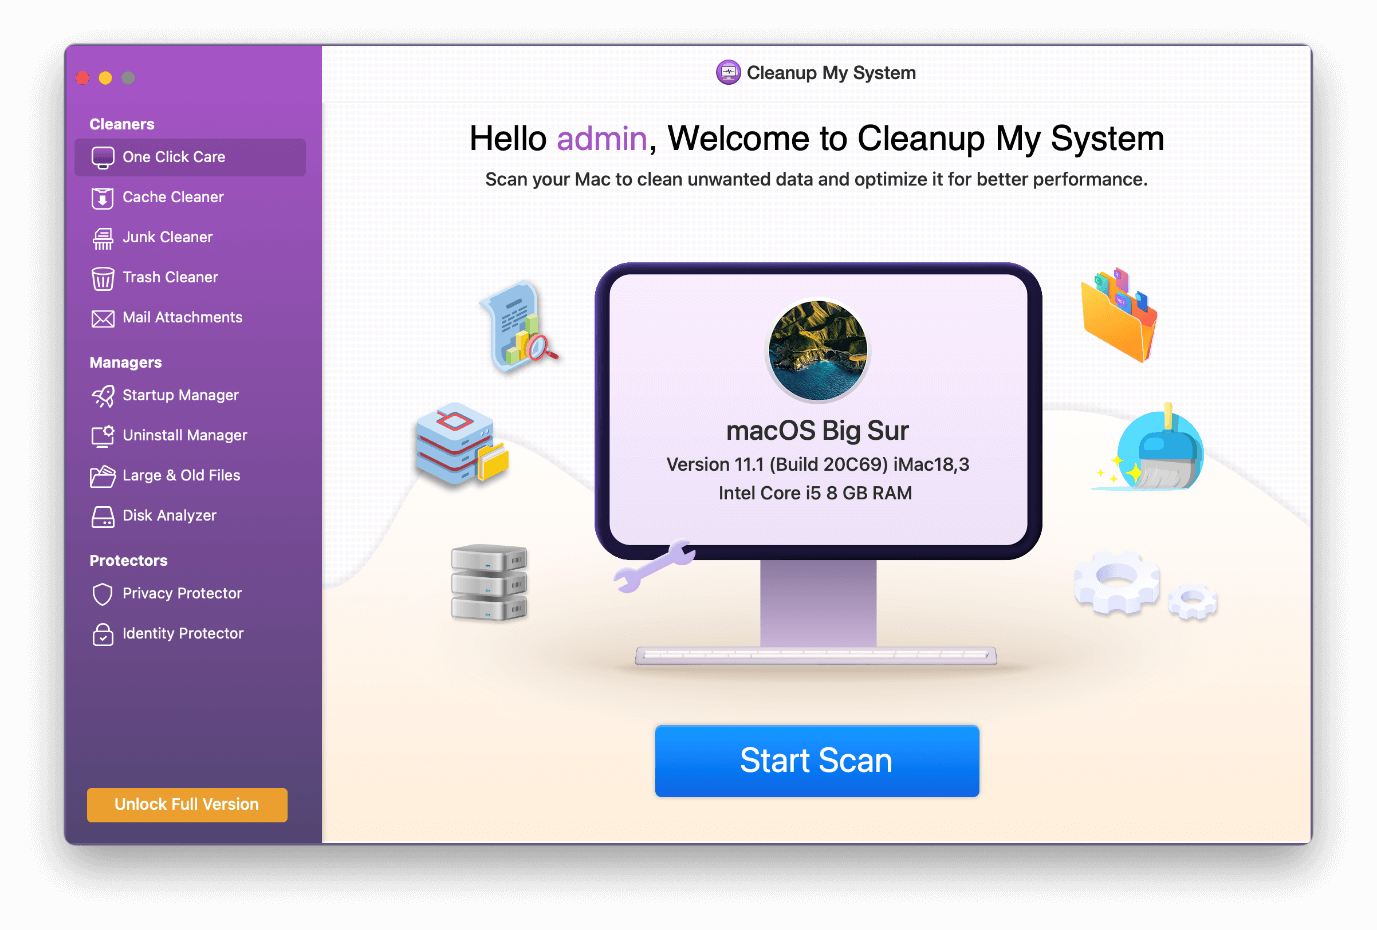
4. Click the Start Scan button to initiate the scanning process.
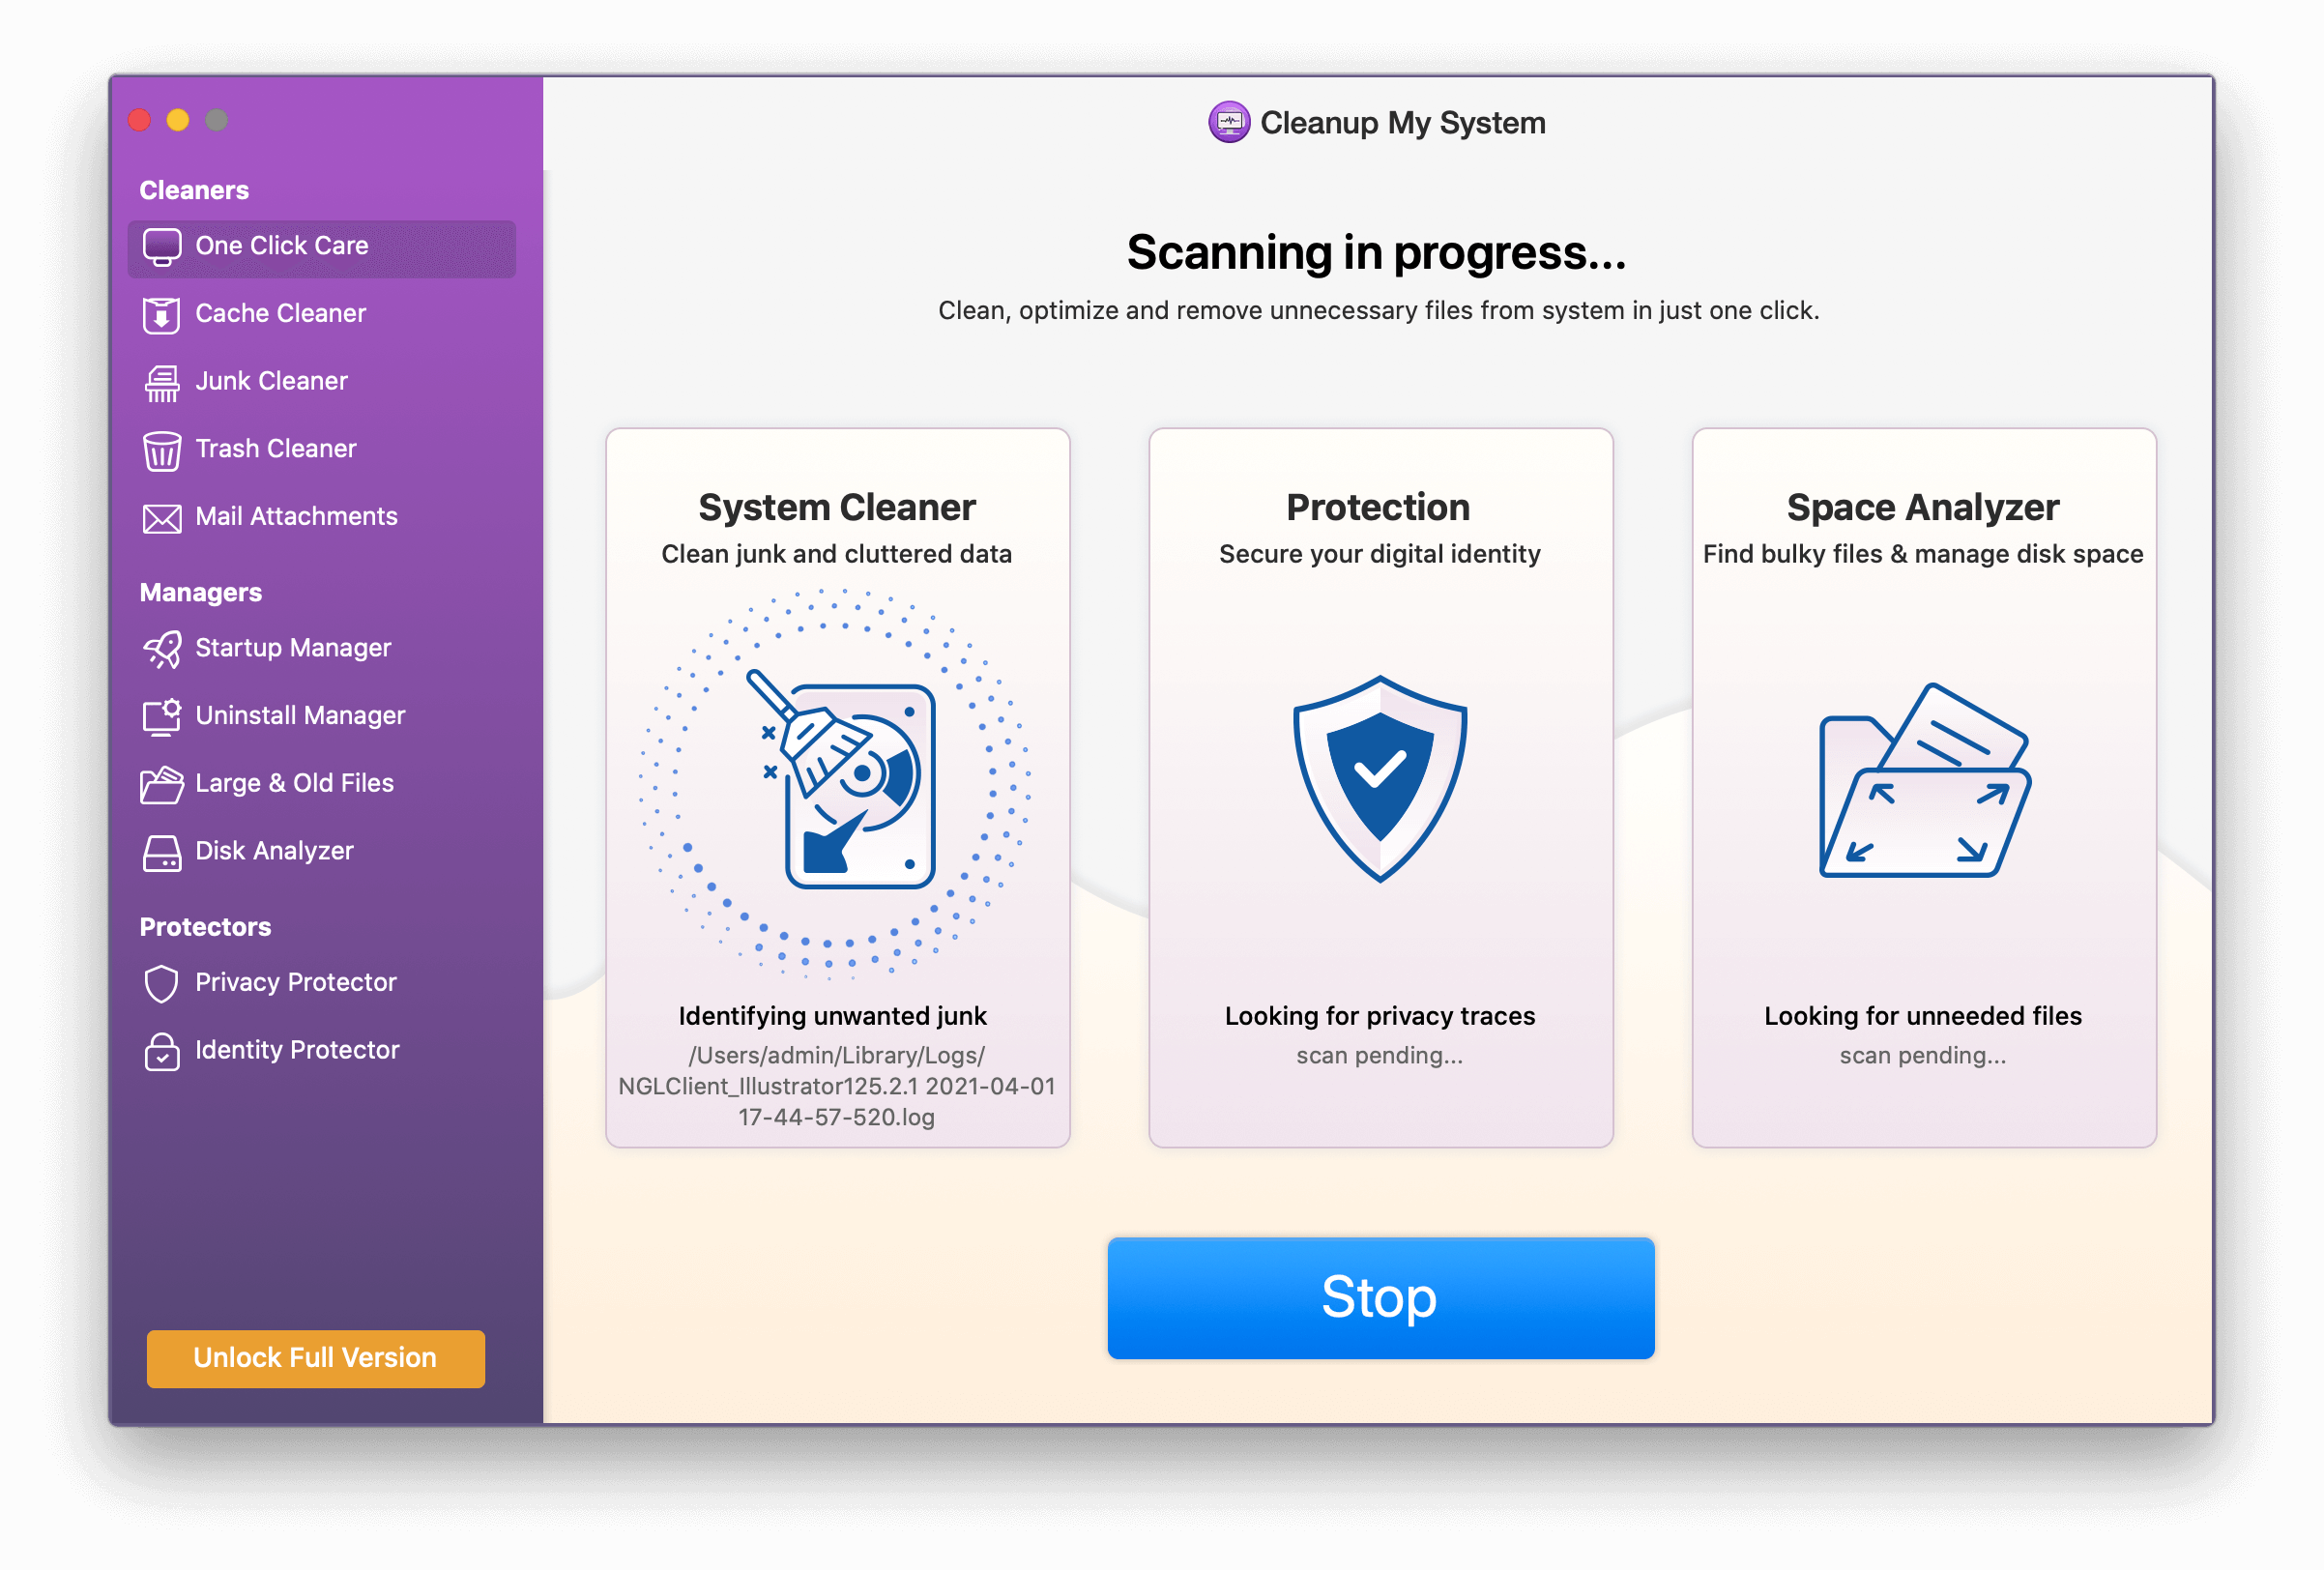
5. Select the files you want to remove permanently from your Mac and hit the Clean Now button.
Alongside, you can also use other modules provided by Cleanup My System. This will help keep Mac optimized and enhance the performance of your system.
Read More – How To Uninstall Programs On A Mac
2. Fix The File Is Locked message
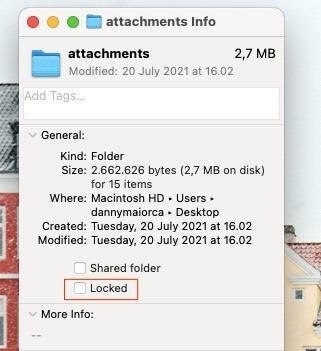
If a file is locked, then you cannot move it to Bin. To unlock a file and move to Bin, follow these steps:
1. Select the file > press Ctrl + right-click the file
2. From the context menu select “Get Info.”

3. This will open a new window, here double click the General section to expand it.
4. Look for the checkbox that reads “Locked” deselect it.
5. If this doesn’t work, you can head to Mac’s Terminal to unlock the file.
Finder > Go > Applications -> Utilities -> Terminal
6. Type the following command:
chflags nouchg /path/to/file
7. file is the name of the file you want to remove.
This will unlock the file. Now you can select the file and Move it to Bin..
Read More – Advanced Uninstall Manager – Is It Miles Ahead Than Your Regular Uninstaller
3. Fix – You Don’t Have Permission to Edit the File
When moving an app to Trash, if you get the “You don’t have permission to edit this file”, follow these steps.
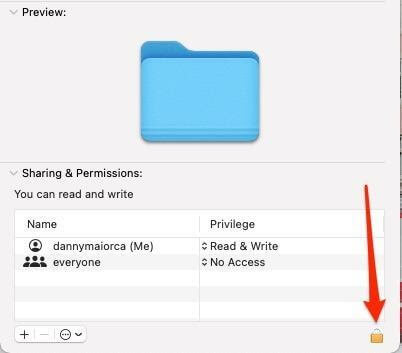
1. Press Ctrl select the file > right-click and select Get Info from the context menu.
2. Double click the “Sharing & Permissions” section. You’ll get a list of all the user accounts registered with your Mac.
3. Click the padlock icon to give permission to edit the file.
4. When prompted, enter your username and password.
5. Look for your username in the list, click the down arrow and select “Read & Write.”
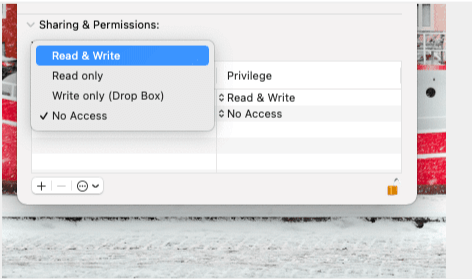
6. This will give permission to edit the file.
7. Select the file and then drag it to the Bin.
4. Bonus Tip
If none of the above fixes have worked so far, try the Force Delete option using the Terminal command.
Note: Force deleting the file doesn’t move it to Bin – it is permanently deleted. This means you cannot restore the file. Therefore, use this method wisely. Using this step, you can also delete the files that normally won’t delete. But remember Apple protects certain files for some reasons therefore, don’t use this method to delete those files.
Force-delete is a useful technique but should be used with caution.
To force-delete a file, follow these steps.
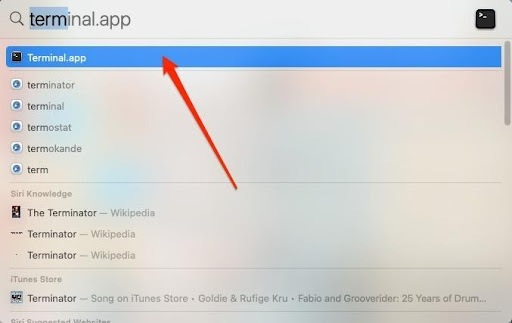
1. Click Finder > Go > Applications > Utilities > Terminal.
Alternatively, you can click the magnifying glass present in the top right of your toolbar. Search for “terminal” and click on “terminal.app.”
2. When in Terminal, type the following command:
rm -f /path/to/file
3. Now select the file you want to delete and move it to Bin.
This is it, using these simple steps, you can delete files that won’t get deleted. We hope you managed to move the apps to Bin using the steps explained above.
Now, that the files are deleted, you won’t want them to sit in the Bin and eat up storage space right? The best way to avoid this is to empty trash. In addition to this, you can also remove junk files and other unwanted data that take unnecessary space.
For this, you can try using Cleanup My System. The best Mac optimization utility that helps clean junk files, identify large and old files. Also, it helps empty trash without any issues.
To use it follow these steps:
1. Download and install Cleanup My System
2. Launch the Mac cleanup tool
3. You can either use the Smart Cleanup or can use the individual module
4. To clean Trash Bin, hit the Trash module from the left pane

5. Click Start Scan to scan the Bin
6. Select the files you want to remove permanently from your Mac
Alongside, you can also use other modules provided by Cleanup My System. This will help keep Mac optimized and enhance the performance of your system.
Wrapping Up
We hope you enjoyed reading the post and found the information helpful. In addition to removing apps if you want to learn how to delete duplicates from Mac, keep Mac optimized, clean malware from it, you can read all our previous posts. You will certainly find the information useful. Also, to stay updated with the latest tips and tricks follow us on social media, you can also bookmark this page.
Do share your feedback about the post in the comments section.
Related Topics


Leave a Reply