Microsoft WindowsOS is undoubtedly the most reliable operating system you can ever put your hands on. With new & latest versions every once in a while, Windows keeps entertaining users with new updates & features. For example, the adaptability from Windows XP to Windows 7 & now Windows 10 has been a very smooth ride.

Though Windows OS is extremely reliable, things can go wrong any time without prior intimation. Your instant reaction would be to keep your data safe as soon as possible and to do so, you need to make sure that your system is up & running again. This is where users think about creating a Windows 10 recovery disk that can help out in these situations.
Here’s How to Create Windows 10 Recovery Drive
We all are familiar with the history of operating systems running into problems out of nowhere & the first person who gets impacted is the user. So in order to keep his/her data safe, the user needs a solution that can be helpful in these situations.

Yeah, creating a proper backup of all the data (including files & folders) is a good idea. And let me tell you, while you are creating data backup, Windows gives you an option to create the whole operating system’s backup as well. Doing so will come in handy when your system starts working funnily & you would want to restore or repair it to working condition. So without further ado, let’s get to know the ways to create Windows recovery drive as mentioned below:
Prerequisites:
- Windows 10 in working condition
- USB flash drive (1GB or more); depending on your data
- Empty CD or DVD (if you wish to use disk method)
Once you have got all the above prerequisites, start following below steps to create your Windows 10 recovery drive:
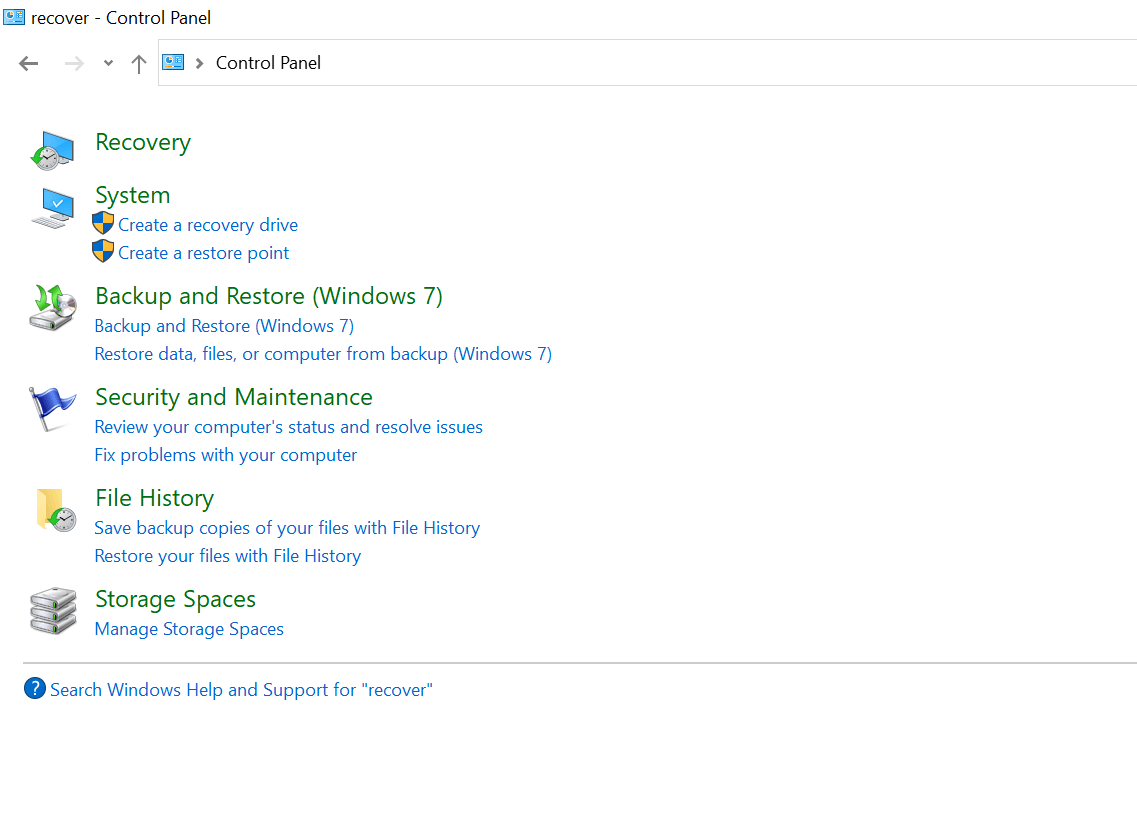
1. Start with navigating yourself to the Control Panel & look for Recovery (Ctrl + F & search for the function).
2. Once found, you need to tap on Create a recovery drive that would be under the System heading.
3. After tapping on the recovery creating command, the Recovery Drive window will open up. Here, you need to decide if you wish to “back up system files to the recovery drive” or not.
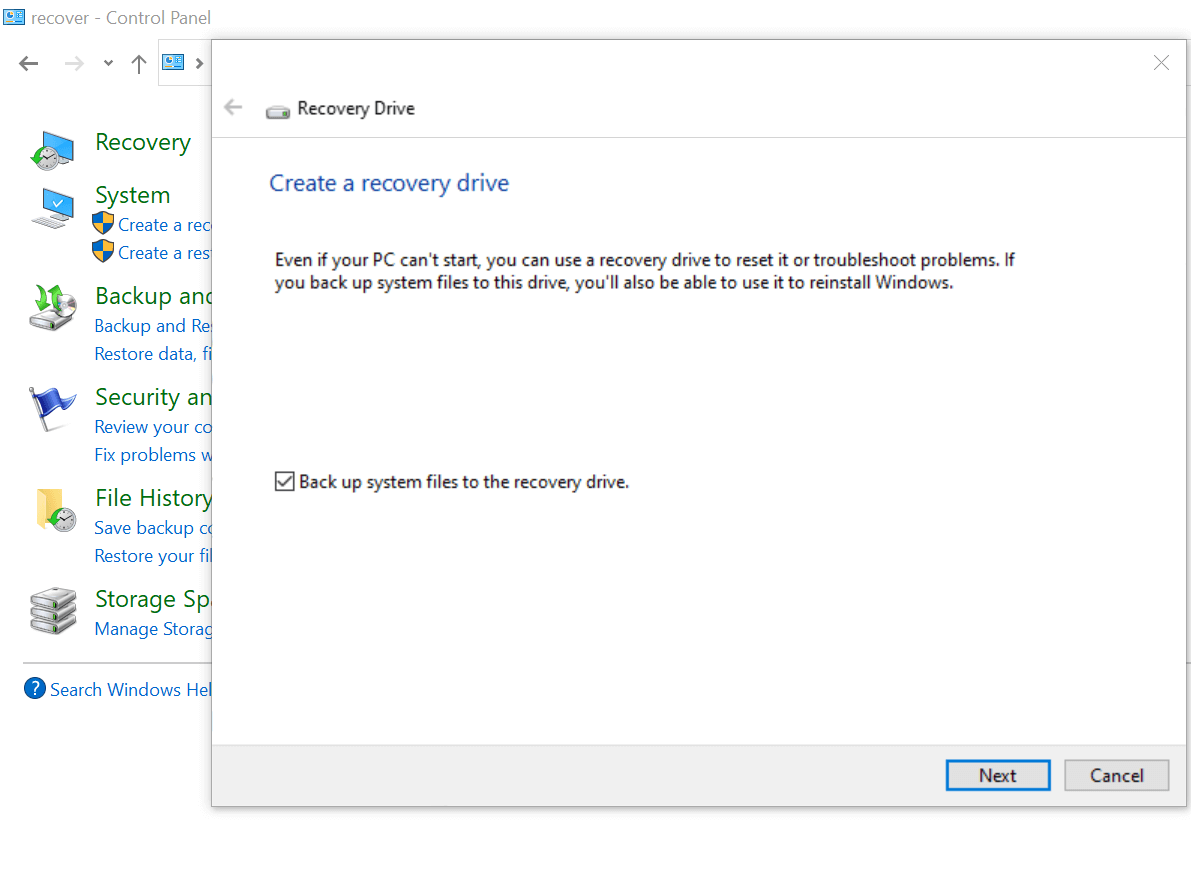
Please note: There would be a huge difference between the data size while trying to back up the recovery drive with system files & without it as well.
1. According to your choice, go ahead with the process & the next step would want you to select the USB flash drive.
2. The next step would come as a warning where your selected USB will be getting formatted so all of its data will be gone. (you need to make sure that the USB flash drive doesn’t have any important data before the process begins).
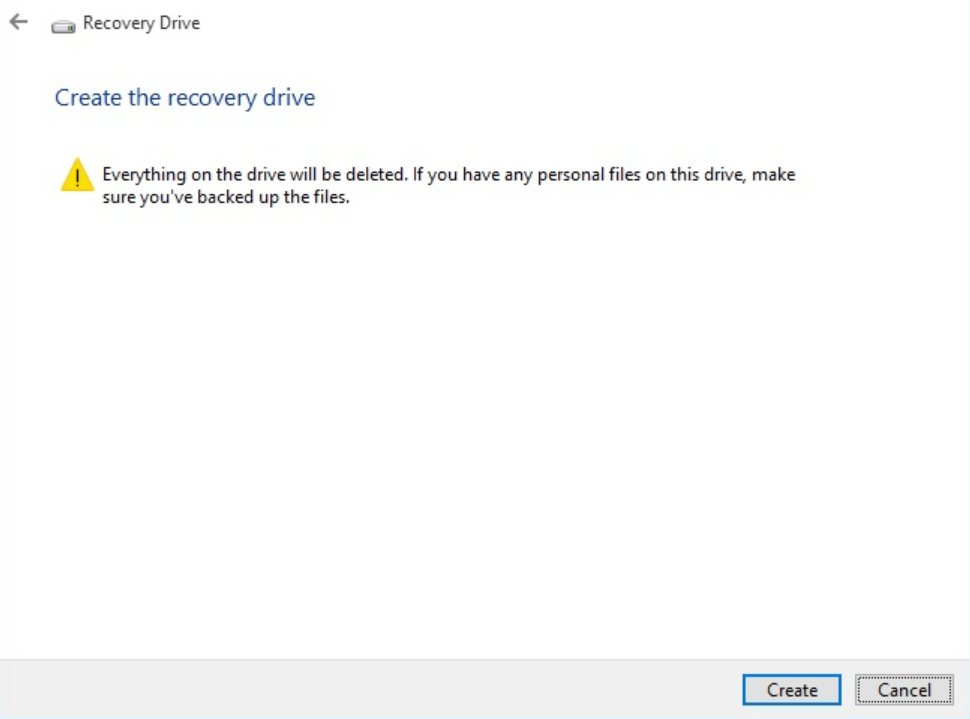
3. Once you are sure, go ahead with the process & soon you will see that the recovery process has started. Now, it will take a bit longer if you went ahead with system files backing up or else no more than 5 minutes.
4. Once the process has been completed, you will see that the USB flash drive has been renamed to Recovery. And that means that you have successfully created the Windows 10 recovery drive on your PC.
Here’s How to Create a Windows 10 Recovery Disk
Once you have created your Windows 10 recovery drive, you wouldn’t need to create the recovery disk as well. It’s not a process of creating both, however, some people don’t prefer using USB for system files & that’s where they shift to using disks. This is why we will be explaining here the ways to create a Windows 10 recovery disk in the easiest ways possible:
1. Let’s start with launching the Control Panel on your PC & look for Backup and Restore (Windows 7).
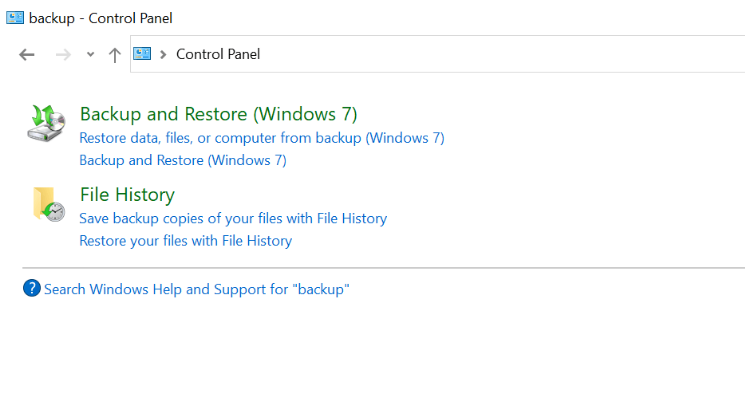
2. Once narrowed down, tap on the functionality & once the next page opens up, select “Create a system repair disc” (the extreme left side of the screen).

3. The next step would be to choose the DVD drive that you wish to convert into a recovery disk (from the list of drives the system will show you) & then tap on, Create disc.
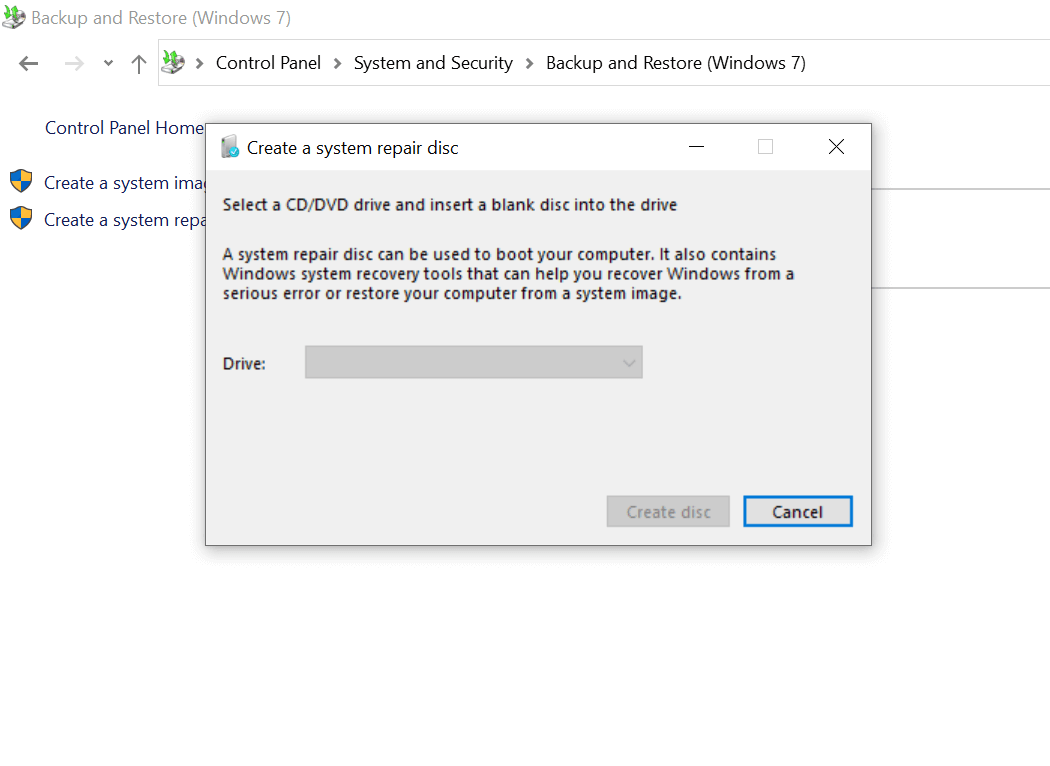
4. Post the selection, recovery disc creation will start & within no time, your WIndows 10 recovery disc will be created. Voila!!
Also Read: How to Take Scrolling Screenshot on Windows 10?
How to Use Windows 10 Recovery Drive or Disk to Restore/Repair Your PC
Now that you have successfully created your Windows 10 recovery drive, how will you use it when the time comes?? You won’t get any prior intimation that you need to use the recovery drive to repair the PC. And that is why you will have to boot the system directly with the recovery disk or drive. Yeah!! You need to follow the below path & the restoring process will start, thanks to the recovery drives.
Advanced System Options > Troubleshoot > Recover
Following the path will help you repair your Windows operating system if it face any issues. As well as, having a recovery drive is always a good option because you don’t want to wait for someone to help you repair your PC if you yourself is enough to do so.
Wrapping Up
The Windows operating system has been extremely useful to almost everyone of us for quite a long time & the history shows that it has had ups & downs as well. Creating a recovery drive is a feature that was introduced in Windows 7 & from that time, users became more aware of troubleshooting systems on their own. You will find the option in Windows 10 as well where you can create a recovery drive & disc easily to repair your PC without any hassle.
So explore both the scenarios of creating a recovery drive as well as disc & you won’t have to worry about instances when your PC starts giving you hard time.
Next Read
How to fix Windows Hello Fingerprint not working on Windows 10?
How To Change Login Name On Windows 10


Lucy Taylor
Creating a proper backup of all the data is a good idea. Thank you Ankit