
A lot of us find installing Windows very confusing, time-consuming, or a difficult task that we cannot perform alone. We fear any plausible damage to any software while installing Windows or inputting any wrong key command while displaying boot options. What if we accidentally crash the currently running Windows and can’t use the PC anymore before any pro helps us out?
There are different ways to install Windows on your PC successfully with the help of internal as well as external resources. One of the most common and easiest ways to boot Windows PC is through a USB flash drive, and that’s what we will talk about in today’s article.
Let’s learn how to install Windows 10 from USB?
Best Ways to Install Windows 10 from USB Drive: Learn Windows Installation from USB
So, let’s go through the various ways in which we can run Windows 10 from a USB flash drive and become pro at it.
A. Install Windows 10 From USB Using the Windows .iso file Tool
Microsoft has got a tool for you that’s going to help you out to run Windows 10 from USB on your PC. Visit the installation tool page from here, and follow the below instructions:
1. Tap on “Download tool now”
2. Open the downloaded setup, and click on “OK” for installation
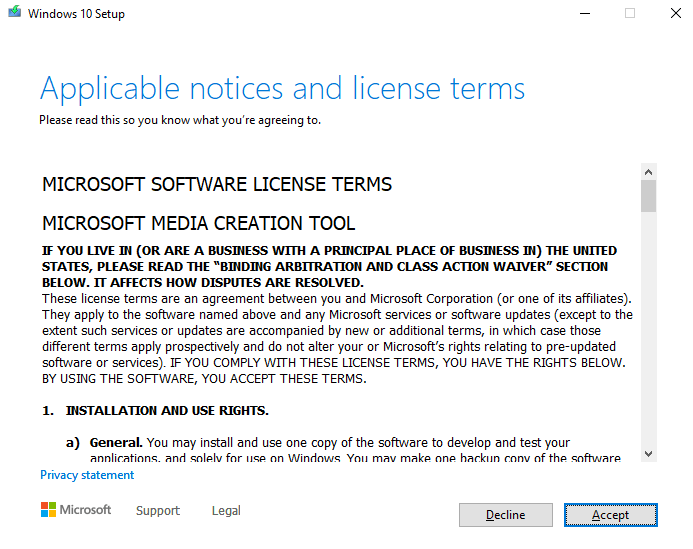
3. Let it start and then click on “Accept” once it pops up with license terms
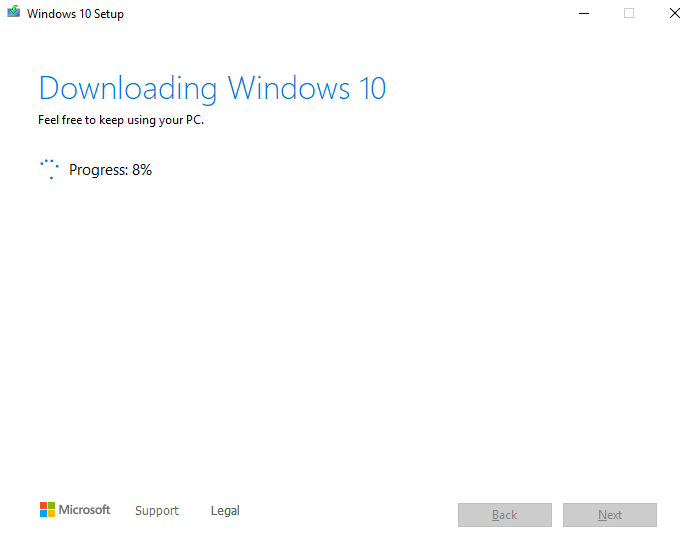
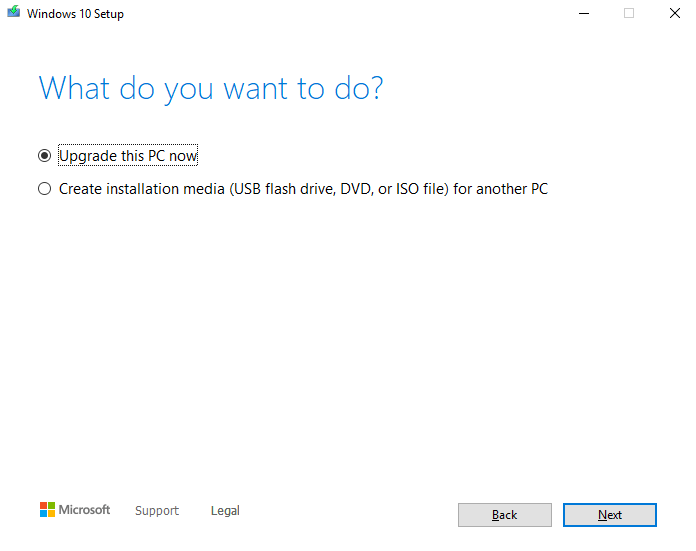
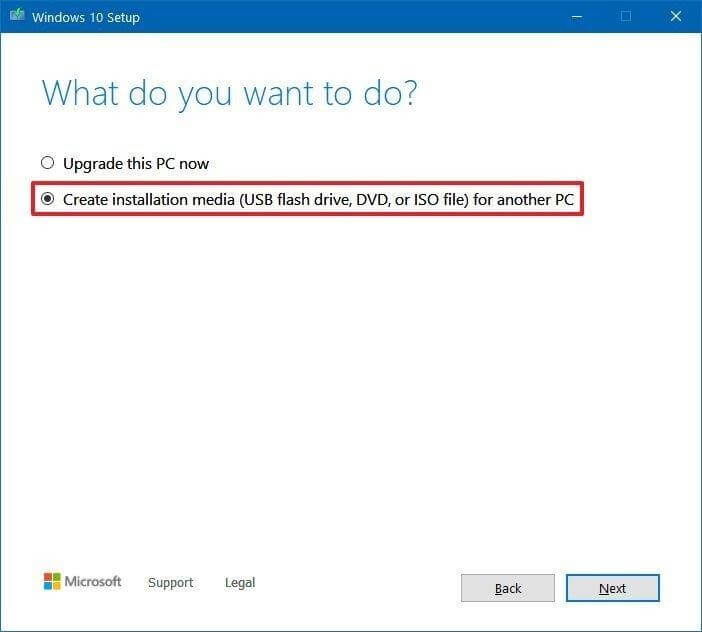
4. After accepting the terms, click on “Create installation media for another PC”
5. Once you select it, the Windows 10 downloading will start.
6. Once the file gets downloaded, you need to provide a source that you will use to install Windows 10 on PC and that will be a USB flash drive.
Please note: The USB flash drive must have at least 8GB space and it must be empty.
Don’t forget to save the backup of your important work before the installation as you may lose your precious data if you won’t save it.
7. Now insert the USB drive in the PC, which needs to have installation for Windows 10
8. Restart the PC and press boot options (F2/F12/Esc – whatever works for you) if it doesn’t automatically read the flash drive
9. Now follow the given instructions while installing the Windows 10 from USB
10. Select the appropriate language, time, and keyboard preferences, and tap Next
11. Now sit back and let the installation begin.
Note: If you want to upgrade the same PC, you downloaded the above tool, select “Upgrade this PC now” instead of “Create installation media for another PC” and follow the instructions.
This was one of the easiest and common ways you can use to install Windows 10 from USB.
Keep your Office product key handy if you are performing an all-new installation of Windows 10.
Also Read: How to Fix USB Not Working in Windows 10
B. Install Windows 10 From USB With Rufus
A lot of users have used Rufus software to boot Windows 10 from a USB flash drive. With an easy interface and a not-complicated process, you can easily perform this task. All you need to do is click on the link here, and download Rufus.
Claimed as Rufus is comparatively faster than its alternatives including Windows 10 USB download tool. This claim makes us use this option if Rufus actually is faster than the other options to boot Windows 10 from USB.
Follow the below process to use Rufus & complete Windows installation from USB:
1. Download Rufus
2. Launch the software and add the required files as below:
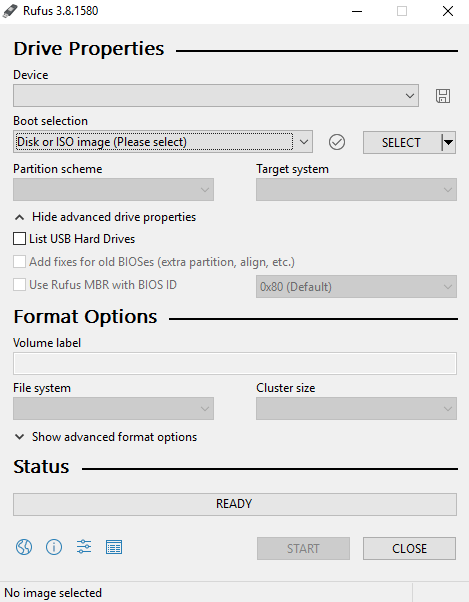
- USB drive location in the “Device”field
- Click on “Select”next to “Boot Selection” and choose your Windows 10 ISO file
- Let other options be as they are (apart from changing “Image option” to “Windows To Go”
- Name the volume label whatever name suits you, and click on “Start”
3. The following screen will ask you to choose the version you seek to install on the USB flash drive.
4. After selecting the version, click “OK” (do keep the USB empty beforehand)
5. The next step will have Rufus copying all necessary files on the selected USB drive.
6. Once the drive is all set up, you can close Rufus and your bootable USB flash drive is ready to run Windows 10 from USB.
Must Read: How To Fix ‘Windows Update Pending To Install’ Issue?
C. Install Windows 10 From USB With WinToUSB
After using an internal and an external option to install Windows 10 from USB, let’s find out another outsourced option “WinToUSB”. WinToUSB stands for “Windows to USB” that lets you run Windows 10 from USB successfully free of cost.
Please note that the other versions of WinToUSb are paid ones that include different versions of Windows 10 such as Win 10 Professional or Enterprise.
The process to install Windows 10 from USB flash drive is described as below:
1. Download WinToUSB
2. Install the software in the PC and launch it
3. Once you launch WinToUSB (keep the USB flash drive empty or formatted already)
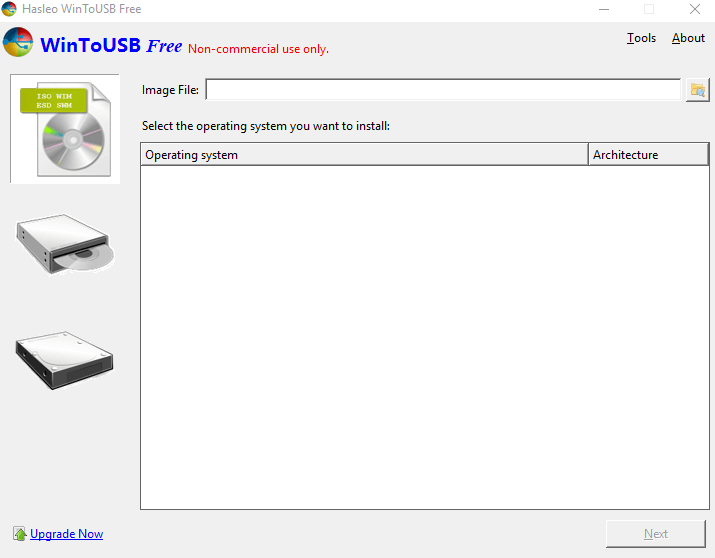
4. Click on “Image File” and select (considering that you already have) Windows ISO file from the PC
5. Alike Rufus, choose the Windows 10 version you want to run in your system (free WinToUSB version – Windows 10 Home)
6. Post this, the tool will ask you to locate the USB flash drive address so add the same in the required field.
7. Now, the auto pop-up will ask to select the partition scheme and that will be MBR for BIOS. Choose the same and tap Yes.
8. Following this, you will select “Legacy” from the next slide and go ahead with the installation.
9. Once the installation is complete, close the WintoUSB window. Simple as that.
This way you can successfully complete Windows installation from USB!
Have a look: How To Uninstall Windows 10 Updates
D. Install Windows 10 From USB With UEFI Support
If you have a PC using UEFI, simply rely on the Media Creation Tool to create a bootable USB media:
1. Simply navigate to the Windows 10 download page.
2. From the ‘Create Windows 10 Installation Media’ section, hit the Download tool now button. Simply execute the exe file to launch the tool. Accept the Microsoft terms & conditions to proceed further.
3. Select the option ‘Create Installation Media (USB flash drive, DVD, or ISO File) for another PC. Hit the Next button!
4. In the next window, you have to select the language, architecture & edition of Windows 10 you wish to install. Click the Next button to proceed further!
5. Now choose the USB flash drive option to move forward. Hit the Next button again.
6. At this step, you need to select the removable from the list.

7. Hit the Next button & click on the Finish button to confirm the process!
This is one of the best ways to install Windows 10 from USB!
How Did You Install Windows 10 From USB?
Though there are ample amounts of ways to install Windows 10 from a USB flash drive, we have selected only three of them. These four methods are the perfect combination of easy-going, not-so-complicated, reliable, faster, and glitch-free factors. So, go ahead, give all of them a try, and let us know which one worked the best for you to complete the Windows installation from USB.
And don’t forget to mention the tools you use (not the above ones) that’ve been giving you 100% results without any difficulty.
Frequently Asked Questions: Windows Installation From USB
Q1. How To Install Windows 10 From USB To New PC?
Here’s a step by step process to install Windows 10 on a new PC using USB:
Prerequisites To Install Windows 10 OS:
- Windows 10 install.iso file or DVD
- USB Flash Drive with at least 8GB free space
- Idle PC where you can format the USB flash drive
- A USB Format tool
- New PC where you can install Windows 10 OS
Now, follow the steps carefully to successfully install Windows 10 from USB to new computer:
Step 1- Use a dedicated USB Format Tool to format the USB drive & set the primary partition as active. We recommend using EaseUS Partition Master Free for the process.
Step 2- Now it’s time to create a Windows 10 Installation USB. You can use a dedicated tool like UltraISO to burn a Windows 10 DVD or ISO to the USB Flash Drive.
Step 3- Connect a bootable USB flash drive to your new PC. Turn on the computer & press the key that opens the boot-device selection menu (ESC, F10, F12 Keys).
Step 4- Once the Windows Setup starts, follow the on-screen instructions to install Windows 10 OS.
Remove the USB flash drive successfully, once you have successfully installed Windows 10.
Q2. How To Recover Corrupted Files From USB On Windows 10?
Here are the step by step method to recover corrupted files from USB on Windows 10 via CMD:
Step 1 – Launch the Command Prompt.
Step2- On the CMD Window, type chkdsk H: /f (H – is the Drive letter of the corrupted USB drive)
Step 3- Hit Enter button.
Step4- Now execute the command: ATTRIB -H -R -S /S /D “drive letter”:*.*to quickly recover the files from USB.
Q3. How Long It Takes To Install Windows 10 From USB?
Usually the entire process should take about 10 minutes or so.
Q4. How Do You Make Windows 10 Boot USB?
To make a Windows 10 bootable USB for free, watch this quick video tutorial!
Editor’s Recommendation:
USB Port Blocker Software For Windows 10/8/7
How To Disable USB Ports In Windows 7 & 10


Isabellgracia
Hi there, this is a very good blog I appreciate your work. thanks for sharing such useful information.