If you want to install Windows 10 on your Mac machine you can use Boot Camp Assistant. Boot Camp Assistant is a utility that helps users to install the Windows 10 operating system on Macintosh computers without any hassle. This nifty piece of software is provided by Apple and you do not need to install any third-party software to install Windows 10.
You can use both operating systems on a single computer using Boot Camp Assistance.
Requirements for installing Windows 10 on Mac machine
Compatible Mac machines on which you can install Windows 10:
- MacBook model 2015 or later
- MacBook Air model 2012 or later
- MacBook Pro model 2012 or later
- Mac mini model 2012 or later
- iMac model 2012 or later1
- iMac Pro (all models)
- Mac Pro model late 2013
Update to the latest version of the Mac operating system, to get the latest version of Boot Camp Assistant.
Space required:
Minimum required free space is 64 GB that must be on your main disk.
However, if you do not have enough free space and are looking for a way to free it up, try using the Disk Clean Pro. It is an all-in-one optimization suite for Mac devices. Disk Clean Pro’s advanced features and powerful tools help enhance Mac speed with ease and improve your Mac experience.

Once you have enough space you can use BootCamp assistance to install Windows 10 on Mac.
Note: The size of Windows partition should be equal to the startup disk of your machine. E.g. if you have 128 GB of memory then recommended the size of the disk should be 128 GB.
External drive for storing ISO image of the Windows operating system (More than 16 GB).
ISO file of Windows 10 operating system
How to install Windows 10 on Mac
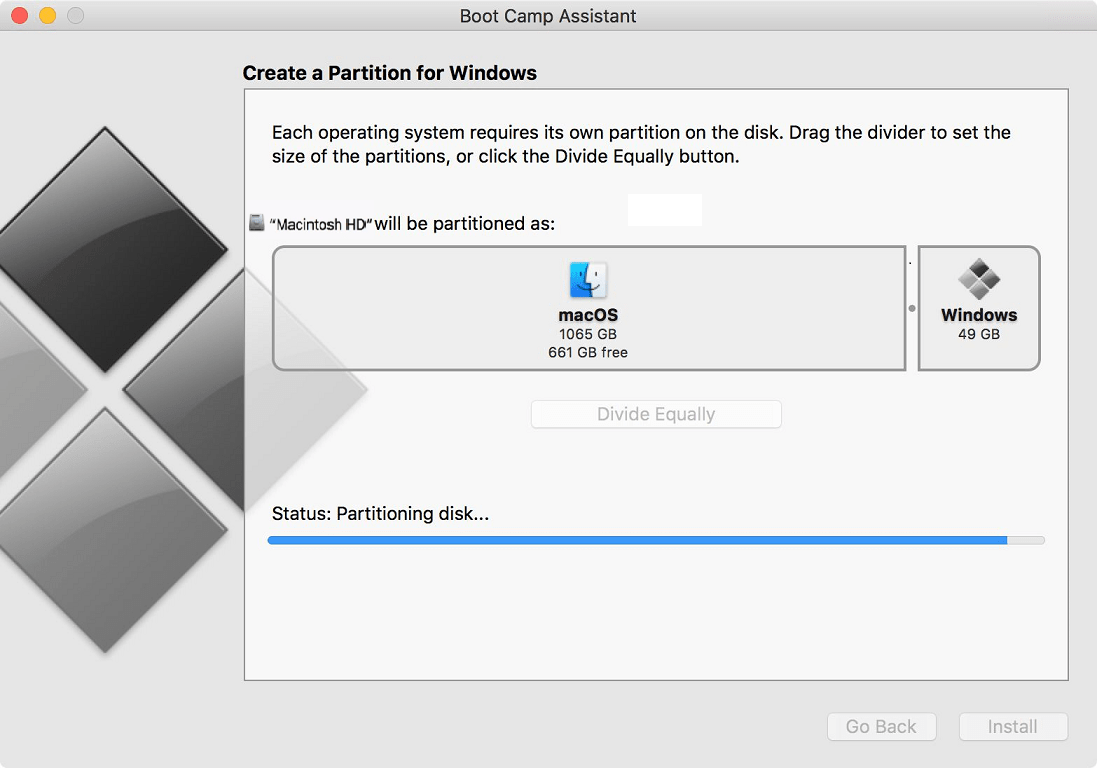
Boot Camp Assistant is very easy to use and will help to install Windows 10 on mac in no time. It will also create a partition for Windows 10 so that there is no need to create partition manually. Boot Camp Assistant provides slider to allocate space to your Windows 10 partition from the main disk.
1. Open Boot Camp Assistant from Utilities.
2. Click on continue and select partition size for Windows.
3. Select the ISO image of Windows 10 and click on install.
4. After that click Windows 10 installation will start. You will not be asked to select the partition. Select Boot Camp partition and format it.
(Without formatting the password you won’t be able to select the partition)
5. After selecting the partition Windows installation will start.
Once Windows installation is complete use Boot Camp installer to install drivers on your Windows 10.
In addition to installing Windows 10 on Mac if after a while you decide to uninstall it you can follow the steps mentioned below.
Also Read: How to Run Mac Apps on Windows 10
How to remove Windows 10 partition from your Mac?
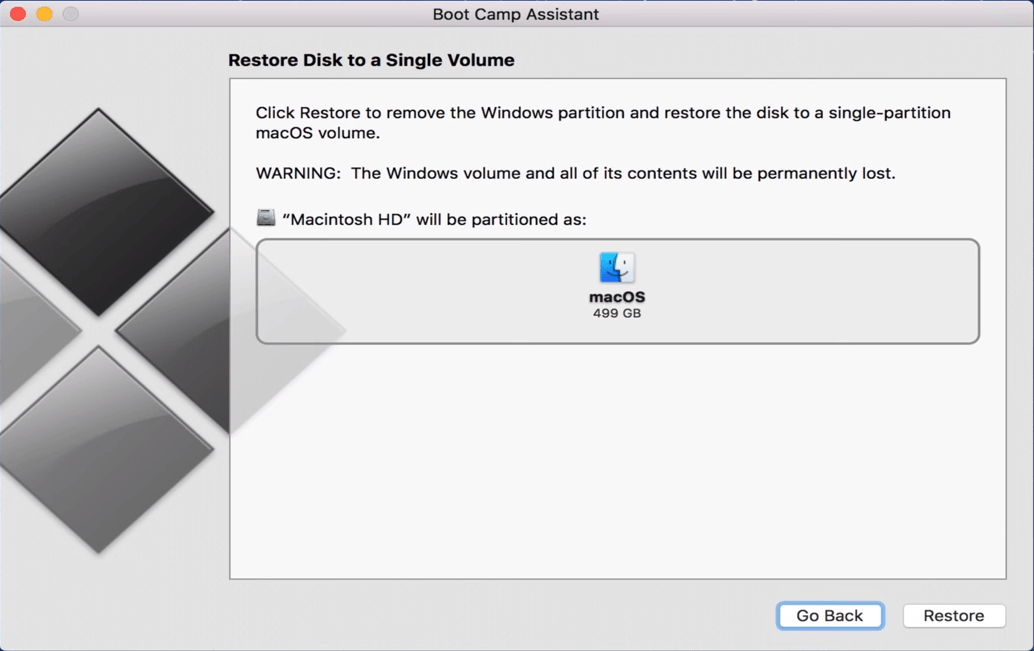
Remove Windows 10 partition from your Mac which was created using Boot Camp Assistant is as easy as creating it. In case you do not need Windows 10 and want to take back the space allocated to Windows 10 follow the steps below:
- Boot your machine into MacOS and open Boot Camp Assistant from utilities.
- Click on Restore button and it will automatically remove Windows 10 from your Mac machine.
Note: Remove the Windows operating system will also remove any files you have stored in it. Therefore, make sure that you take a backup of files stored in the Windows operating system.
Boot Camp Assistance is simple to use and will install Windows 10 on your Mac machine in no time. You can now use both operating systems on a single machine. Using both operation systems proves very useful as you can perform different tasks on a single machine.
Also Read: How to Install and Run Android Apps on Windows 10?
To read more articles like this on your smartphone scan the QR code below:

Follow us here


Leave a Reply