
You turn on your computer but there’s no display on the monitor. What is more frustrating than this situation when you see the lights blinking on the computer cabinet, hearing the sound of a running computer fan and hard drive but nothing displays on the computer screen. But believe me you are not alone, while you are reading this article there are several users who are facing this issue right now.
However, as every problem has a solution, the same occurs with this problem. In this article we have accumulated some tested steps that have worked for the users who were unable to see any display on their monitor.
So without further ado, start following each troubleshooting step before your problem gets resolved
Also Read: How To Fix “Display driver stopped responding and has recovered” Error On Windows 10
Check if Monitor is Working Properly
Monitor is the display device that shows the visual output from the computer. This means if the monitor is not working properly then even turning on the computer will display nothing. So, to get started first of all check that you have really turned on the monitor. You can turn on the monitor simply by pressing the power button on the monitor.
If the monitor doesn’t turn on even after pressing the power button then check the power cables to rule out any possibility of loose connections that are avoiding the monitor to turn ON. You can unplug the power adapter attached to the monitor and from the power source, and plug it back. Also check for the video cable, if in case it is damaged try with a new video cable.
Note: Also watch for the port connectors both on your computer and on the monitor. If any pin of the port connectors is bent or damaged that also nothing will be displayed on the monitor. In such a case you again have to visit a local computer shop.
You can also try with an alternate monitor to check whether the problem lies with the monitor or is there some other hardware issues. If changing the monitor resolves the issues then you need to get your monitor repaired. If the problem persists even changing the monitor then try the next fix.
Reset BIOS Settings to Default
Have you recently updated your BIOS, and started facing problems after that? Then you need to reset BIOS settings to default, as improper BIOS settings may lead the PC to go out of display. But the good news is that resetting the BIOS settings to default can fix the problem.
To do so follow the steps listed below:
- Keep on holding the power button on your computer until the computer turns off.
- Now switch off the power socket on which computer is connected. As earlier, we again recommend you to disconnect the cord from the power supply.
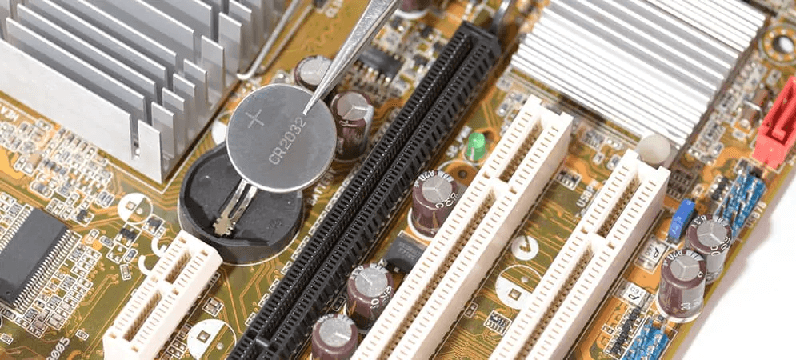
- Open the computer case and look out for the CMOS battery(silver button battery) on the motherboard and remove it from the slot. You can easily pull it out with your nail.

Img Src: https://store.hp.com/ - Now wait for about 5-10 min before putting it back on the slot in the motherboard.
- Connect all the cables back to the power socket, and turn your computer back.
Hopefully this will resolve the problem.
Disconnect All the Attached Peripherals from the Computer
To get the most out of the computer we attach different types of peripheral, like Keyboard. Mouse, webcam, joystick, scanner, printer etc. But if any of these peripherals go bad then also your computer will show no display even if it is turned on.
To fix this you need to check each peripheral individually by following the steps below.
- Turn off the computer by pressing and holding the power button.
- Now disconnect all the peripherals attached to your computer (like keyboard, mouse, printer, webcam etc.)
- Once disconnected, turn on the computer back. If the computer boots properly and you see the display on monitor then the problem is due a faulty peripheral.
- To figure out the faulty peripheral you need to attach each at a time. Once you are able to locate the culprit device try replacing it with an alternate (if an alternate is available with you).
You can also contact the device manufacturer for assistance if it’s under warranty period.
If the problem still persists then head on to next fix, which is reinstalling the RAM
Reinstall RAM of your Computer
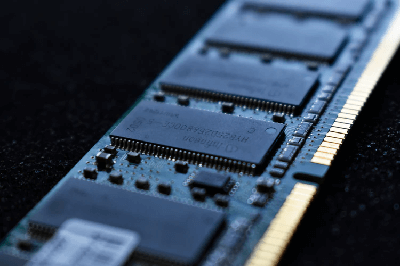
RAM that is responsible to carry out all the processing on your computer if not properly seated on its slot can cause the issue of no display on the monitor. Please note that to properly place the RAM in its slot you have to be careful. And if you have doubts then it is better to consult a computer expert.
- To get started power off the computer by long pressing the power button.
- Now switch off the power socket on which computer is connected. We also recommend you to disconnect the cord from the socket.
- Now open the computer case, and remove the RAM from the memory slot on the motherboard.
- Clean the RAM pins smoothly and put it back into the memory slot. If you have attached two RAM to the computer, then pull out both and put back both of them again in their respective slots.
- Close the computer case and connect back all the cables and switch on the power supply.
Now turn on your computer back to check whether it fixed the problem. If it fixed the problem, then it’s great. If not then check out the next step.
Recommended Tip: Update the Outdated Drivers
An outdated video driver can result in many problems including no display even the PC is turned ON. So to avoid any display related issues we recommend you to update your display drivers to the latest. To update the obsolete drivers you have two options:
- Manually updating the drivers by visiting the device manufacturer website and looking out for the compatible drivers based on the operating system (bit and version) installed on your computer.(Risky and Not Recommended)
- Automatically updating the drivers by using a dedicated driver update tool. You neither need to search for the manufacturer website nor worry about getting the compatible driver.
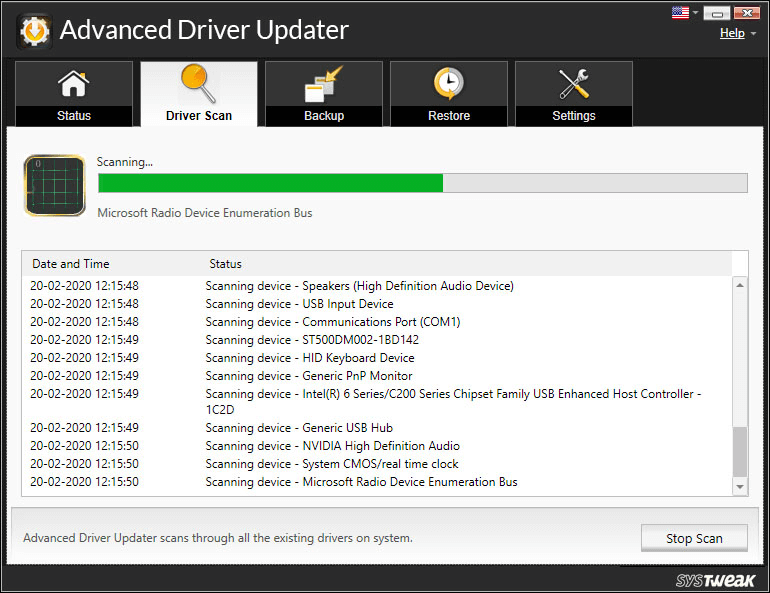
Our recommendation for an automatic driver updater tool is Advanced Driver Updater. This amazing tool from Systweak (a software company serving millions of customers from the past two decades) has an advanced scan engine that quickly yet thoroughly scans your complete PC for the outdated drivers. After the scan completes it presents a complete list of all the obsolete drivers of your PC. You can then update an individual outdated driver or all at once with the latest drivers. The product also takes a complete backup of all the drivers before updating them, so that in rarest of the rare cases if something goes wrong you can revert them back.
Let’s click, download, install and explore this Advanced driver updater software for Windows 10.

And what more, the company backs up their product Advanced Driver Updater with 60 days no question asked money back guarantee.
Also Read: How To Reinstall Graphics Drivers In Windows 10
Bottom Line
Your computer turns on but shows no display, this really seems to be a dreadful issue. But the methods listed above will help you to fix this issue effectively. Also, do let us know in the comment box below which of the steps worked for you. And in case you find some other troubleshooting method that helped you in fixing the problem, then also do let us know in the comments section.
To keep yourself updated with all such troubleshooting guides and latest trending articles do follow us on our social media platforms that are on the left side of your screen.
Next Read:
Best Network Monitoring Tools & Software of 2020
Best Multiple Monitor Software For Windows 10


Abhay
Also face this issue few days back when my computer turn on but no display showing. Try so many ways but fail and finally went for service. Well will try this amazing write up in future.