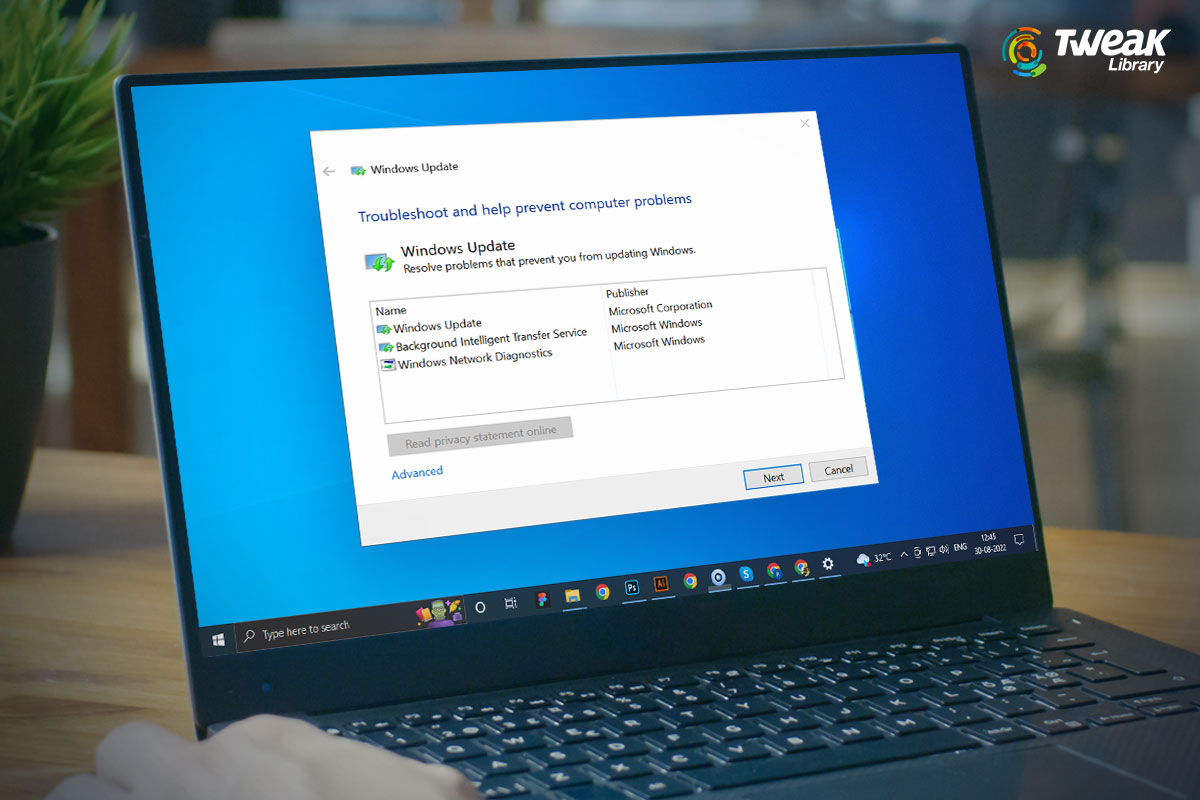
Facing Windows troubleshooter not working error? Or wondering how to fix the Windows update troubleshooter not working on Windows 10/11? Microsoft Windows troubleshooter solves technical issues quickly and efficiently. The troubleshooter might sometimes fall short. Here are some fixes you can attempt if Windows Troubleshooter is not working on Windows 10/11.
Fix’s For Windows Update Troubleshooter Not Working
1. Run A SFC & DISM Scan
- Press the “Windows” key with the key “S” to open the “Search Dialogue Box” menu.
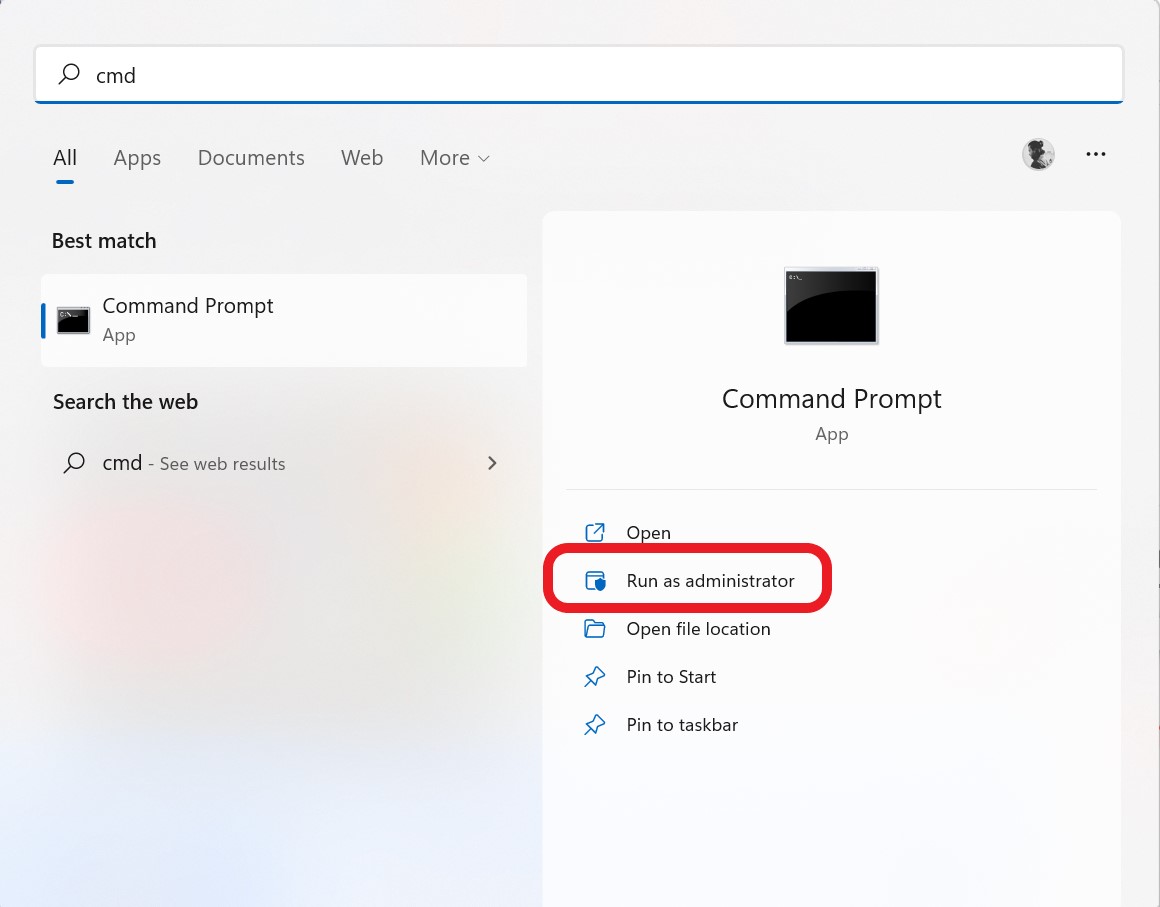
- Now enter “cmd” and choose “Run As Administrator” to open the “Command Prompt.”

- Type “sfc /scannow” into the command prompt window to start the scan.
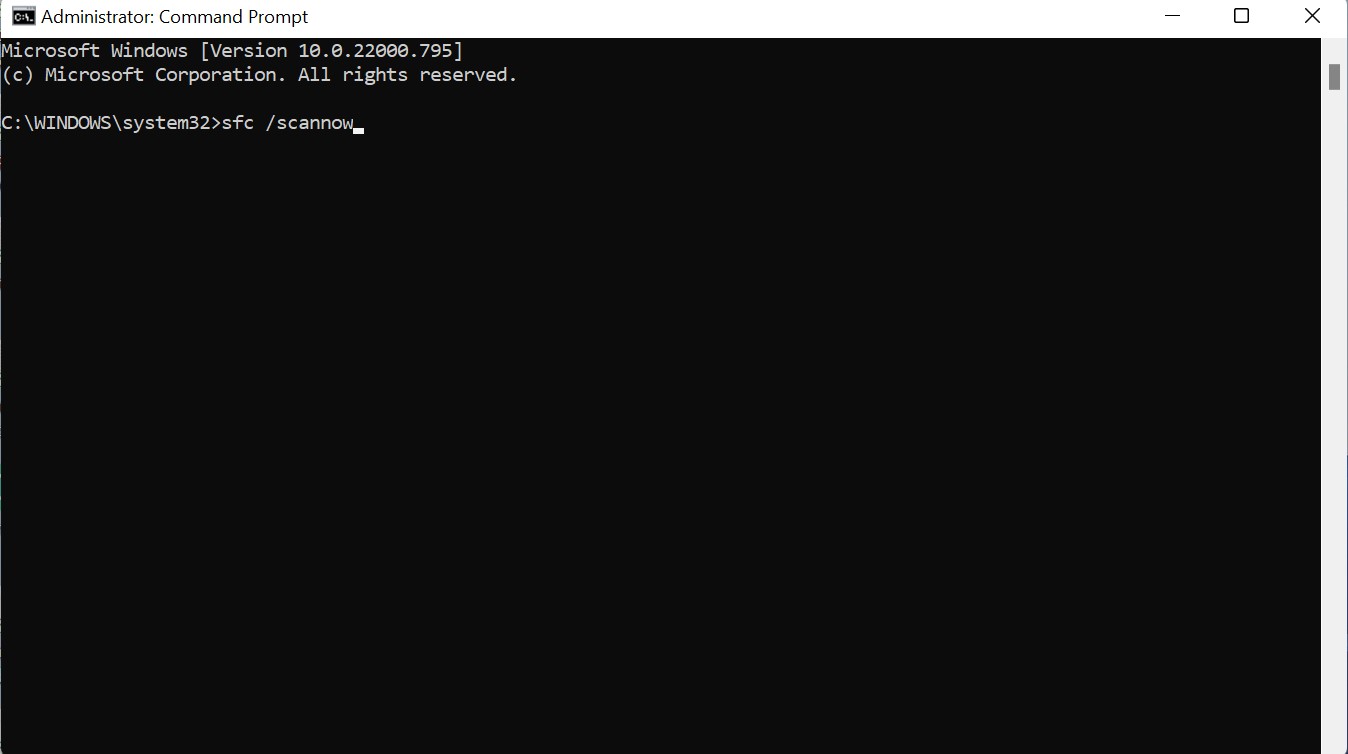
According to some users, performing an SFC scan may help resolve this Windows update troubleshooter not working issue. The issue should be fixed following the SFC scan.
If the issue is still present or the SFC scan failed, try doing a DISM scan. To do so, follow the steps below:
- Press the “Windows” key with the key “S” to open the “Search Dialogue Box” menu.
- Now enter “cmd” and choose “Run As Administrator” to open the “Command Prompt.”
- Now enter the following code and hit enter: “DISM /Online /Cleanup-Image /Restorehealth”
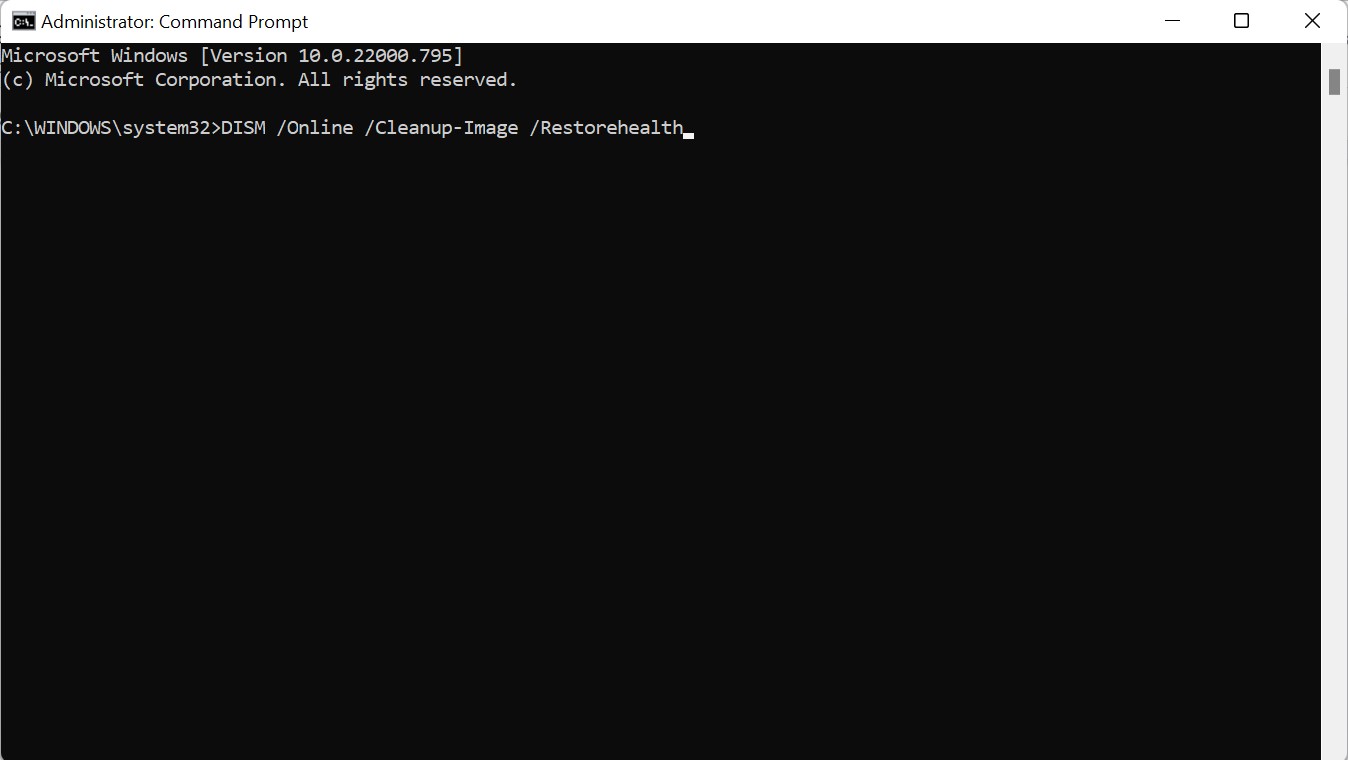
The scan will start, and it could take up to 15 minutes to complete. Once the DISM scan is finished, verify that the issue has been fixed.
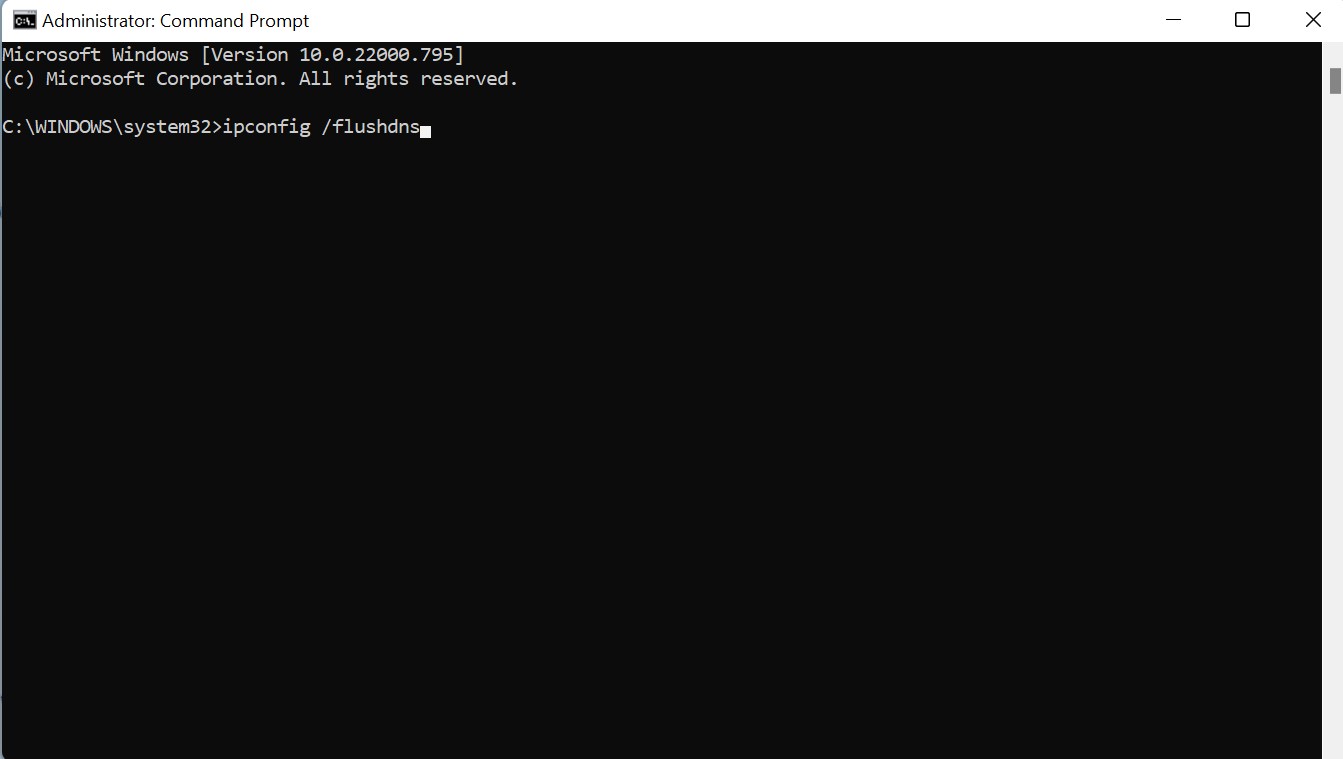
2. Flush The DNS Cache
Accessibility problems with the Windows troubleshooter can be fixed by clearing the DNS. You must flush the DNS to fix the accessibility difficulties with Microsoft Servers that the Troubleshooter uses to diagnose faults. Here’s how to do it:
- Press the “Windows” key with the key “S” to open the “Search Dialogue Box” menu.
- Now enter “cmd” and choose “Run As Administrator” to open the “Command Prompt.”

- Now enter the following code and press the enter button: “ipconfig /flushdns.”
Restart your computer, and check whether the Troubleshooter is working again.
Read Also: How To Optimize Memory and Manage System Cache
3. Uninstall Any Third Party Antivirus Program
Sometimes Troubleshooter can also be prevented from looking for solutions online and contacting Microsoft servers by your antivirus program. Try momentarily disabling your antivirus program to determine if the Troubleshooter can be used. To do so, follow these steps:
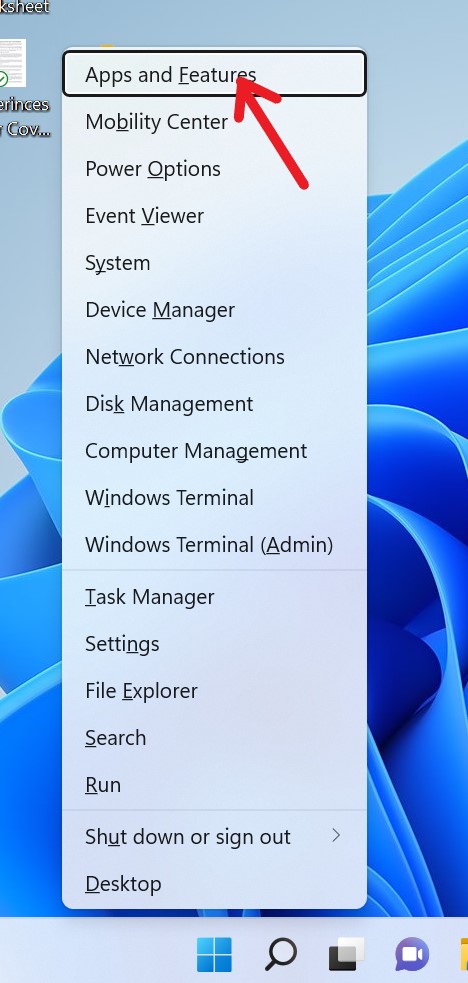
- Press the “Windows” key with the key “X” to open the “WinX” menu.
- Now Click on “Apps & Features” from the top of the menu.
- On the Apps & Features page, you will find all the apps installed on your computer. Select the Antivirus program and uninstall it by right-clicking on it.
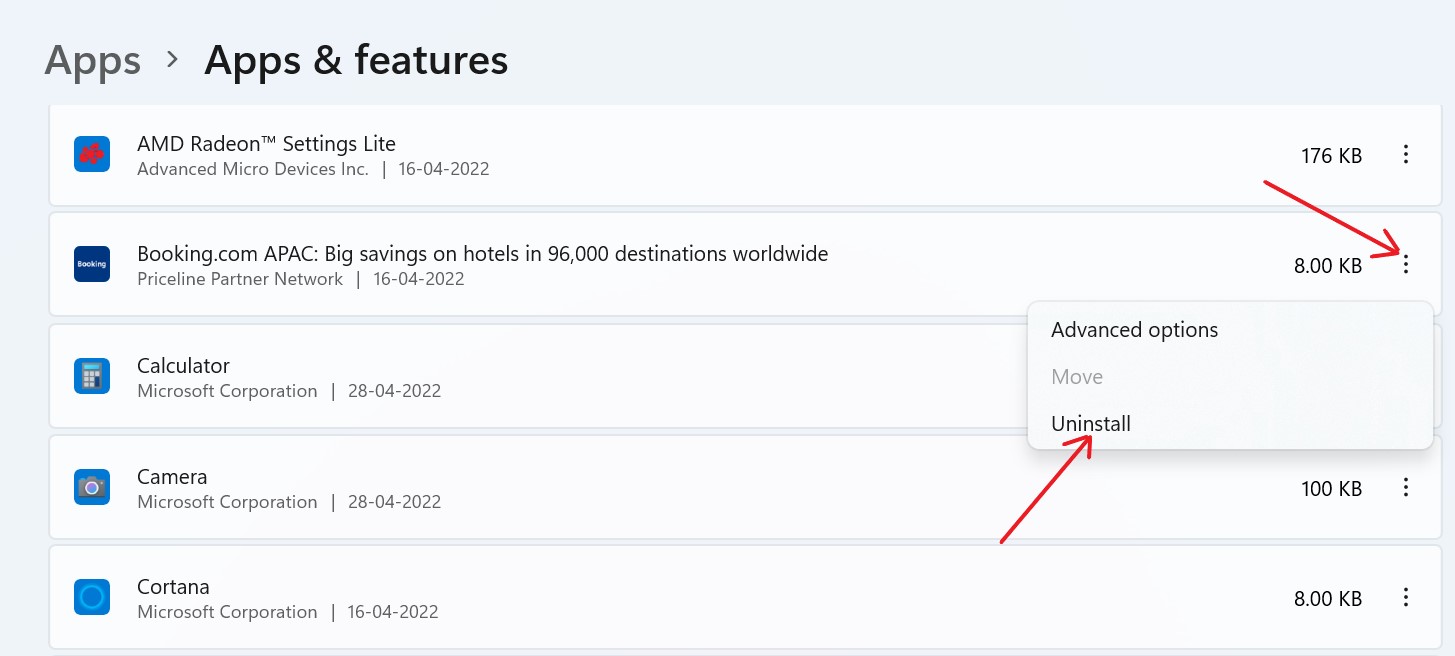
Once the antivirus program has been removed, restart your computer to see if the Windows 11/10 troubleshooter not working problem has been resolved.
Read Also: T9 Antivirus Review: The Best Real-Time Protection Tool for Windows
4. Change Cryptographic Services To Automatic
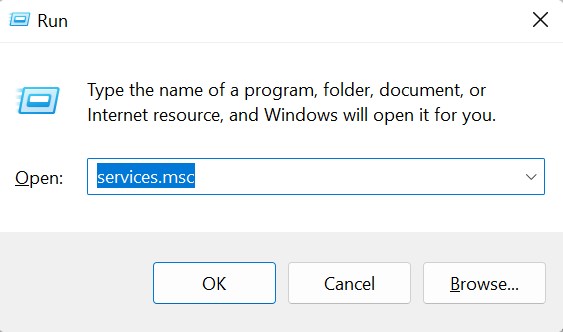
- Press the “Windows” key with the key “R” to open the “Run Dialogue” box.
- Now type “services.msc” and hit the enter button.
- A “Services” tab will appear in front of you, now scroll down to locate “Cryptographic Services” and open it by double clicking on it.
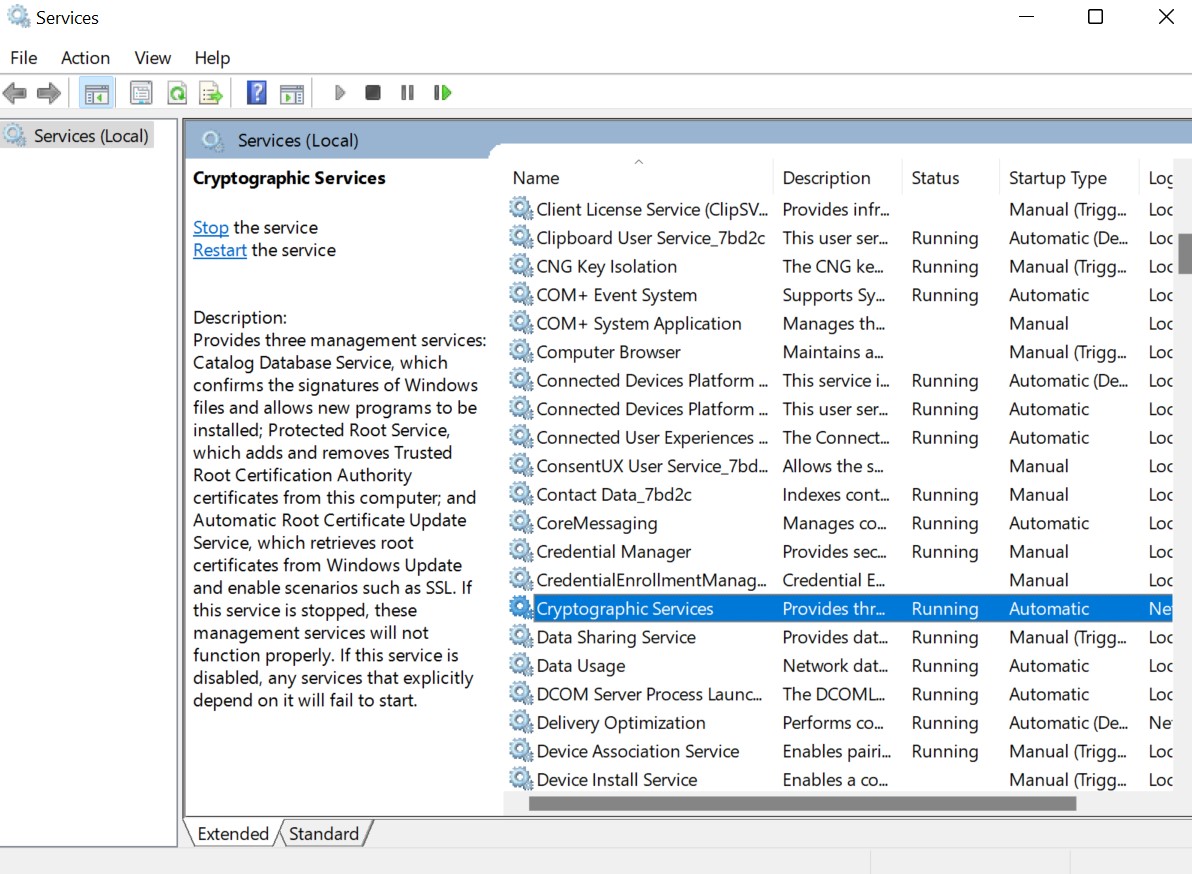
- Now locate the “Startup type” and choose “Automatic” for the Startup type. Additionally, if the cryptographic services are by default inactive, hit the “Start” button to make them active.
- To save the current modifications, finish this process by selecting “OK” and “Apply.”
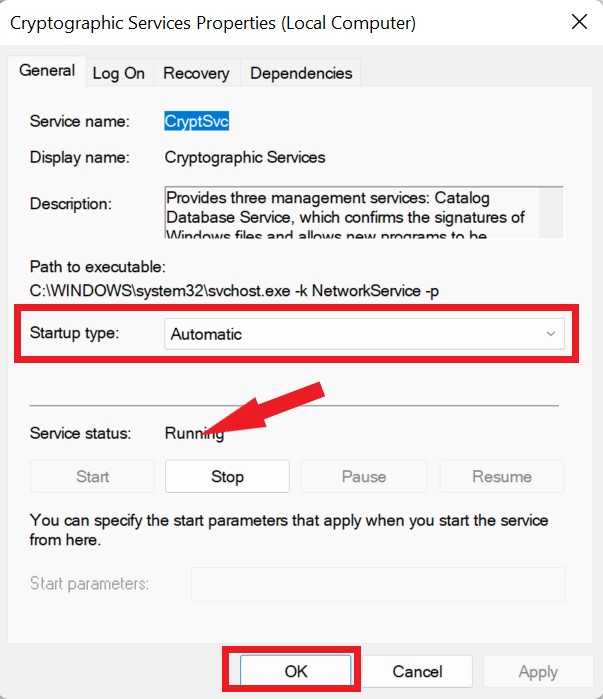
Now check if the Windows 11/10 troubleshooter not working error is resolved or not.
5. Fix Windows Troubleshoot Not Working in Windows 10/11 Via PC Repair Tool
Using the “PC Repair Tool,” you can identify and resolve program/application problems, malware/virus problems, registry problems, and other system issues. And to fix this annoying troubleshoot not working error in Windows PC, I strongly suggest you use Advanced System Optimizer tool.
This PC repair tool will fix common computer faults, safeguard your data from viruses and hardware failure, and optimize your computer for better performance. It comes with various useful modules that can be used to improve your PC’s overall health. You can easily repair common computer issues with the help of its unique “Smart PC Care” feature.
In just 3 simple steps, fix PC troubles and eradicate spyware/malware:
First: Download & install the Advanced System Optimizer by clicking on button below.

Second: After Installation, open it & choose the “Smart PC Care” option.
Third: Tick all the boxes and then click on the “Start Scan” button.
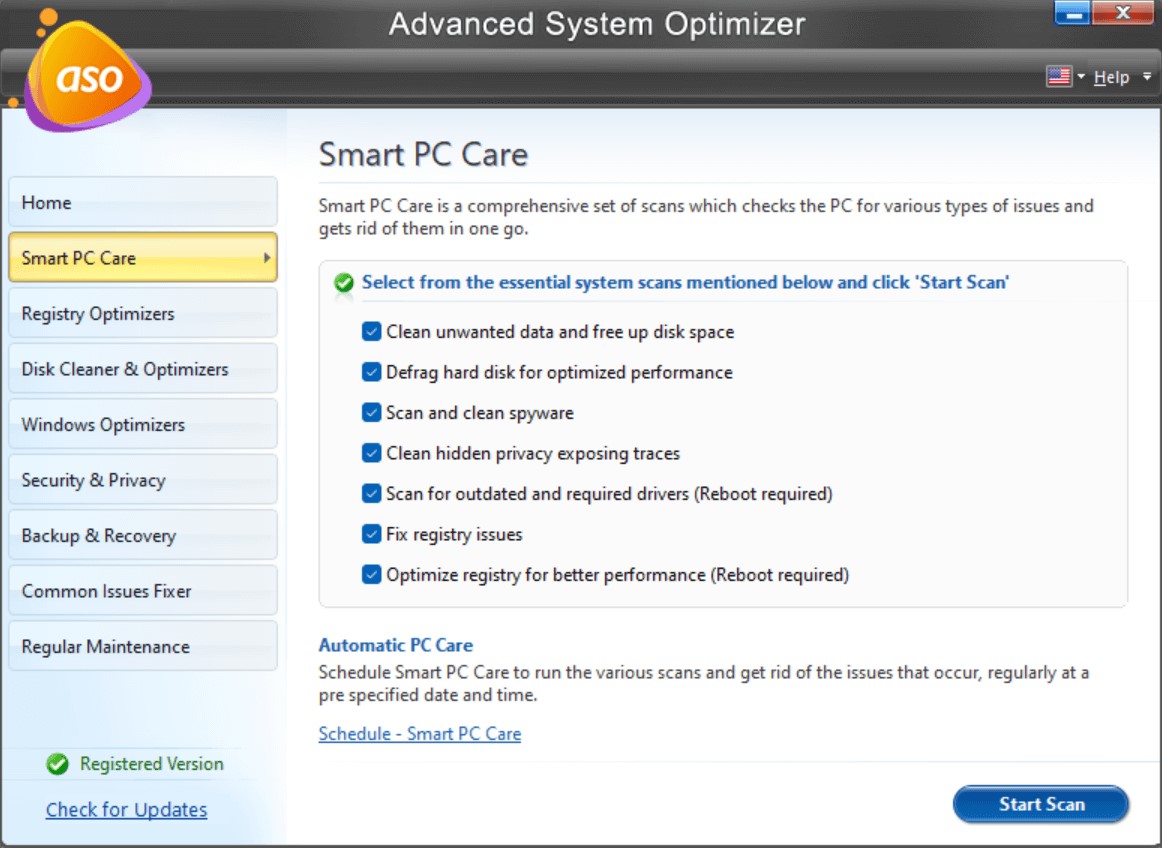
Once the scan is done now click on “Optimize” and then it will ask you for a reboot to allow it by clicking on “Yes”.
To Wrap This Up
There are several ways to fix this Windows update troubleshooter not working issue but here I’ve discussed the fixes which you can easily do without any technical help. Give these methods a try and tell us which one works for you. And if you also know another easygoing approach to fix this issue then do let us know in the comments below. We would like to hear from you.
Related Topics


Leave a Reply