What do you do when you have to organize files and delete duplicates on your Mac? Do you select them, check them; move them to a new folder manually? Do you know how time-consuming it is? I would say, Hours! What if I say I have found a tool that can merge your Photos albums on your Mac, even ten times faster!
Multiple photo libraries look messy especially when you capture pictures for a living. Even for personal usages or social media usage, multiple photo libraries never work. And, splitting them according to the date and genres takes a lot of time. With time, the mess will get bigger. If you’re looking for something to deal with the hassle of different photo libraries, you’ve stopped at the right place. This blog covers the best way of merging Photos libraries along with free software. So, let’s get started.
Important Step:
Before you begin merging photo libraries on your Mac, make sure you have created a backup of everything. During the process, you’re going to combine photos and delete duplicates. Therefore, to avoid any mistake or accident, we strongly recommend creating a backup because such accidents or mistakes during the process are unable to recover or retrieve.
How to Merge Photos in iCloud

For people who have purchased or created an account iCloud, merging photo libraries in iCloud is very easy. The only disadvantage of using iCloud is the storage space. But if you have already purchased it, it might be okay to merge photos on iCloud.
To do this, you will have to sync all your photos with iCloud on your Mac. To do this:
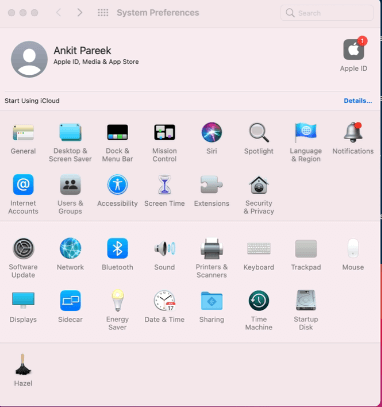
Go to System Preferences ? Apple ID ? iCloud and check the box to Photos (if it is not checked already).
Your Mac should have now started syncing, now follow these steps:
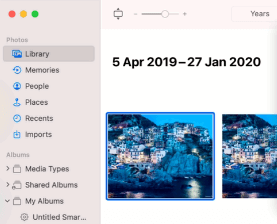
1. First of all, select the Photos library you wish to merge and then double-click for opening.
2. Now, Go to:
Photos ? Preferences ? General ? use as System Photo Library
If the window is greyed out, it means it is already in the System Photo Library).
3. Now, scroll down to the bottom of the Photos windows to see the progress of uploading pictures. You can also pause the progress in between to resume it later.
After you’ve combined photo libraries
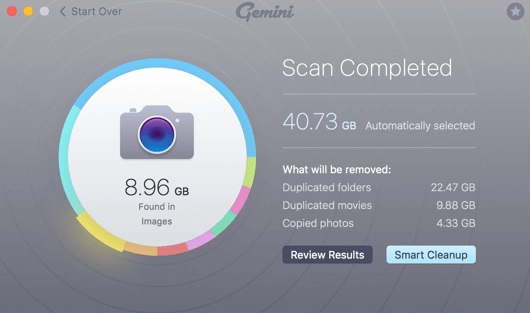
After the process, you are surely going to have similar looking or duplicate pictures in your Photos libraries. To scan your images instantly to get rid of hassles like blurry, duplicate, or similar photos, you can download Gemini 2. Gemini 2 is completely free. If you wish to download Gemini 2, click here.

How to merge photos by exporting and importing
If you do not have enough storage space on iCloud or do not wish to merge photos through iCloud, you can export and import your pictures in Mac.
Note: Though this method is time taking it is the easiest thing to do.
To do it, follow the below-mentioned steps:
1. Hold to the Options button on your keyboard and open the Photos app.
2. Now, select the library you wish to export and then click on “Choose Library”.
3. Click on Photos available on the sidebar.
4. Now, select the first photo, hold the shift button, and scroll down toward the bottom and click on the last picture.
5. Now, click…
File ? Export
6. Choose Export [number] for exporting photos or exporting Unmodified Originals.
Alert: Exporting the edited photos may retain all your changes, but this can lead to the loss of original files. “Exporting the original” refers to the loss of all edits.
7. After this, it’s time to set up your export settings, to do this, click on Export.
8. Now, select wherever you wish to export pictures, and then click on Export Originals or Export.
Once you have exported all your photo libraries, now it’s time to import them back to Photos:
1. Hold the Option key and open the Photos.
2. Now, select the library you wish to use and then click on “Choose Library”.
3. Through Finder, check the pictures you’ve exported.
4. Now, drag and drop the pictures in the Photos app.
How to merge old photo backup with current library
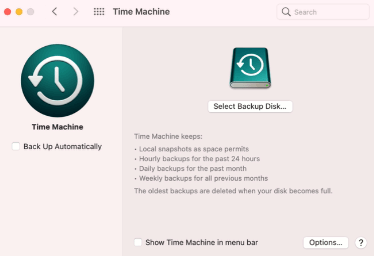
If you‘re using Time Machine to create a backup, make sure you are not restoring your Photos library or iPhotos in the Pictures folder. If you are doing it, it may delete your new pictures along with old ones. To merge your old photo backup with the current library, follow these below-mentioned steps:

1. Secure your connection with Time Machine drive and launch it.
2. Go to the Pictures folder. Go? Home ? Pictures.

3. Now, use the arrow for going back to the last state of the Library that you wish to restore.
4. Hold the Control key and click on the library file. Now, choose “Restore Photos Library.”
Note: Please select a destination different than current Library lives.
5. Click on Restore.
6. These were the best way to merge Photo Libraries on Mac. Talking about Gemini 2…this app is free and instantly removes all the duplicates.
To use Gemini 2 on your Mac, all you have to do is to install & launch the app. add or drop the files and photos you wish to examine. Click the Scan Button (Green button) and wait until the software identifies the duplicates in your Mac. the best part I loved about Gemini 2 is that it also displays the space covered by duplicates.

Gemini 2
Click Here to Download Gemini 2
I hope this blog helps you merge photo libraries without any hassle. Comment down and share your views after merging photo libraries on your Mac with this blog. For more such content, follow Tweak Library on all social media platforms.
Thanks for reading!
Recommended Readings:
- Ways to Clear Your iCloud Storage Space On Mac and Windows PC
- 10 Best Software to Make Your Mac Run Faster & Free Up Disk Space
- Ways To Edit Images In Photos App For Mac
- Duplicate Photos Fixer Pro for Mac – Remove Duplicate Photos On Mac With Ease


Leave a Reply