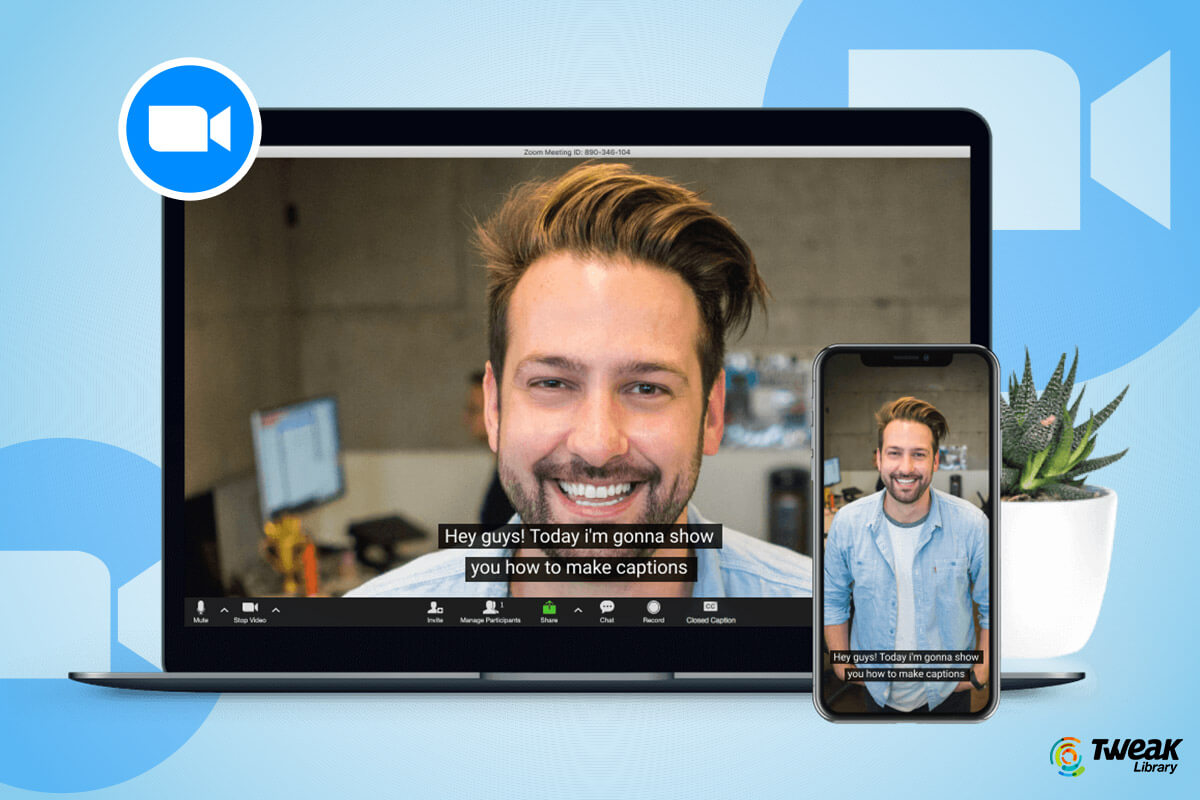
With work from home becoming the new normal and everything going online, video calls and meetings over Zoom are gaining popularity. But the accent or the way the speaker delivers information sometimes creates problems. If you feel the same and have problems connecting with the audience or understanding what’s being delivered, enable live zoom closed captions. Using these live captions, the presenter in real-time can generate text. Here we explain how to enable Zoom live captioning.
Also Read: Best Zoom Backgrounds in 2021 (Free)
What is captioning?
When every spoken word converts into text it is known as captioning. With its help, Zoom’s live closed captions, you can easily convert the audio content into text and display it on the screen, monitor, or another display system. Moreover, live captioning in real-time makes every spoken word in your event, webinar, etc, available to the audience in the text format. This assures the information is comprehended, leaving the speech barrier behind that might come up between the presenter and streamer.
Prerequisites for Zoom Closed Caption feature:
Prerequisites:
- Closed captioning
- Zoom desktop client (enter or view captions)
- Windows: version 5.37712.0111or higher
- macOS: version 5.37712.0111or higher
- Linux: version 5.37712.0111or higher
- Zoom mobile app (view captions only)
- Android: version 0.21521.0116or higher
- iOS: version 0.21521.0116or higher
- Live transcription
- Account type: Pro, Business, Education, Enterprise
Note: Approved K-12 accountsand other accounts upon request can also have access to this feature. - Zoom desktop client for Windows, macOS: version 0.2or higher
- Zoom mobile app for Android and iOS: version 0.2or higher
- Account type: Pro, Business, Education, Enterprise
- Zoom desktop client (enter or view captions)
Also Read: How To Change Zoom Background On Laptop And iOS
How To Enable Live Captions On Zoom
Note: The difference between standard closed captions and Zoom’s live caption is they are automatically generated by AI. Also, to get this feature for your account, you need to submit a Google Form (at the time of writing this is how it is done.)
Once the live caption feature is added to the account, the user receives an email from Zoom informing the same. This is when zoom closed captions can be enabled and used in meetings.
Now that we know the prerequisite, let’s learn how to enable Zoom live closed captioning.
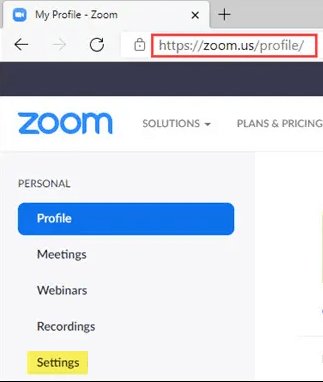
1. Open your web browser and visit here
2. Sign in to your account and click the Settings option present on the account page.
2. Scroll down and look for the In Meeting (Advanced) section.
3. Toggle the switch to enable Closed Captioning

4. Once you enable Closed Captioning, you will receive a pop-up message suggesting enabling Save Captions. Hit Enable.

5. Thereafter, under Close Captioning, checkmark the box next to “Enable live transcription service to show transcript on the side panel in-meeting” >
This way, you can enable live captioning in Zoom.
Now, let us learn how to use the Zoom closed captioning service.
Additional Information:
Live captioning currently only supports English, and its accuracy depends on:
- Background noise
- Speaker’s English language proficiency
- Volume and clarity of the speaker
- Gee-specific dialects and lexicons
By the fall of 2021, live transcription will be available to all users.
How to use closed captions in Zoom
Once live caption is enabled, using it in your meeting is simple. The only thing you need to remember is that you need to be a host or a meeting attendee assigned by the host.
Note: Live captions can be enabled from both the smartphone and desktop app.
Steps to enable closed captions on desktop app
1. Launch Zoom app on your desktop
2. Click the Live Transcript button present in the toolbar.

3. You will now a few options > select Enable Auto Transcription
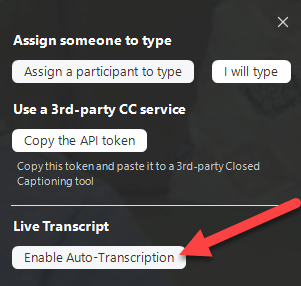
4. You will now see the transcribed text in a translucent black box.
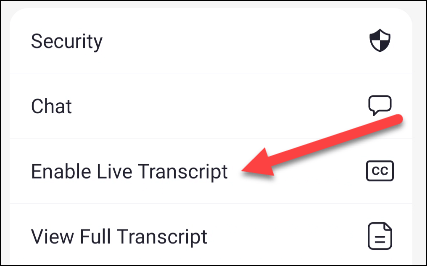
Step To Enable Live Close Caption On Zoom Via Mobile App
1. Launch the Zoom app on your Android or iOS device.
2. Tap the three dots present at the bottom to open menu
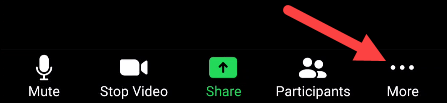
3. Tap Enable Live Transcript from the menu.
That’s it, you will now see the live captions underneath the video that you host. Isn’t it great? You can now clearly deliver your lectures, presentations without any misinterpretation. We hope you will give it a try. To know more about Zoom live close caption, you can also visit the support page. Do share your experience with us in the comments section.
Next Reading:
How to use Loomie to create 3D Avatar for Zoom Calls?
Cast Zoom Meeting To Chromecast
How to Play Jackbox Games Online With Zoom


Ariana reyes
hi im looking for this