We don’t underestimate the power of an Antivirus for Mac and neither should anyone else. But, there are times when an Antivirus can result in a slow working Mac. Especially when there are times when it runs in the background and consumes your Mac’s precious resources. The wise thing to do at that time is to uninstall the Antivirus or use an alternative Antivirus and then check if your Mac has regained its long-lost speed. Most Antivirus software runs in the background and eats up Mac’s resources.
So, in case your security is overpowering your productivity, and you are sure that you haven’t installed a risky application on Mac or that you aren’t going to deliberately visit a website that is infamous for bringing along something malicious, you can go ahead and uninstall the Antivirus on your Mac.
But, what if you have your eyes set on an alternative and your existing Antivirus is refusing to go? What if you have supposedly uninstalled the antivirus and its meddling with the one you have installed?
Here Are Some Ways for Uninstall Antivirus Software on your Mac.
1. Check If Antivirus Is Open Or Not
If you are trying to uninstall antivirus on Mac and it doesn’t, it necessarily isn’t bad. You may ask why? It could be that the Antivirus is open. And, if that’s the case, all you have to do is close the app and then try uninstalling the antivirus on Mac. For this purpose, let’s put Mac’s very Activity Monitor to work –
1. Click open your Finder
2. Select Applications from the left-hand column
3. Click on Utilities and then open Activity Monitor
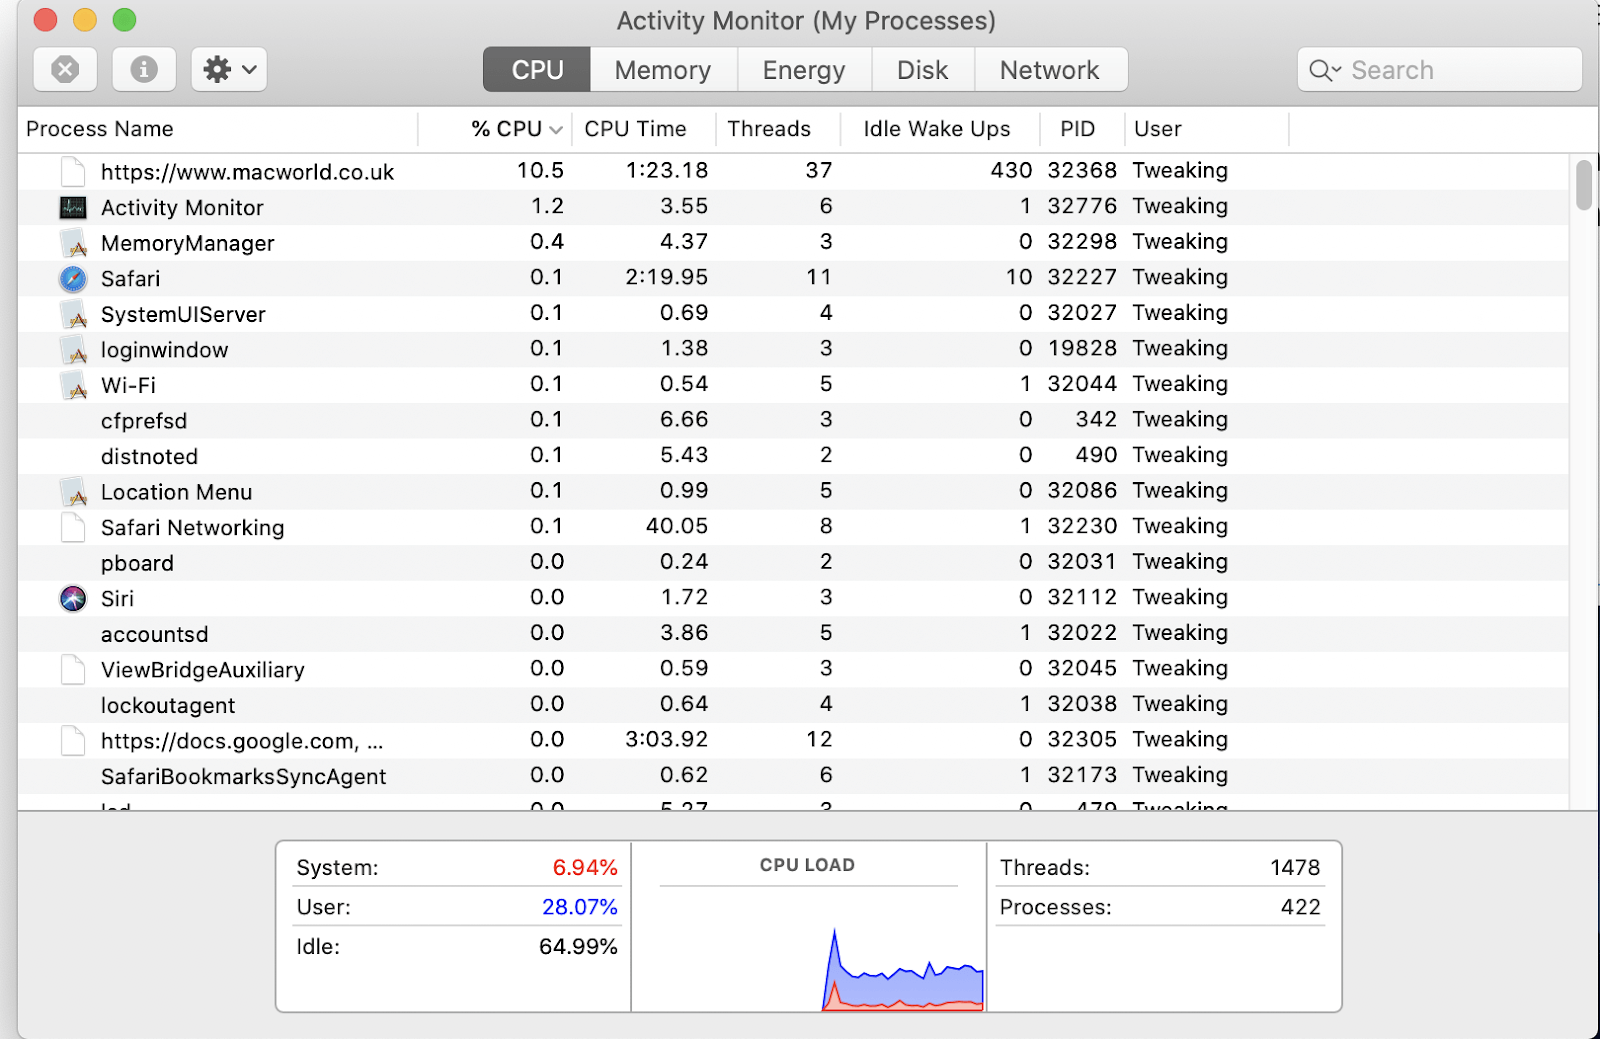
4. Locate your antivirus, select it and then click on the X button that will appear on the upper left corner
5. Once you do that, a prompt will appear. Click Quit
Voila! As soon as the process ends, you can go ahead and uninstall antivirus from your Mac, no hassles! But, what if it still doesn’t uninstall? We have got more ways to get rid of antivirus.
2. Use Antivirus’ Uninstaller
Every Antivirus comes with its native uninstaller. Oftentimes, just by using the uninstaller, you won’t have any issues in removing the Antivirus from your Mac. Let’s take the example of Bitdefender Antivirus for Mac. Here are the steps for using Bitdefender’s uninstaller –
1. First, close all the windows on your Mac
2. Click on a space
3. On the top, click on Go and select Applications
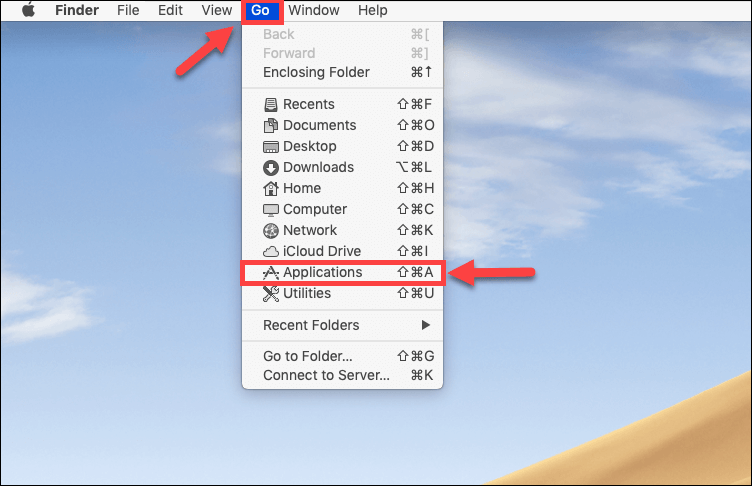
4. When the Applications window opens, locate and double click on the Bitdefender folder
5. Here you will find the Bitdefender Uninstaller. Double-click on it
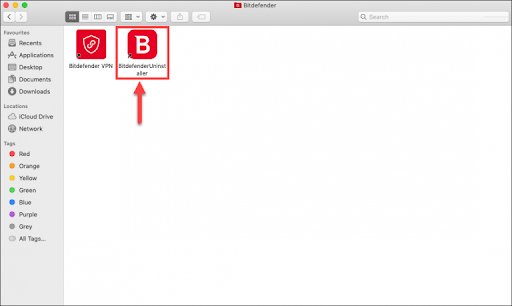
6. When a new window pops up, select Uninstall Antivirus and VPN
7. Enter your Username and Password
8. Hit the Close button once you are done
9. Now, go to Macintosh HD > Library and drag the Bitdefender folder to Trash. Again furnish your administrator password
10. If you still see the antivirus name on the doc, right-click on it, select Options and Remove from Dock
3. Get Rid of Antivirus Using A Dedicated App Uninstaller
Working with a slow Mac is extremely annoying. And, when it comes to an antivirus that simply refuses to leave your Mac despite sparing every trick in the book, it’s time that you use a dedicated cleaner app. Consider using a Mac Cleaner & Optimizer like Cleanup My System spring cleans your Mac in no time, leaving behind no software traces whatsoever and that includes Antivirus software too.
How to uninstall Antivirus on Mac using Cleanup My System?
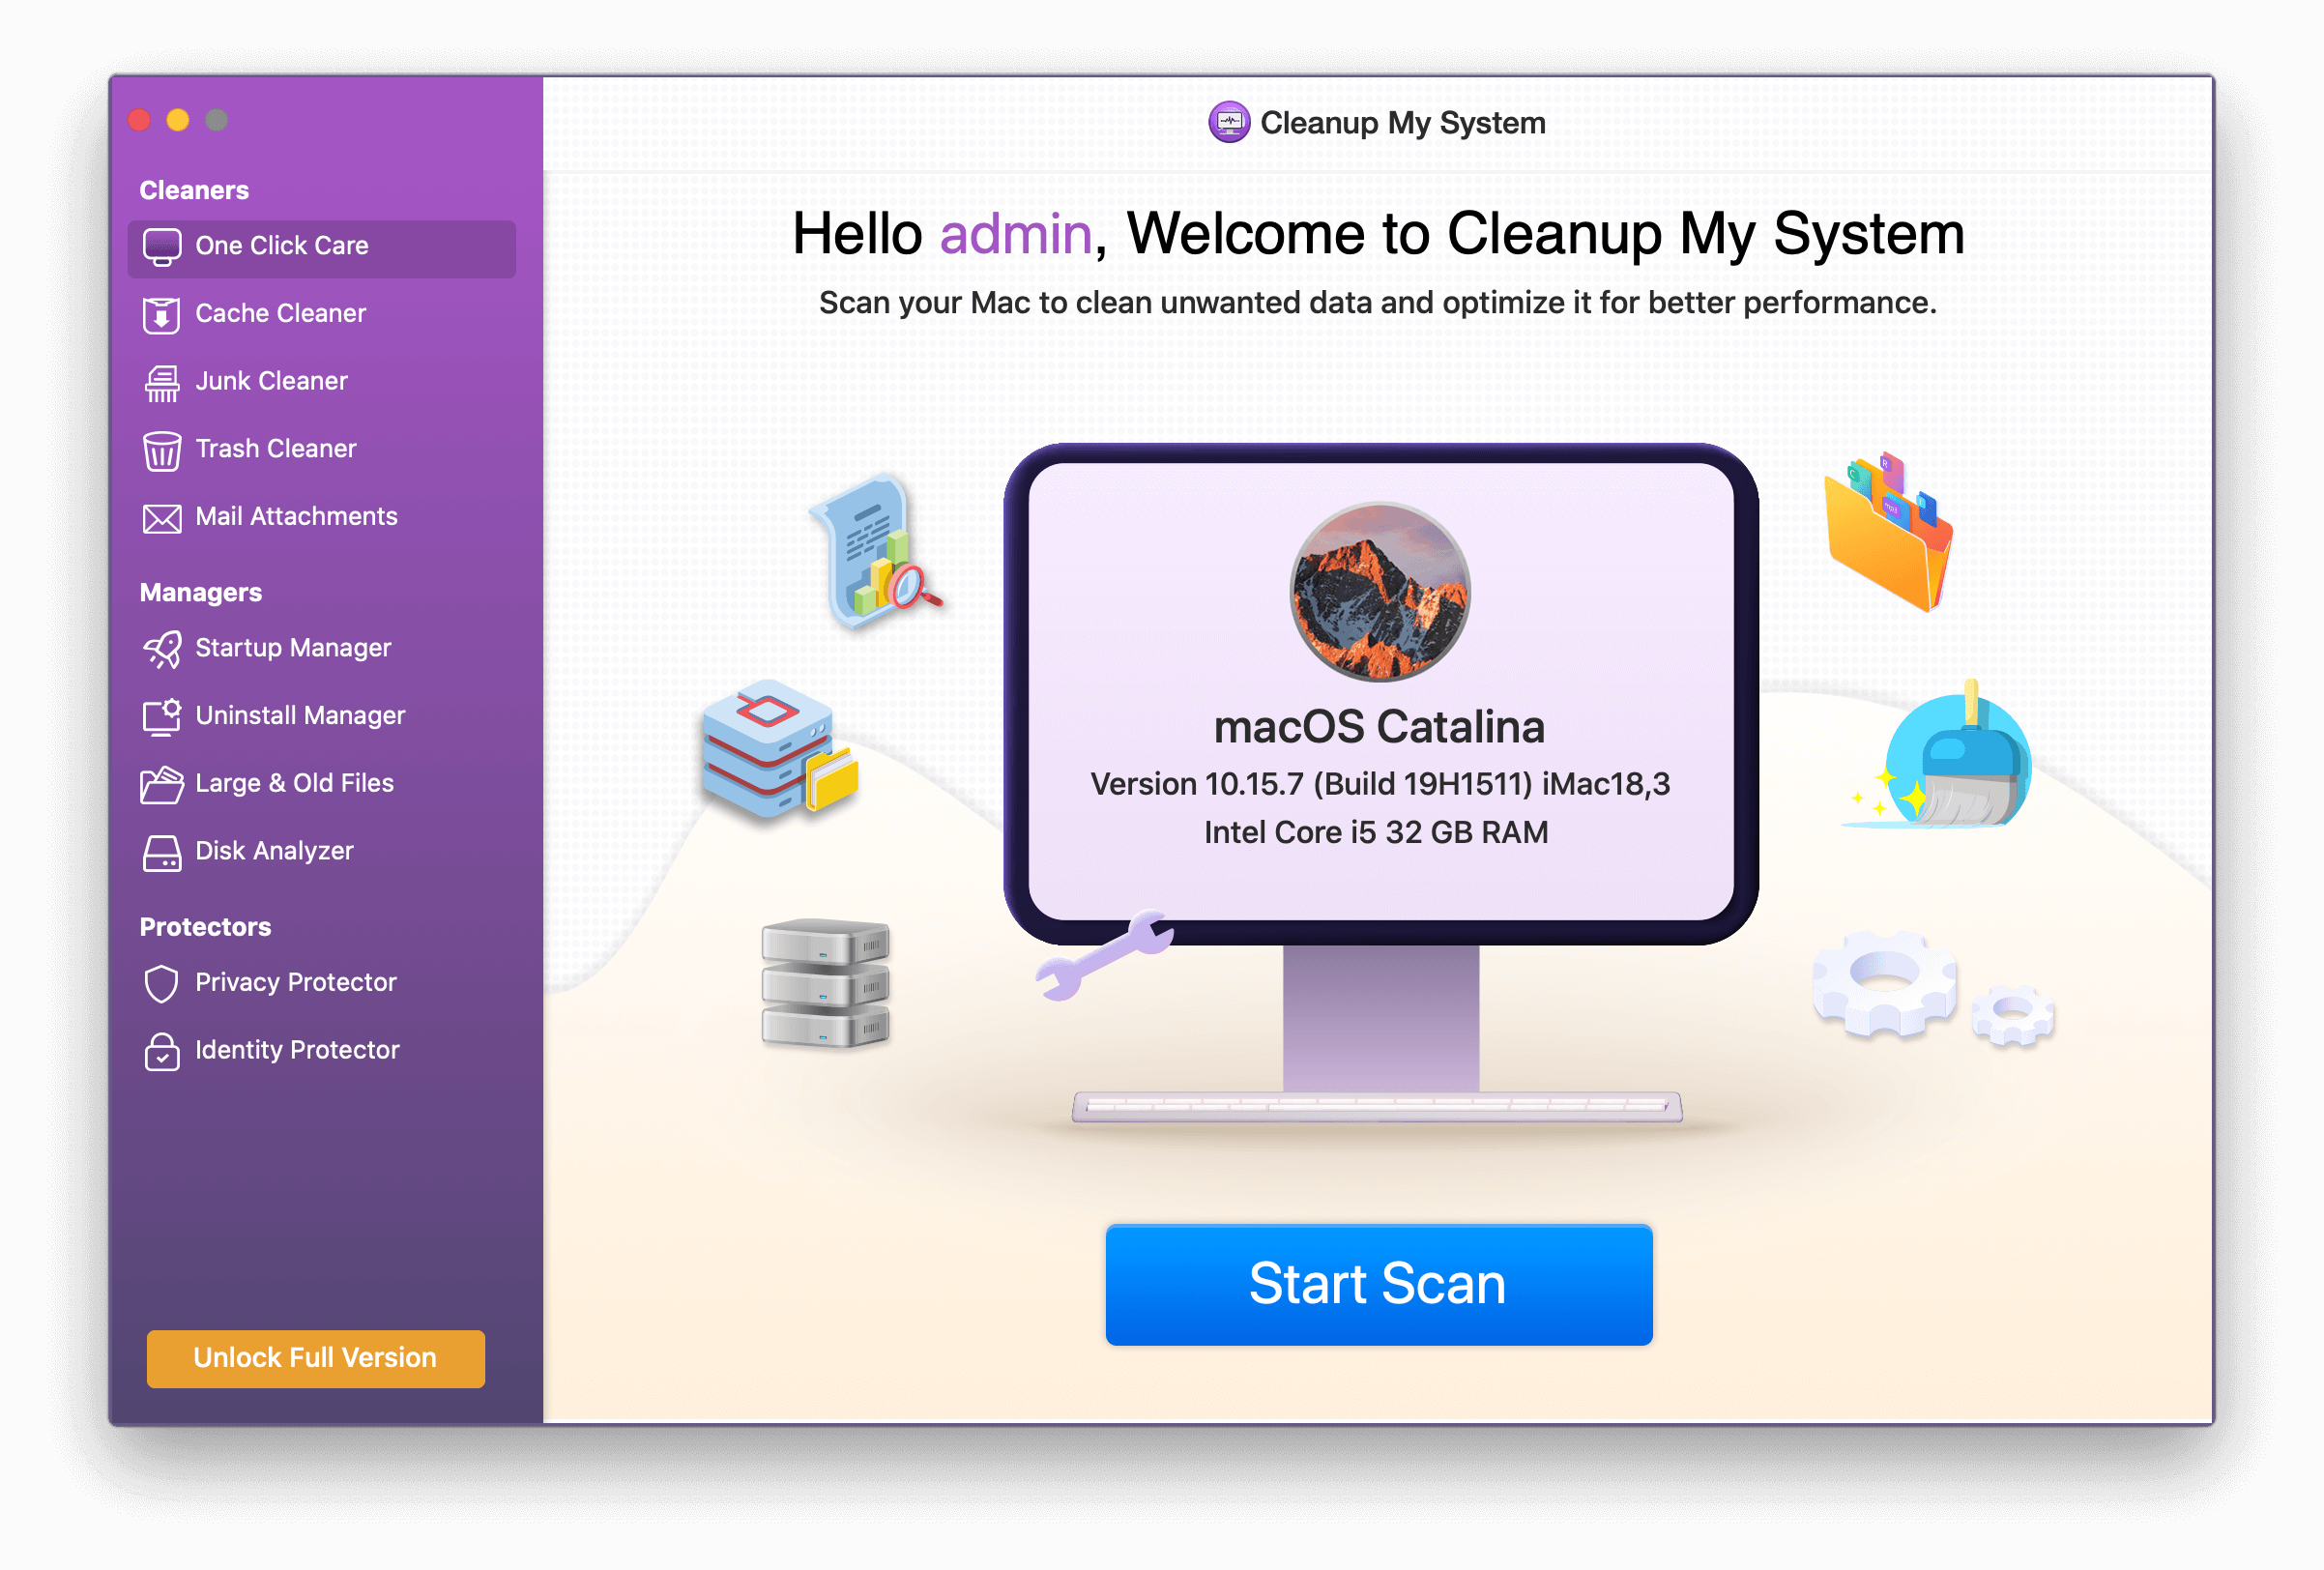
1. Download and install Cleanup My System on your Mac.
Click Here to Download Cleanup My System!
2. From the left-side column, navigate to the Uninstall Manager module.
3. Check out the list of applications that have been installed on your Mac and locate Antivirus and then click on it.
4. Select the Mac apps you wish to delete and click on the Uninstall option at the bottom right and then when the prompt appears click on the Yes button.
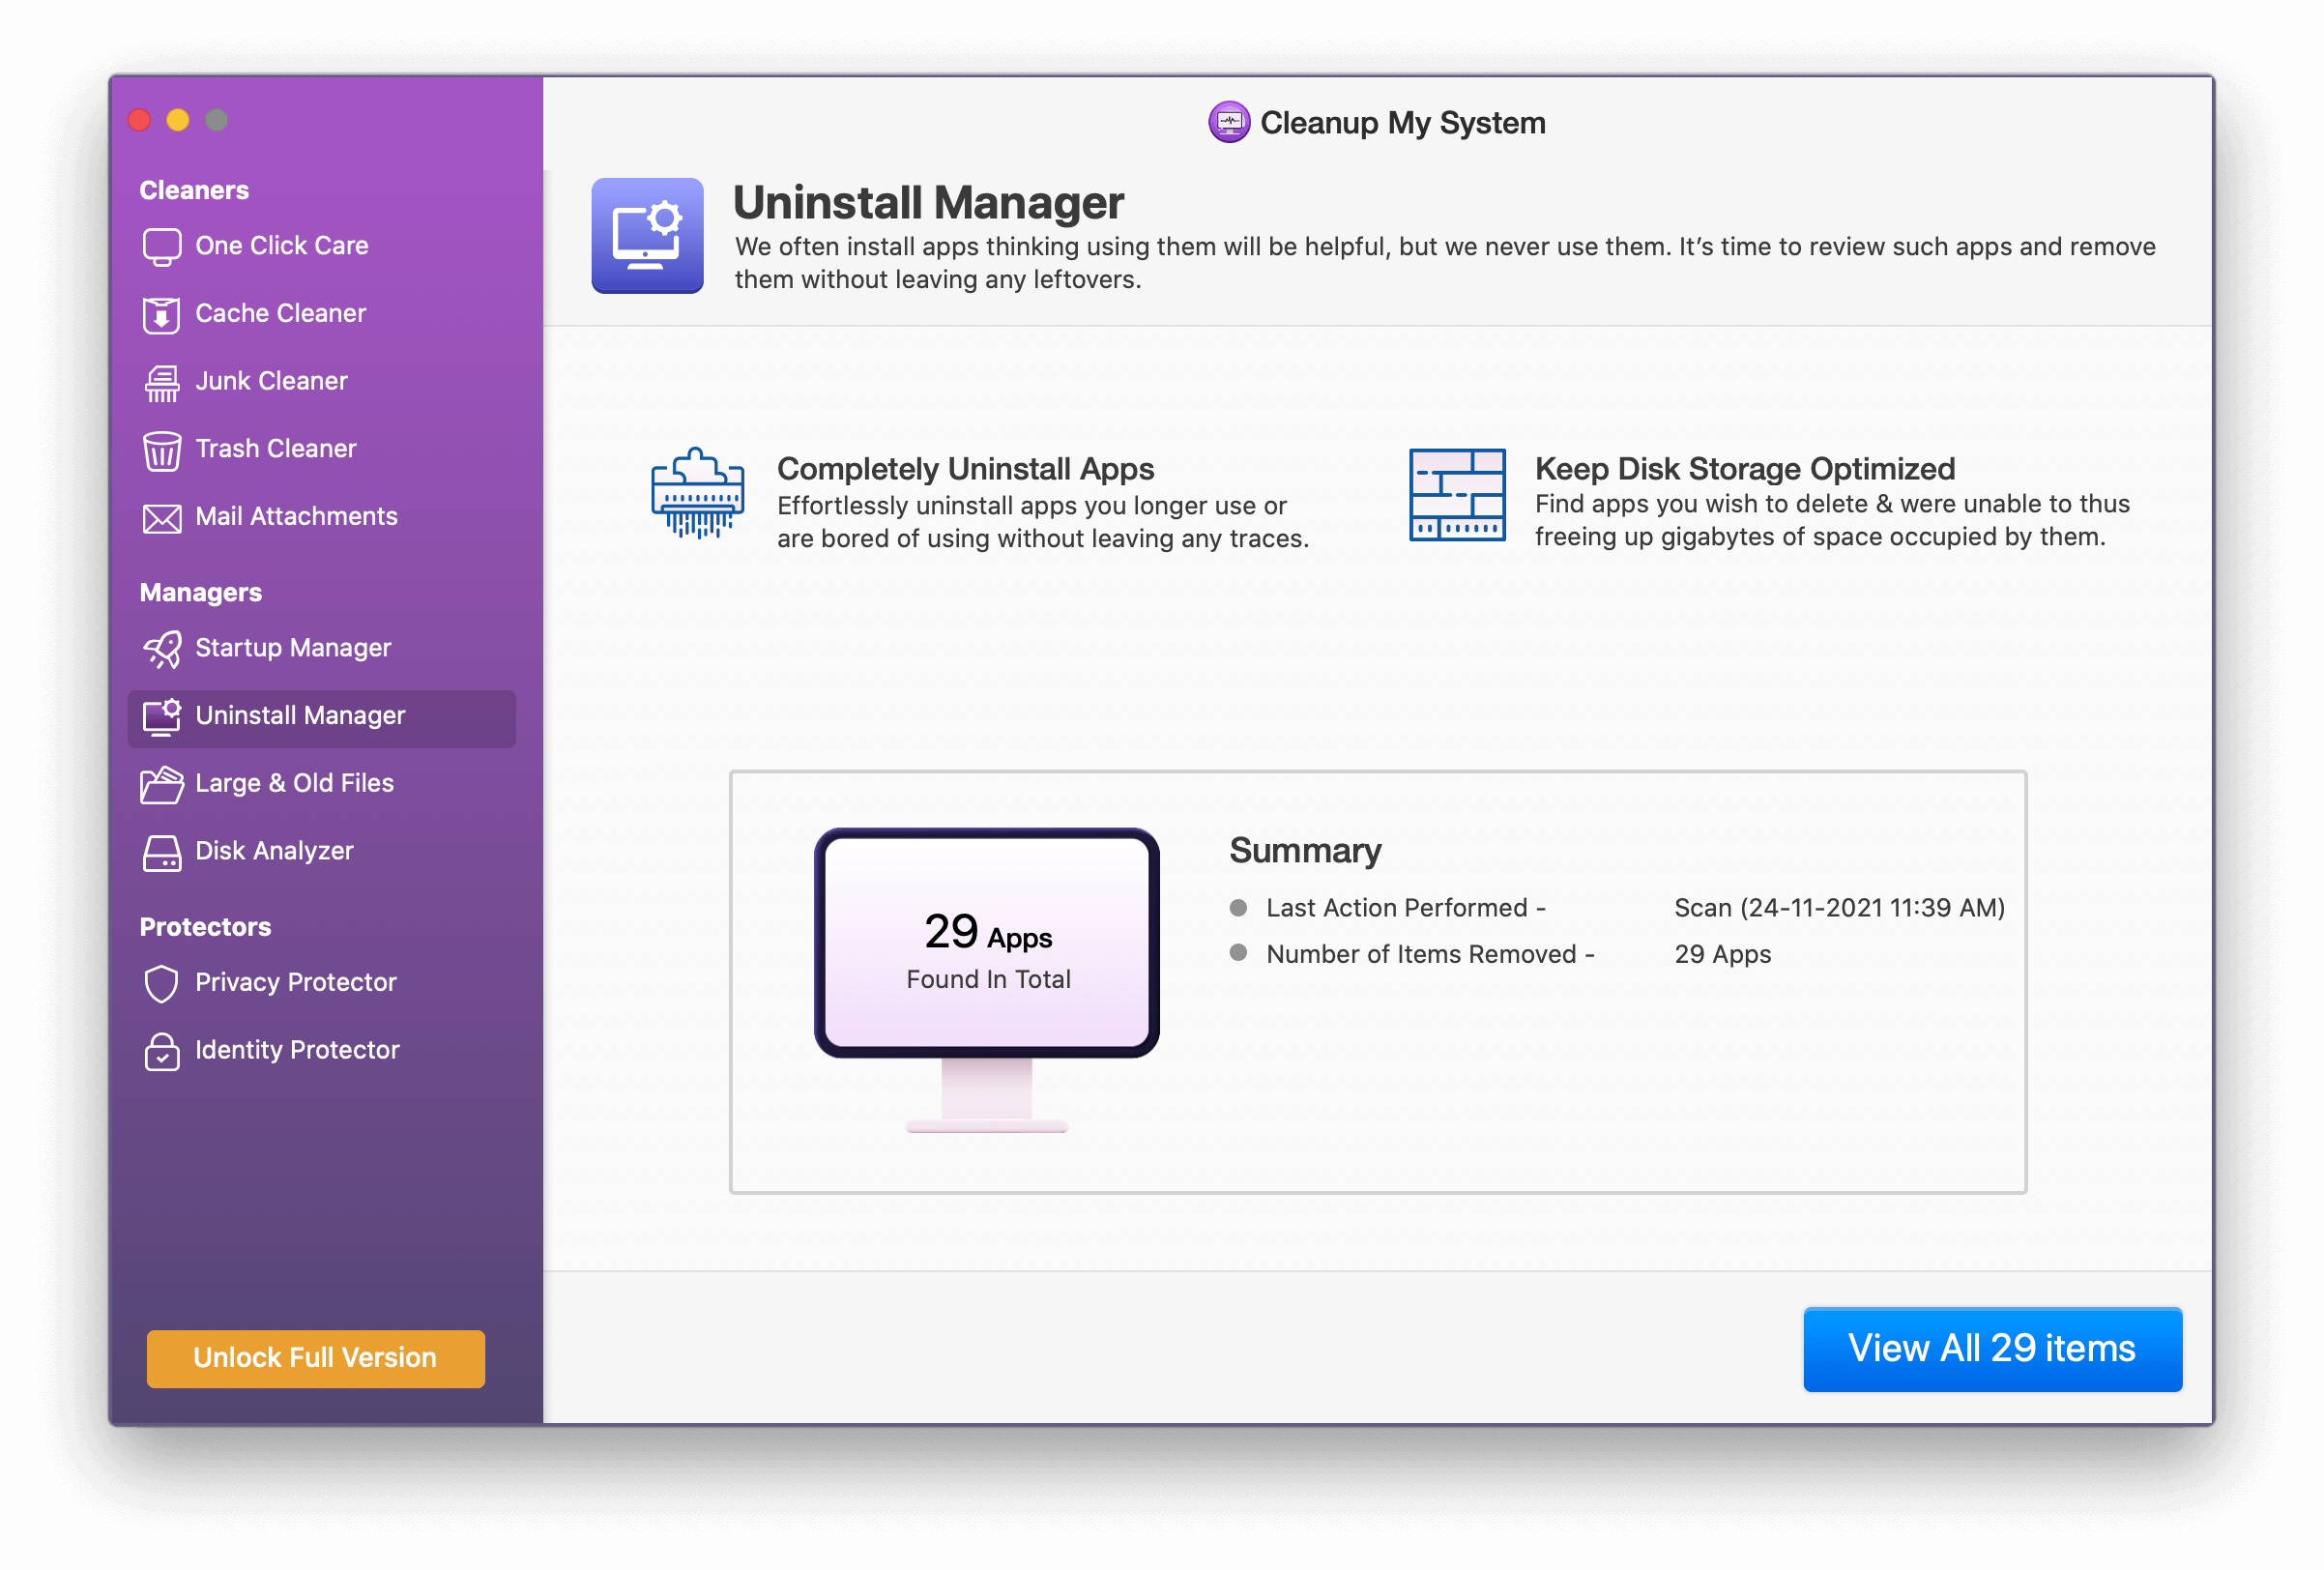
5. Now restart your Mac and you will find the Antivirus is completely removed from your Mac, leaving behind no leftovers or belonging files.
|
Features of Cleanup My System At A Glance:
Price: US$ 34.99 per year Click Here to Download Cleanup My System! |
4. Remove Extensions
Even after you have uninstalled the antivirus using the above methods, ensure that even the Kernel extensions are removed. Here are the steps to do that –
1. Open your Mac’s Finder
2. Press Command + Shift + G
3. In the Go to the folder Window enter /Library/Extensions/
4. Delete the following extensions (Kernel Extensions)
FileProtect.kext
SelfProtect.kext
TMProtection.kext
Wrapping Up:
Give these ways a shot and let us know if you were easily able to get rid of Antivirus on your Mac. Although, we recommend that you take a safe stance and use a dedicated Mac cleaning application like Cleanup My System. If you liked what you read, do give us a thumbs up and share it with your friends and family. For more such information, keep reading Tweak Library.


Leave a Reply