
Taking screenshots and recording live screens on Windows 10 have become a norm. And, if you are someone who has to constantly communicate changes to colleagues and friends or have to make how-to tutorials, you do know the importance of capturing screen in Windows 10 or even taking screenshots on Windows 10. In this blog, we’ll talk about certain simple things, you need to keep in mind whether you are about to capture a video or screen in Windows 10. We’d also recommend you to bookmark this blog and come back for ready reference when you are about to capture a screen or start a live recording of your Windows 10 screen.
Checkmark These Points When Capturing Screenshots Or Recording Videos in Windows 10 –
Don’t Record Everything On The Screen
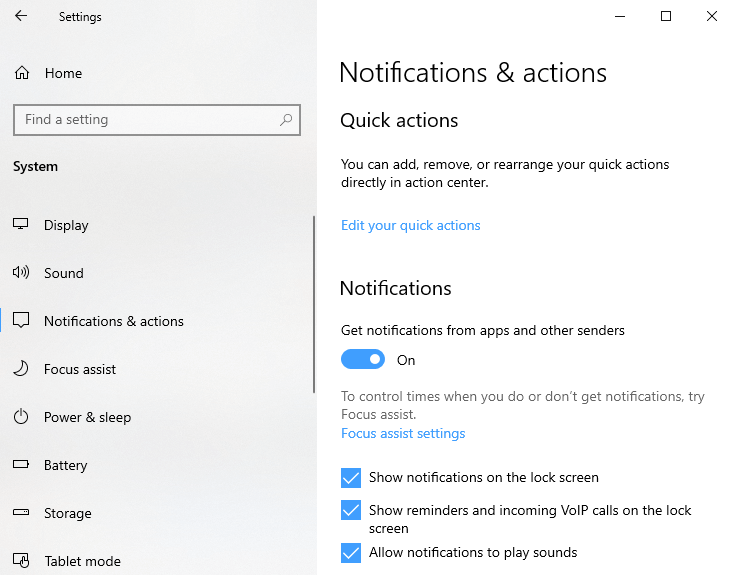
One of the benefits of recording or capturing a screen is that you can record everything that appears on the screen in real-time. However, this has a downside too, you might end up capturing unwanted pop-ups and notifications as well. The worst part is, you may not even realize this at the time of recording but, you may repent not having paid heed to this, once you go back and watch your recording.
So, before you record or capture your screen make sure you disable all the notifications and popups
Keep Shortcuts or Hotkeys Handy
Most users are aware of Windows very own Snipping Tool, Snip & Sketch tool, or even the Print screen function (the PrtSc button on the keyboard) to capture screenshots, but, if you are someone whose life depends on screenshots or even recording screen, you may consider getting your hands on the various short keys so that you don’t have to look around for keys to do exactly what you want. Do read our blogs on effective methods to take screenshots on Windows 10 PC and how to record screen with sound on Windows and Mac
Install A Third Party Screen Recording and Screen Capturing Software
You may say that when we can record or capture a screen in Windows 10 using the inbuilt tools, why consider installing (or investing) in third-party software. Third-party software like TweakShot is capable of capturing screenshots and capture videos in Windows 10. Another screen recording software Movavi Screen Recorder has great editing capabilities. To exemplify let’s have a broad look at each of –
TweakShot –
TweakShot’s a wonderful application that can help you with both taking screenshots and recording screens. Plus, it has several great tools that can help you annotate your screenshots or make edits to your captured videos. Let’s have a glimpse of this wonderful software:
Here’s a sample screenshot of what the interface looks like and what all it has to offer –
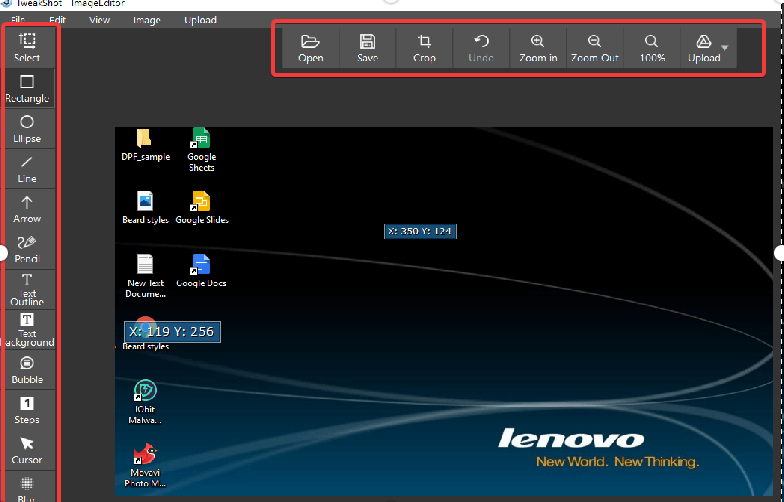
To give you a gist, here are the kind of annotations you can perform on your screenshots. Before we delve into features, we’d like to mention that TweakShot is one of those utilities which let you capture screenshots pixel by pixel, thereby capturing with accuracy.
- Add texts, arrows, lines
- Add shapes such as rectangles, ellipse, bubbles
- Blur the parts that you don’t need
- Zoom in and out on images
- Crop images
- Upload images from the computer or even from the cloud storage medium
These are some of the many features that TweakShot offers:
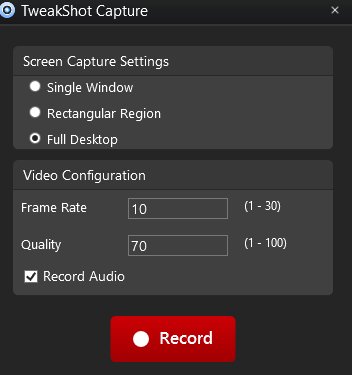
And, when you capture a live screen (record a screen), here are the kind of features you can expect –
Click here to Download TweakShot Capture

Movavi Screen Recorder –
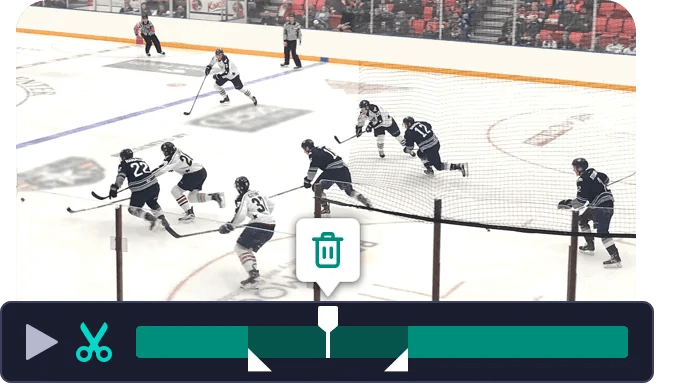
This screen recording tool can help you capture online calls, webinars, tutorials, and a lot more with utmost ease. Plus there is a lot more –
- You can easily set up recording parameters

- Perfectly cut, trim and join clips. You can also add special effects and animated titles. Once done you can save your clip in HD
- Schedule Recording :How about being able to decide when the recording should start. And, not just that you can even assign the time limit of your recording as well.
- You can choose to record audio and video simultaneously or separately.
Download Movavi Screen Recorder
Also Read: Have a look at some of the best Snipping Tool alternatives (most of these alternatives perform both the functions of taking and annotating screenshots and even recording live video of screens)
Tidy Up Your Desktop
Quite a large part of your screen is captured or recorded. You certainly don’t want your audience to see the clutter. And, this is what we are talking about. In case you have a desktop that is flooded with icons pertaining to folders, programs, spreadsheets, etc, it’s time that you sort your desktop. In short, you would want to throw away any unwanted desktop icons and even arrange the several icons on your desktop.
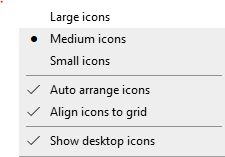
To declutter your desktop, and to do that, here is a little trick –
Right-click on the blank part and then click on View > Auto arrange icons. This will snap the on-screen icons into grid information.
Also, choose small icons instead of Large icons or Medium icons as shown in the screenshot above.
Wrapping Up
Like we said – you can bookmark this blog for ready reference, and as and when you go about capturing screen videos or taking screenshots, you can tick mark each of the points mentioned above. And, if we missed anything, do let us know in the comments section below. You can also follow us on YouTube, Facebook, Pinterest, Flipboard Twitter, and Tumblr.

Leave a Reply