There is no dearth of storage mediums where you can carry your precious photos. These include smartphones, flash drives, external and internal hard drives, and many more. But, if you are a Windows user, who aims at editing these images, you would first import them on your PC or laptop, isn’t it? However, consider a scenario where you had collected hundreds and thousands of images on a storage medium and when you sat down to edit them, you received an error saying “Windows 10 photo import not working”, what would you do?
There are some effective ways to resolve this issue and in this blog, we are going to have a look at some of them.
Best Ways To Fix Photo Import Not Working On Windows 10
Finding it nearly impossible to import photos on your Windows 10 PC or laptop from any of the storage mediums (smartphone, flash drive, external hard disk, SD card, etc), you can try these methods –
1. Reinsert The Storage Medium Or Check Permissions
Be it your Flash drive, SD card, external hard disk, or smartphone, the first thing you can try is to reinsert your storage medium. Here you can insert the medium once, plug it out again and reinsert it after a few minutes.
Also, especially in the case of your smartphone (whether Android and iOS), check that you have enabled all necessary permissions that are required to transfer/ import images.
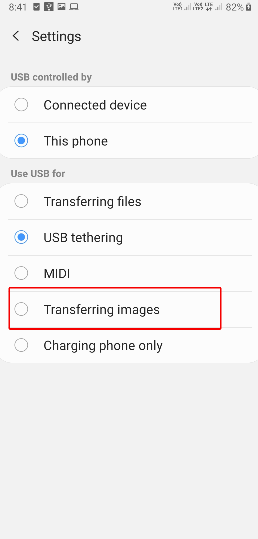
If you are sure that you have inserted your storage medium correctly and have also enabled the necessary permissions and still photos import is not working on your Windows 10 computer, you can try the other methods.
2. Repair or Uninstall The App
You might not be able to uninstall the Photos App but, if you are using an alternative third-party picture viewer, you can uninstall the app and then reinstall it.
- Let’s First See How You Can Easily Uninstall The Third-party Application.
1. Press Windows key + I to open the Settings
2. Click on Apps
3. Under Apps & Features click on the app
4. Click on Uninstall
Now you can try a fresh installation of your chosen third-party app and check if you are now able to import images.
- What about the Photos App? Is There Any Which Way I Can Repair It?
1. Press Windows key + I to open the Settings
2. Click on Apps
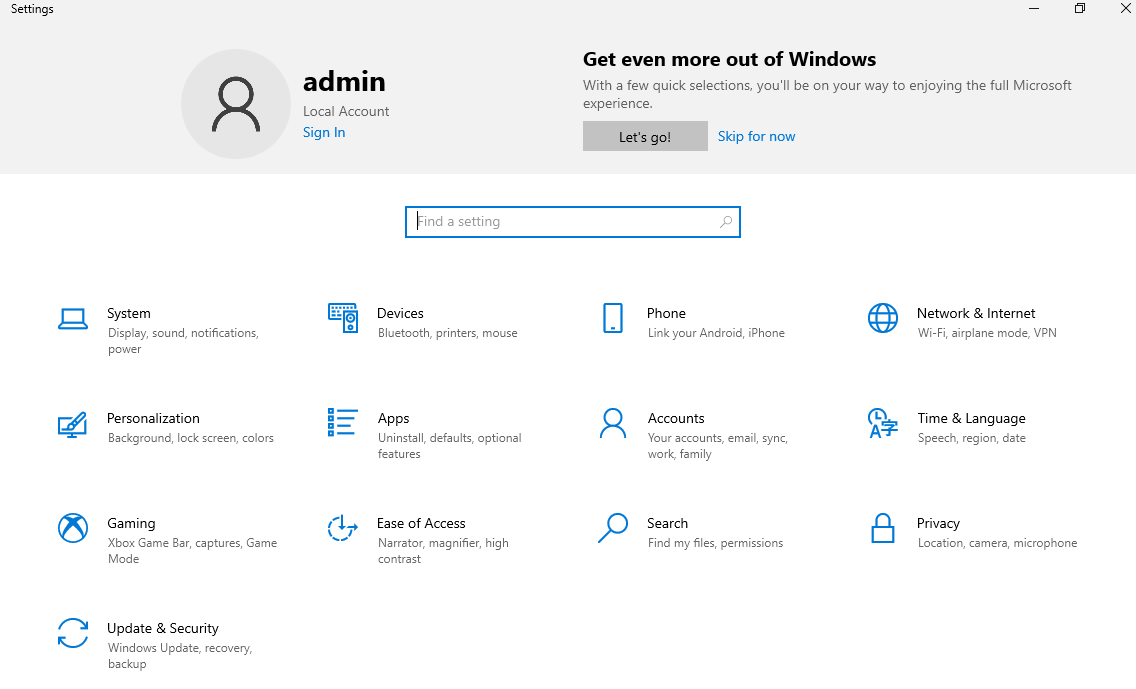
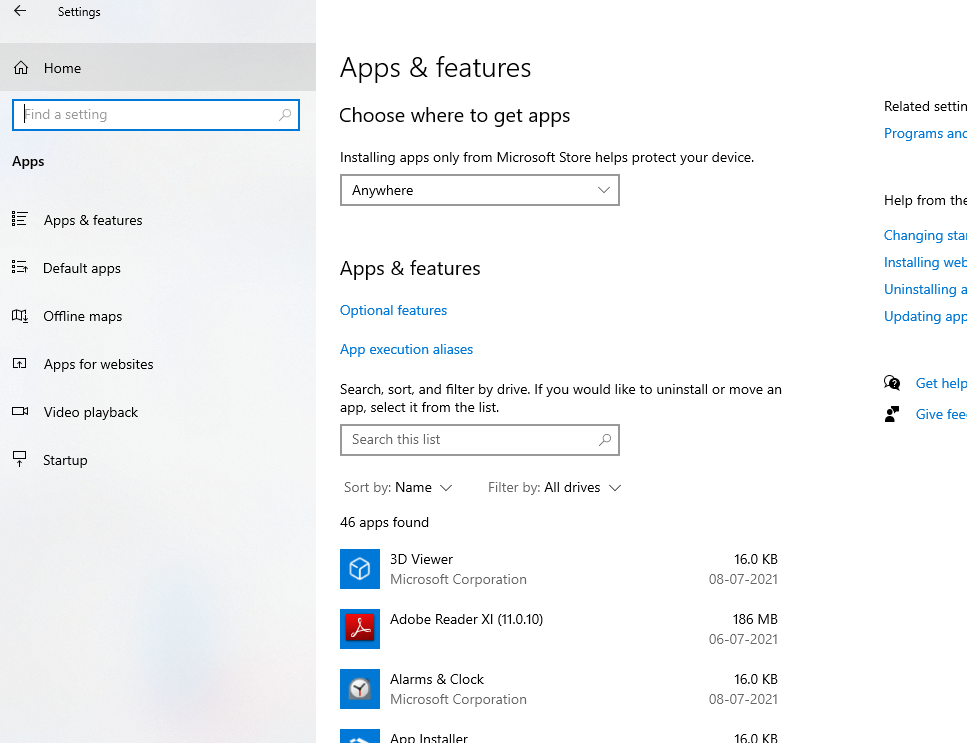
3. Under Apps & Features click on the Photos app
4. Click on Advanced Options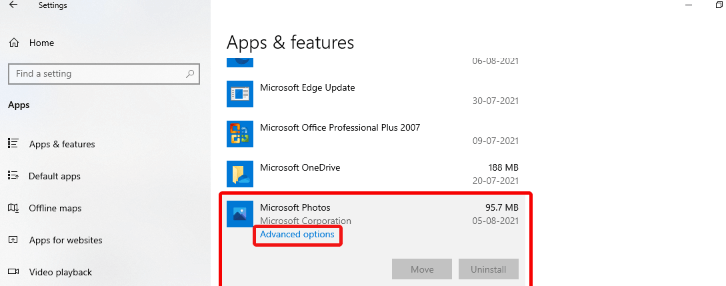
5. Scroll down and under the Reset option you can choose to Repair or Reset the app
Even though you can’t uninstall the Photos app, you can still repair or reset it. Windows gives you an option to repair default apps, in case they don’t function as they should. It is important to note while the “Repair” function doesn’t affect the app data, the “Reset” function will delete the app data.
3. Close Your Photo Viewer App And Relaunch It Back Again
Many of us use the Windows 10 Photos App to view photos. After all, you can directly import pictures from any location or connected devices right into the interface. Like any other application, even the Photos app or any other photo viewer app can act up and stop you from importing images. In that case, you can take the help of the Task Manager and completely close the application.
1. Press Ctrl+Shift+Esc
2. When the Task Manager opens, locate Photos App (or your photo-viewer utility)
3. Highlight it and then click the End Task button located at the bottom-right corner
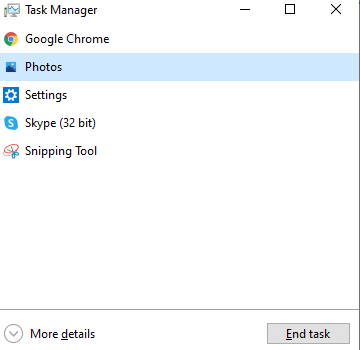
After the application is closed completely, relaunch the application and re-try importing the images.
4. Change security settings
Wondering why your pictures aren’t imported into your computer. What happens is that sometimes, when appropriate settings are not enabled, you can’t transfer or import pictures. Like for instance you can check your security settings on your Windows 10 computer and make these tweaks –
1. In your File Explorer, locate the pictures folder. You can see on the left-hand side. Right-click on your pictures folder
2. Click on Properties
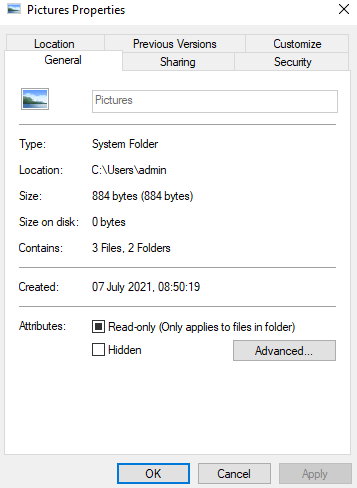
- Click on the Security tab
- Under Groups or usernames dropdown click on Home Users
- Then, under Permissions for System click on Full Control
- Again, under Groups or usernames dropdown select Administrators and click on Full Control
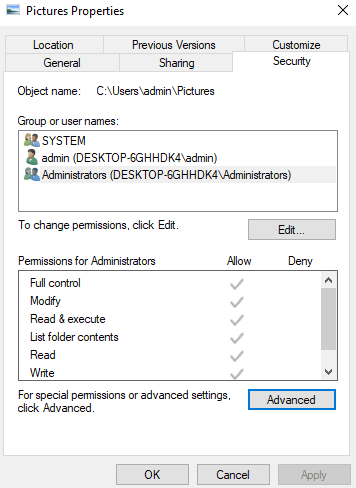
Now, check if you can see the imported photos, if not re-try importing the photos once again.
5. Are There Corrupt Files In Your Storage Medium?
Yes! This is one of the possibilities. Let’s presume the photos in your storage medium, for example, your SD card or pen drive have become corrupt. This could be the reason why you are unable to access them, leave alone import them to your computer. So, does that mean, you won’t ever be able to access them?
How about we give you a way through which you would first be able to recover those photos and then you can try importing them to your computer?
You can first delete such photos from the storage medium. Don’t worry! There are several third-party utilities out there that can help you restore images. And, one such utility is Photos Recovery.
|
Photos Recovery – Features At A Glance |
|---|
Price: US$ 39.95 Download Systweak Photos Recovery |
How To Recover Photos From An External Storage Medium Using Photos Recovery?
1. Download and install Photos Recovery
2. When the interface opens click on the Removable Devices tab
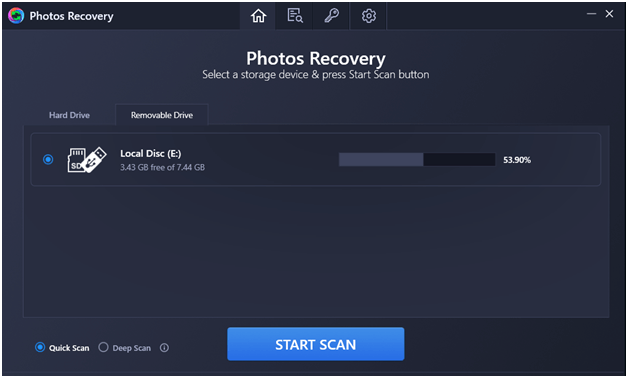
3. Select the mode of scanning –
(i) Quick Scan:
Quicker of the two modes. This can come in handy when you want to recover photos that were deleted permanently by pressing Shift + Delete
(ii) Deep Scan:
This mode of scanning takes a bit more time but it can be used to scan those photos that were lost because your drive or storage medium was formatted. It takes a bit more time because this scanning mode performs a sector-wise scan
4. Click on the Start Scan button and wait for the scanning process to complete. This may take some time depending on the scanning mode you have chosen
5. Once the deleted photos are listed, select the ones that you want to recover
6. Click on the Recover button on the bottom-right corner of the screen
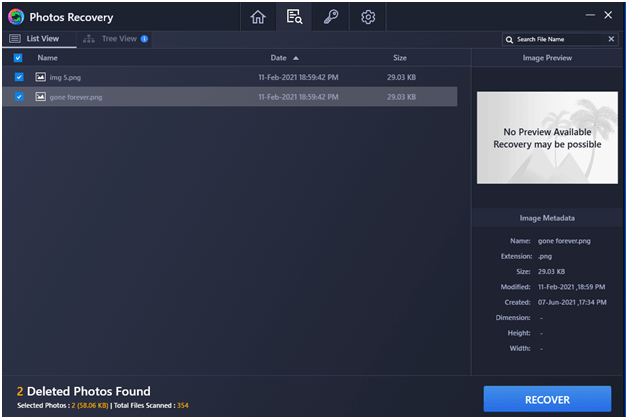
Now that you have recovered photos, you can re-try importing them on your PC.
Wrapping Up:
Photos not imported on Windows 10 can be frustrating. But, just like any other problem, a positive mindset and the right solutions can help you fix the issue. And, if these fixes have worked for you, do let us know in the comment section below. If you have found a way other than the ones mentioned above, do let us know those too. Till then, happy reading!


Leave a Reply