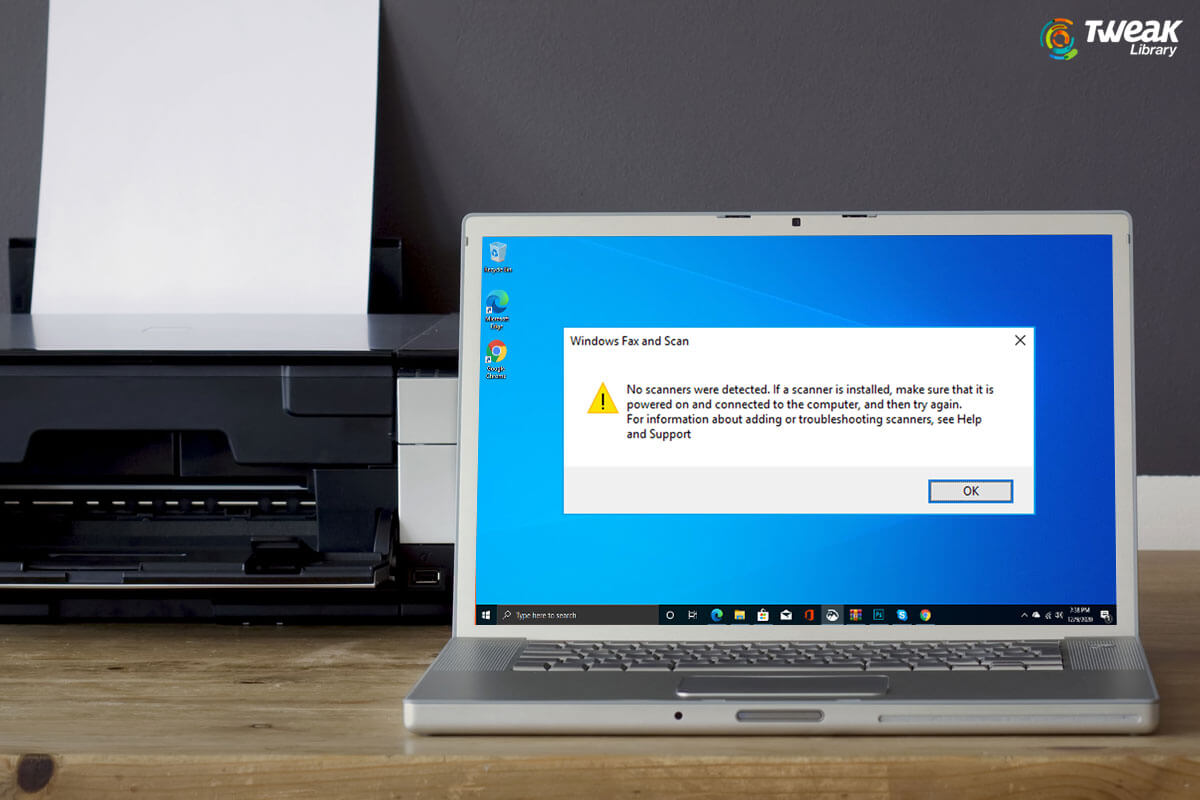
Has it ever happened with your printer-scanner that as soon as you tried to send a print job, you were able to take the print out successfully, but the moment you tried to scan a document, the scanner was not detected on Windows 10?
It’s quite a common issue and in this blog, we will look at some ways you can resolve the issue.
Reasons For Scanner Not Detected In Windows 10
Immaterial of the brand, the users of HP, Epson, Canon, etc face this issue. But, what are the causes of this issue? Let’s have a look at some of the possible causes –
- Faulty/ corrupt/ incompatible driver
- Appropriate services not activated
- Faulty Hardware
We’ll look at some of the effective troubleshooting steps that can help you in case “no scanners were detected in Windows 10 -,o;
No Scanners Were Detected In Windows 10 – Here’s What You Can Do
1. Run Hardware Troubleshooter
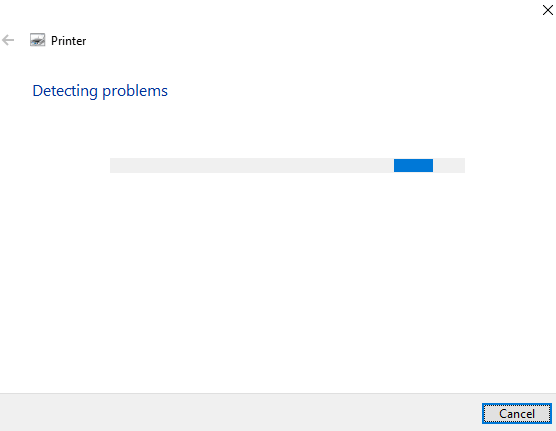
You can use the Windows inbuilt troubleshooting utility which you can use to resolve any firmware damages because of which scanner is not detected on your computer. Here are the steps to do the same –
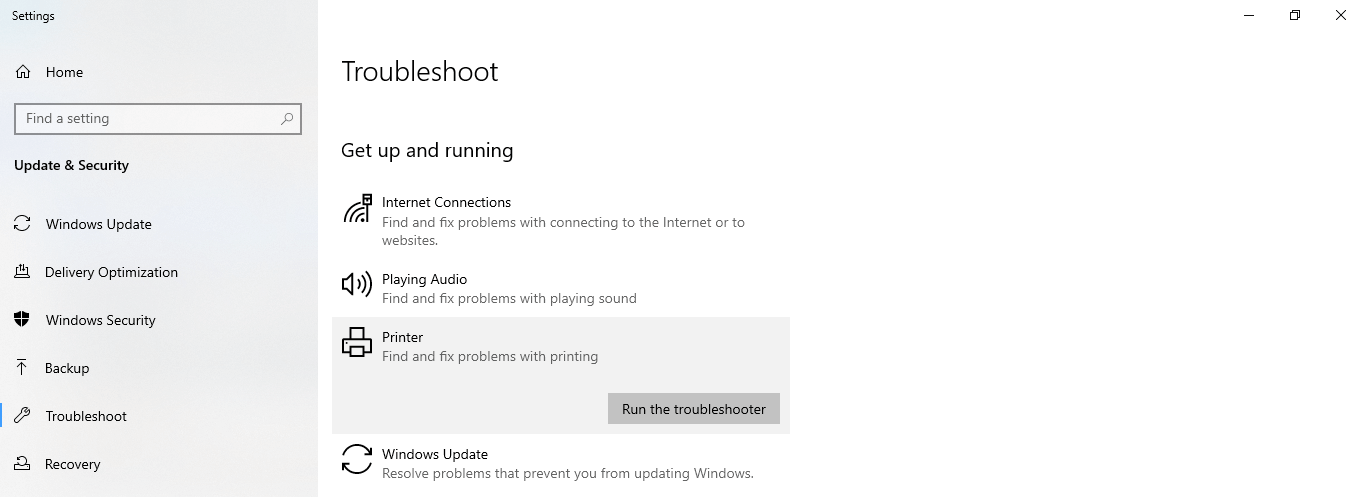
1. In the Windows search bar type Troubleshoot and then click on Troubleshoot Settings
2. On the right-hand side under Printer click on Run the troubleshooter
3. Your computer will look for any scanner errors and if it finds them it will fix them
2. Update Drivers Using A Dedicated Driver Updater Software
Talking of updating drivers, there can be times when even after visiting the firmware website, you might not be successful in installing the right driver for your scanner. You might as well try and reinstall your Scanner driver, but to be honest that might consume a lot of your time.
In that case, you can instead use a driver updater software to upgrade your scanner driver. And, if you are looking for options, here is a list of some of the best driver updater software.
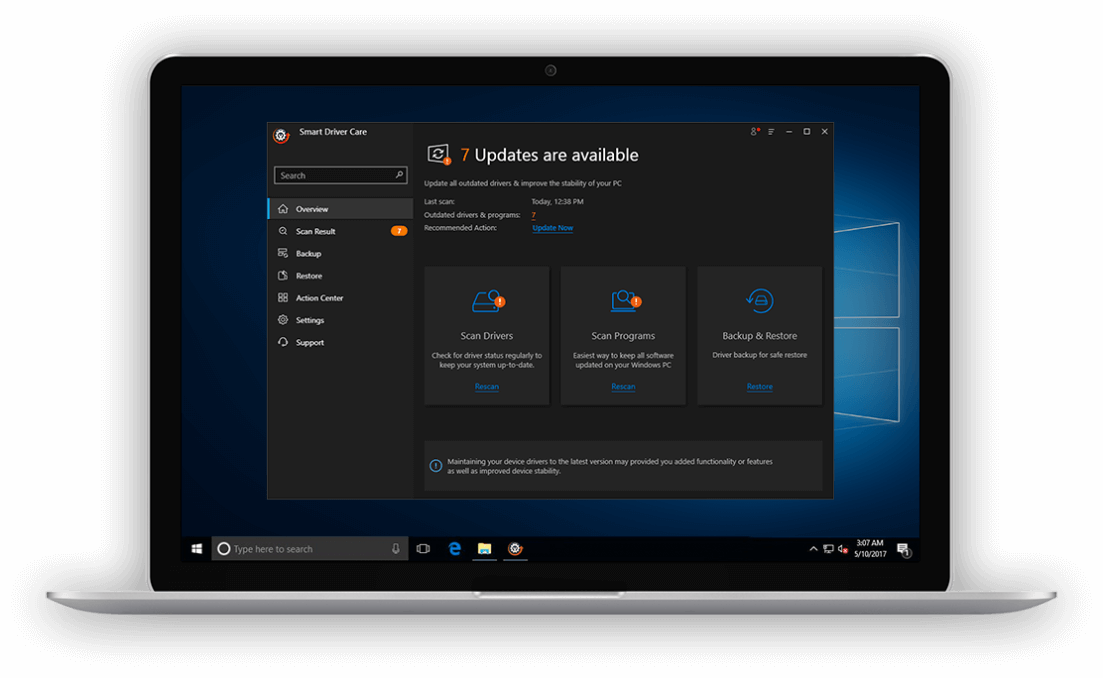
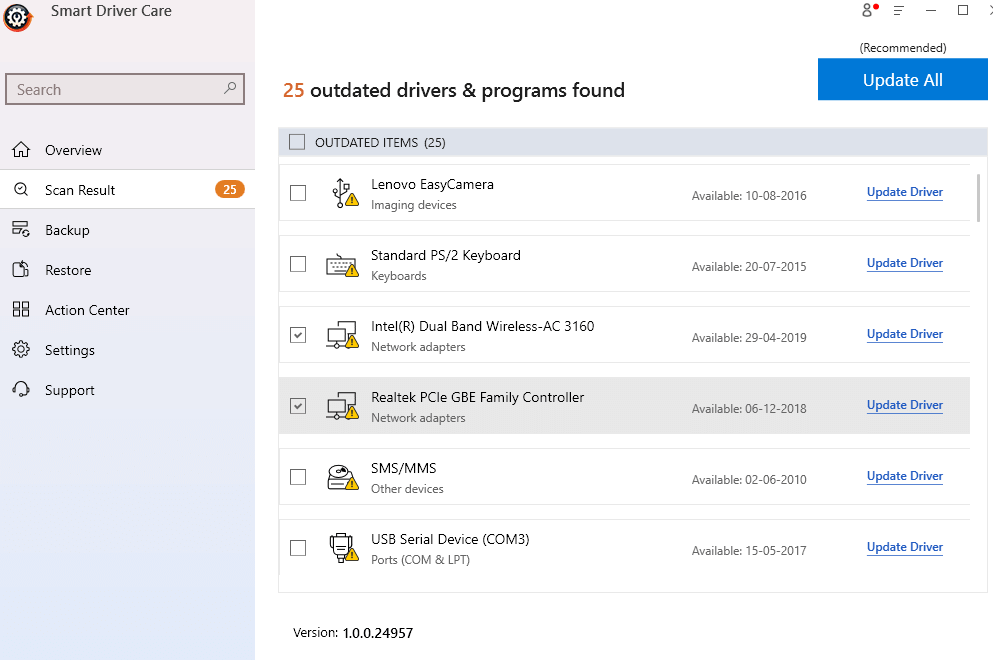
Smart Driver Care is one such driver updater tool that scans for outdated and corrupt drivers and updates them.
| Smart Driver Care – Features At A Glance |
|---|
Windows Versions Supported: 10/8.1/8/7 Price:$ 39.95 Note: It is important to note that with the free version, you can update two drivers per day. With a premium version you can update unlimited drivers Click Here To Install Smart Driver Care |

Now, here’s how you can take the help of Smart Driver care and resolve the issue –
1. Install the Smart Driver Care application
2. Choose Scan Drivers option or click on Scan Results to have a look at a list of all the outdated drivers
3. You can choose to either update all drivers or select individual drivers and update them
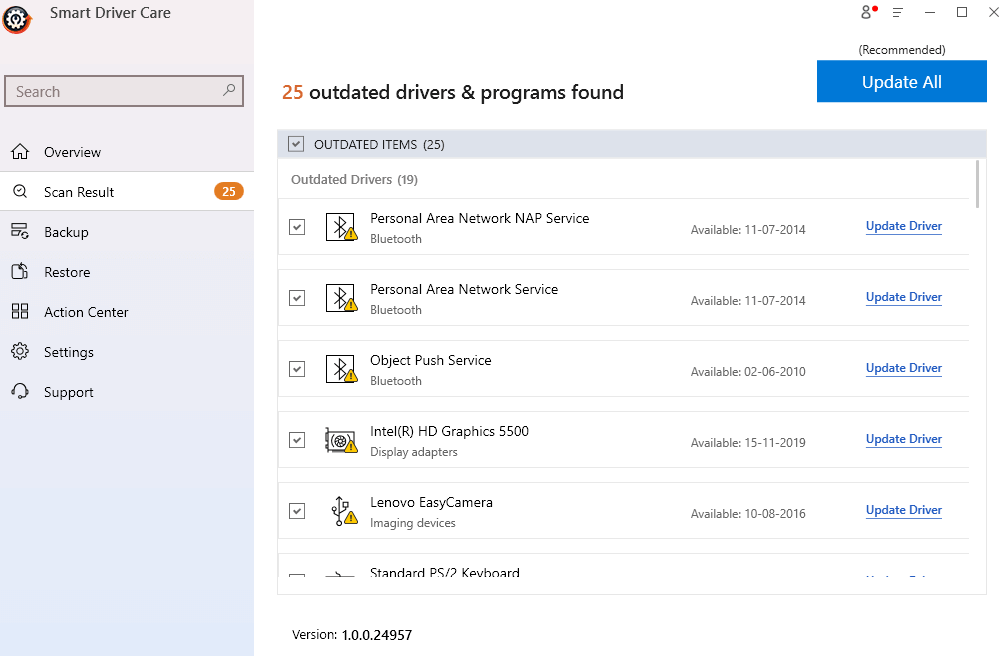
4. Here, look for the problematic scanner driver and then click on the Update Driver option
5. Wait till the process has completed
4. Corrupt System Files

In case your Windows 10 scanner not detected, the reason could be corrupt system files. For this, you can take the aid of SFC SCANNOW option. For this –
1. Type cmd in the Windows search bar
2. Select Run as administrator from the right-hand side
3. When the Command Prompt opens type SFC /SCANNOW and press Enter
4. Wait for the scan to complete
5. Restart the computer and check if both your printer and scanner are working
3. Check Windows Services
In the absence of certain services, you might encounter “Windows 10 scanner not detected”. Such services include –
- Shell Hardware Detection
- Windows Image Acquisition (WIA)
- DCOM Server Process Launcher
- Remote Procedure Call RPC
Let’s check how we can activate the Windows Image Acquisition (WIA) service –
1. Press Windows + R keys on your keyboard to open the run dialog box
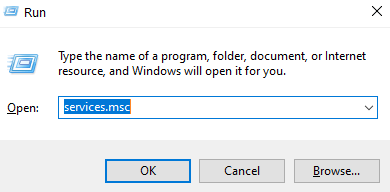
2. Type services. Msc
3. When the services window opens look for Windows Image Acquisition (WIA) service
4. Once you find it, right-click on it and then open Properties
5. Click on the Startup type dropdown and select Automatic and then click on Start
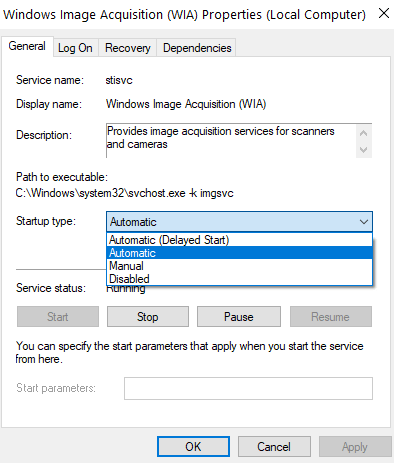
6. In case the process is already running head to the other services mentioned above and repeat the steps from 1-5
7. Wait for any given service to restart
8. Once the service has restarted, check your scanner once again
4. Ensure That Your Scanner Is Not Set In Compatibility Mode
The first course of action to take if you find that the Windows 10 scanner is not detected is to check the Compatibility Mode of your scanner. If it is set in Compatibility Mode, you will have to uncheck it. For this follow the steps mentioned below –
1. Locate the scanner’s icon and right-click on it
2. Click on Properties
3. Click on the Compatibility tab
4. Uncheck the option that says Run this program in Compatibility Mode
5. Click on OK
Wrapping Up
Out of all the above steps, the easiest way is to update outdated/ corrupted or incompatible scanner drivers using a driver updater software like Smart Driver Care. We understand how frustrating it can be when you are unable to scan your documents. As a last resort, you can even try disabling and then re-enabling your printer-scanner and check if it is plugged correctly or not.
If you liked the blog and found it helpful, do give it a thumbs up and share it with your friends.


Mansi Vijay
Updating correct drivers helped me to fix this annoying issue on Windows 10. Thanks for the suggestions!