
Scanning documents has always been an easy task through an Android or iOS device. What if you want to scan your important documents using Windows 10? Is it possible? Yes, scanning documents using Windows is pretty possible in a few ways. How to do this is explained in the article below. These ways to scan documents are helpful when you have to send a digital copy of things such as your identity proofs, handwritten letters, contracts and more.
Having a standalone scanner helps you do the needful. Otherwise, you can always seek help from Windows 10 applications without using any manufacturer software. You can use these methods to scan documents or photos on Windows 10 whether you have a flatbed or feeder scanner.
Best Methods To Scan Documents On Windows 10
When it comes to scanning documents on Windows 10, here are listed two of the best ways that can help you scan documents or photos on your device. They are either l;p[using Windows Scan app or using Windows Fax and Scan app.
Scan Documents Using Windows Scan App
Windows 10 consists of a lot of unique features including a modern scan app. To proceed with this step, you have to download and install it from Microsoft Store. Further, follow the steps to get your documents scanned in just a quick span of time.
- Download and install the Windows Scan
- Once the app is downloaded and installed, you can convert documents from physical state to digital format.
How To Scan Documents?
Convert all your physical documents to digital mode i.e. into PDF, JPEG, and any other format. To begin click on Start and follow the steps below:

- Search Windows Scan on the Start menu and open the first result.
- Now, choose the Scanner from the drop-down menu and select the scanning device.
Ensure that the scanning device is connected to your PC. Also consider if the scanner is all set to use and connected via a USB or a Network.
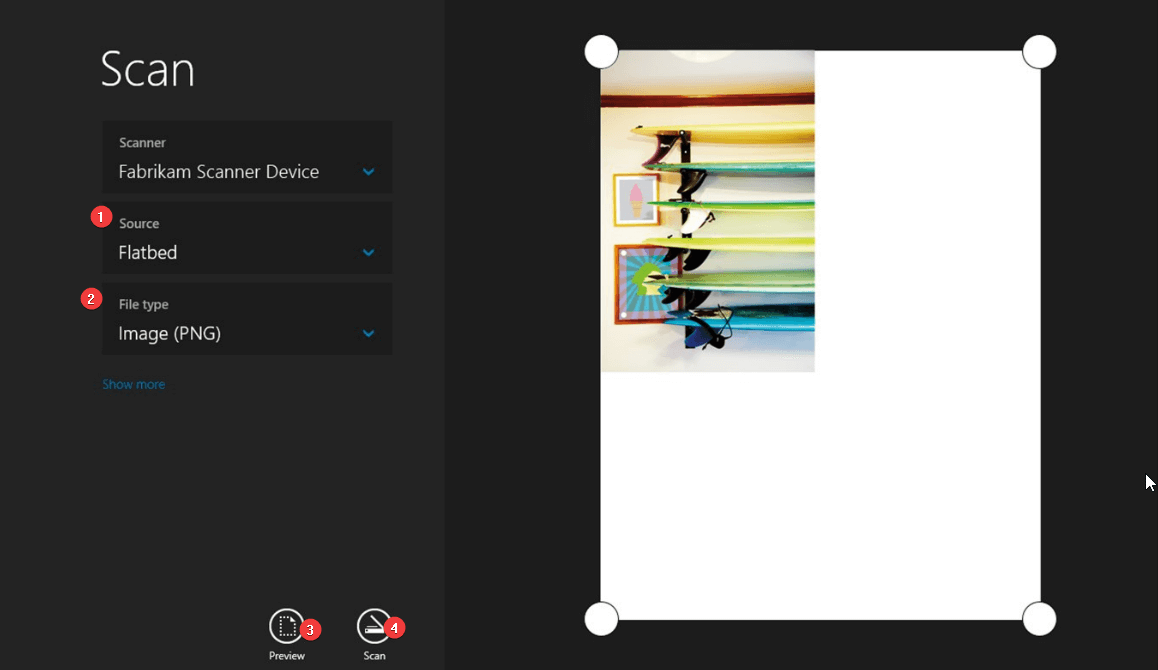
- Then use the source drop-down menu and select the document location out of the following three:
Flatbed- Applies to users with standalone scanners or a multifunctional printer with the scanner.
Feeder- Applies to the scanners that supports scanning by feeding the document using the roller paper feeder.
Auto-Configured- It does not include additional settings. It scans the document and saves the output.
- Select the scanner and use the File type out of JPEG, PNG, TIFF, Bitmap, OpenXPS, XPS, PDF etc.
- Click on the Show More
- Choose the Color Mode drop-down menu to opt for Color, Grayscale, or Black and white.
- Next, comes the Resolution DPI Herein you can select Dots Per Inch setting.
- Click on Save file to option to select the destination folder.
- Click on the Preview Crop the document if needed.
- Now click on Scan and then View
After you follow these steps, the scanner will scan the document and save its digital copy on Windows 10 PC. For the documents to be scanned, choose PDF file type while for images choose PNG or JPEG file formats.
Scan Documents Using Windows Fax And Scan App
While you are looking for ways to scan documents, the alternative one is the use of legacy Windows Fax and Scan apps. The app lets you enjoy all the essential features to scan documents and images. To scan documents with Windows Fax and Scan app, follow the steps below:
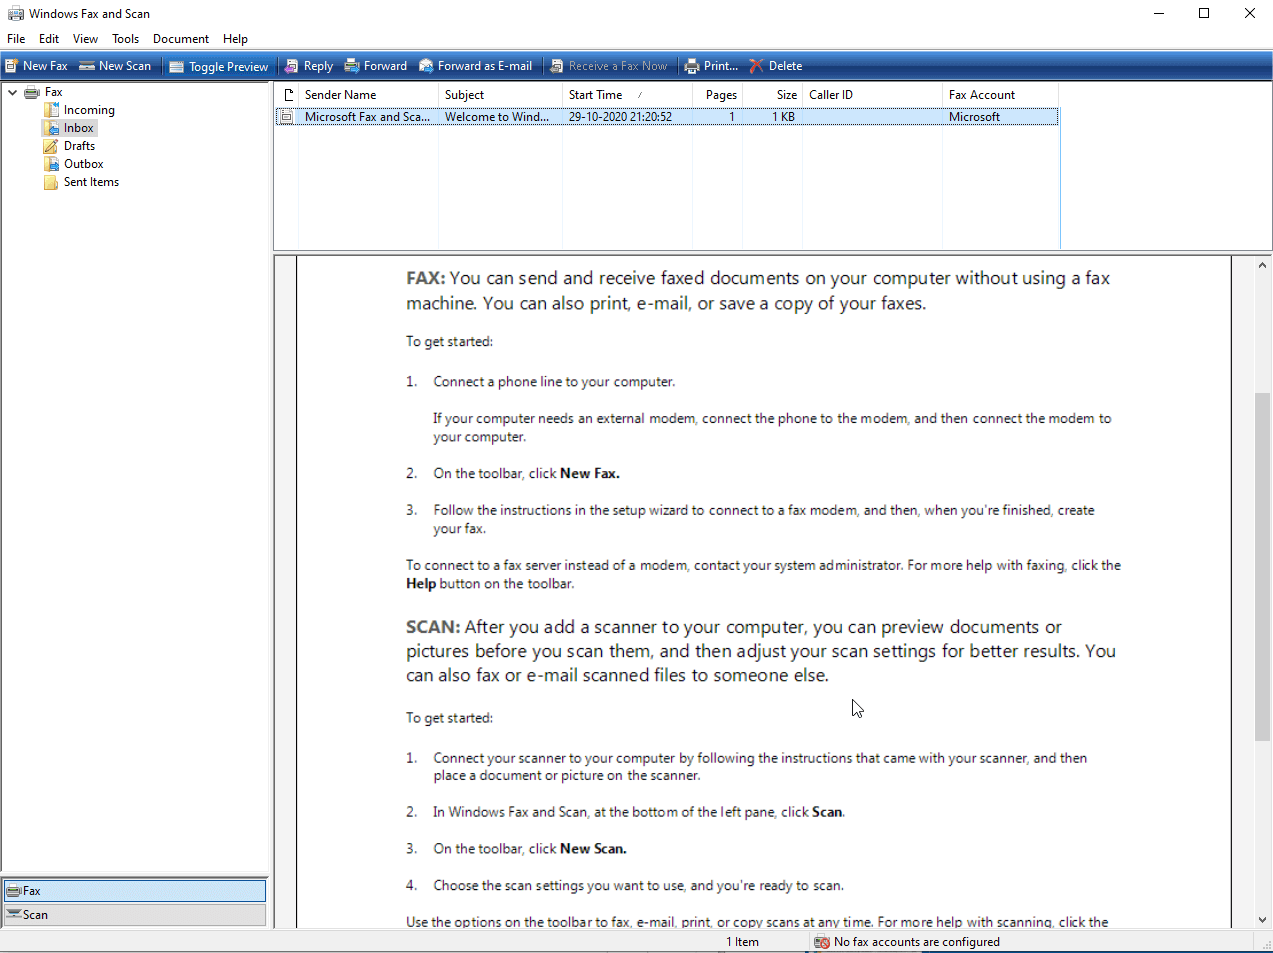
- Open Start and search for Windows Fax and Scan.
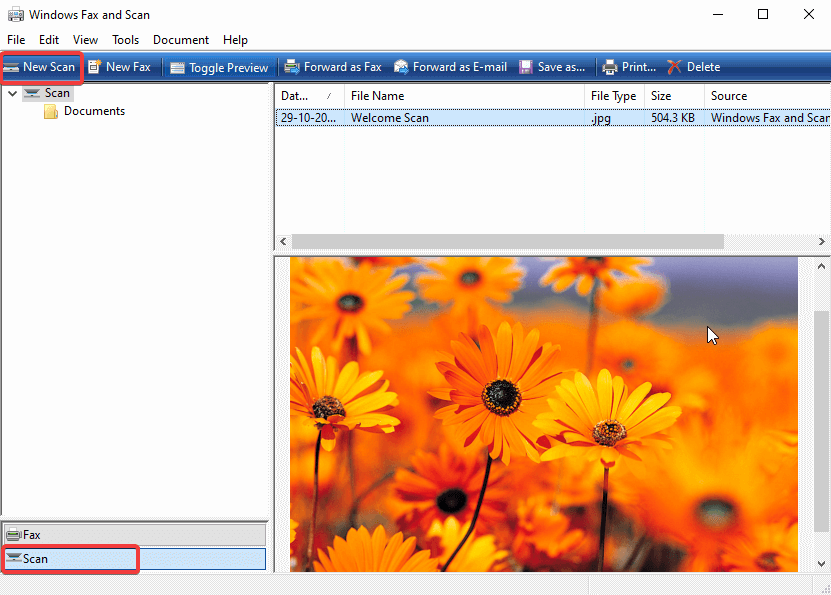
- Open the app and then click on the Scan option located at the bottom of the page.
- Click on the New Scan tab and click on Change to select the scanning device. Click OK to proceed.
- Next, use the Profile drop down menu and select the profile that applies to photos or documents scan.
- Then choose the Source out of Flatbed or Feeder and select the document you are trying to scan.
- Next comes the Color format, File type, Resolution (DPI) and more. While you choose the resolution value ensure that the higher the number, the higher will be the resolution.
- Furthermore, you can use the slider to control the scan brightness and contrast.
- Click on the Preview tab, crop the scan image or document.
- Click on Scan and that’s all.
You can now view the scanned image from the Windows Fax and Scan inbox. Once the process is complete, you can find the output file under the Scanned Documents folder.
Final Word For Scanning Documents On Windows 10
Having a scanner but do not know how to scan documents on Windows? Check out this guide and learn more about scanning applications and scanning ways to turn your physical or handwritten documents into digital copies. What tool do you use to scan important documents? Which operating system do you feel convenient while scanning? Do let us know your thoughts and suggestions in the comments section below.
For more How-to guides, keep reading Tweak Library.
Recommended Readings:
Best Document Scanning Apps On Android in 2020
Effortlessly Scan Documents With These Best Scanner Apps For iPhone
How To Convert Scanned Pdf Documents To Plain Text
Do You Need an Offline Malware Scanner?


CHETAN
Well, I had no idea Windows has an app altogether that's been dedicated for scanning docs. Thank you for making us aware about it
Akshita Gupta
Try this out this is so hassle-free way :)