
iMessage is the popular messaging platform for iOS devices. Be it an iPhone or a Mac, iMessage eases the communication process. What if you use Windows as your default OS for your regular work? Consider a scenario where everyone you need to communicate has an iPhone just like you and you need to avoid looking at your iMessage every now and then, unlocking your iPhone too often and end up wasting a lot of your time. Sometimes, picking up a phone in between is fine but frequently it interrupts regular workflow.
Have a Look: Best Messaging Apps For Windows 10
What should I do in such a case? We understand this question might be hitting your mind and therefore, for all windows users with iPhone we have a quick hack and that is using iMessage on Windows. Wondering how to set it up? This article can guide you well on this. Read further to learn setting up iMessage app for Windows 10.
The stepwise process is a bit lengthy, but quite easy to set up. All you need is an iPhone, MacBook and of course, your Windows PC. Remote access is the only best way to text using iMessage on Windows. Here, iPhoneX is used as a messaging source, Macbook Air as a host and Windows 10 PC as the client PC.
How To Text With iMessage On Windows 10
1. Enable Messages on iPhone
2. Activate Messages for macOS
3. Get Chrome for macOS
4. Final Setup on Windows 10 PC
Step 1: Enable Messages on iPhone
- On your iPhone, go to Settings.
- Tap on the Apple ID account.
- Tap iCloud.
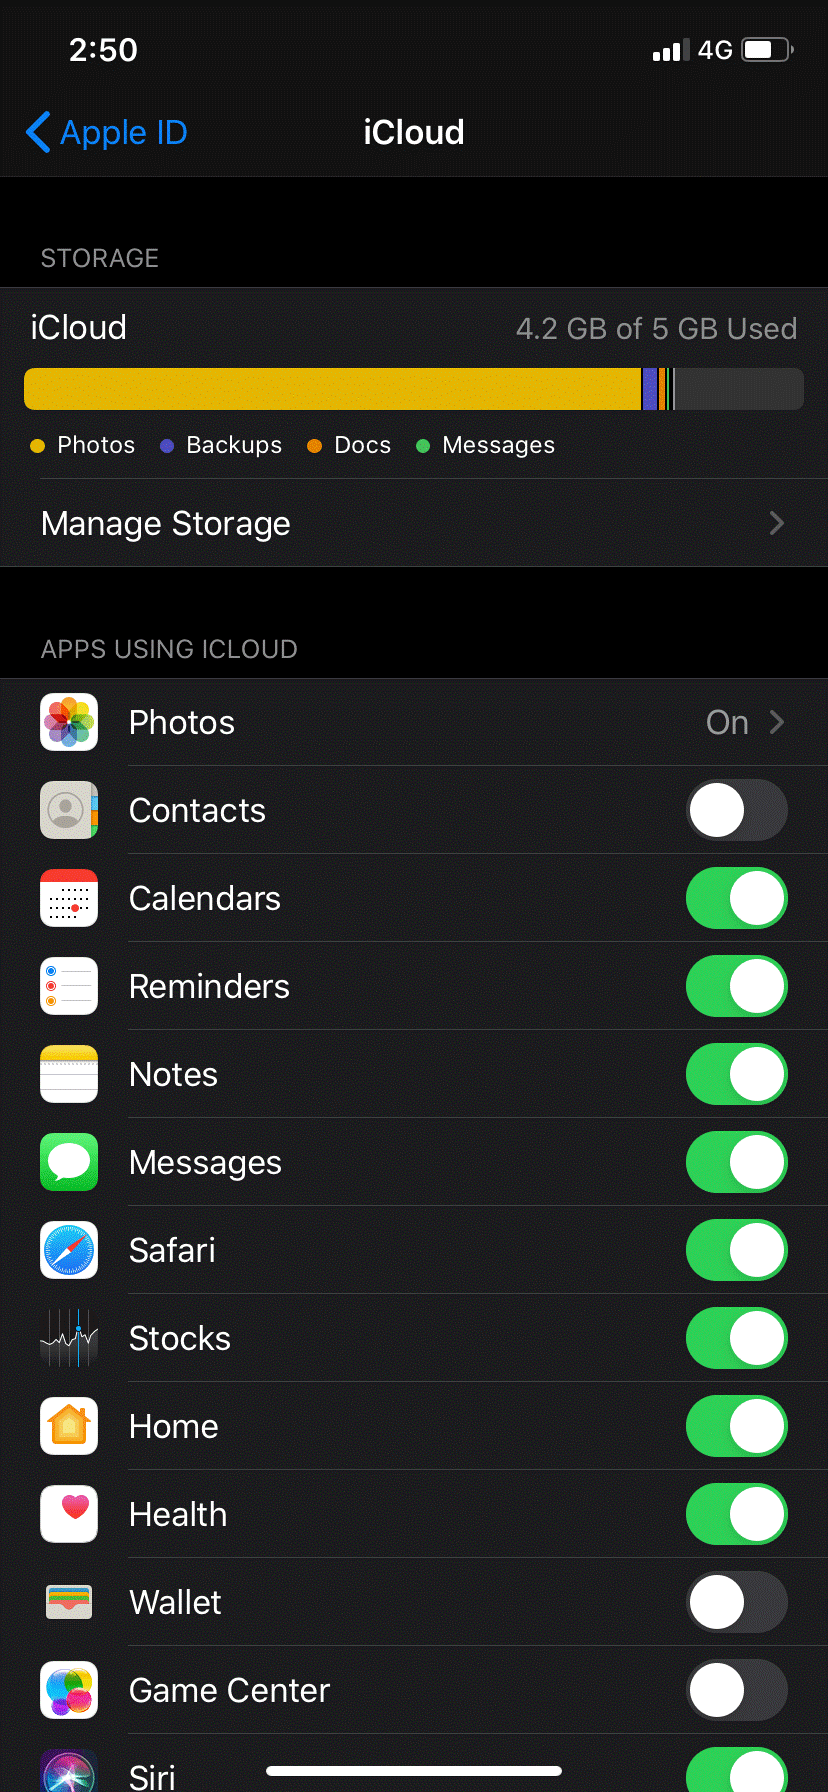
- Toggle on Messages, if not.
Also Read: How To Retrieve Deleted Text Messages On iPhone?
Step 2: Activate Messages for macOS
- On your Mac, launch the Messages
- Sign in with Apple ID and password.
- Enter verification code (if you have enabled two-factor authentication).
- Go to Menu Bar, click Messages, and choose
- Select iMessage tab in the pop-up panel.
- Enable your Account, if needed.
- Enable Messages in iCloud, if needed.
- Activate your phone number and Email addresses.
- Select or deselect Send read receipts.
- Start a new conversation.
- Click the Sync Now
Read Further: How To Clear Your iCloud Space On Mac and Windows
Step 3: Establish Chrome for macOS
iMessage is now activated and now you need to follow the steps below to proceed the setup process.
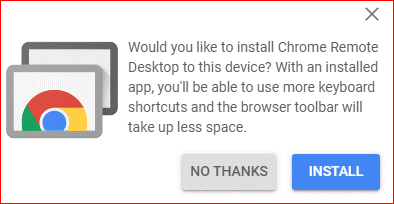
- Download Google Chrome.
- Sign in using your Google account.
- Now, install the Chrome Remote Desktop extension. You’ll see a message requesting authorization.
- Now, in the address bar enter chrome://apps and click on the icon. Hold the CTRL button while clicking on ‘Chrome Remote Desktop’ icon to pull up a menu. For quick access, add its shortcut on the macOS desktop.
- Now click on Get Started, under My Computers, and then Enable remote connections.
- Click Accept and Install. This will let you acquire host software.
- Click OK to download Chrome Remote Desktop Host Installer.
- On your system, locate dmg file and open it.
- The file has Chrome remote Desktop Host package, which you’ll require to install. Double-click and follow the steps ahead.
- Once installation is done, re-launch Chrome Remote Desktop and enable remote connections.
- Create a six-digit PIN and re-enter your Mac’s password.
- You’ll see a pop-up window stating remote connections are now enabled.
Note: Ensure that Mac does not go to sleep mode in order to keep your system running. For this, go to System Preferences > Energy Saver > confirm ‘Prevent computer from sleeping automatically when the display is off’. Also, check ‘Wake for Wi-Fi network access’ option toggled on.
Step 4: Final Set Up of iMessages on Windows 10
- On your Windows PC, install Google Chrome if you do not have it already.
- Sign in with the same Google account that is already used above.
- Install Chrome Remote Desktop Extension from the Chrome Web Store.

- Once the installation is done, in the address bar, enter chrome://apps and look for Chrome Remote Desktop Once found, right-click the icon and add a shortcut on your desktop to access it easily anytime when needed.
- Now, click Get Started, under My Computers.
- You’ll see the host macOS in the list. Click on your MacBook.
- Now, enter the PIN you created in the above process.
And it’s done. You can now remotely access your macOS on Windows 10. Not only the iMessage app, but you can also use any apps that are installed on your Mac on Windows PC. This is how you can set up iMessage for a PC. This way, you‘ll see on your Mac’s screen a message saying, ‘Your desktop is currently shared with (your email address)’ along with a Stop sharing button.
Must Read: iOS13 Features You Must Know About
This is how you can send/receive texts using iMessage on Windows 10 by minimizing the frequent use of your iPhone during working hours. You can anytime try using a Mac remotely on Windows 10 or vice-versa. The only thing is you need to ensure that you’re logged into your Google account.


Leave a Reply