Do you want to take a screenshot of a particular region and ignore the rest of the desktop screen? For this, you can either use a keyboard shortcut Windows + Shift and S key or can use a screen capturing tool. Well, the shortcut can help you take a screenshot of the selected region but the in-built tool lacks the advanced editing features.. Therefore, using a screengrab app like TweakShot is recommended.
This screen capturing tool allows you to take a screenshot of a selective screen and edit it simultaneously. Moreover, the application will enable you to capture a scrolling window, a rectangular region, and more. Furthermore, you can record videos, webinars, live meetings other online events using this powerful screen grab tool – TweakShot.
To get the tool, click the download button below

However, if you don’t want to use a third-party tool, no worries; we’ve got you covered on that part too. This post explains how to use TweakShot to capture screens & the manual steps to take a screenshot of a selective screen.
Here’s How to Take a Screenshot- Windows 11,10
The Print Screen button is the simplest way to take a screenshot of everything you see on your desktop. This will take a snapshot of the whole desktop.
But this isn’t what you’re looking for, is it? So, what are you going to do now?
How to manually snap a screenshot of a certain screen in Windows 11,10?
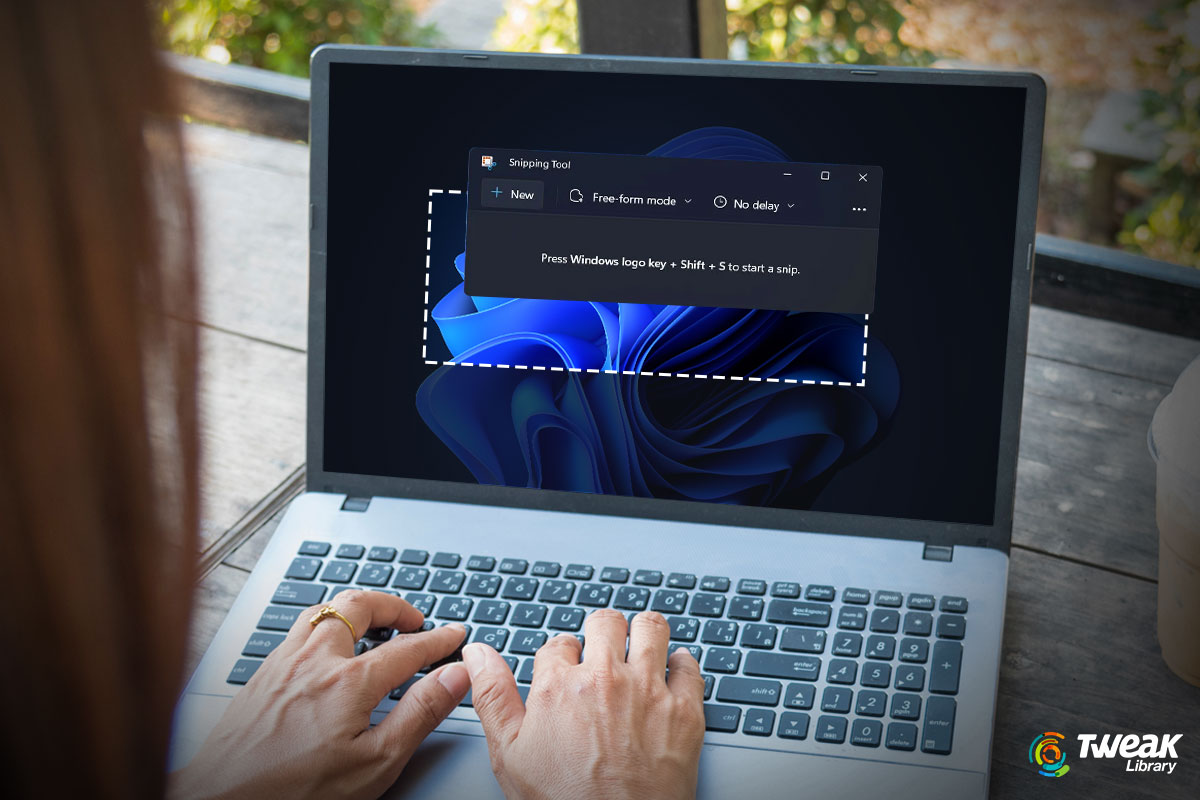
1. Press the Windows key + Shift + S keys together.
2. The window will be greyed out, and a menu with four icons will appear, allowing you to take a rectangle screen, freeform, Full screen, and window snip. Choose the one you wish to utilize.
3. Then, using the new mouse cursor, choose the area of the screen you want to record.

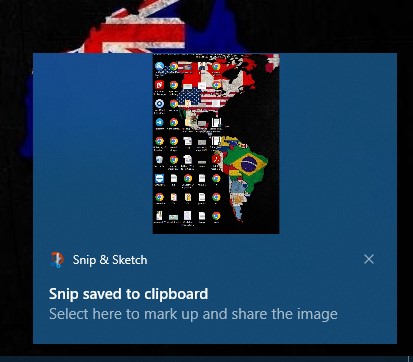
4. The snapshot will be transferred to the clipboard and pasted into another program.
Note that the shortcut is only compatible with the most recent version of Windows.
5. Take a screenshot and save it to your clipboard.
6. To save the screenshot, use Ctrl + V in the image editor or word document you wish to save it to.
However, the editing tools are limited in the built-in picture editor. As a result, if you’re searching for a tool that allows you to take screenshots of the selective screen and edit them, TweakShot is a good choice.
You may use the tool to record & capture your screen without leaving a watermark. It also enables you to take screenshots of a scrolling window.
Also Read:- YouTube Screenshots – 2 Ways to Take Screenshots From YouTube Video
TweakShot: How to Take a Screenshot of a Selective Screen
TweakShot is a selective screen capture program for Windows and let us see how you can take a selective screenshot.
1. Download and install TweakShot.
2. Open TweakShot on your computer.

3. Go to the screen or web page you wish to capture and open it.
4. Select Capture Region from the context menu of the TweakShot icon in the system tray.
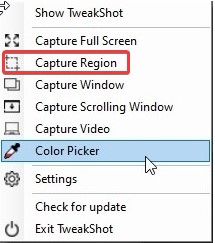 5. Choose the area you want to take the screenshot of.
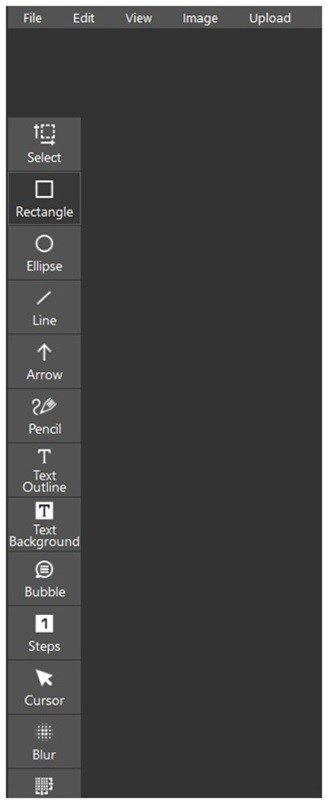
6. The TweakShot picture editor will instantly open the screenshot.
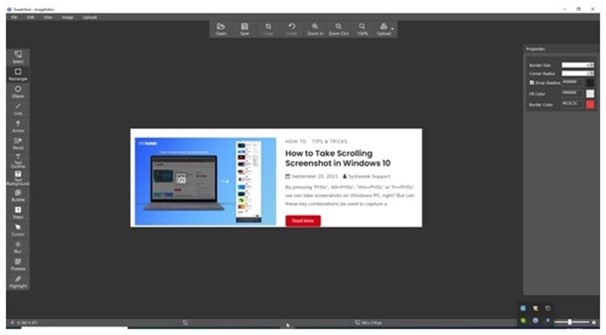
7. Using the tools in the left pane, you may now alter the screenshot. You may also upload it to the cloud and add any comments, steps, or figures you desire.
 8. That’s all; you can now capture a selected screen with TweakShot and these simple methods.
Additional Features Of TweakShot:
- Capture selected window, full screen, and scrolling window
- Record video
- Built-in image editor with powerful features to edit screenshot
- Compatible with all versions of the Windows operating system
- Color picker to add colors.
Conclusion
Above we demonstrated how to capture a screenshot of a certain screen manually and with TweakShot.
TweakShot is an easier way to capture screens in multiple ways than the manual method and the tool supports Windows 11, 10, and previous versions. The screen capture tool includes a powerful picture editor that goes beyond the basics to assist users in accomplishing their goals.
What do you think? Which method would you choose to take screenshots on Windows 11 or 10? Please mention your thoughts in the comments section below.


Leave a Reply