
Resizing images without affecting the quality of the picture is something you cannot compromise upon. Because as important as it is to resize the image, the same significance has been given to the quality as well. Now there can be hundreds of reasons why you want to resize the image including uploading the same on a specific platform with a criteria for photo size.

& we all know about the size of the photo when you click from your smartphone or iPhone. Because it is nothing less than a couple of MBs that eventually take more space as well as doesn’t meet the criteria for uploading on certain websites. & this is where you start looking for image resizer tools that help you to reduce picture size or to make a picture smaller (size wise).
How to Resize Image Without Compromising Quality
There are many platforms that can help you out of the issue “how to reduce size of image or how to resize a photo” including the online ones. But did you think once that in this online-scams-&-scandals era, are these platforms secure enough? Well, we thought & the outcome is that we have got just the perfect tool to resize the images keeping security on the priorities list: Image Resizer (Resize batch of photos)

Fully compatible with your Windows PC as well Mac, Image Resizer has many features you can use to reduce the size of image. Let’s explore the Image Resizer tool & understand the features to reduce the picture size without compromising the quality.
First of all, you need to know that Image Resizer is the perfect tool that helps you to alter images from resizing to flipping, rotating, and changing format for multiple images at once. So, on condition that Image Resizer has successfully been downloaded on your PC, let’s look at the rich features it brings to the table as below:
Download Image Resizer Tool for Windows


1. Photos Selection
With the utmost easiest user interface, it would be a cakewalk for even new users who’re not that familiar with computers. Since the photo alteration process starts with selecting & adding photos to the Image Resizer tool, let’s start adding photos to the software.
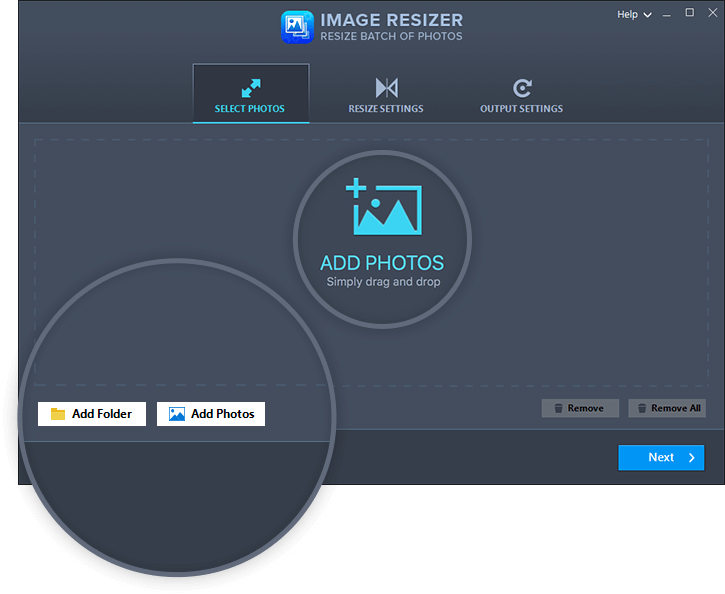
All you need to do is, tap on Select Photos header option (extreme left header on the top) & then click on Add Photos (mid of the screen). The tool will ask you to either add individual photos or the entire folder itself that needs to be worked on, like reducing the image size.
To make things entirely simple for you, Image Resizer lets you drag & drop image files & folders in the easiest ways possible.
Also Read: Best Image Editor for Mac: Free and Paid
2. Resize Settings
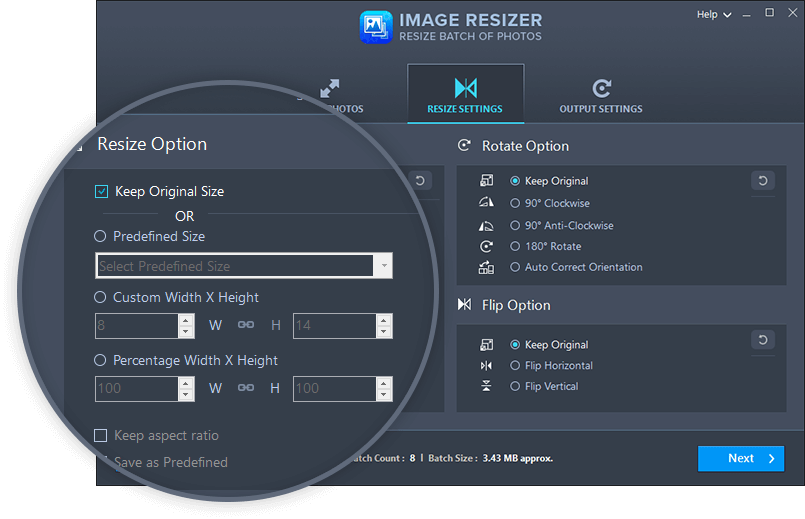
Once the files have been selected & added to the tool, now is the time to give command for image alterations. Here, you need to start the process by tapping on Resize Settings (top middle header) & you will see the below part has been divided into two sections: Resize Option & Rotate Option.
Exploring each one of them, you need to give the tool commands (according to your preferences) & that’s it. For example, in the Resize Option section, you would need to choose either to keep the original picture size or make changes as shown below. To make changes, click on Predefined Size & put in the width & height according to what you want.
After you have made changes in the Resize Option section, go to the Rotate Option section to explore the features if you want them to resize the image size.
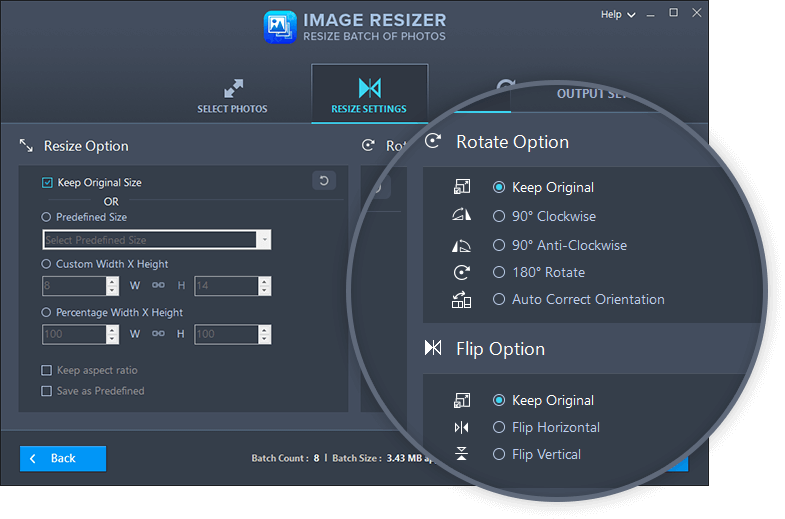
Now is the time to give your selected images a hell of a ride by flipping them upside down & rotating the way you want. Because Image Resizer not only helps you with resizing the image, but also helps you set them the way you want (flip, rotate, rename, & whatnot).
So choose the options according to what you think is working best for your image & start reducing the size of the image.
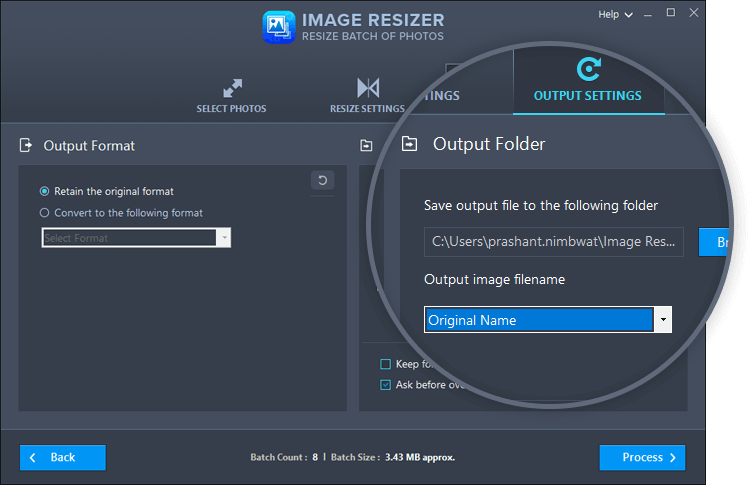
3. Output Settings
Once you have given the appropriate alterations to the image that need to be resized or reduced, now is the time to put in the output information. So all you need to do here is, click on the Output Settings button (right side header) & the below screen will open up for you:
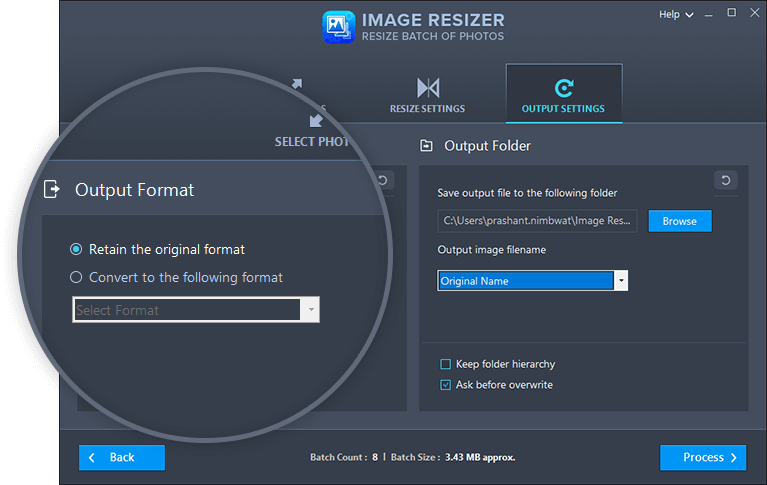
You need to start with using the Output Format first that will help you out to choose the format of the altered image. You can either go with retaining the original format or choose from the list of the formats Image Resizer has for you; & let me tell you there are a lot!!
Once you have chosen the image format, now is the time to set up the location for the image you just altered. Just click on Browse & choose the perfect location along with the name you want for the file (click on arrow sign under Output image filename).
Once everything has been set up according to your preferences, tap on Process & the following screen will show you the details related to the image size. After every image resizing process, you can check the log reports that will give you a better picture of the image size & other details.
Also Read: Top 8 Video Compressor Apps For Android
Wrapping Up
How to resize an image without compromising on quality and how to reduce the size of image is quite an issue with users with lack of proper tools on Windows. So here you need to have access to a tool that can help you make the best out of it. So here we have Image Resizer for you that reduces the size of images in the easiest way possible.
Start exploring Image Resizer & stop compromising with images while trying to reduce size of images altogether.
Next Read
Best Image Compressor and Resizer Apps 2020
Best GIF Cutters to To Edit GIF Images


Alex
I want to resize my images for 20 KB without loosing it's quality. How much is 20KB in pixels?