Geo-tagging images, for sure, make it easier for us to sift through images. Especially, if you want to sort through images based on the many vacations and exotic locations you have been to.
However, everything has its share of cons. And, in this case, these cons can soon convert into grave danger. Someone stalking you or your friends or family can soon find out your location. Or, let’s say, you have feigned sickness from your boss and have sneaked out on a small trip with a few other colleagues, that’s the time you wouldn’t want to let your boss know where exactly you were. However, if you haven’t removed the location data from your photo, you might soon have to face a fierce boss and probably bid adieu to your job.
Worry not! We are not going to let you fall into such situations. So, if you are searching for ways on how to remove location data from your photo, you have stumbled on the right blog.
Easily Remove Location Data From Photos On Mac and iOS
We’d urge you to bookmark or save this post before you plan to upload an image onto any platform. You would want to make sure that you don’t reveal information that can put your or your loved one’s safety in soup.
How To Remove Location Data From Photos On Mac
(i) Use Mac Settings To Remove Geo-Location Data From Photos On Mac
First, let’s have a look at how you can hide GPS data of photos on Mac using the available settings –
If you wish to remove location data from photos on Mac, there is a dedicated setting that can help you hide the GPS data. For this, you will have to open the general preferences of the photo. More specifically the path for the same is – Photos > Preferences > General. Now, uncheck the checkbox next to Metadata that says Include location information for published items
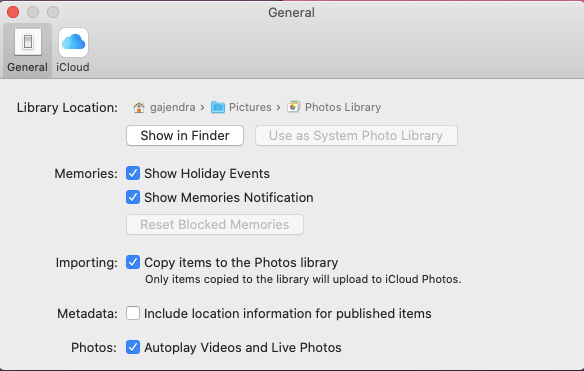
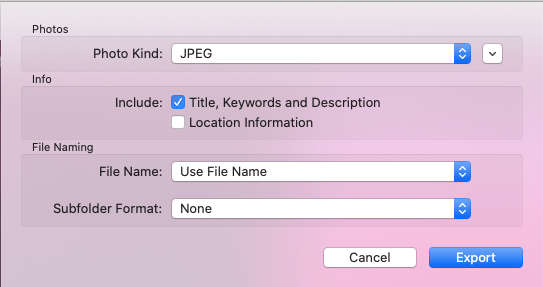
You can also remove location data on an ad hoc basis. For this, you can follow this path – File > Export and uncheck the location information when the export sheet appears.
It is important to note: In case you have set your General Preferences to not include location information, the next time to drag a photo from your photo library to Finder, it will be saved without location data.
(ii) Use A Third Party Exif Editor
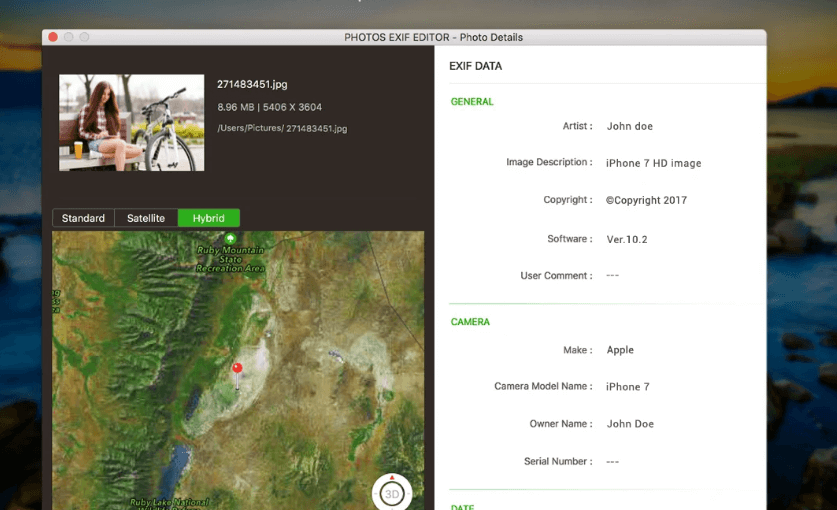
An easy way to remove or rather edit GPS data or any other metadata on your photos is to use a third-party EXIF Editor.
Photos Exif Editor is one such intuitive app that can help you remove location data from your photos. It can help edit EXIF, IPTC & XMP data from multiple photos. With the help of Photos Exif Editor, you can choose to view or even edit the date and time values as per your desires. Not just that, you can even add Geo-location information to your photo as well.
Download Photos EXIF Editor
To know more about how to use Photos Exif Editor, visit this post.
Remove Location Data From Photos On iOS
Quite many of us are fond of snapping spectacular images on our beloved iPhones. And, we don’t just stop there, we immediately want to share it with the world. But, now that you are aware that not every small detail needs to be shared, here’s how you can remove location data or GPS data from your photos on iOS –
1. Open Photos
2. Select photos that you want to share
3. Tap on the Share button
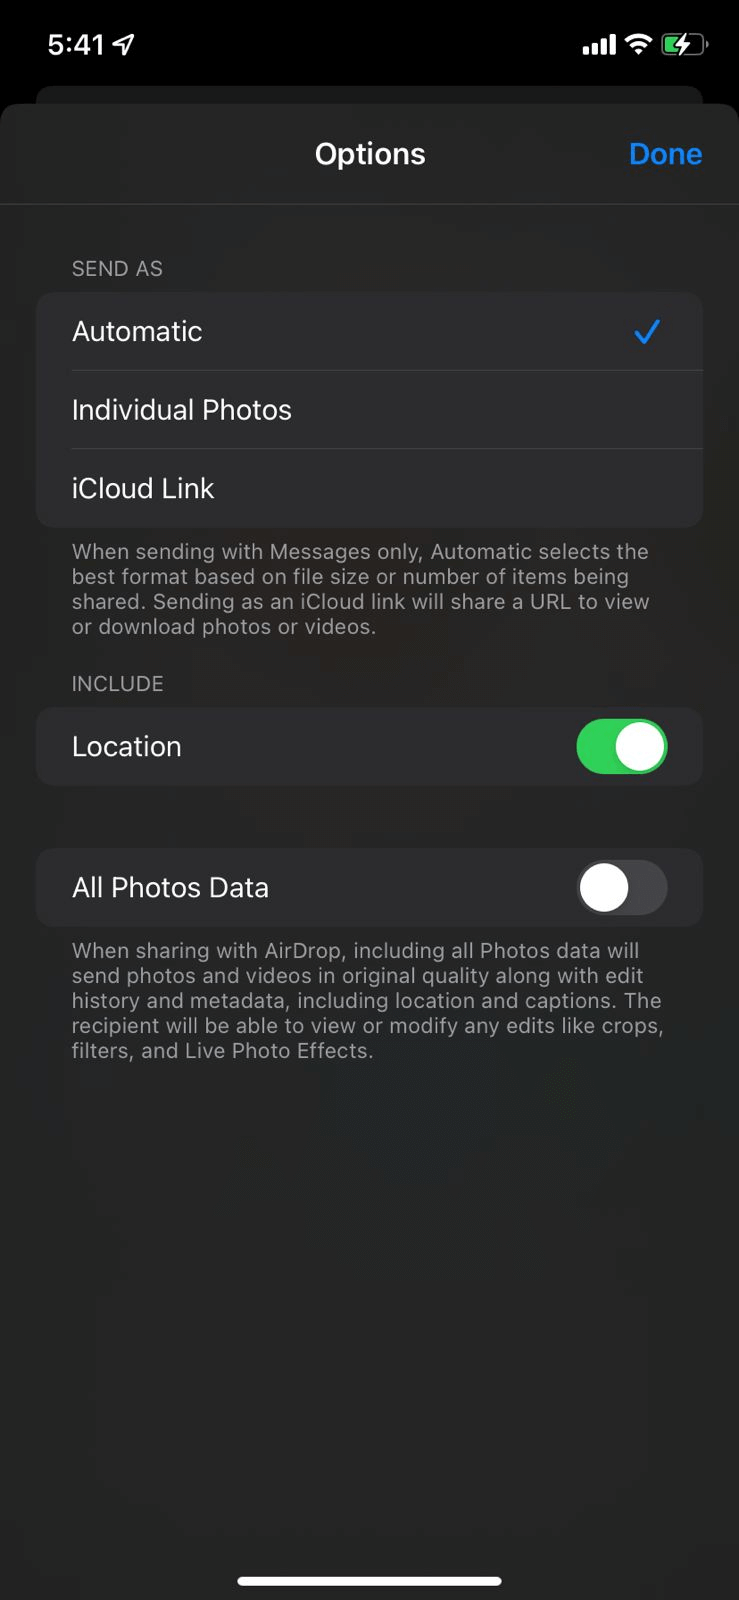
4. Under the number of photos selected click on Options
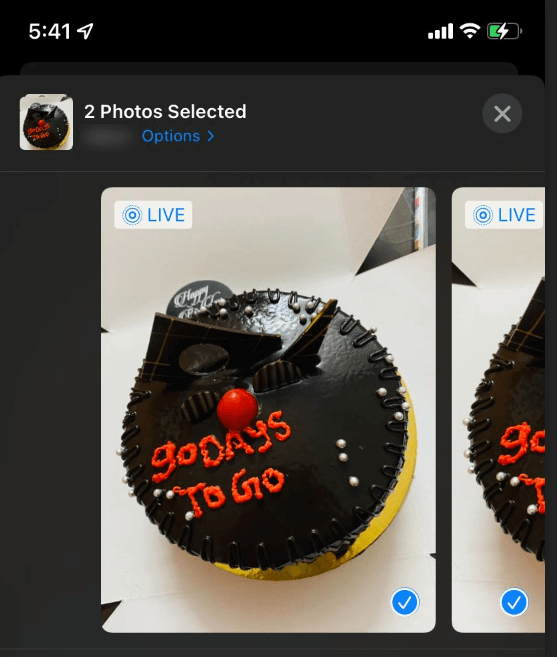
5. Under the Include section, you will find that the Location is enabled. We’ll now toggle this switch off
6. Next, tap Done
That’s very much it! To verify if you have been able to hide the location, refer to the screenshot above and check if whether you are seeing the location or not (see the blurred part next to options )
Wrapping Up
Presuming that you are about to share your masterpieces on social media platforms like Instagram, Facebook, WhatsApp, and others, we wanted to keep it quick. If still, we missed something, Jot down in the comments section below. For more such informative content, keep reading Tweak Library.
Related Topics


Sp Special
How can I help Screen Shara live with my phone and to other phones
Tweak Library Team
Hi Thanks for taking out time to comment on the blog. for sharing your phone screen with other phone you can give a screen mirroring app like TeamViewer a spin. This is just an example, there are several different apps (depending on whether you have iOS or Android) that can help you share live screen. Do give such apps a try and let us know which one would you prefer.