Excel is often regarded as the best spreadsheet tool available. It’s one of the most prominent Microsoft programs for storing and analyzing important data. Both businesses and individuals utilize it; that’s why losing these important entries abruptly can be upsetting.
For a variety of reasons, an Excel file may be left un-saved. Frequently, it’s a simple case of closing the file without storing the modifications. Other times, it might be an unexpected Excel crash, sudden battery drainage, or other concerns.
Also Read:- Best Ways To Convert Excel To vCard
Thankfully, there are ways to recover unsaved excel files, and this post explains how to retrieve excel files there were not saved.
Best Ways to Recover an Unsaved Excel File on a Windows 10 PC
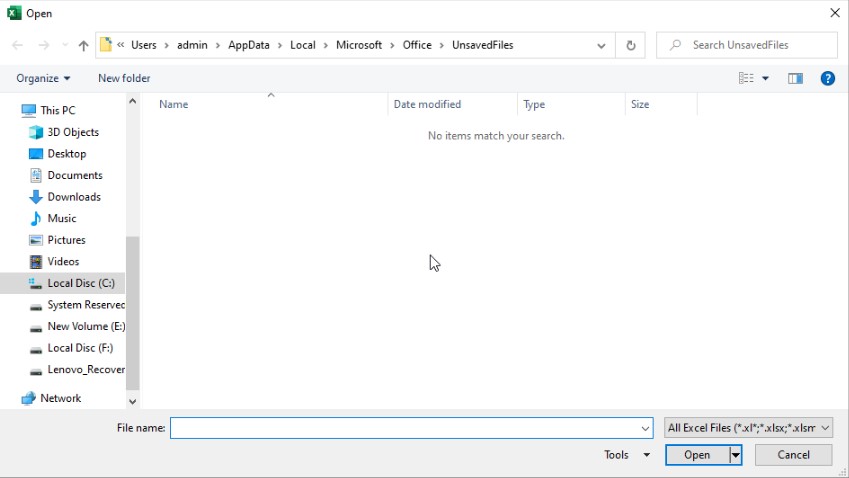
Note: Microsoft products like Excel, Word by default, save a copy of unsaved files at a specified location that is:
“C:\Users\[YourSystemName]\AppData\Local\Microsoft\Office\UnsavedFiles”
Using Windows Explorer, you can search this folder > view > open and save the unsaved copy of the file.
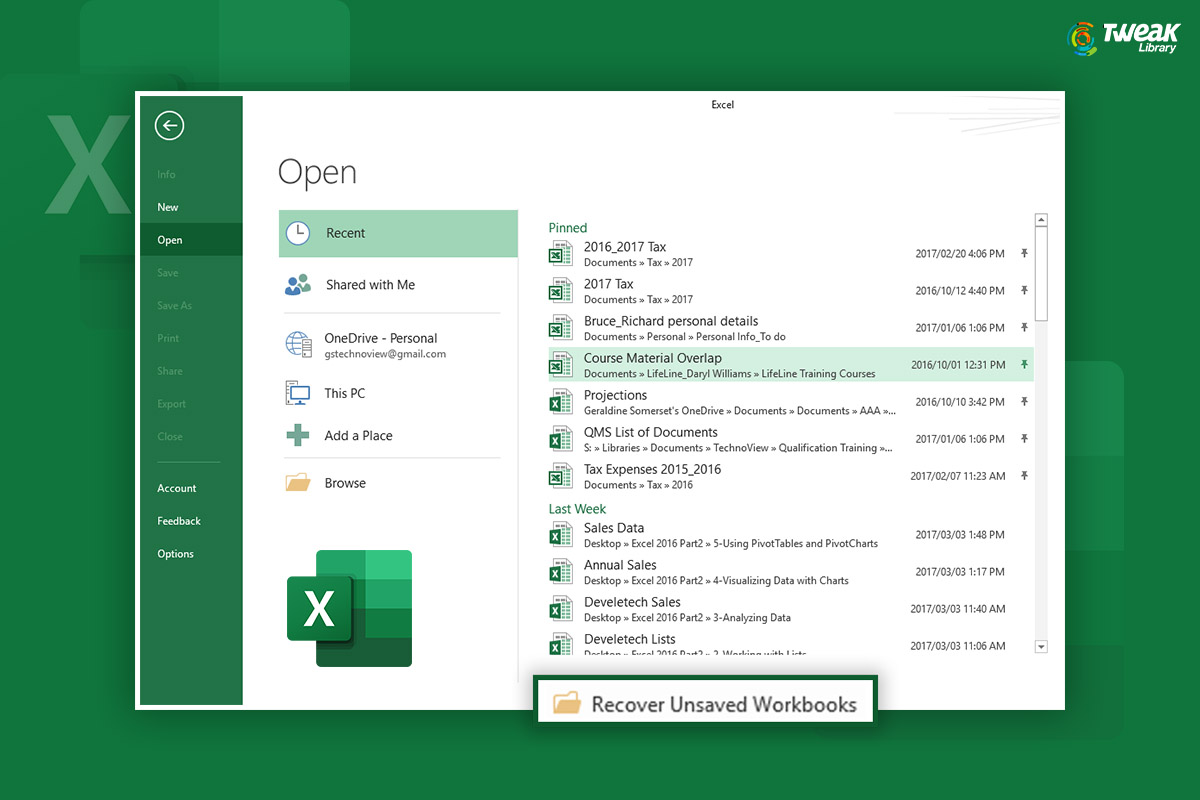
Method 1 – Recover Unsaved Workbook
Excel includes a built-in recovery system that allows users to recover unsaved workbooks. To use it, follow these steps:
1. Make a new workbook in Excel.
2. Navigate to the ‘File’ tab.

3. Select ‘Open’ from the drop-down menu.

4. Select Recent Workbook

5. At the bottom of the page, click the ‘Recover Unsaved Workbooks’ button.
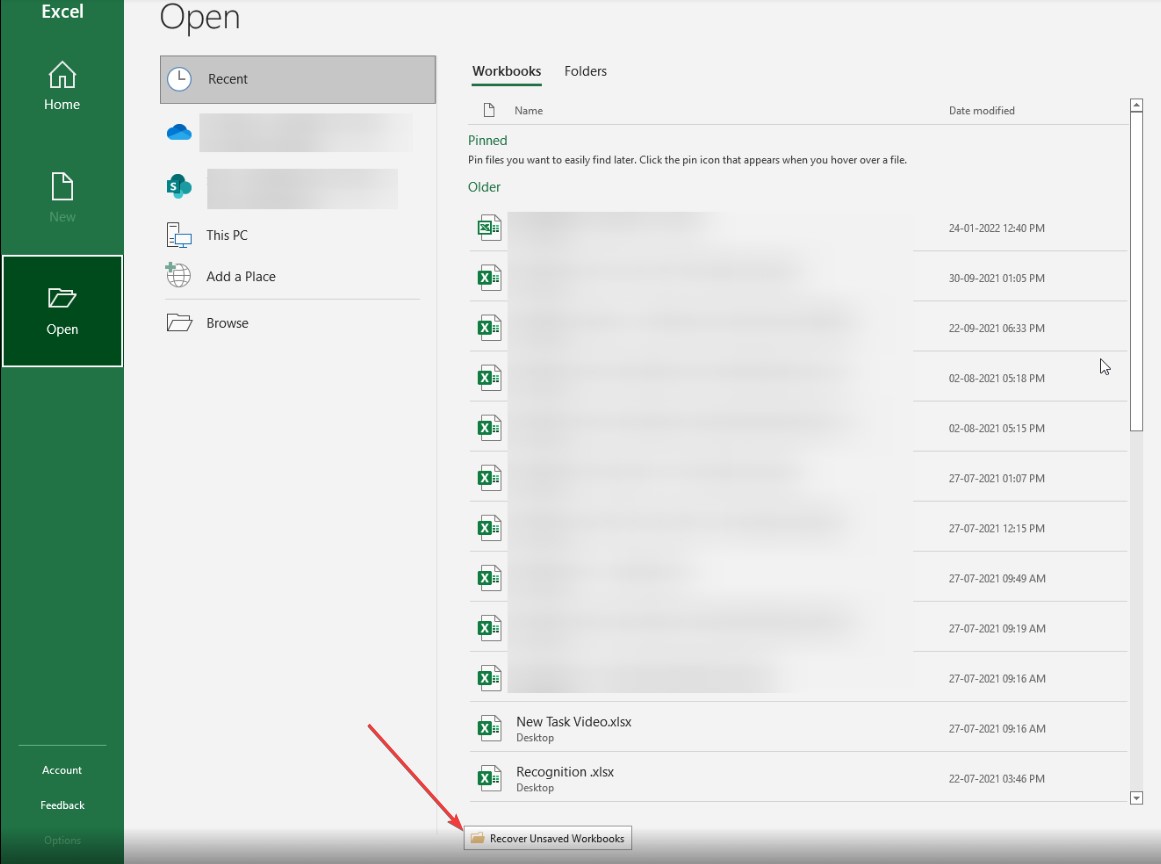
6. Scroll through the listed unsaved Workbooks in the dialogue box that appears and choose the one you wish to open.
7. Save the file under a different name in the place of your choice (using the ‘Save As’ option).
Note: This solution works since Excel has built-in AutoSave and AutoRecover features. Because it’s enabled by default, you should restore the files using these techniques. If it isn’t already enabled, you will need to access these features.
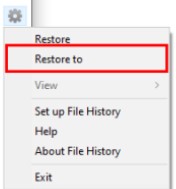
Method 2- Use File History
- Enter “restore files” in Windows 10 search field and select “Restore your files with File History” from the menu.

- To save an unsaved Excel file to a specified place, locate it and click “Restore to.”
Method 3 – Use A Data Recovery Tool Like Advanced Disk Recovery
The tool advises against recovering data on the same disk since files might be overwritten. Plus, when compared to other programs, Advanced Disk Recovery restores the most erased files and is very easy to use. It’s also reasonably priced at US$ 39.95. Nonetheless, there is a 60-day money-back guarantee.
This ensures you can use it without fear of anything going wrong. Its user interface is straightforward and self-explanatory, so even a novice may use it without difficulty.
What makes Advanced Recovery the best, other than the advice of not restoring data on the same drive? It comes out on top because of its features, user interface, convenience of use, Quick and Deep scans, session pause, and other perks.
Also Read:- Recover Hard Disk Data Files With Advanced Disk Recovery
Features: Advanced Disk Recovery
- Recover different file format
- External devices are supported.
- All versions of the Windows operating system are supported.
- Two sorts of scans for retrieving data quickly and thoroughly.
- Virus & malware-free
Advanced Disk Recovery: How to Use It
1. Click here to download and install Advanced Disk Recovery.

2. Launch the recovery tool and select the drive and area to be scanned. If you wish to restore data from a hard disk, choose Hard Drive and the drive letter.
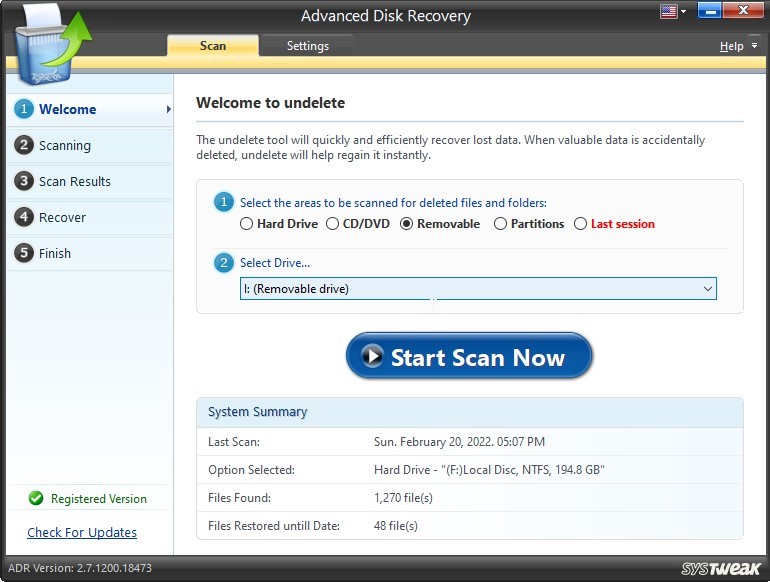
3. Then, click “Start Scan Now” > “Scan Type” > “Scan Now.”
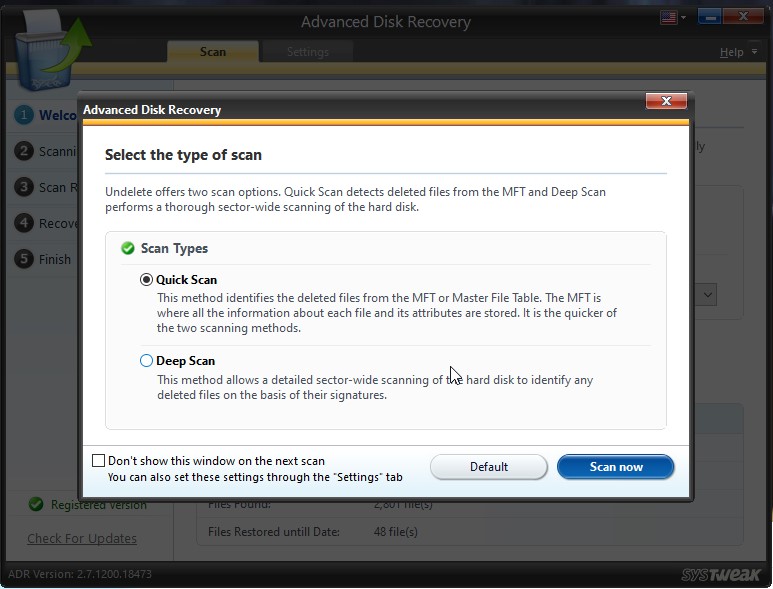
Note:- Advanced Disk Recovery has two types of scans: Quick and Deep. Deep Scan is the option to choose if you want a comprehensive scan. It is important to note that this method is time-consuming, but it aids in the recovery of a large number of deleted or lost data.
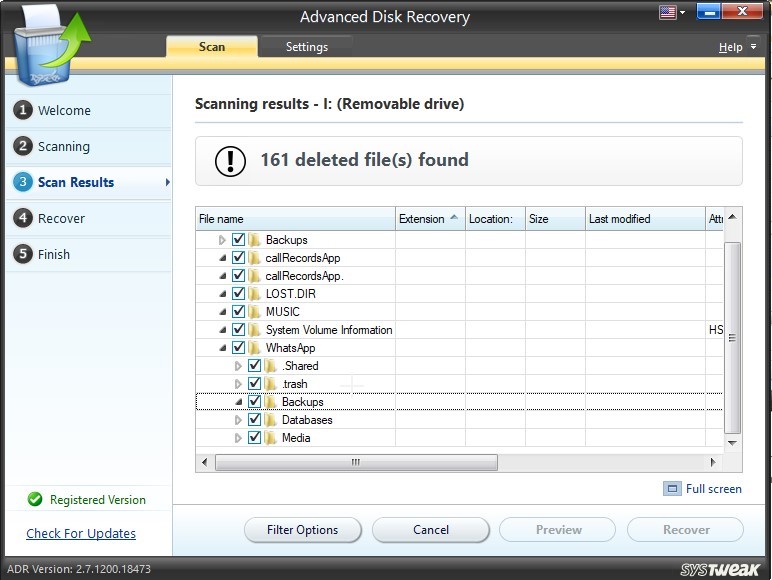
4. When the scanning is complete, select the excel file to get back and hit the Recover button.
5. Select the location where you wish to save the returned data by clicking Recover.
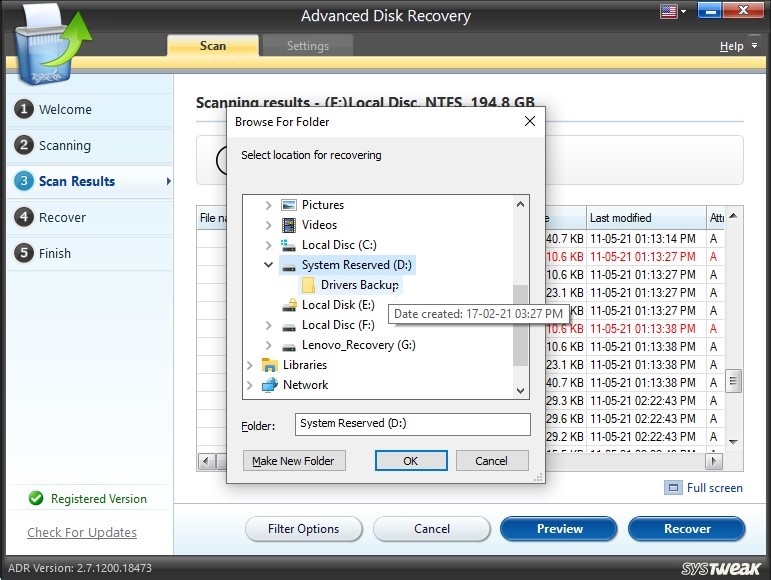
Note: Don’t save data on the same disc where you’re trying to recover lost files.
6. You’ll be able to watch the healing procedure after that. Advanced Disk Recovery generates a report that includes the number of files recovered, total files examined, deleted files, and other information.
7. This will tell you if Advanced Disk Recovery successfully retrieves files or not.
8. Click Finish if you don’t want to recover more files. If you wish to retrieve additional data, you can recover more files.
In addition to this, you can also use Filter options to retrieve files based on time, size, health, date, and other factors.
If you’re still undecided about whether or not to use the tool, you can use the trial version. Advanced Disk Recovery is available in both free and premium editions, allowing consumers to choose what they want. Of course, the commercial edition of the product will have more features than the free version. Nothing, however, can prevent Advanced Disk Recovery is the most excellent recovery tool.
Conclusion:-
Working with data in Excel usually necessitates a high level of focus and attention to detail. However, despite the numerous valuable measures in the application that prevent it, data loss occurs occasionally. However, you don’t have to lose everything because Microsoft has made it easy to locate unsaved Excel files with a few simple steps.
The “Recover Unsaved Workbooks” button is a godsend and may save you a lot of time and effort. Suppose, if it doesn’t work, you can use Advanced Disk Recovery to get back unsaved, deleted, and lost files. Let us know about your experience in the comment section below.


Leave a Reply